
There’s just something magical about preserving the peak summer flavor of garden tomatoes, isn’t there? It’s like capturing sunshine in a jar! Growing up in my grandmother’s kitchen, we always had jars lining the pantry shelves, and that familiar aroma of spiced tomatoes always meant cozy days ahead. That’s exactly why I’m so excited to share this tried-and-true tomato salsa canning recipe recipe with you. It’s a reliable way to turn your fresh bounty into shelf-stable, incredibly flavorful salsa that tastes like summer all year long. Trust me, following tested canning guidelines means you get delicious, safe salsa every single time. It’s a little bit of kitchen magic that brings so much joy, just like the recipes shared on our about page.
- Why You'll Love This Tomato Salsa Canning Recipe
- Gather Your Ingredients for Homemade Canned Salsa
- Essential Equipment for Safe Canning Salsa
- Step-by-Step Guide to Your Tomato Salsa Canning Recipe
- Tips for Your Best Garden Tomato Salsa
- Ingredient Substitutions and Variations for Pantry Salsa Jars
- Storing Your Homemade Canned Salsa
- Frequently Asked Questions about Tomato Salsa Canning
- Estimated Nutritional Information
- Share Your Canned Salsa Creations!
Why You’ll Love This Tomato Salsa Canning Recipe
Seriously, making your own homemade canned salsa is one of those kitchen wins you’ll be so proud of! Here’s why this recipe is a keeper:
- Super Easy: Even if you’re new to salsa canning for beginners, these steps are clear and simple!
- Incredible Flavor: Forget store-bought! This garden tomato salsa tastes SO much fresher and brighter.
- So Versatile: Perfect for tacos, chips, eggs, or as part of your meal planning!
- Preserve the Bounty: It’s the best way to use up all those lovely garden tomatoes and create shelf stable salsa jars.
- Customizable Heat: You can make it mild or really spicy salsa canning – totally up to you!
Gather Your Ingredients for Homemade Canned Salsa
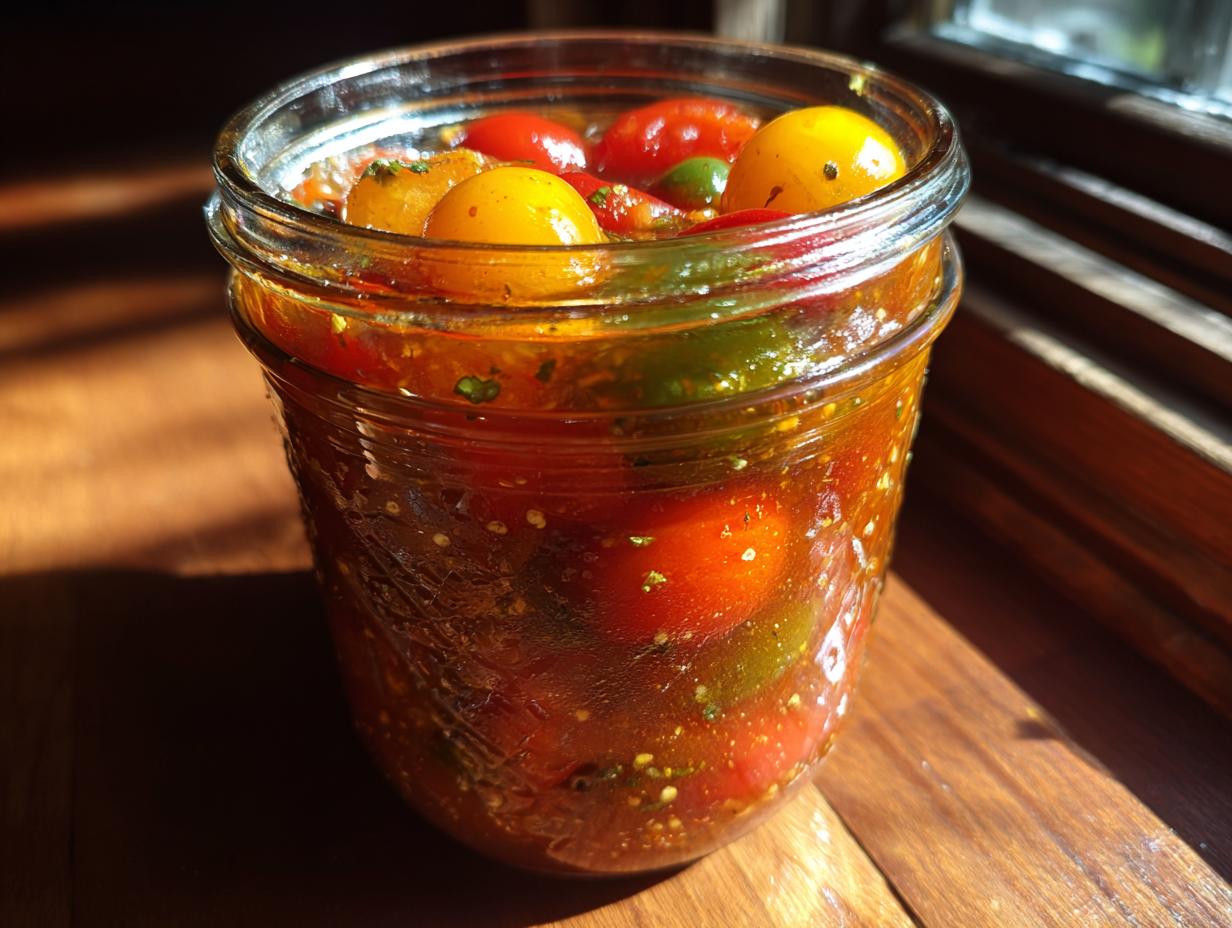
Alright, let’s get our pantry shelves ready for some serious goodness! To get this fantastic homemade canned salsa going, you’ll need a few things. Make sure you grab those ripe, juicy tomatoes – the riper, the better, honestly! You’ll want about 16 cups of them, all peeled, cored, and chopped up. That’s usually around 8 to 10 pounds, so grab a good amount!
Next up, we’ve got our aromatics and veggies: about 2 cups of chopped onions (that’s roughly 2 medium ones), and 1 cup of chopped green bell peppers (about 2 medium ones). For that little kick, we need 2 to 3 medium jalapeño peppers, chopped up nice and fine. If you’re not a fan of heat, just scoop out all those seeds and membranes first! And we can’t forget about 4 cloves of garlic, minced nice and small.
For flavor and safety, you’ll also need 2 tablespoons of lime juice, 1 teaspoon of salt, 1 teaspoon of dried oregano, and a good pinch of cumin (about 1/2 teaspoon). If you’re feeling brave and want a bit more heat, you can toss in about 1/4 teaspoon of cayenne pepper. Remember, using ripe tomatoes really makes all the difference in flavor, so pick the best ones you can find!
Essential Equipment for Safe Canning Salsa
Getting ready to can your salsa is half the fun, and having the right gear makes all the difference! For this delicious tomato salsa canning recipe, you’ll want to gather a few key tools to keep things safe and sound. A big pot that can fit your jars and hold boiling water is a must – this is your water bath canner. Make sure it’s tall enough so the jars are covered by at least an inch or two of water.
You’ll also need canning jars, lids, and bands – pint-sized ones are perfect for this recipe! Don’t forget a jar lifter; it’s a lifesaver for safely moving hot jars in and out of boiling water. A wide-mouth funnel makes filling those jars a breeze, and a ladle is essential for scooping the hot salsa. Having these on hand means you’re all set for some successful water bath canning salsa!
Step-by-Step Guide to Your Tomato Salsa Canning Recipe
Alright, let’s get this salsa into jars so you can enjoy it all year long! Trust me, following these steps makes safe canning salsa a breeze, and you’ll feel like a total pro. It’s all about taking your time and being a little bit careful, just like when you’re following any good recipe from a trusted source.
Preparing Jars and Canner
First things first, let’s get everything ready for our tomato salsa canning recipe. You want to get your water bath canner filled with water, leaving enough room so it won’t overflow once those jars are in. Get that water heating up – you want it at a simmer to keep your jars warm. Go ahead and wash your jars, lids, and bands really well. The jars need to be sterilized, which you can do by boiling them in water for at least 10 minutes. Keep your lids and bands handy, but don’t boil the lids!
Cooking the Salsa Base
Now for the fun messy part – cooking up that delicious salsa! In your big pot, combine all those chopped tomatoes, onions, bell peppers, jalapeños (remember to de-seed if you want it milder!), and minced garlic. Toss in the lime juice, salt, oregano, cumin, and that optional cayenne if you’re feeling adventurous. Give it all a good stir. Bring this whole mixture to a boil over medium-high heat, stirring now and then so nothing sticks. Once it’s bubbling away, lower the heat and let it simmer for about 10 minutes. This helps all those flavors meld together beautifully!

Filling and Sealing Jars
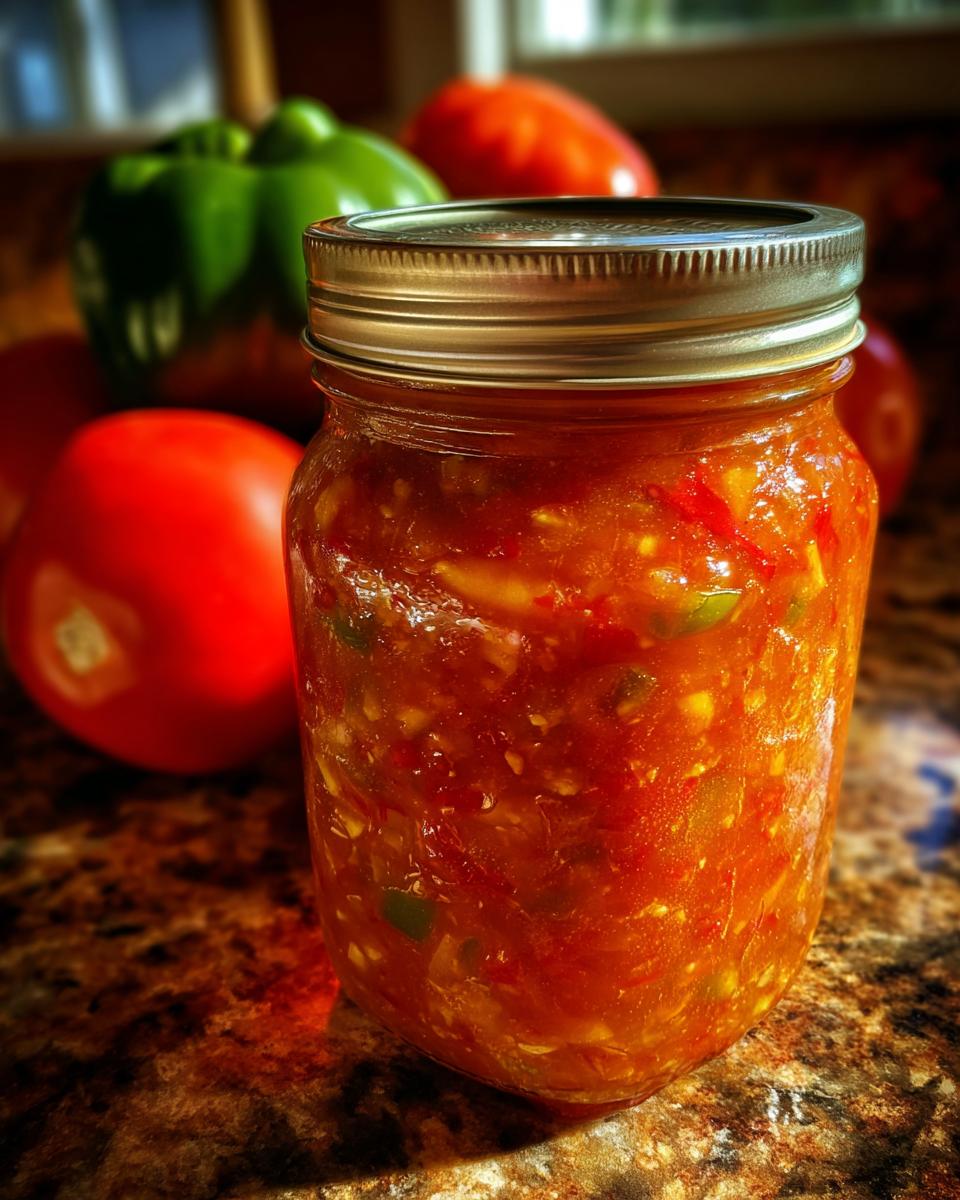
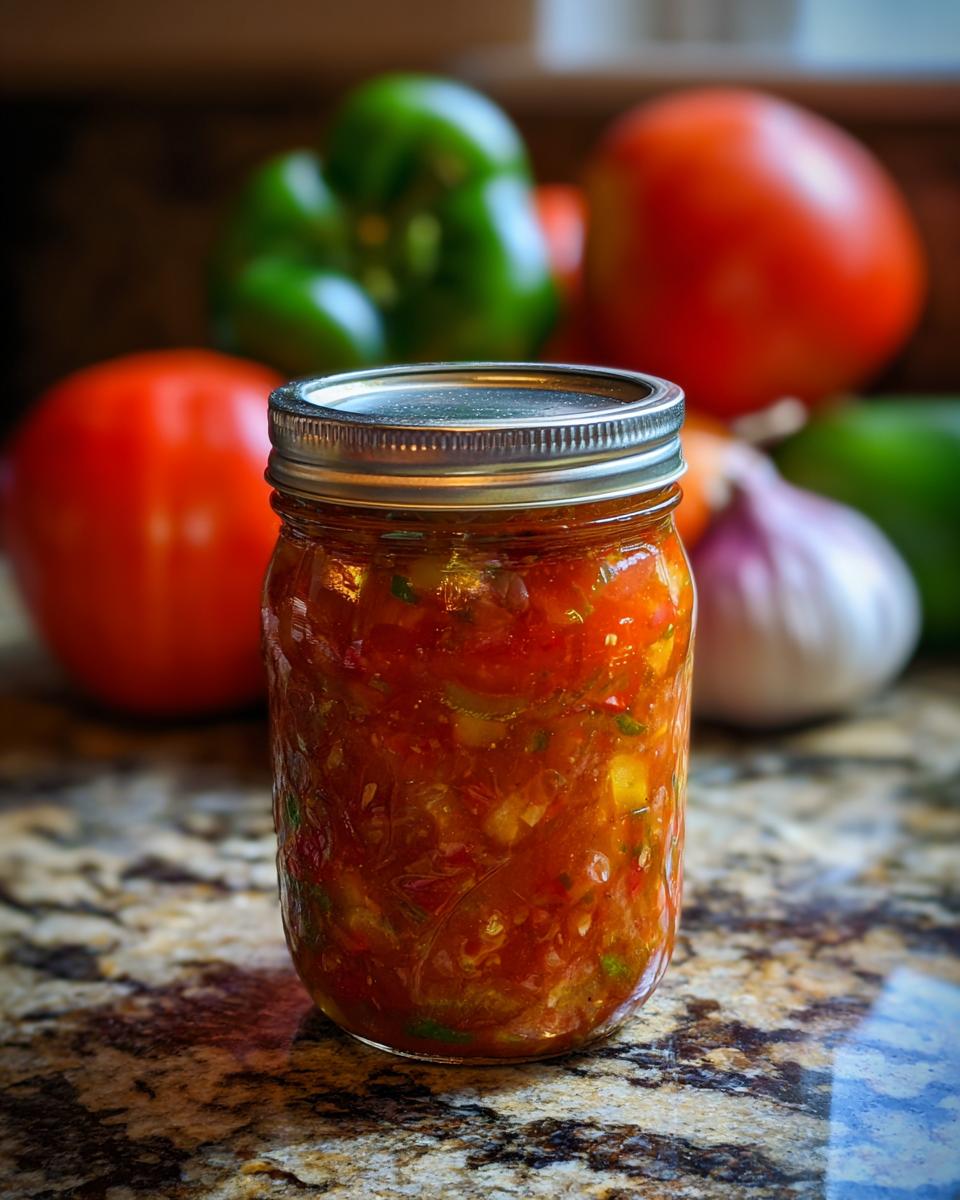
Time to get that gorgeous salsa into jars! Make sure your sterilized jars are still nice and warm. Using your ladle and funnel, carefully fill each jar with the hot salsa mixture. You absolutely *must* leave about 1/2 inch of space between the salsa and the top of the jar – this is called headspace, and it’s super important for a good seal. Now, take a clean, damp cloth and wipe the rims of the jars really well. Any salsa residue on the rim can prevent a good seal. Place your prepared lids on top and screw on the bands until they feel just fingertip tight. Don’t crank ’em down hard!
Water Bath Processing for Shelf Stable Salsa
This is where the magic really happens to make your salsa shelf stable! Carefully use your jar lifter to place the filled jars into the simmering water in your canner. Make sure the jars are vertical and not touching each other. Add more hot water if needed to cover the jars by at least an inch or two. Once the water is back to a rolling boil, start your timer. You’ll process these pint jars for 15 minutes. Now, if you live at a higher altitude, you’ll need to add more processing time – check your canning charts for that! After the 15 minutes are up, turn off the heat, take the lid off the canner, and let the jars sit in the hot water for another 5 minutes. This helps prevent siphoning (where liquid escaped).
Cooling and Checking Seals
The final, and probably hardest, part: waiting! Carefully remove the jars from the canner using your jar lifter and place them on a towel-lined counter or cooling rack. Let them cool undisturbed for a full 12 to 24 hours. You might hear little pinging sounds as the lids seal – that’s a good sign! After they’ve cooled completely, it’s time to check. Press down on the center of each lid. If it doesn’t flex or pop up and down, it’s sealed! If a lid didn’t seal, don’t worry! Just pop it in the fridge and use that jar of homemade canned salsa within a few weeks. Sealed jars can be stored away.

Tips for Your Best Garden Tomato Salsa
Okay, let’s talk about making this tomato salsa canning recipe absolutely sing! The secret to truly amazing garden tomato salsa is all in the details. First off, for the best flavor, pick those tomatoes when they’re perfectly ripe – you know, those deep red beauties that just scream summer! Don’t be shy about using them. And when it comes to heat, this recipe is totally customizable. Remember how we talked about those jalapeños? If you want it milder, get rid of all the seeds and white pith. Want it spicier? Nope, don’t do that! Or, go wild and add a little extra cayenne, like we mentioned as optional. Always, always, *always* make sure you’re following tested canning guidelines for safety, just like we’re doing here. It’s the only way to guarantee your beautiful jars of shelf stable salsa are safe for everyone to enjoy!
Ingredient Substitutions and Variations for Pantry Salsa Jars
One of the best things about making your own homemade canned salsa is how you can totally tweak it to be *exactly* how you love it! This recipe is fantastic as is, but feel free to play around a bit to create your perfect pantry salsa jars. If you’re craving more heat, don’t be afraid to swap out those jalapeños for something a little more adventurous like serrano peppers, or even a tiny bit of habanero if you’re feeling really brave! Just remember, more seeds often mean more heat, so start small. You could also swap out the green bell pepper for a red one for a slightly sweeter flavor profile.
Herbs are another fun place to experiment! While oregano is classic, a pinch of cilantro can add a fresh, zesty twist. Just be aware that adding fresh herbs might slightly change the safety guidelines for canning, so always double-check tested canning charts if you go way off the beaten path. Remember, this salsa is super versatile – it’s incredibly easy to incorporate into your meal planning for quick weeknight dinners or weekend appetizer spreads!
Storing Your Homemade Canned Salsa
Alright, you’ve done it! You’ve got these beautiful jars of homemade canned salsa, all sealed and ready to go. Now, to keep them tasting fresh and amazing, proper storage is key. You’ll want to find a nice, cool, dark place for your shelf stable salsa jars. Think pantry, cellar, or a cupboard away from any heat or sunlight. When stored like this, your salsa should stay delicious for at least a year, though honestly, it’s so good you’ll probably use it up much sooner than that!
And what if a jar didn’t quite seal perfectly? No worries at all! Just pop that unsealed jar into the refrigerator. It’s still perfectly good to eat, but you’ll want to enjoy it within a few weeks to make sure it stays fresh and tasty.
Frequently Asked Questions about Tomato Salsa Canning
Got questions about whipping up your own tomato salsa canning recipe? I’ve got answers! Canning your own homemade canned salsa is super rewarding, but it’s good to know the little things.
Can I can salsa without lime juice?
You know, lime juice is really important in safe canning salsa because it helps make sure the pH level is acidic enough for water bath canning. Tomatoes can vary a lot in acidity! The tested recipes, like this one, usually call for lime juice or vinegar for that very reason. While you *could* skip it, it would make your salsa less safe for shelf storage. Stick with the lime juice to be sure!
How long does canned salsa last?
When you’ve got perfectly sealed jars of shelf stable salsa and you store them in a cool, dark place, they’re generally good for about 12 to 18 months. They’ll still be safe to eat after that, but the flavor and quality might start to fade a bit. So, while they keep well, I always say: the sooner you eat it, the better it tastes!
What is headspace in canning?
Headspace is just the empty space between the top of your food (in this case, the salsa!) and the rim of the jar. For this tomato salsa canning recipe, we’re aiming for 1/2 inch of headspace. Why does it matter? It’s crucial for creating a vacuum seal! That little bit of space allows the food to expand slightly when heated, and then contract as it cools, pulling the lid down tight. Too little or too much can mess with the seal.
Can I use different types of tomatoes for salsa canning?
You sure can! While paste tomatoes (like Roma) are often recommended for canning because they have less water and more pulp, you can often use other ripe tomatoes too. Just be aware that using juicier tomatoes might mean your final salsa is a bit thinner. Another thing to watch out for is acidity; different tomato varieties can have slightly different pH levels. For the safest bet with your water bath canning salsa, using paste tomatoes or a mix where paste tomatoes are the majority is a great idea!
Estimated Nutritional Information
Just so you know, this salsa is tasty *and* pretty light! These numbers are just estimates, of course, since things can change a bit depending on exactly what tomatoes and peppers you use. But for a 1/4 cup serving, you’re looking at around 25 calories, 1g of protein, 6g of carbs with 1g of fiber, and about 4g of sugar. It’s also low in fat with 0g and around 200mg of sodium. Not bad for a flavor explosion, right?
Share Your Canned Salsa Creations!
Now that you’ve got your gorgeous jars of salsa ready, I’d LOVE to hear all about it! Did you try it with chips? Put it on tacos? Tell me how your homemade canned salsa turned out in the comments below. And if you snap any photos, please tag us on social media – I can’t wait to see your creations!
PrintCanned Tomato Salsa Recipe
Learn how to can fresh tomato salsa for a shelf-stable pantry staple. This recipe is perfect for preserving your garden tomatoes and offers options for spice level.
- Prep Time: 30 min
- Cook Time: 25 min
- Total Time: 55 min
- Yield: Approximately 6-7 pint jars 1x
- Category: Preserves
- Method: Water Bath Canning
- Cuisine: American
- Diet: Vegetarian
Ingredients
- 16 cups peeled, cored, and chopped ripe tomatoes (about 8–10 lbs)
- 2 cups chopped onions (about 2 medium)
- 1 cup chopped green bell peppers (about 2 medium)
- 1/2 cup chopped jalapeño peppers (about 2–3 medium, seeds removed for less heat)
- 4 cloves garlic, minced
- 2 tablespoons lime juice
- 1 teaspoon salt
- 1 teaspoon dried oregano
- 1/2 teaspoon ground cumin
- 1/4 teaspoon cayenne pepper (optional, for extra heat)
Instructions
- Prepare your water bath canner, jars, lids, and bands. Jars should be sterilized.
- In a large pot, combine tomatoes, onions, bell peppers, jalapeños, and garlic.
- Add lime juice, salt, oregano, cumin, and cayenne pepper (if using).
- Stir well to combine.
- Bring the mixture to a boil over medium-high heat, stirring occasionally.
- Reduce heat and simmer for 10 minutes.
- Carefully ladle the hot salsa into the prepared jars, leaving 1/2 inch of headspace.
- Wipe the jar rims clean with a damp cloth.
- Place the lids on the jars and screw on the bands until fingertip tight.
- Process the jars in the boiling water bath canner for 15 minutes (adjust for altitude if necessary).
- Turn off the heat, remove the canner lid, and let the jars sit in the canner for 5 minutes.
- Remove the jars from the canner and let them cool on a towel-lined counter for 12-24 hours.
- Check the seals. If a lid has not sealed, refrigerate the salsa and use it within a few weeks.
- Label and store sealed jars in a cool, dark place.
Notes
- For a milder salsa, remove all seeds and membranes from the jalapeños. For a spicier salsa, leave some seeds in or add more jalapeños.
- You can substitute other peppers like serranos or habaneros for more heat.
- Ensure your tomatoes are ripe for the best flavor.
- Always follow tested canning guidelines for safety.
Nutrition
- Serving Size: 1/4 cup
- Calories: 25
- Sugar: 4g
- Sodium: 200mg
- Fat: 0g
- Saturated Fat: 0g
- Unsaturated Fat: 0g
- Trans Fat: 0g
- Carbohydrates: 6g
- Fiber: 1g
- Protein: 1g
- Cholesterol: 0mg