

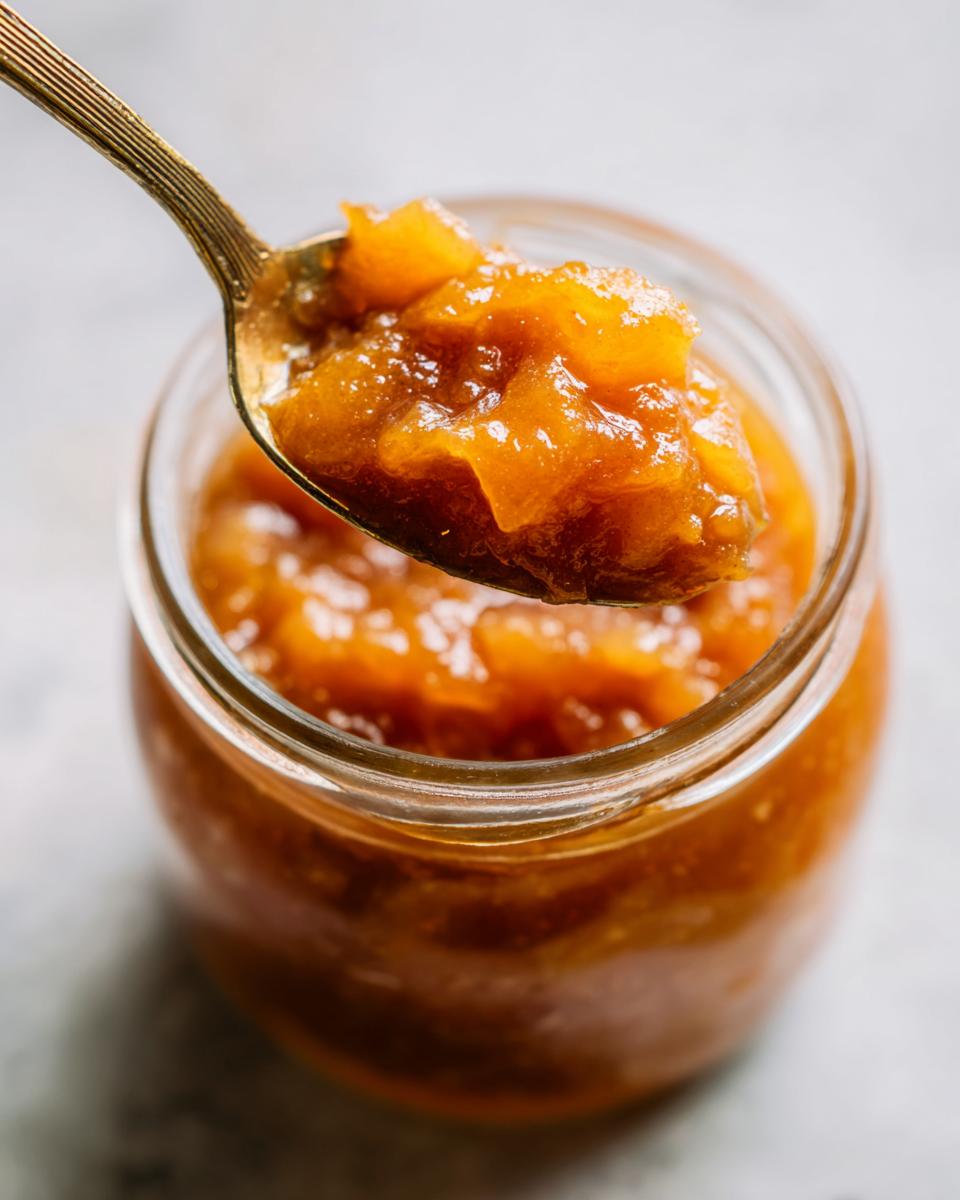
Oh, that moment when the pears are just perfect on the tree, heavy and sweet, just begging to be turned into something special! My kitchen always smells like a dream this time of year, and making pear preserves is one of my absolute favorite ways to capture that fall magic. This isn’t just any preserve; it’s that old-fashioned, chunky kind – the kind you remember – and guess what? No pectin needed! We’re doing it the classic way, with simple ingredients and trusted water bath canning that Ellie learned from her grandmother. It’s all about bringing that simple, reliable goodness straight from our farmhouse kitchen to yours.
- Why You'll Love This Old-Fashioned Pear Preserves Recipe
- Ingredients for Old-Fashioned Pear Preserves
- Essential Equipment for Canning Pear Preserves
- Step-by-Step Guide to Making Pear Preserves Without Pectin
- Tips for Perfect Old-Fashioned Pear Preserves
- Understanding Pear Preserves Safety and Acidity
- Serving Suggestions for Your Homemade Pear Preserves
- Storage and Reheating Instructions for Pear Preserves
- Frequently Asked Questions about Pear Preserves
- Estimated Nutritional Information for Pear Preserves
- Share Your Pear Preserves Creations!
Why You’ll Love This Old-Fashioned Pear Preserves Recipe
Oh, you’re going to adore this recipe! It’s all about capturing that pure pear flavor without all the fuss of added pectin. Here’s why it’s become a favorite in my pantry:
- Pure Pear Flavor: We let the natural sweetness and lovely flavor of the pears shine through, no fancy thickeners needed!
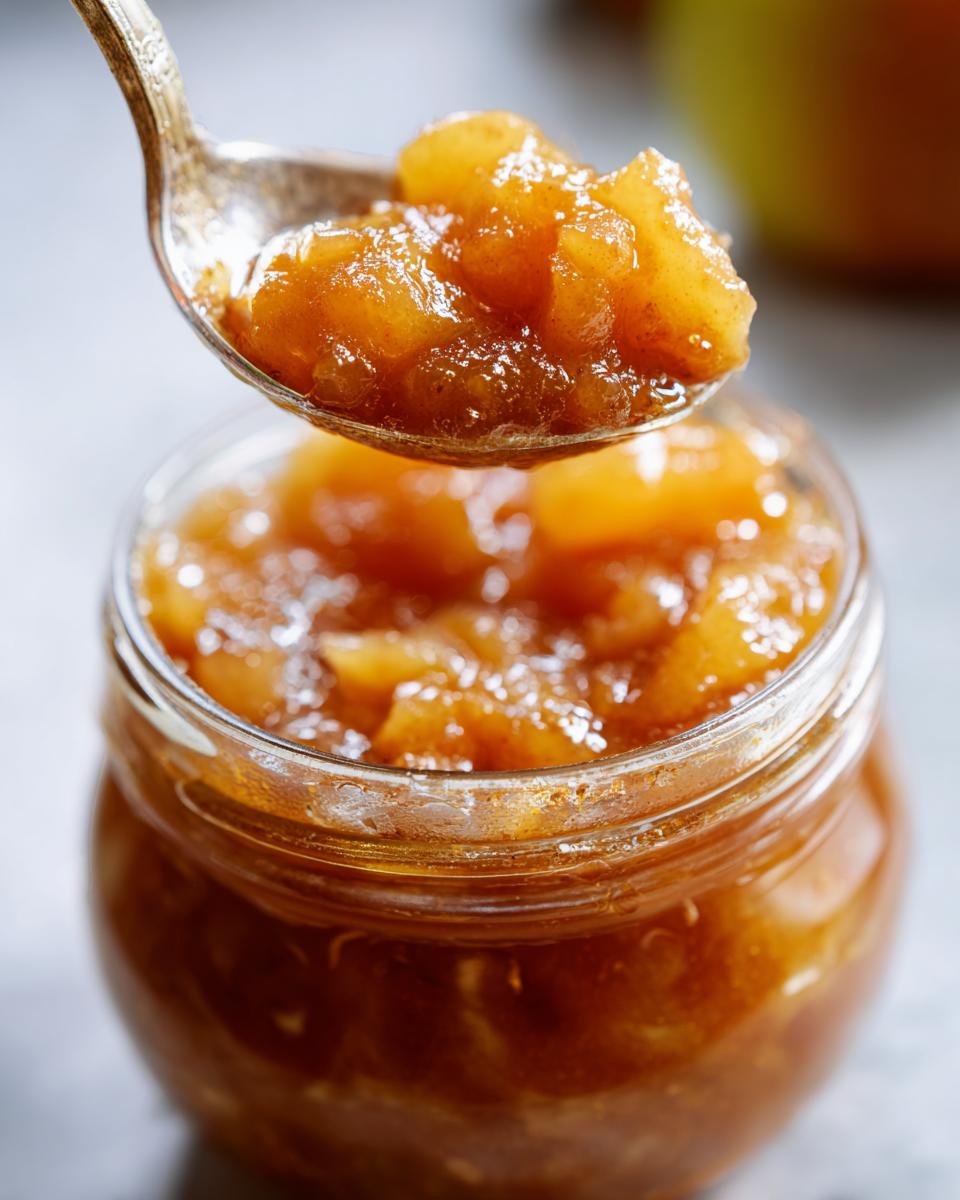
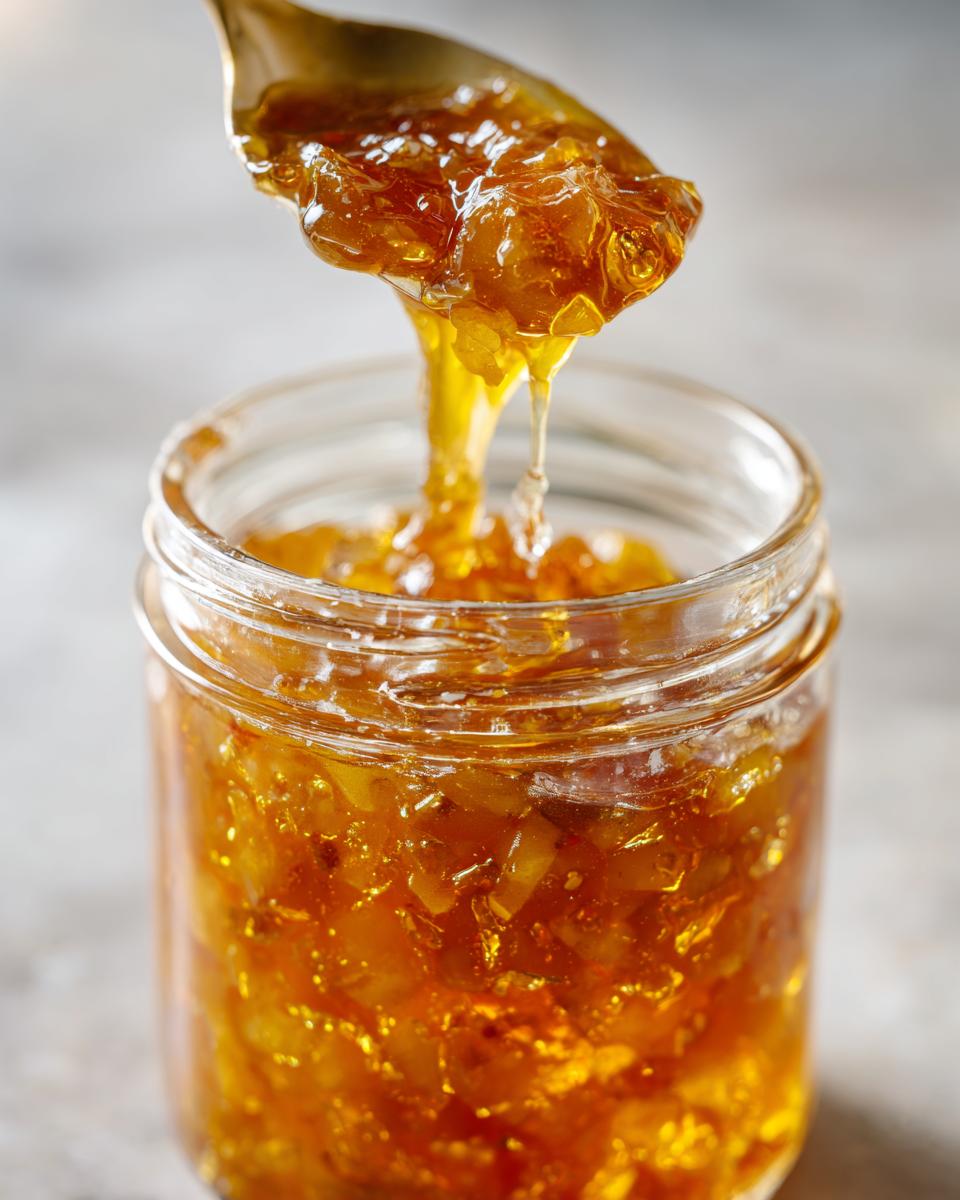
- That Chunky Texture: Forget smooth jelly – this is a rustic, chunky pear preserve that’s just perfect on toast or biscuits.
- Super Simple Canning: Using the water bath method means your pear preserves are safe and will keep beautifully in the pantry. It’s so satisfying knowing you’ve got homemade goodies ready to go!
- Perfect for Seasonal Pears: Got a bunch of ripe pears from the orchard or farmer’s market? This is the absolute best way to turn them into something delicious that lasts.
- Giftable Goodness: Seriously, who wouldn’t love a jar of homemade pear goodness? They make the prettiest gifts for friends and family.
Ingredients for Old-Fashioned Pear Preserves
Alright, let’s talk about what you’ll need to make these glorious pear preserves! It’s really just a handful of simple things that let the pears be the star of the show. You don’t need anything fancy, just good quality. Here’s the rundown:
- 3 pounds ripe pears (like Bartlett or Bosc), peeled, cored, and chopped
- 3 cups granulated sugar
- 1/4 cup lemon juice (from about 1 large lemon)
- 1/2 cup water
See? Super straightforward! Using ripe but still slightly firm pears gives you the best texture, trust me on that one. That splash of lemon juice is key, not just for a little brightness, but it helps everything thicken up nicely without needing pectin. So gather these up, and we’ll get cooking!
Essential Equipment for Canning Pear Preserves
Now, before we dive headfirst into making these yummy pear preserves, let’s make sure we’ve got all our ducks in a row, equipment-wise! Having the right tools makes the whole process so much smoother and, most importantly, safer. Think of it as getting prepped for a cozy kitchen adventure!
- A Big, Heavy Pot: You’ll need something sturdy, like a Dutch oven or a large stockpot, to cook down all those pears. A heavy bottom means less sticking and scorching, which is a lifesaver when you’re simmering for a while.
- Water Bath Canner: This is your best friend for safe canning! Make sure it’s big enough to hold your jars and has a rack at the bottom. It’s what keeps everything bubbling away safely.
- Canning Jars, Lids, and Bands: Of course! You’ll need clean jars, new lids that seal, and bands to hold them tight. I like using half-pint jars for these preserves – they’re the perfect size.
- Jar Lifter & Canning Funnel: These are lifesavers! The jar lifter safely grabs hot jars, and the funnel helps you ladle the preserves into the jars without making a huge mess.
- Ladle & Utensils: A good ladle for scooping the preserves and some long-handled spoons for stirring are essential.
Having these handy means you’re ready to rock and roll. It’s all about setting yourself up for success, and with these tools, you’re well on your way!
Step-by-Step Guide to Making Pear Preserves Without Pectin
Alright, let’s get down to business and make some absolutely delicious pear preserves! This is where the magic really happens. Don’t worry, I’ll walk you through every single step, just like we’re in the kitchen together. Making these pear preserves without pectin is totally doable and so rewarding!
Preparing Your Water Bath Canner
First things first, let’s get our canning setup ready. Grab that big water bath canner and fill it about two-thirds full with water. Pop it on the stove over medium-high heat and let it come up to a simmer – you want nice, hot water before we even start ladling the preserves in. And while that’s heating, make sure your jars, lids, and bands are all clean and sterilized. Trust me, having everything hot before you start filling makes a world of difference for sealing.
Cooking the Pear Preserves Mixture
Now for the fun part! In your big, heavy-bottomed pot, toss in those chopped pears, the sugar, that essential lemon juice, and the water. Give it all a good stir. Let it hang out like that for about 15-20 minutes – you’ll see the sugar start to get all syrupy and pull some lovely juice out of the pears. This pre-soak really helps get things going. Then, turn up the heat to medium-high and bring the whole glorious mess to a boil, stirring occasionally. Once it’s bubbling away, turn the heat down to medium. We’ll keep it simmering, stirring frequently – seriously, keep stirring to prevent any scorching! You’re aiming for a thick, chunky consistency, which can take anywhere from 45 minutes to a good hour and a half. The pears will soften and break down a bit. To check if it’s ready, pop a little spoonful onto a plate that’s been chilling in the freezer. If it mounds up nicely and doesn’t run everywhere, you’re golden! Keep that canner simmering away too!
Filling and Processing Jars for Pear Preserves
Okay, your preserves are looking perfect and chunky, and your canner is humming along nicely. Now, carefully ladle that hot preserve mixture into your hot, sterilized jars. It’s super important to leave about a half-inch of space at the top – that’s our headspace, and it’s key for a good seal. Take a clean, damp cloth and wipe those jar rims really well; any little bit of pear or sugar left there can mess with the seal. Pop on your lids, then screw on the bands until they’re just fingertip tight. Don’t crank them down hard! Carefully place the filled jars back into that simmering water bath canner. Make sure they’re covered by at least an inch of water. Put the lid on the canner and let them process for 10 minutes. After the time is up, turn off the heat, lift the lid, and let the jars hang out in that hot water for another 5 minutes. This little soak helps prevent siphoning. Then, use your jar lifter to carefully take them out and place them on a towel-lined counter to cool and seal. Listen for that magical “ping” sound – it means they’re sealing up nicely!
Tips for Perfect Old-Fashioned Pear Preserves
Making these old-fashioned pear preserves without pectin is so rewarding, and a few little tricks can make sure they turn out absolutely perfect every single time. My grandma always said it’s all about respecting the fruit and taking your time with the process. So, let’s chat about how to get that glorious chunky texture and great flavor.
First off, your pears! You want them ripe, but still with a little bit of firmness. Softer pears will turn to mush too fast and won’t give you that lovely chunky texture we’re after. Bartlett and Bosc are usually my go-to’s for this. And remember that lemon juice? It’s not just for a little zing; it’s crucial for getting the right acidity for safe water bath canning, and it actually helps the preserves thicken naturally as they cook down. You can play with the sugar a *tiny* bit, depending on how sweet your pears are, but don’t go too low! Sugar is a preservative, and reducing it too much can mess with how well they seal and keep. Honestly, this recipe is pretty spot-on as is for the best results.

Understanding Pear Preserves Safety and Acidity
When we’re talking about canning, especially water bath canning, safety is absolutely number one. That’s why the pear preserves safety lemon juice is so doggone important in this recipe! Pears, on their own, aren’t super acidic, and low-acid foods can be a risk if not processed correctly. That little bit of lemon juice we add? It’s not just for a hint of brightness; it bumps up the acidity to a level that the water bath process can handle safely. This makes sure any little nasties that could spoil the jam or make you sick just can’t survive in there. It’s a simple step that gives us peace of mind and ensures our homemade pear goodness is safe to enjoy from the pantry!
Serving Suggestions for Your Homemade Pear Preserves
Alright, so you’ve put in all the work, and now you have these gorgeous, chunky jars of pear preserves! What do you do with them? Oh, the possibilities are just delightful! This isn’t just for toast, though it’s *amazing* there. Spread a generous dollop on warm, fluffy biscuits – pure heaven!
They’re also a showstopper on a cheese board. The sweet pear flavor is just divine with sharp cheddar, creamy brie, or even a salty blue cheese. For a quick treat, swirl some into your morning yogurt or top a scoop of vanilla ice cream. And if you’re feeling a little fancy, this pear goodness makes a wonderful filling for thumbprint cookies or even a rustic tart. It truly elevates simple meals into something special!
Storage and Reheating Instructions for Pear Preserves
Once your beautiful jars of pear preserves have cooled completely and you’ve heard that satisfying ‘ping,’ it’s time to store them. For jars that have sealed properly, just pop them into a cool, dark place like your pantry or a cellar. They’ll stay delicious for up to a year! Always give them a good shake or stir before using, and check that the lid is still sealed before you open it.
Now, what if a jar didn’t seal, or you just can’t wait to dig in? No worries! Just pop those open jars into the refrigerator. They’ll keep well for a few weeks. And if you’re reheating any leftovers, just warm them gently on the stovetop or in the microwave until they’re spreadable. Easy peasy!
Frequently Asked Questions about Pear Preserves
Got questions about making your own pear preserves? That’s totally normal! It’s my absolute favorite part of cooking – figuring out all those little details. Let’s clear up some common things people wonder about when making this old-fashioned pear preserves recipe so you feel super confident!
Can I use Pomona pectin with this pear preserves recipe?
This recipe is made to be pectin-free! We’re relying on the natural goodness of the pears themselves and a bit of patient cooking to get that lovely thick, chunky texture without any added thickeners. If you wanted to use something like Pomona pectin, you’d actually need a different recipe because the amounts of sugar and fruit would change, and the cooking time would be much shorter. This way is just old-school and wonderfully simple!
How much sugar is truly needed for pear preserves safety?
This is such a smart question to ask! Sugar does more than just make things sweet; it’s also a really important part of keeping your preserves safe for pantry storage. It helps draw out moisture and creates a barrier against yucky stuff trying to grow. While you can sometimes tweak sugar a little based on the pears’ sweetness, you don’t want to cut it back too much. This recipe’s sugar amount is tested to work with the lemon juice for safe, long-lasting pear preserves. It really helps with texture and preservation!
What is the correct canning headspace for jam and preserves?
Headspace is super important for a good seal! For this chunky pear jam recipe, we’re aiming for about a 1/2 inch of headspace. That’s the little bit of empty space between the top of the preserves and the rim of the jar. Too little, and the preserves might bubble out during processing and mess with the seal. Too much, and it might not seal properly. So, that 1/2 inch is your sweet spot for ensuring those jars seal up tight and stay safe in the pantry!
Estimated Nutritional Information for Pear Preserves
Now, let’s take a peek at the estimated nutritional facts for our delightful pear preserves. Remember, these are just estimates per serving (about 2 tablespoons), and the actual numbers can vary a bit depending on the exact sweetness of your pears and the brands you use. It’s good to have a general idea though!
- Calories: Around 70
- Sugar: About 17g
- Carbohydrates: Approximately 18g
- Fat: 0g
- Protein: 0g
- Sodium: 0mg
As you can see, it’s mostly natural sugars from the fruit and added sugar, which is pretty typical for homemade preserves. But oh, is it worth it!
Share Your Pear Preserves Creations!
I just *love* hearing about your canning adventures! Did you make these amazing old-fashioned pear preserves? Did you try them on biscuits or maybe a cheese board? I’d be tickled pink if you’d leave a comment below to share your experience, maybe give the recipe a rating, or even tag me on social media with your beautiful jars! It really makes my day to see what you’re all creating. You can also reach out via my contact page!
PrintOld-Fashioned Pear Preserves
Make chunky, old-fashioned pear preserves without pectin using a water bath canning method. This recipe is perfect for preserving your seasonal pear harvest.
- Prep Time: 30 min
- Cook Time: 1.5 hr
- Total Time: 1 hr 45 min
- Yield: 4-5 half-pint jars 1x
- Category: Preserves
- Method: Water Bath Canning
- Cuisine: American
- Diet: Vegetarian
Ingredients
- 3 pounds ripe pears (like Bartlett or Bosc), peeled, cored, and chopped
- 3 cups granulated sugar
- 1/4 cup lemon juice (from about 1 large lemon)
- 1/2 cup water
Instructions
- Prepare your water bath canner by filling it with water and bringing it to a simmer. Sterilize your canning jars, lids, and bands.
- In a large, heavy-bottomed pot, combine the chopped pears, sugar, lemon juice, and water.
- Stir the ingredients together and let them sit for about 15-20 minutes to allow the sugar to start drawing out the juice from the pears.
- Place the pot over medium-high heat and bring the mixture to a boil, stirring occasionally.
- Once boiling, reduce the heat to medium and continue to cook, stirring frequently, until the preserves thicken. This can take 45 minutes to 1.5 hours, depending on the juiciness of your pears. You are looking for a thick, chunky consistency. Test for set by placing a small spoonful on a chilled plate; it should mound up and not spread too much.
- While the preserves are cooking, ensure your canner is at a rolling boil.
- Carefully ladle the hot preserves into the hot, sterilized jars, leaving 1/2 inch of headspace.
- Wipe the rims of the jars clean with a damp cloth. Place the lids on the jars and screw on the bands until fingertip tight.
- Process the filled jars in the boiling water bath canner for 10 minutes (adjusting for altitude if necessary).
- Turn off the heat, remove the canner lid, and let the jars sit in the hot water for another 5 minutes.
- Carefully remove the jars from the canner and place them on a towel-lined counter to cool completely. You should hear them ping as they seal.
- Check seals after 12-24 hours. If a jar has not sealed, refrigerate it and use within a few weeks. Properly sealed jars can be stored in a cool, dark place for up to a year.
Notes
- Using ripe but firm pears will give you the best texture.
- Lemon juice is crucial for acidity and helps with the setting process.
- Adjust sugar slightly based on your preference and the sweetness of your pears, but do not reduce it too much as it acts as a preservative.
- For a smoother preserve, you can mash some of the pear pieces with your spoon while cooking.
- This recipe makes approximately 4-5 half-pint jars.
Nutrition
- Serving Size: 2 tablespoons
- Calories: 70
- Sugar: 17g
- Sodium: 0mg
- Fat: 0g
- Saturated Fat: 0g
- Unsaturated Fat: 0g
- Trans Fat: 0g
- Carbohydrates: 18g
- Fiber: 1g
- Protein: 0g
- Cholesterol: 0mg