

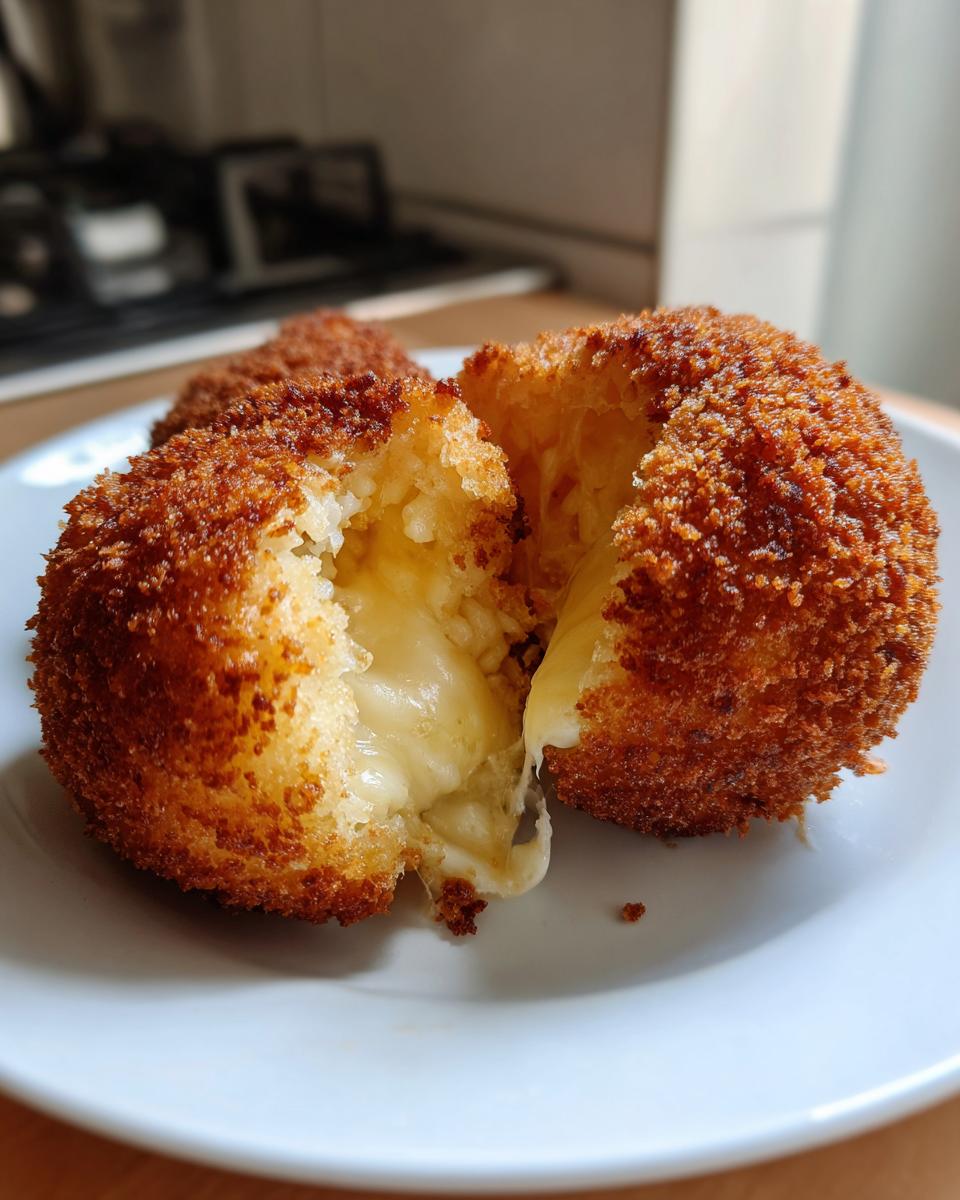
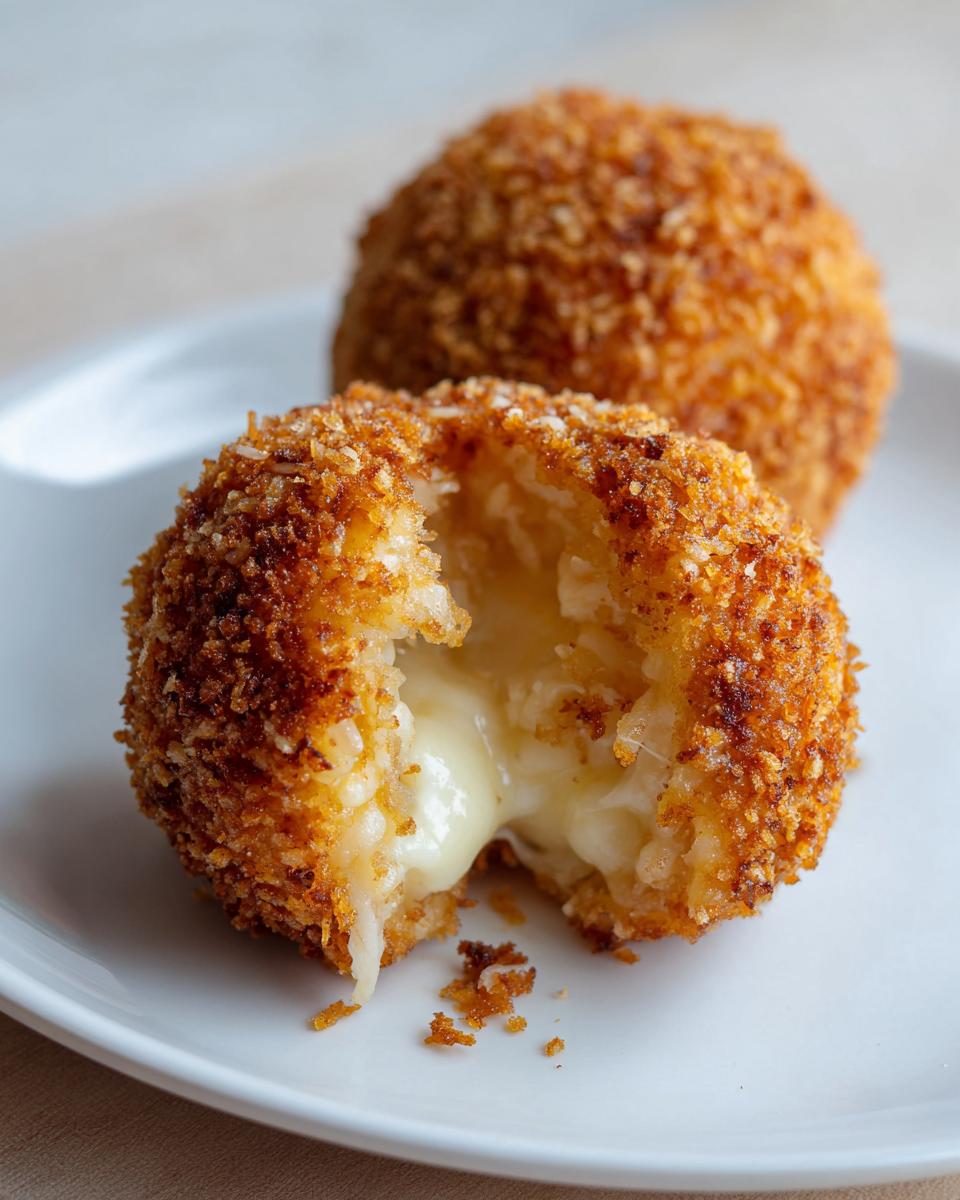
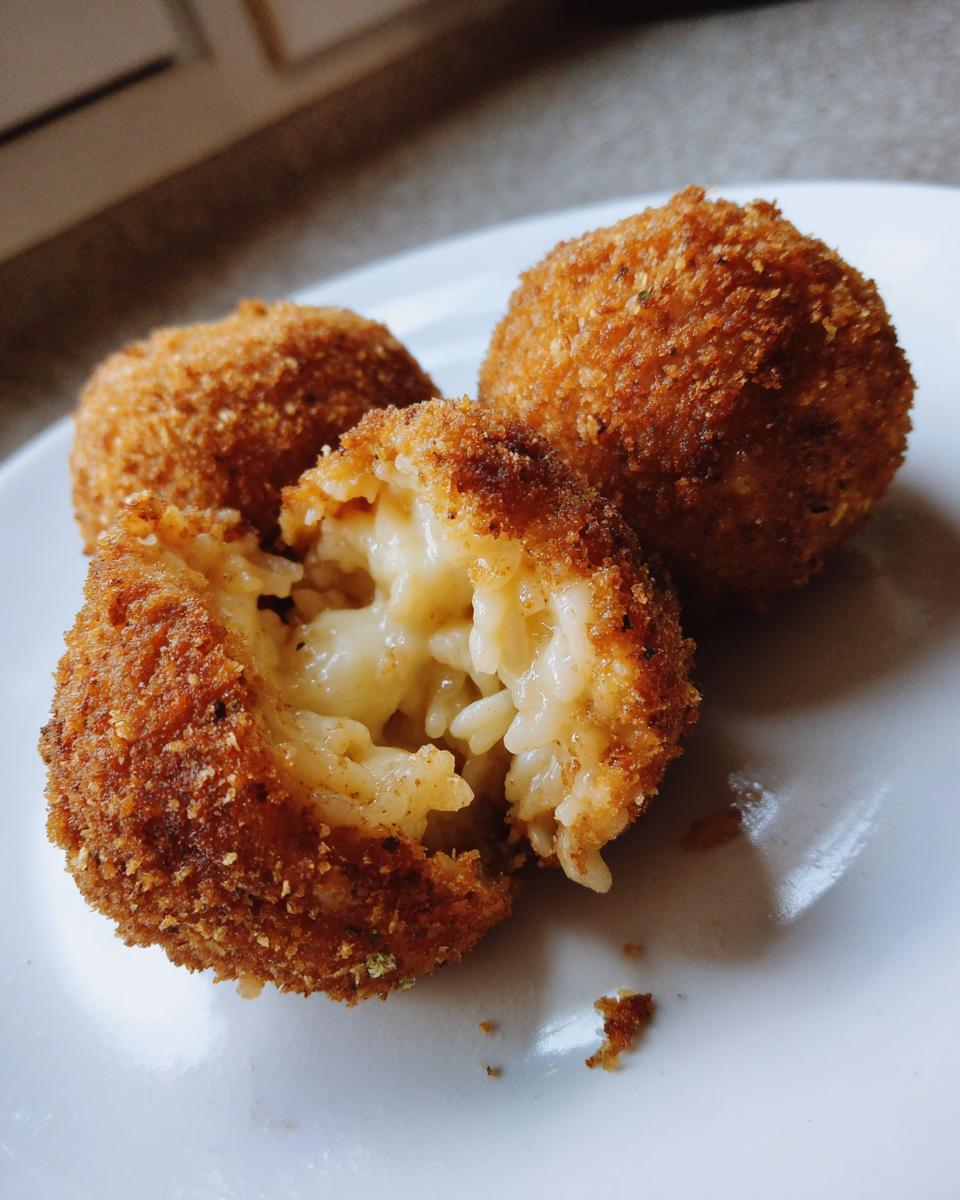
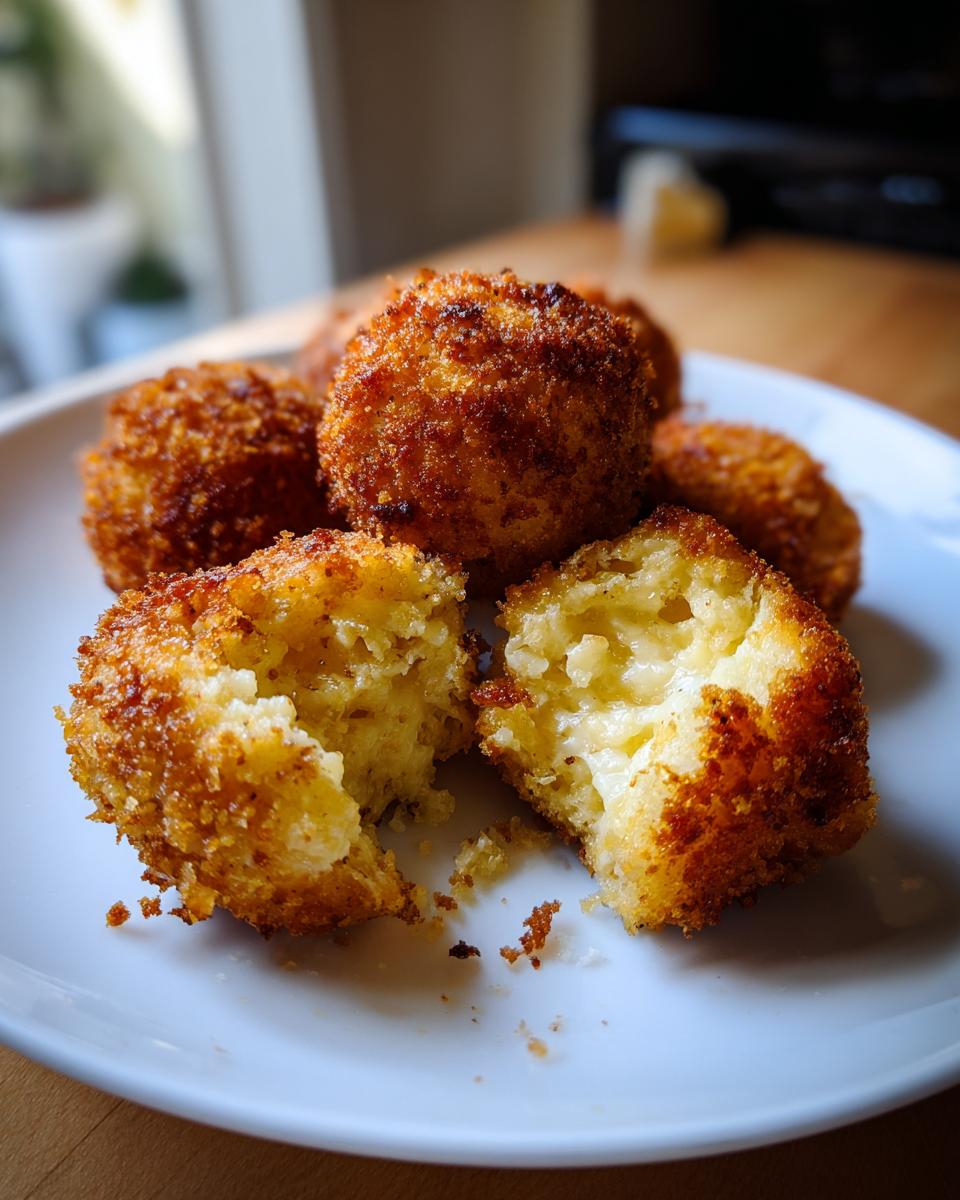
Oh, stop everything you’re doing! If you have leftover risotto sitting sadly in the fridge, I’m about to show you the most magical way to transform it. Forget dry snacks; we are making classic, cheesy Italian rice balls—Arancini! These are golden, crispy on the outside, and stuffed with that gooey, delightful cheese pull that makes everyone happy. That’s the heart of what DeliceRecipe is about, you know? My friend Ellie Vance, who started this whole thing founded this site on the belief that the best food shouldn’t be complicated, just reliable. Trust me on this one; these delicious rice balls are quick, satisfying, and use what you already have. They are the ultimate comfort food appetizer!
- Why This Cheesy Baked or Fried Arancini is Your New Favorite Rice Balls Recipe
- Gathering Ingredients for Crispy Fried Rice Balls
- Step-by-Step Instructions for Golden Brown Rice Balls
- Expert Tips for Making the Best Rice Balls
- Serving Suggestions for Your Homemade Rice Bites
- Storage and Reheating Instructions for Arancini
- Frequently Asked Questions About Italian Rice Balls
- Understanding Nutrition for Your Rice Balls
- Share Your Experience Making These Rice Balls
Why This Cheesy Baked or Fried Arancini is Your New Favorite Rice Balls Recipe
I know you’re busy, and that’s why this recipe for Arancini—our famous cheesy rice balls—is going to save your next dinner party or your next lazy evening. This isn’t some fussy culinary project; this is real home cooking designed to be foolproof. Once you master this process, you won’t look at cooked rice the same way again!
Here’s why these Italian rice balls are absolute winners:
- They turn a simple leftover into something spectacular. Seriously, the texture in these rice balls is unmatched!
- The cheese center guarantees that amazing, satisfying “cheese pull” every single time. Who doesn’t love gooey cheese?
- You get that perfect, crunchy crust! Whether you fry or bake, the exterior snaps beautifully, contrasting the creamy inside.
- It’s fast! If you already have the risotto ready, these appetizer balls come together in about 15 minutes before they hit the oil. I love pairing them with sides from my other cheesy bakes, too!
Perfect for Leftover Rice Snacks
This is where the magic starts. Traditional Arancini *require* cold, day-old risotto. Why? Because if the rice is too warm or too wet, you can’t handle it, and you won’t get those tight, perfect spheres. The starch in the cold, cooked-down risotto acts like glue. So yes, please, save that leftover creamy rice! It becomes the perfect base for these handheld Italian rice balls.
Versatile Comfort Food Rice Balls
Don’t let the Italian name scare you off thinking this is only fancy party fare. Absolutely not! These are the ultimate comfort food rice balls that fit any spot on the menu. Pop a plate out for your guests—they’re fantastic finger food appetizers. Or, have two or three alongside a simple tossed salad for a completely satisfying weeknight dinner. They’re just that good!
Gathering Ingredients for Crispy Fried Rice Balls
Okay, gathering everything is half the battle, right? Especially when you’re aiming for that spectacular crunch. Since we are making classic Arancini, we rely on a few key players here—one being your leftover risotto, which is the star, obviously. If you need a refresher on how to make the base creamy risotto perfectly before it gets cold, take a peek at my guide on creamy risotto recipe, but make sure it chills completely!
For the coating, trust me, you want Panko breadcrumbs if you can find them; they create that serious golden brown rice balls texture we are aiming for. Everything else is pretty standard pantry fare. You’ll need three separate dishes set up for what we call the dredging station, so get those shallow bowls ready before you start rolling!
- 3 cups cooked risotto (must be cold and firm!)
- 1 large egg, lightly beaten (for binding the rice)
- 1 cup grated Parmesan cheese
- 1 cup shredded mozzarella cheese (keep this super cold!)
- 1/2 cup frozen peas, thawed (optional, but adds nice color)
- 1/2 cup finely chopped cooked ham or ground beef (optional filling)
- 1 cup all-purpose flour
- 2 large eggs, beaten for dredging
- 2 cups breadcrumbs (Panko is strongly recommended for crispiness)
- Vegetable oil, enough for about 2 inches in your pot, for frying
- Salt and black pepper to taste
Step-by-Step Instructions for Golden Brown Rice Balls
Alright, now for the fun part where we turn that cold rice into glorious, golden orbs! It takes a little patience, but honestly, even if your ball isn’t perfectly round, it’s going to taste amazing once it hits that hot oil. The secret to getting these golden brown rice balls right is handling the cool rice mixture gently and making sure those cheese centers are sealed up tight. Remember, we need that mozzarella to stay hidden until the very last second! When we get to frying, if you’d rather use your air fryer sometimes—maybe to make some crispy additions for dipping—we cover that in the tips later on, but for now, let’s focus on the classic fry!
Preparing the Rice Mixture and Stuffing the Rice Balls
First, let’s get that rice ready to go. Dump your cold risotto into a large bowl. Add in that single lightly beaten egg and the Parmesan, plus your seasonings. Mix it gently—and I mean gently! Overmixing makes the rice gummy. If you are using ham or peas, fold those in now. Now for the star moment: take about two tablespoons of the rice mixture and flatten it out in your palm. Grab a small cube of that ice-cold mozzarella, pop it right in the center, and then carefully mold the rice all around it. You have to pinch and seal the rice wrapper until the cheese is totally contained. These stuffed rice balls need to be seamless, or oozy cheese happens in the fryer, and nobody wants that mess!
The Breading Station for Perfect Coating
Set up your three shallow dishes—this is your assembly line for maximum crispiness. Do you remember making breaded chicken cutlets? Same principle! First, the ball goes into the flour; just a light coat, shake off the extras. Next, it gets a good dunk in the second bowl of beaten egg. Finally, roll it thoroughly in those Panko breadcrumbs, pressing them in firmly with your hands so you don’t miss any spots. That three-layer coating is what gives you that unbeatable crunch.
Frying These Italian Rice Balls to Perfection
You need good, clean oil, and you need it hot! Heat about two inches of vegetable oil to 350°F (175°C). If you don’t have a thermometer, wait until a stray breadcrumb dropped in sizzles vigorously right away. Be careful not to crowd your pot! Drop in maybe three or four rice balls at a time. If you dump too many in, the oil temperature drops instantly, and you end up with greasy messes instead of crispy fried rice balls. Let them hang out for about 3 to 5 minutes total, turning them gently until they are deeply golden brown all over. Scoop them out onto a wire rack immediately so they can drain off that excess oil.
Expert Tips for Making the Best Rice Balls
So, you’ve made your Italian rice balls, and they are crispy and delicious! But I want to make sure you feel like a total pro next time you make them, or if you have to troubleshoot. Getting that perfect texture—creamy inside, shatteringly crisp outside—is really all about temperature management. Remember how I stressed the cold risotto? Keep that rice cold, keep that cheese cold, and make sure your oil isn’t too hot or too cool. Hot oil seals the crust quickly before the cheese melts into a mess everywhere!
If you find your risotto is actually a little too sticky or wet to handle even when cold, try mixing in a spoonful of plain breadcrumbs right into the rice base mixture before you start rolling. It helps absorb any stray moisture. Also, after breading, if you have time before frying, pop those breaded balls onto a baking sheet in the fridge for about fifteen minutes. This chill time helps the coating really set up, which drastically cuts down on how much breading falls off when they hit the hot oil.
Now, if you want to skip the deep fryer—maybe you’re just using up some basil from your garden and want to pair it with something lighter—you can totally bake these! Just brush them lightly with oil and throw them onto a rack over a sheet pan. Bake them at about 400°F (200°C) for about 15 to 20 minutes. They won’t be quite as deeply golden or robustly crisp as the fried ones, but they are still truly delicious, especially when dipped in a savory herb and cheese bread spread!
Tips for Meal Prep Rice Balls
This is one of my absolute favorite ways to use these, honestly. If you are planning ahead for easy appetizers later in the week or freezing for quick dinners, focus on preparing the meal prep rice balls before they get fried. You form the rice around the cheese, you seal it up perfectly, and then you bread them completely—flour, egg, Panko, the whole deal. Make sure they are nice and tight!
Lay those fully breaded, but uncooked, rice balls on a baking sheet lined with parchment paper. Stick that whole sheet carefully into the freezer until they are rock solid—maybe an hour or so. Once they are completely frozen, transfer them right into a heavy-duty freezer bag. When you’re ready to cook them, don’t even worry about thawing them out! Just drop them straight from the freezer into that hot 350°F oil. You’ll just need to add about 2 to 3 extra minutes to your frying time until they are perfectly golden brown and cooked through.
Serving Suggestions for Your Homemade Rice Bites
Okay, you’ve got these beautiful, hot, crispy little things. What do you dip them in? Serving your homemade rice bites is almost as fun as making them! Since these Arancini are rich and cheesy, they pair wonderfully with something bright or acidic to cut through that richness. They are truly the best party appetizer ideas because dipping is encouraged!
For me, the best thing in the world with a classic cheesy Arancini is a simple, vibrant marinara sauce. You can use store-bought if you’re in a pinch—no judgment here!—but warming it up with a little fresh oregano makes a huge difference. A good spicy kick also works wonders if you like heat. You could whisk some Calabrian chili paste into your marinara for a serious flavor boost.
But don’t feel restricted to just tomato sauce! If you want something totally different that still gives you that dipping satisfaction, try a lighter, cooler dip. I’ve been loving making a batch of super quick black bean dip to serve alongside them sometimes. The cool, earthy flavor of the beans is unexpected but fantastic against the hot, savory rice. Or, if you’re feeling really fancy, a drizzle of high-quality balsamic glaze over the top makes them look stunning when you put them out for guests!
Storage and Reheating Instructions for Arancini
We all know that fresh-from-the-fryer Arancini are perfect, but what if you have some leftovers (if that’s even possible in your house!)? Or maybe you followed my advice and prepped a huge batch ahead of time. Don’t worry about them losing their crunch! Storing and reheating these precious Italian rice balls correctly is key to enjoying them the next day.
If you’re keeping them in the fridge, make sure they are completely cooled down first. Place them in an airtight container, and honestly, they’ll be great for about three to four days. The inside stays creamy, which is nice, but the outside will soften up—that’s just the way fried food goes, folks.
Here is the absolute secret, though: never, ever use the microwave! Zapping these crunchy beauties just turns the coating gummy and steams the interior. We want that beautiful, shatteringly crisp exterior back, right?
The best way to revive that crunch is by using dry heat. If you have an oven, preheat it to about 375°F (190°C). Pop the leftover Arancini on a wire rack set over a baking sheet—this allows air to circulate all around them so the bottom doesn’t steam. Heat them for maybe 8 to 10 minutes. They get piping hot and the crust firms right back up!
If you want the absolute best crispness, use your air fryer! I use mine all the time for reheating things like air fryer funnel cake bites, and it works wonders here too. Set your air fryer to 375°F (190°C) and cook the rice balls for just 4 to 6 minutes, shaking the basket once halfway through. They come out tasting almost exactly like they just came out of the oil! It’s honestly magical how well it works.
Frequently Asked Questions About Italian Rice Balls
I know you might have a few lingering questions when taking on a classic recipe like Arancini! It’s a special dish, and I want to make sure you feel totally confident taking these rice balls from your counter to the hot oil. We developed this recipe to serve as a perfect example of easy weeknight dinners that feel fancy, but there are always little details that pop up. Here are some of the things I hear most often from folks trying this recipe for the first time. Don’t worry if you need to double-check—that’s why I wrote it down here! You can find more guidance on putting together quick meals over at DeliceRecipe, too, if you check out the easy weeknight dinners section.
Can I make these rice balls without risotto?
That’s a great question! Traditionally, you absolutely need leftover risotto because the simmering process releases starch, allowing the rice to bind perfectly when cold. However, if you’re in a real pinch and forgot to make extra risotto last night? Yes, you can cheat just a little bit. You need to cook short-grain rice (like Arborio or even Calrose) exactly like you would risotto, but add a bit more broth than normal and cook it down until it’s very creamy and stiff. It won’t have that deep flavor payoff that true leftover risotto brings, but if you add that Parmesan cheese and egg in right away, you can usually get those homemade rice bites to hold their shape just fine!
What is the best oil temperature for crispy fried rice balls?
If you remember one thing from this whole process, please remember the oil temperature! For these crispy fried rice balls, you really need that oil at a steady 350°F (175°C). Why? Because the rice mixture itself is already cooked—we aren’t trying to cook the inside; we are just trying to create that gorgeous shell. If the oil is too cool, the breading soaks up grease before it has a chance to seal, and you end up with soggy, oily things. If it’s searing hot, the crust burns before the cheese inside even gets warm. Keep it steady at 350°F so you can achieve that perfect golden brown rice balls exterior in just 3 to 5 minutes!
Are these cheesy rice balls suitable for vegetarians?
Yes, absolutely! The base recipe as written—using just the risotto, egg, Parmesan, mozzarella, and peas—is completely vegetarian. The ham or ground beef I mentioned is totally optional for those who want a heartier filling, but you don’t need it to achieve amazing cheesy rice balls recipe flavor. If you want to bump up the vegetarian filling, try thinly sliced mushrooms sautéed down until they are dry, or roasted red peppers mixed in with your peas. They are fantastic either way!
Understanding Nutrition for Your Rice Balls
I always tell folks that while Arancini are certainly a treat—hello, deep-fried cheese!—it’s good to have a rough idea of what goes into these delightful rice balls. Now, please remember these numbers are just estimates, based on the recipe yielding about 12 balls and serving two per person. The exact sodium and fat content will change wildly depending on, say, how cheesy you go or what kind of oil you use for frying! If you’re looking for lighter alternatives in general, you might want to check out my guide on quick healthy lunch recipes, but for this classic Italian appetizer, here’s the scoop:
- Serving Size: 2 balls
- Calories: Approximately 350
- Fat: Around 18g
- Carbohydrates: About 35g
- Sugar: Very low, around 2g
- Protein: Roughly 14g
Because we are using Parmesan and mozzarella, the sodium is a little higher, which is something to keep in mind if you are watching your salt intake. But honestly, these are best served fresh and hot as part of a special gathering rather than everyday eating. Enjoy them guilt-free when you make them!
Share Your Experience Making These Rice Balls
Whew! We did it! You’ve got a beautiful, crispy batch of Italian Arancini sitting right there on your cooling rack, smelling exactly how they should. I’m so incredibly proud of you for tackling these! Making the perfect stuffed rice balls takes a little bit of elbow grease, but I promise, the payoff when that cheese melts out is worth every single step.
I really, really want to hear how they turned out for you! Did you fry them or give the baking method a shot? What kind of optional filling did you use inside your rice balls? If you used less traditional additions—maybe some spinach or different cheeses—let me know how that combo worked out!
Please head down to the comments section below! Drop a rating for the recipe, ask me anything else you might be wondering about the frying time or the coating process, and if you snapped a picture of your perfectly golden brown gems, share it on Instagram and tag me! Showing off your amazing cooking skills helps other folks get the confidence boost they need to try this recipe next. If you have questions, don’t hesitate to reach out via the contact page, too. Happy cooking, and come back soon for more easy, reliable recipes!
PrintClassic Cheesy Arancini: Crispy Italian Rice Balls

Make these classic Italian rice balls, known as Arancini. They are crispy on the outside, filled with melted cheese, and perfect as an appetizer or snack.
- Prep Time: 20 min
- Cook Time: 15 min
- Total Time: 35 min
- Yield: About 12 rice balls 1x
- Category: Appetizer
- Method: Frying
- Cuisine: Italian
- Diet: Vegetarian
Ingredients
- 3 cups cooked risotto (leftover is fine)
- 1 large egg, lightly beaten
- 1 cup grated Parmesan cheese
- 1 cup shredded mozzarella cheese
- 1/2 cup frozen peas, thawed (optional)
- 1/2 cup finely chopped cooked ham or ground beef (optional)
- 1 cup all-purpose flour
- 2 large eggs, beaten for dredging
- 2 cups breadcrumbs (Panko recommended for crispiness)
- Vegetable oil, for frying
- Salt and black pepper to taste
Instructions
- In a large bowl, combine the cooked risotto, 1 beaten egg, Parmesan cheese, salt, and pepper. Mix until just combined.
- If using fillings, gently fold in the thawed peas and ham or meat.
- Place the mozzarella cheese in the refrigerator to keep it very cold.
- Scoop about 2 tablespoons of the rice mixture into your palm. Flatten it slightly. Place a small cube of cold mozzarella cheese in the center.
- Carefully mold the rice around the cheese to form a tight ball, ensuring the cheese is completely sealed inside. Repeat with the remaining rice mixture.
- Set up a standard breading station: one shallow dish with flour, one with the 2 beaten eggs, and one with breadcrumbs.
- Dredge each rice ball first in the flour, shaking off excess. Dip it into the egg mixture, allowing excess to drip off. Finally, roll it thoroughly in the breadcrumbs, pressing gently to adhere.
- Heat about 2 inches of vegetable oil in a deep pot or Dutch oven to 350°F (175°C).
- Carefully place 3-4 rice balls into the hot oil, ensuring you do not overcrowd the pot. Fry for 3-5 minutes, turning occasionally, until they are deep golden brown and crispy.
- Remove the arancini with a slotted spoon and place them on a wire rack or paper towel-lined plate to drain excess oil.
- Serve immediately while the cheese is melted. These are great for party appetizer ideas or as a satisfying comfort food rice balls option.
Notes
- For a lighter option, you can bake these rice balls at 400°F (200°C) for 15-20 minutes, flipping halfway, until golden.
- If you are planning for meal prep rice balls, you can form them and freeze them uncooked on a baking sheet before transferring them to a freezer bag. Fry directly from frozen, adding a few extra minutes to the cook time.
- These fried rice balls work well with a simple marinara sauce for dipping.
Nutrition
- Serving Size: 2 balls
- Calories: 350
- Sugar: 2
- Sodium: 450
- Fat: 18
- Saturated Fat: 8
- Unsaturated Fat: 10
- Trans Fat: 0
- Carbohydrates: 35
- Fiber: 2
- Protein: 14
- Cholesterol: 60