
When it comes to celebrations—birthdays, Valentine’s Day, or even just a really ambitious Tuesday—you need a dessert that stops the conversation when you bring it to the table. Let me tell you about the one that always steals the show: the red velvet cheesecake. This isn’t just a dessert; it’s a statement piece! Here at DeliceRecipe, Eleanor Vance is committed to bringing you recipes she trusts completely, and this layered beauty is definitely one of them. We’re taking that familiar, gorgeous red velvet flavor and marrying it with a tangy, rich cheesecake filling, all sitting atop a buttery, crunchy Oreo crust. If you love rich desserts, you might also want to check out our recipe for easy tiramisu recipe. Trust me, achieving this showstopper dessert is easier than you think, and it’s guaranteed to make any gathering memorable.
- Why This Classic Red Velvet Cheesecake Recipe Stands Out (EEAT)
- Gathering Ingredients for Your Red Velvet Cheesecake
- Step-by-Step Instructions for Layered Red Velvet Cheesecake
- Tips for a Perfect Red Velvet Cheesecake Presentation
- Variations on the Classic Red Velvet Cheesecake
- Storage and Serving Suggestions for Your Impressive Baked Goods
- Frequently Asked Questions About Red Velvet Cheesecake
- Estimated Nutritional Data for This Red Velvet Cheesecake
- Share Your Velvety Sweet Treats Creations
Why This Classic Red Velvet Cheesecake Recipe Stands Out (EEAT)
When you’re aiming for a dessert that truly impresses, you need layers, texture, and foolproof flavor—that’s why this Red Velvet Cheesecake Recipe is Eleanor’s go-to for big events. It delivers on being a truly decadent layered dessert without demanding that you be a pastry chef. I’ve tested this combination dozens of times, and the secret is keeping the cake layer slightly thinner than usual. If you enjoyed working with cream cheese in our cream cheese pound cake recipe, you’ll love how it anchors this filling!
This technique is vital; it ensures the baked cake doesn’t fight the cheesecake filling, giving you that wonderful, soft crumb that melts right into the tangy cream cheese layer. It holds up beautifully, unlike some fluffier desserts that deflate after a day.
The Perfect Balance of Flavor and Texture
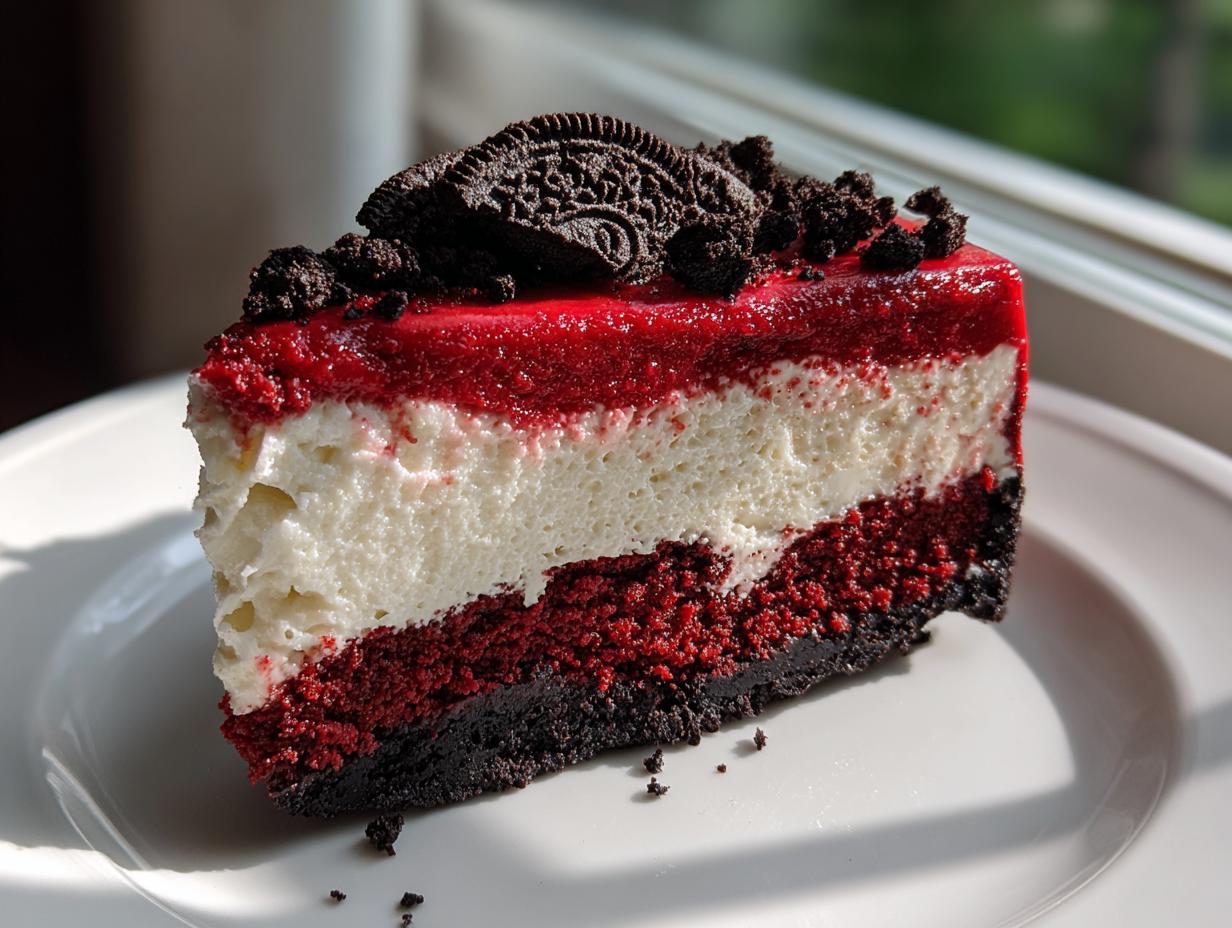
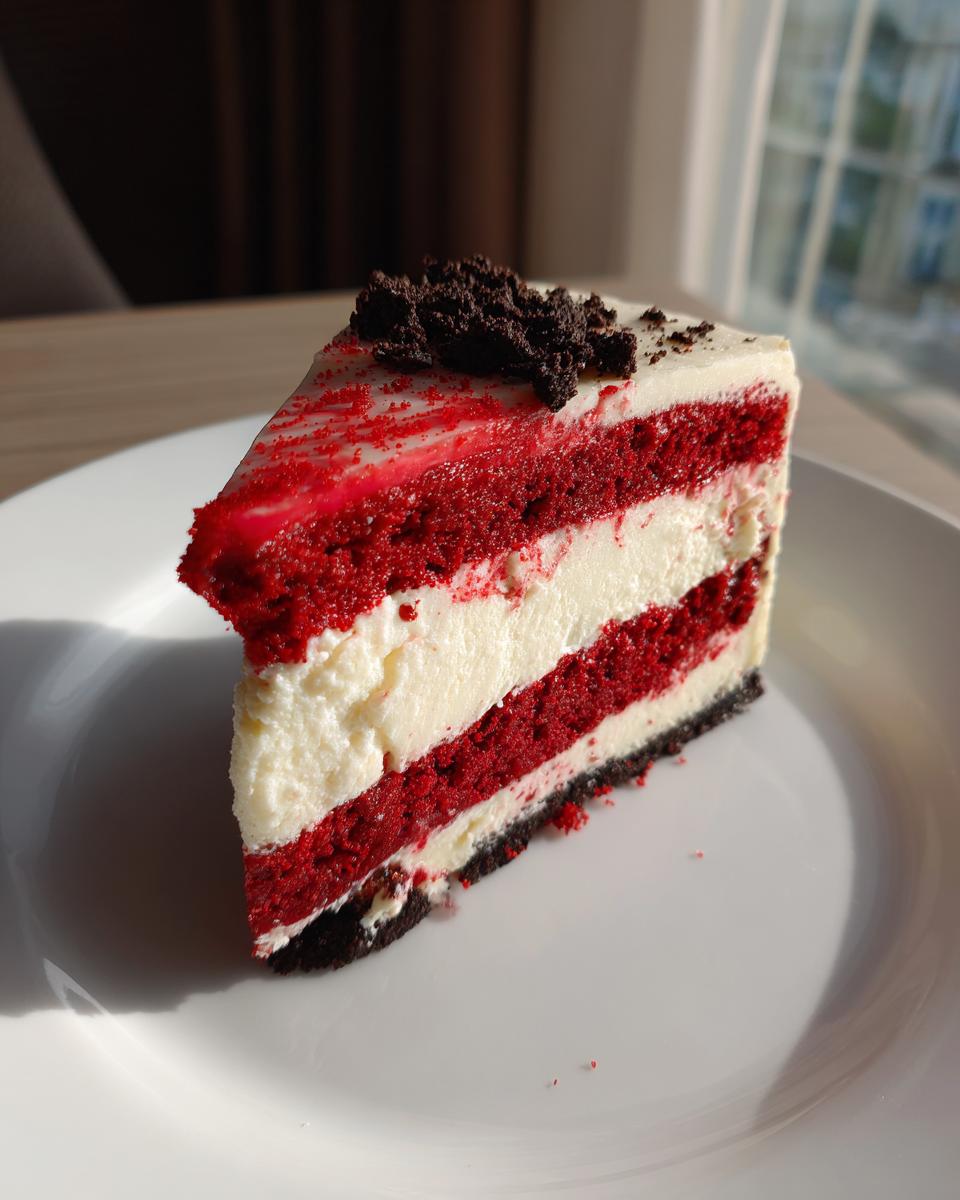
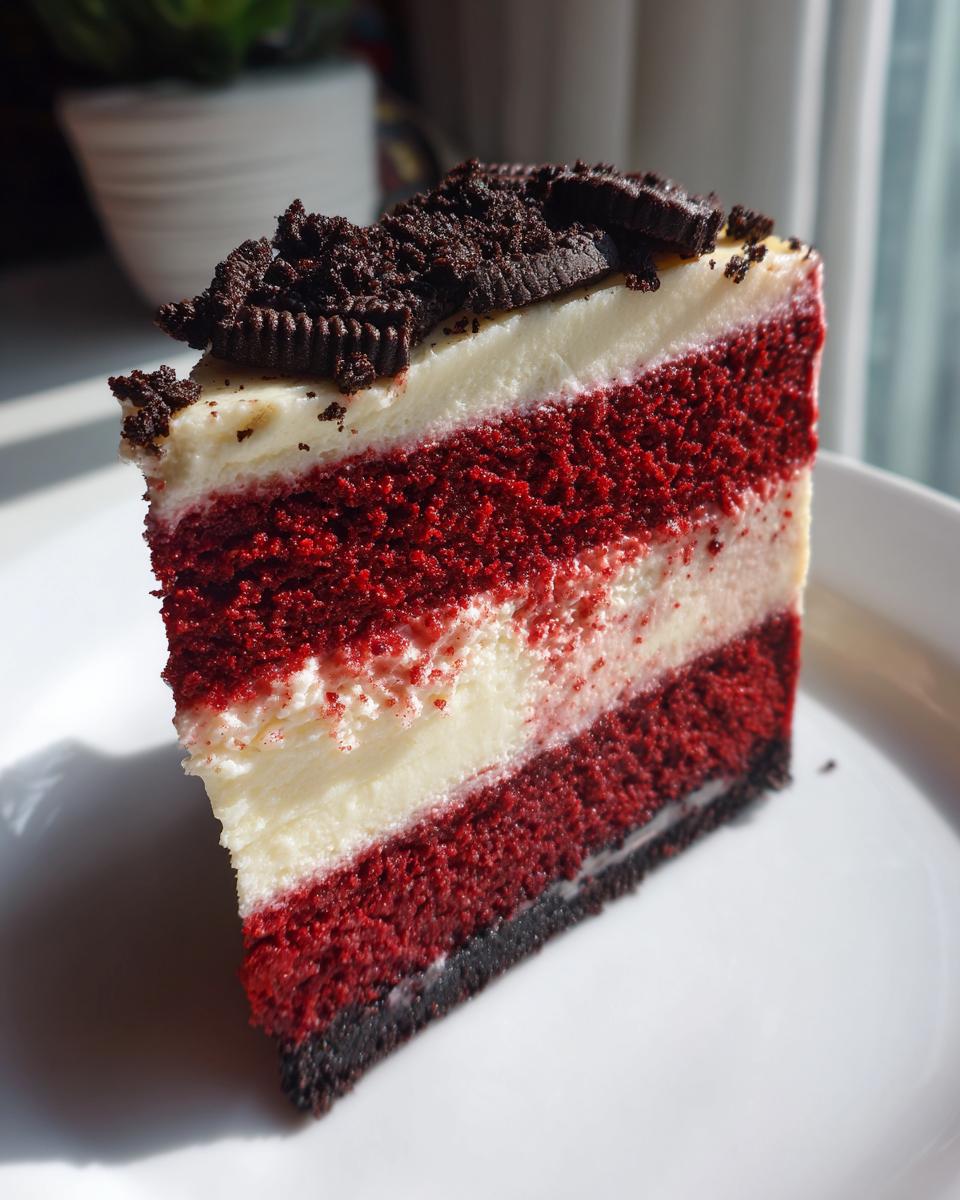
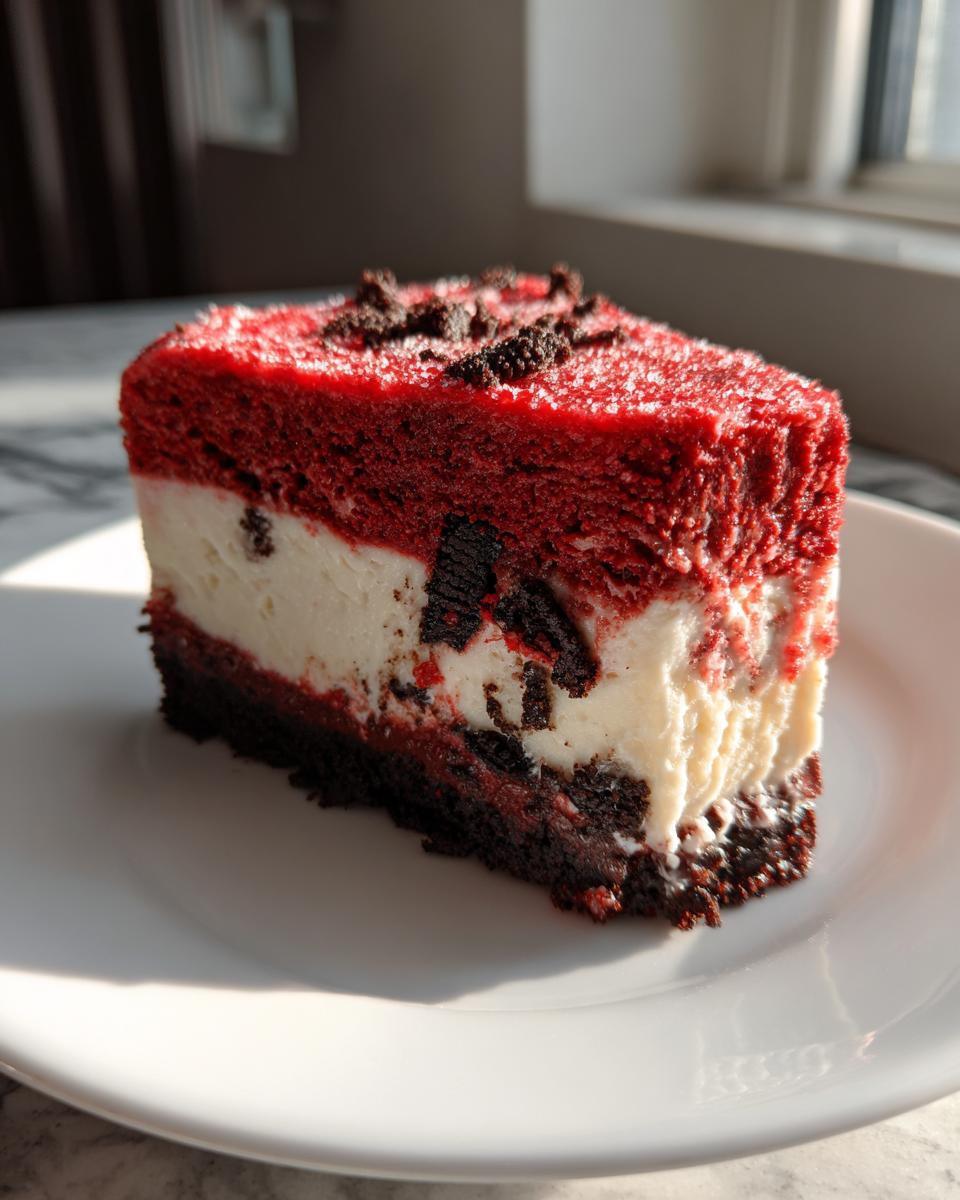
What I adore most is the textural journey in every single bite. You get the satisfying crunch from the buttery Oreo crust first, followed immediately by the moist, slightly acidic red velvet cake, and finally, that unbelievably smooth, cool cheesecake topping. It’s just heavenly.
Making a Showstopper Cheesecake Accessible
Honestly, this looks much more complicated than it is! We rely on a quality box mix for the cake portion, which takes the guesswork out of the most time-consuming part. That really brings the process down to earth, making it perfect for regular baking for celebrations. You get all the wow factor of a complex bake, but the actual steps are super manageable. You’ve got this!
Gathering Ingredients for Your Red Velvet Cheesecake
Okay, darling, if we want this layered dessert to come out perfectly, we need to treat our ingredients like they matter—because they absolutely do! When you’re aiming for that *best cheesecake recipe* status, exactness in the ingredients list is non-negotiable. Trust me on this; those little details are what take this from good to absolute showstopper!
We are going to tackle this in three manageable groups. Don’t worry if you aren’t familiar with every single component; I’ll point out exactly what you need to grab from the pantry before you start mixing. If you’re already planning ahead for flakiness in other bakes, make sure you peek at tips for our butter pie crust recipe—good habits start here!
For the Crunchy Oreo Crust
This is where we build our chocolatey foundation! You absolutely must have Oreos—not just any chocolate sandwich cookie, but the real deal crushed up fine. The texture needs to be almost like coarse sand. You’ll mix those pulverized cookies with some melted butter, and that’s it! Make sure you have a 9-inch springform pan ready because this mix is pressed right into the bottom of that pan.
For the Creamy Cheesecake Filling
For the filling, cream cheese is our star, and listen closely: it *must* be softened to room temperature. If it’s cold, you’ll get lumps, and nobody wants a lumpy center in their creamy cheesecake! Make sure you grab three large eggs. Also, don’t skip the sour cream; that’s where the beautiful, necessary tang comes from that cuts through all that richness.
For the Red Velvet Cake Base and Topping
For the base, we’re taking a shortcut that still tastes amazing: a standard box of red velvet cake mix—use whatever the box calls for in terms of eggs and oil. If you want that extra brilliant color, have some good quality red food coloring ready, too. Finally, for the gorgeous cloud on top, you’ll need heavy whipping cream and some powdered sugar for our stable topping.
Step-by-Step Instructions for Layered Red Velvet Cheesecake
Now for the fun part—putting this masterpiece together! I promise, if you follow these steps exactly, you’ll end up with that incredible dessert you dreamed of. We’ve got four important stages here: the cake base, the crust, the filling, and then the long, necessary wait. Remember, good things take time, especially when it comes to cheesecake!
Baking the Red Velvet Cake Base
First things first, crank that oven up to 350°F (175°C). Grab a 9-inch springform pan and get it properly greased and floured—we don’t want any sticking later! When you mix your red velvet cake batter, pay attention to the water substitution: use exactly 1 cup of boiling water mixed with 1 cup of cold water. It sounds odd, but trust me, this specific liquid combination helps the structure immensely. Pour that batter in and bake it for just 15 to 20 minutes. It should be set, but you want it still tender. Pull it out and let it cool completely on a rack while we move on to the crust!
Creating the **Oreo Crust Cheesecake** Foundation
This is a secret to our layered look: we make the crust in a separate springform pan base. Mix those crushed Oreos with the melted butter until it holds together like wet sand. Press this mixture down firmly into the bottom of that pan. You want it compact! Don’t bake it; just pop this base into the freezer. It needs to get nice and cold to hold its shape when we pour the filling over it later.
Mixing and Baking the **Homemade Cheesecake Filling**
Time for the main event. In a big bowl, beat your softened cream cheese and sugar until they are perfectly smooth—no grainy bits allowed! Now, add those three eggs, but you have to do it one at a time, mixing well after each addition. Once those are incorporated, gently mix in the sour cream, flour, vanilla, and vinegar. If you want that extra bold color, this is the moment to splash in your red food coloring. Once the filling is ready, pour it right over that completely cooled red velvet cake layer in its pan. Immediately drop your oven temperature down to 325°F (160°C) and bake for about 50 to 60 minutes. You’re looking for the edges to be firm but the very center should still have a slight, gentle jiggle.

The Crucial Cooling and Chilling Process
This is where most people ruin a beautiful cheesecake, so please pay attention! When the baking time is up, turn the oven OFF. Don’t take the cheesecake out yet! Just crack the oven door open slightly—we want it to cool down slowly. Leave it in there like that for a full hour. This slow temperature drop is our secret weapon against cracks! After that hour, take it out, let it finish cooling on the counter until it’s room temperature, then wrap it tight and stick it in the fridge. You absolutely must chill this for a minimum of six hours, but honestly, overnight is when the magic really happens. If you haven’t already checked out our guide on easy super moist pumpkin bread recipe, you’ll find similar patience is key there, too!
Tips for a Perfect Red Velvet Cheesecake Presentation
Listen, we’ve done all the hard work, and now we want this beauty to look exactly like the picture, right? Since this is such a stunning centerpiece for any table—think Valentine’s Day desserts or even your big Christmas spread—we can do a couple of little tricks to make sure it’s absolutely flawless.
Achieving a Crack-Free Surface
I mentioned this in the notes, but I have to stress it again: if you are worried about cracks on your top layer—and who isn’t?—you need to try the water bath method when you bake the filling. Yes, it sounds fancy, but it’s honestly just setting your springform pan inside a larger roasting pan filled with a couple of inches of hot water. This gentle, humid heat cooks the Cream Cheese Dessert evenly, preventing those ugly seams from forming. It’s the professional baker’s secret weapon for perfect cheesecake!
Finishing Touches: Whipped Topping Application
Once it’s chilled overnight, it’s time for the topping. You want to whip that heavy cream until you have stiff peaks—don’t stop too soon! You can spread it on with an offset spatula for a lovely, rustic look, or if you have a piping bag (and I highly recommend practicing with a star tip—you can see my favorite piping resources over at this icing guide), you can dollop little mounds all over the top. Before you even think about unlatching the sides of the springform pan, grab a very thin knife and gently run it all the way around the edge where the cheesecake meets the metal. This releases any sticky bits, ensuring your slice comes out clean. You can also find some amazing inspiration over at Recipe Girl’s site if you need more ideas on decorating!
Variations on the Classic Red Velvet Cheesecake
While this layered version with the crisp Oreo crust is absolutely my favorite—a true example of rich chocolate desserts done right—I know some days you just feel like switching things up! I always encourage you to play around, especially once you’ve mastered the base recipe. Baking is about flexibility, after all, and you can easily adapt this to your mood or what you have on hand.
It’s important that you feel confident enough to experiment once you know the core technique works. If you’ve had a blast with this recipe, you might also enjoy tweaking things around for a showstopper like my turtle cheesecake recipe sometime soon!
Boosting Chocolate Flavor in the Red Velvet Cake Inspiration
If you want the cake layer to really sing, try adding just one extra tablespoon of unsweetened cocoa powder right into your red velvet mix before you bake that base layer. It deepens the chocolate background without messing up the texture too much, making it feel even more gourmet! Another simple swap is replacing the Oreos in the crust with chocolate graham crackers or chocolate wafer cookies—they offer a slightly different, sometimes richer, crumb.
Considering No Bake Cheesecake Variations
I know some of you are looking for something quicker, especially when the weather gets warm! While this baked method gives us that perfectly sturdy layer, you absolutely can create a version of this using no bake cheesecake variations. Just know that to keep that filling from weeping or collapsing, you’d have to add a stabilizer, usually gelatin or a bit more cornstarch, treated very carefully. That’s a whole different beast we’d tackle another day, but keep it in mind for future summer baking!
Storage and Serving Suggestions for Your Impressive Baked Goods
This lovely red velvet cheesecake is rich, so it’s likely you’ll have leftovers—which is a wonderful problem to have! Because it contains both cake and a dairy-heavy filling, we need to store it carefully to keep it tasting its absolute best. This ensures your beautiful dessert remains perfect for those next-day treats. If you’ve ever stored something delicate, you know that a little care goes a long way, just like keeping our easy steak fajitas tasting fresh!
Keeping the Red Velvet Cheesecake Fresh
Once it’s completely chilled and set, cover the pan loosely—or transfer slices to an airtight container—and get it into the refrigerator right away. It stays deliciously fresh for up to four days. Since the whipped cream topping softens over time, it’s best eaten within the first two days for that truly perfect texture.
Serving Temperature
Here’s the key, folks: cheesecake should never be served rock solid straight from the fridge! For the absolute best flavor release and the smoothest, creamiest mouthfeel, pull your slice out about 20 to 30 minutes before you plan to serve it. That slight warming time is magic for creamy desserts!
Frequently Asked Questions About Red Velvet Cheesecake
I know you bakers out there might have a few lingering questions once you dive into making this magnificent creation. That’s totally normal! When you’re working on something this impressive, you want reassurance every step of the way. I’ve gathered up the questions I get asked most often about this recipe, so you can bake with total confidence. If you’re looking for other comforting bakes, you might enjoy the instructions for making our easy chicken pot pie casserole!
Can I skip the red velvet cake layer in my red velvet cheesecake recipe?
You certainly can, but I highly recommend against it if you want that true layered experience! That cake layer is what breaks up the richness and gives you that wonderful textural difference. If you decide to skip it, you’ll need to use the Oreo crust recipe in a full 9-inch pan, and you should plan on making about one and a half batches of the cheesecake filling to make up the volume. Alternatively, you could skip the cake and just use a standard graham cracker crust for simpler cheesecake recipes.
What is the best way to get a deep red color for my Cream Cheese Dessert?
This is such a great question because sometimes the red fades in the oven, and we want that deep, moody color! My best advice here is to use high-quality gel food coloring instead of the standard liquid drops. Gel coloring is concentrated, so you need less volume, which doesn’t thin out your batter. Also, make sure you add the color directly into the filling mixture *before* you bake it. The heat of the oven will always dull the color a little bit, so coloring it slightly deeper than you think you need works perfectly.
Is this considered one of the Holiday Cheesecake Ideas?
Oh, absolutely! This makes the cut every single year. Because of that gorgeous, vibrant red contrasted with the white creamy filling and topping, it screams celebration. It’s a massive hit for Christmas dessert recipes because it looks so festive, and obviously, it’s the quintessential choice for Valentine’s Day because of the color. It truly elevates any party menu!
Estimated Nutritional Data for This Red Velvet Cheesecake
Alright, let’s talk numbers! I always tell people that when you make something this gloriously decadent, you probably aren’t doing it for your daily macro count, but it’s good to have a ballpark idea of what you’re diving into. Please remember, this nutrient breakdown is just an estimate based on the specific ingredients and serving size listed in the recipe. Since we are using a box mix and Oreos, there will always be some natural variation based on the brands you choose!
When you serve up a generous slice of this Red Velvet Cheesecake, treating yourself to one of these gourmet dessert recipes, here’s what you can generally expect per serving (based on 12 slices total):
- Calories: Around 450
- Total Fat: Roughly 30 grams (yes, there’s some fat here, but that’s what makes it creamy!)
- Carbohydrates: Approximately 40 grams
- Protein: About 7 grams
This is rich stuff, meant for a celebration, not an everyday snack! If you want to look at how simple baking ingredients come together, you might find our notes on making easy blueberry scones from scratch helpful for comparing how different recipes add up. But honestly, you eat with your eyes first, and this dessert passes that test with flying colors!
Share Your Velvety Sweet Treats Creations
My favorite part about sharing recipes here at DeliceRecipe is seeing all your successes! When you manage to pull off something as gorgeous and decadent as this layered Red Velvet Cheesecake, I truly want to know how it went. Making a showstopper cheesecake should feel like a triumph, and I want to celebrate that with you!
If you made this recipe and it was the hit of your party, please come back and leave a star rating right below this section. It helps other home cooks see that this recipe is reliable and totally worth the effort. And seriously, if you took a photo of your finished dessert—especially if you decorated it for the holidays or paired it with our strawberry cupcakes for a dessert table—please tag us! Showing off those amazing velvety sweet treats is the best reward we could ask for. Welcome to the community; I can’t wait to see what you bake next!
PrintDecadent Layered Red Velvet Cheesecake with Oreo Crust

Make this showstopper dessert combining rich red velvet cake flavor with creamy cheesecake over a crunchy Oreo crust. It is perfect for holidays or special celebrations.
- Prep Time: 30 min
- Cook Time: 70 min
- Total Time: 100 min
- Yield: 12 servings 1x
- Category: Dessert
- Method: Baking
- Cuisine: American
- Diet: Vegetarian
Ingredients
- 1 box red velvet cake mix, plus ingredients listed on box (eggs, oil, water)
- 1 cup boiling water
- 1 cup cold water
- 1/2 cup vegetable oil
- 3 large eggs
- 1 box (15.25 oz) red velvet cake mix
- 1 1/2 cups crushed Oreo cookies (about 12 cookies)
- 1/4 cup melted butter
- 16 oz cream cheese, softened
- 1 cup granulated sugar
- 1 teaspoon vanilla extract
- 3 large eggs
- 1/2 cup sour cream
- 1/4 cup all-purpose flour
- 1 teaspoon white vinegar
- 1/2 teaspoon red food coloring (optional, for extra color)
- 1 cup heavy whipping cream
- 2 tablespoons powdered sugar
- 1/2 teaspoon vanilla extract
Instructions
- Prepare the red velvet cake layer: Preheat your oven to 350°F (175°C). Grease and flour a 9-inch springform pan. Prepare the red velvet cake mix according to package directions, substituting the required water amounts with 1 cup boiling water and 1 cup cold water. Pour the batter into the prepared springform pan. Bake for 15 to 20 minutes, or until a toothpick inserted near the center comes out clean. Let the cake cool completely on a wire rack.
- Prepare the Oreo crust: While the cake cools, mix the crushed Oreo cookies and melted butter in a small bowl until combined. Press this mixture firmly into the bottom of a separate 9-inch springform pan. Place the pan in the freezer while you prepare the cheesecake filling.
- Make the cheesecake filling: In a large bowl, beat the softened cream cheese and granulated sugar with an electric mixer until smooth. Beat in 3 eggs one at a time, mixing well after each addition. Mix in the sour cream, flour, vanilla extract, and vinegar until just combined. Add red food coloring now if you want a deeper red color.
- Assemble and bake: Reduce the oven temperature to 325°F (160°C). Pour the cheesecake filling evenly over the cooled red velvet cake layer in its pan. Place the springform pan containing the cake and filling onto a baking sheet. Bake for 50 to 60 minutes, or until the edges are set but the center still has a slight jiggle.
- Cool and chill: Turn off the oven, crack the door open slightly, and let the cheesecake cool inside the oven for 1 hour. Remove the cheesecake from the oven and let it cool completely on the counter. Once cool, cover the pan loosely with plastic wrap and refrigerate for at least 6 hours, or preferably overnight.
- Prepare the topping: Before serving, whip the heavy whipping cream, powdered sugar, and vanilla extract until stiff peaks form. Spread or pipe the whipped cream over the chilled cheesecake. Carefully run a thin knife around the edge before releasing the springform side. Slice and serve your showstopper cheesecake.
Notes
- For a truly impressive presentation, you can use a water bath when baking the cheesecake to prevent cracking.
- If you prefer a more intense chocolate flavor, substitute the crushed Oreos with chocolate wafer cookies for the crust.
- This dessert keeps well, covered, in the refrigerator for up to four days.
Nutrition
- Serving Size: 1 slice
- Calories: 450
- Sugar: 35
- Sodium: 350
- Fat: 30
- Saturated Fat: 18
- Unsaturated Fat: 12
- Trans Fat: 0.5
- Carbohydrates: 40
- Fiber: 1
- Protein: 7
- Cholesterol: 120