
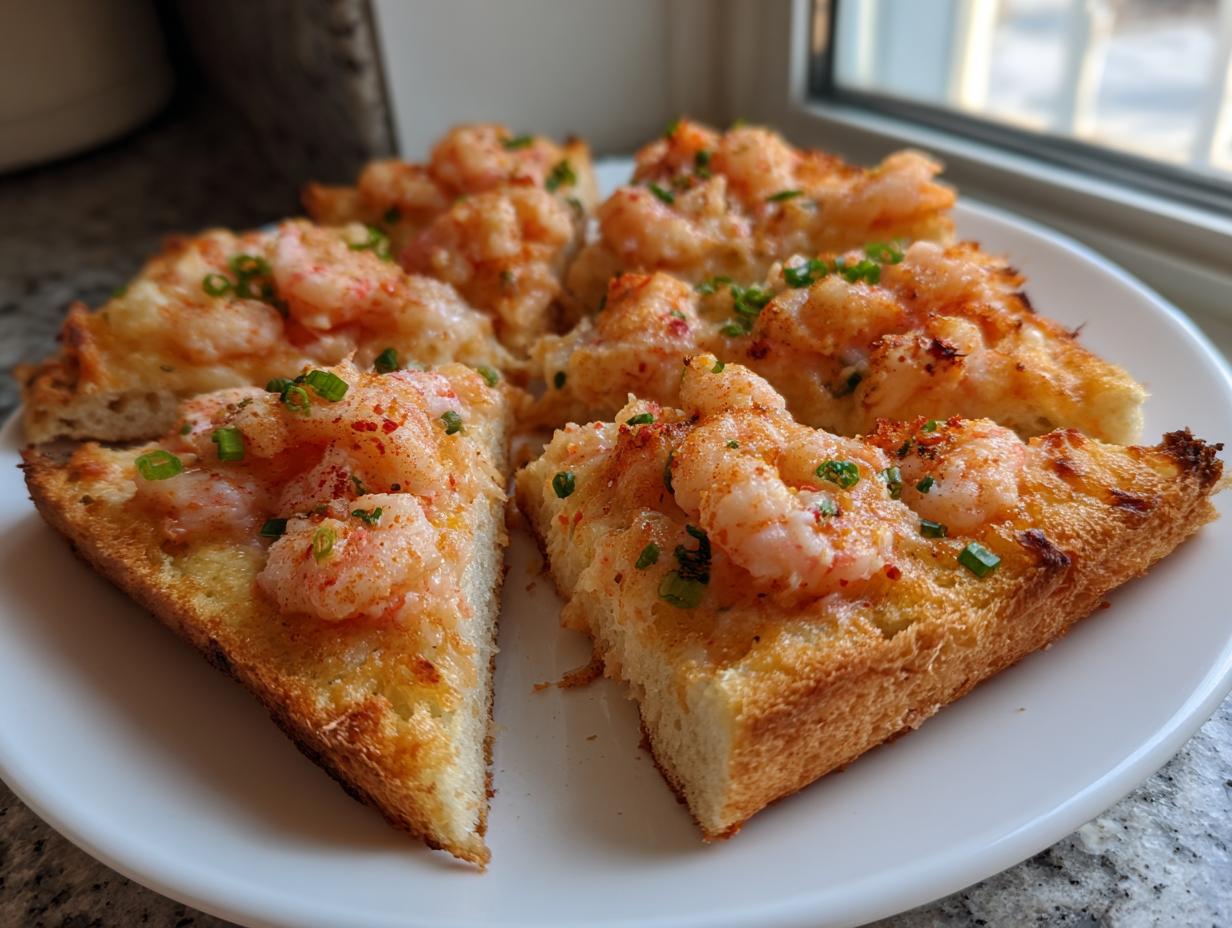
Oh, that craving hits hard, doesn’t it? That deep-seated need for a savory, utterly satisfying bite that feels special but doesn’t demand your entire evening. Forget scrubbing that deep fryer! I remember when I first tested out a healthier version of the classic appetizer, and let me tell you, getting that perfect crunch without all the oil is a game-changer. We’re talking about shrimp toast here—that creamy, garlicky shrimp topping spread thick onto crunchy bread. This baked shrimp toast recipe truly delivers that same iconic texture we all love, but it’s lighter, much simpler to clean up after, and absolutely perfect for getting an impressive appetizer on the table fast. Trust me, this is the recipe you’ll send to your friends.
- Why This Easy Shrimp Toast Recipe Works for Home Cooks
- Gathering Ingredients for Perfect Shrimp Toast
- Step-by-Step Instructions for Baked Shrimp Toast
- Tips for Making the Best Crispy Shrimp Toast
- Variations on Classic Shrimp Toast
- Serving Suggestions for This Party Snack
- Storage and Reheating Instructions
- Frequently Asked Questions About Shrimp Toast
- Nutritional Estimate for Baked Shrimp Toast
Why This Easy Shrimp Toast Recipe Works for Home Cooks
I developed this version because I love seafood appetizers, but I don’t always love the mess that comes with deep frying things. This shrimp toast recipe is all about maximizing flavor while keeping things totally approachable for a Tuesday night, or even when you need some quick weeknight appetizers.
Achieving Crispy Shrimp Toast Without Frying
The biggest win here is the oven! When you brush the edges with a little olive oil, baking gives you that beautiful, satisfying crunch. You end up with perfectly golden brown toast bases without having to deal with hot oil splatter. It’s the best way to get crispy shrimp toast, truly!

Quick Prep Time for Weeknight Appetizers
Seriously, look at the times: 15 minutes to prep, 15 minutes to bake. That means you can get these amazing seafood appetizers ready faster than ordering takeout. It’s fast food that feels fancy, and that’s how I like to roll in my kitchen.
Gathering Ingredients for Perfect Shrimp Toast
Okay, let’s talk about what you need to pull off this amazing shrimp toast. Since we aren’t deep-frying, our focus shifts to getting that shrimp spread absolutely perfect. Don’t just eyeball it—this is where our expertise really comes in handy to make sure we get the best texture possible!
The Shrimp Spread Components
The quality of your spread is everything. You need one pound of raw shrimp, and please make sure they are completely peeled and deveined before they even think about hitting the processor. We’re using two tablespoons of minced garlic for that savory punch, one large egg white to help bind everything, and just one tablespoon of cornstarch. That cornstarch is key! It’s what helps hold the paste together so it doesn’t ooze off when baking. Also, grab those quarter cup of finely chopped scallions; they just brighten everything up. This combination is the heart of all great shrimp spread recipes.
Bread Selection for Golden Brown Toast
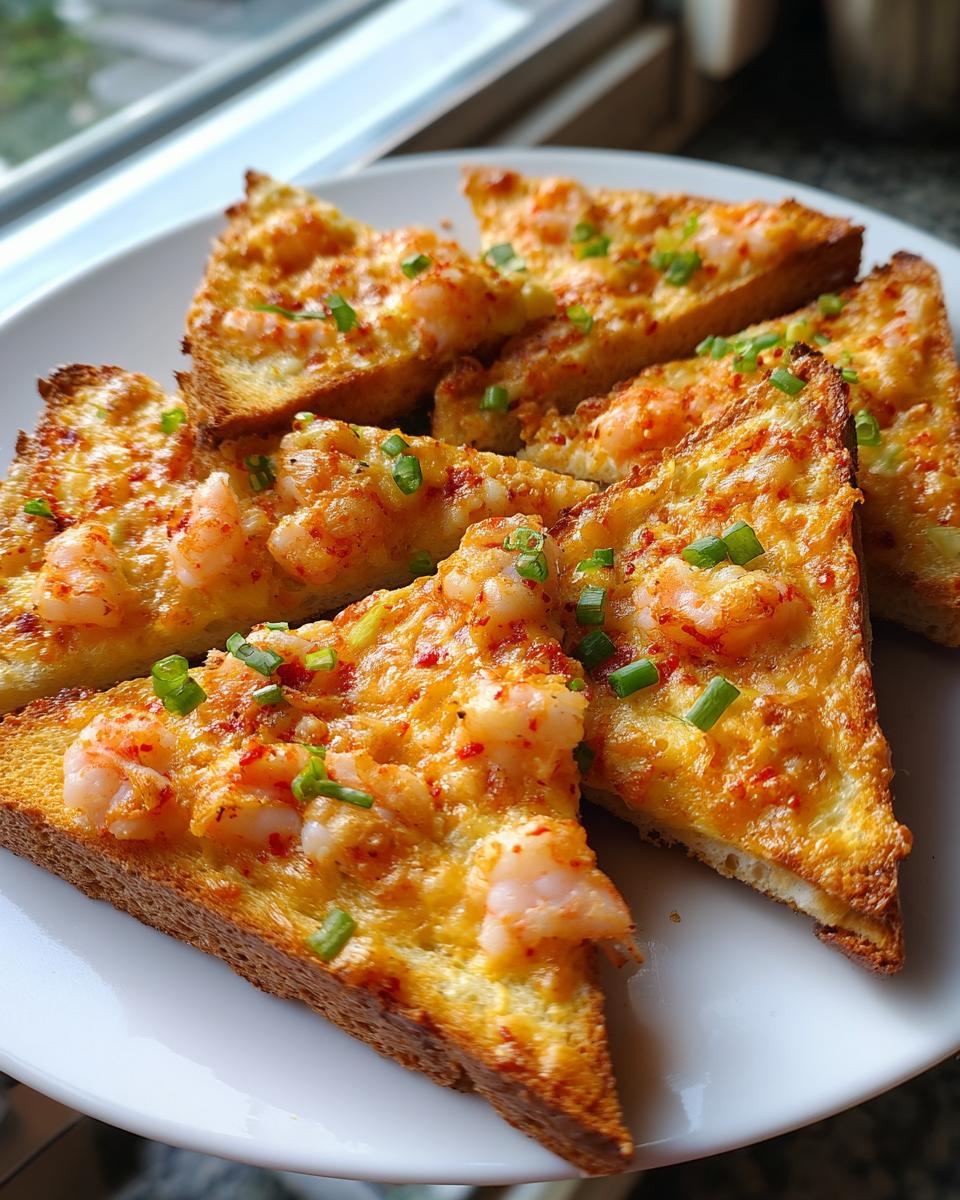
For this recipe, I want you to grab eight slices of standard white bread or a soft sandwich loaf. We aren’t looking for rustic sourdough here; we need something that crisps up nicely and supports the topping. The secret little step is trimming off all the crusts—I know, I know, but trust me on this one! Then, cut each slice diagonally to get those perfect little triangles. They make the best little finger food ideas when you’re entertaining.
Step-by-Step Instructions for Baked Shrimp Toast
Ready to get cooking? This is where the magic happens, and I promise you, it’s super straightforward. We are moving fast because this recipe is designed to be an easy shrimp toast dream come true, getting you from prep to plate in about 30 minutes total. Forget about turning on the deep fryer! While you’re getting your ingredients ready, make sure you preheat that oven to 400°F (200°C) and line a baking sheet with parchment paper. It saves so much cleanup, which is always a win in my book. If you’re looking for other lightning-fast dinner ideas, check out some fun quick stovetop recipes!
Making the Flavorful Shrimp Topping
Now, let’s make the actual spread. We are loading up the food processor with your peeled shrimp, minced garlic, soy sauce, sesame oil, egg white, cornstarch, and scallions. You only want to pulse this mixture until it’s *mostly* smooth. Stop and scrape down the sides often, seriously! If you over-process, you end up with something rubbery, and we definitely don’t want that. We are going for a thick, luscious paste that sets up beautifully in the oven.
Assembling and Baking Your Shrimp Toast
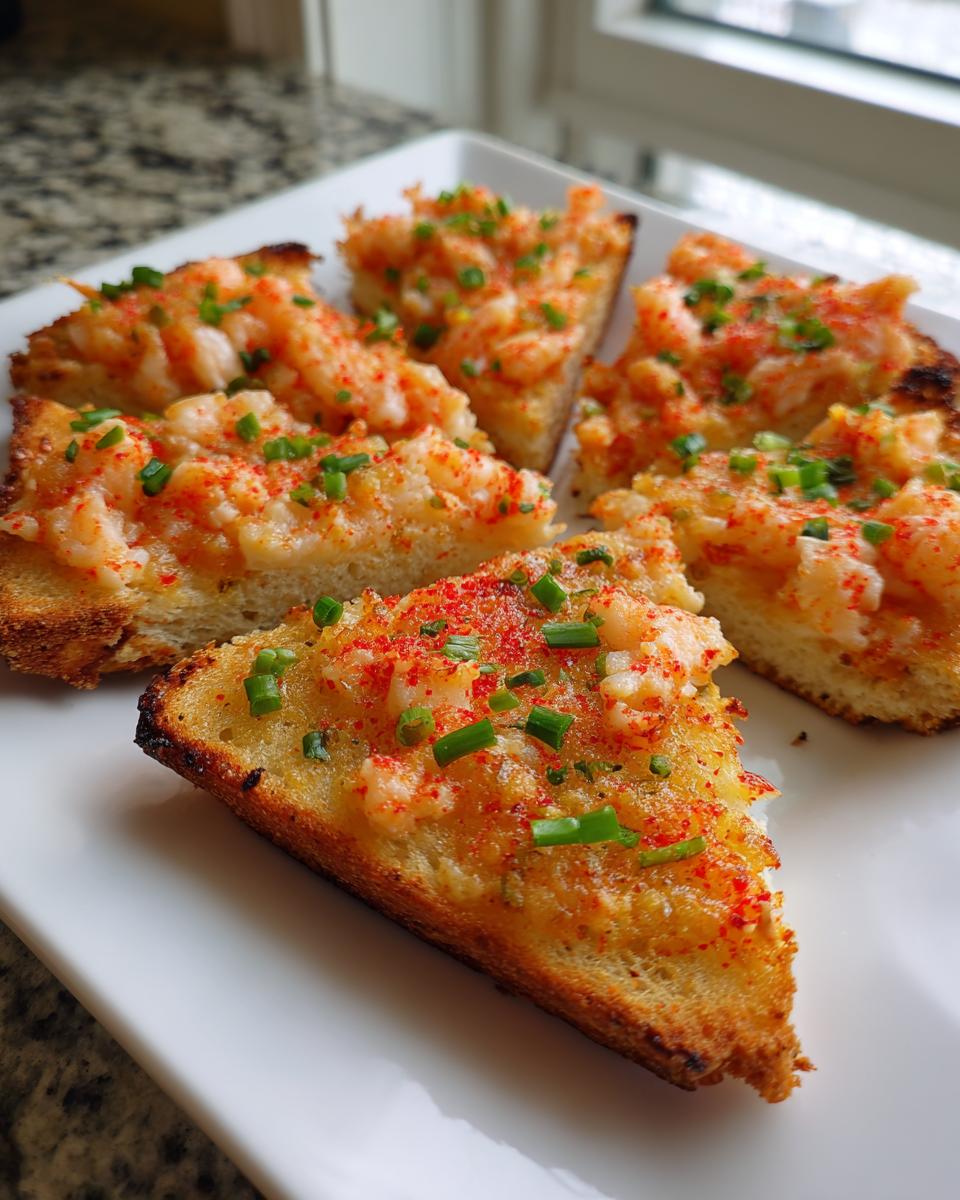
Take all that crustless bread and slice it diagonally into triangles. Gently spread an even, generous layer of that delicious shrimp mixture onto one side of each piece of bread. Place them shrimp-side up on your prepared baking sheet. Before they go in, lightly brush the edges of the bread with olive oil and sprinkle on those sesame seeds, if you’re using them for that extra pop! Bake these beauties for 12 to 15 minutes. You’ll know they are done when the topping is cooked through, and the bread edges are wonderfully golden brown toast. This baking time is perfect for achieving that crispy shrimp toast texture we are aiming for!
Tips for Making the Best Crispy Shrimp Toast
Now that you know the steps for making this shrimp toast, let me share a couple of my secrets designed to guarantee you get that fantastic crunch every single time. Nobody wants a soggy bottom on their appetizer, right? These little nudges take the recipe from good to absolutely the best shrimp appetizers!
Pre-toasting for Maximum Crunch
If you are making these for a party and know they might sit out for a little while, or if you’re just paranoid about sogginess—which, honestly, I totally get—here’s a trick. Before you even put the shrimp mixture on, pop those crustless bread triangles into the oven for about three minutes. You’re not trying to brown them, just dry them out a tiny bit. When you pull them out and immediately spread your shrimp topping on, that little pre-toasting gives you the ultimate defense against moisture. It’s the best way to ensure truly crispy shrimp toast.
Ensuring the Shrimp Topping is Cooked
Since we’re baking these seafood appetizers instead of frying, we need to be sure that beautiful paste is fully cooked through. You are looking for the shrimp topping to stop looking pale pink and start looking opaque white all the way through. It should feel firm, not jiggly, when you lightly tap it with a small spoon. If you’re worried, just pull one piece out early and carefully slice it open. That way, you’ll serve your guests perfectly cooked, hot pieces of deliciousness without any hesitation. For more perfectly cooked snack ideas that skip the fryer, take a look at my tips for making crispy treats in the air fryer here: crispy juicy air fryer chicken recipe. If you want to see how others achieve this crispiness, this link is super helpful: What Makes Baked Shrimp Toast Irresistible?
Variations on Classic Shrimp Toast
Now that you know the base recipe for our easy, baked shrimp toast, sometimes it’s fun to switch things up! I love adapting recipes, and luckily, this savory topping is super versatile. Whether you want something bolder or just a different textural experience, we can certainly adjust this without losing that signature crunch. If you’re looking for dessert inspiration later, check out my favorite rich treat here: easy tiramisu recipe.
Making Vietnamese Shrimp Toast (Bánh Mì Nướng Tôm)
If you’re looking for flavor that really pops, you have to check out the Vietnamese style! It transforms this simple appetizer into something really special. When mixing your shrimp paste, just remember to add a tiny pinch of white pepper for heat, and you’ll want to incorporate some finely minced shallots along with our regular scallions. It’s a subtle change, I promise, but it adds awesome depth to your shrimp toast. If you really get into this version, this guide on Vietnamese Shrimp Toast is fantastic!
Adding Sesame Shrimp Toast Flavor
We put sesame seeds on top as an option, but if you want to guarantee yourself that signature sesame shrimp toast flavor, you need to give your seeds a quick toast first. Pop them into a dry skillet over medium heat for just a few minutes—seriously, three, max—until they smell nutty. Then, right before baking, press the shrimp side firmly into the toasted seeds. This makes them really adhere and brings out the most flavor! It’s a small trick that makes a huge difference in all my appetizer recipes.
Serving Suggestions for This Party Snack
Honestly, I love seeing these little triangles disappear at any gathering. They are the definition of easy entertaining food! While they are absolutely delicious all on their own, serving them with a great dipping sauce elevates this from a simple snack to a full-blown star appetizer. You know I love a good sauce, so check out my recipe for easy homemade BBQ sauce if you want something smoky, but for this shrimp toast, you need Asian flair.

Sweet chili sauce is non-negotiable for this kind of dish—it hits that perfect sweet-spicy note against the savory seafood. If you’re feeling ambitious, a little homemade plum sauce or even a thin drizzle of soy sauce mixed with rice vinegar and a tiny bit of fresh ginger works wonders. They are the ultimate finger food ideas, so put them on a big platter and watch them vanish!
Storage and Reheating Instructions
So, what happens if you actually have leftovers of this fantastic shrimp toast? That’s a good problem to have, right? While I truly believe they are best eaten straight out of the oven when they are piping hot and perfectly crisp, life happens. The main goal when storing any kind of toast is keeping that lovely crunchy texture we worked so hard to achieve.
First off, cool them down completely on a wire rack before you even think about storage. If you try to put warm pieces into any container, the steam gets trapped underneath, and guess what? Soggy toast! Once they are totally cool, store them in an airtight container at room temperature. Don’t refrigerate them if you can help it, as the cold air just dries out the bread even more.
When it’s time to reheat and enjoy those leftovers—perhaps for a quick snack before dinner—you absolutely cannot use the microwave. I know, it’s fast, but the microwave will turn your crispy shrimp toast into something chewy and sad. The best way to bring back that golden brown toast finish is to use the oven or, even better, your air fryer!
Set your oven to about 350°F (175°C). Pop the pieces directly onto a baking sheet (no oil needed this time). Bake them for about five to seven minutes, or until they feel hot all the way through and the edges are firm again. If you’re using an air fryer, just 350°F for about four minutes should work wonders. If you’re looking for other tips on making sure baked goods stay fresh after cooling, I have a great guide on how to keep icing from cracking on my easy cookie icing recipe—the principle of airtight storage is similar!
Frequently Asked Questions About Shrimp Toast
It’s completely normal to have questions when trying a new appetizer recipe, especially when you’re hoping for that perfect crunch we talked about! Here are some of the things I hear most often about making this easy shrimp toast at home. If you follow these little tips, you’ll be serving up these party snacks like a pro.
Can I use frozen shrimp for this shrimp toast recipe?
Oh yes, you absolutely can! Most of us keep a bag of frozen shrimp in the freezer for occasions like this. The key is making sure they are thawed completely before you process them. Once they are thawed, though, you have to dry them really well. Pat them down with paper towels until they feel relatively dry to the touch. Any extra water will just make your shrimp paste too watery, and we really need that paste to be thick for the best shrimp topping recipes.
What is the best way to reheat baked shrimp toast?
Please, for the love of all things crispy, do not use the microwave! I mentioned this before, but it’s worth repeating because reheating incorrectly ruins all our hard work. The microwave steams the bread, and that’s the enemy of crispy shrimp toast. You want to use either the oven or the air fryer to bring back that texture. Setting your oven to 350°F for about five to seven minutes is perfect for getting that warm, firm bite again. If you are looking for more great techniques for keeping things crisp, like my favorite tips on keeping bread fresh for my pumpkin loaf, check out this guide: easy super moist pumpkin bread recipe.
Can I substitute the bread type?
You can certainly try! I recommend soft white bread because it’s pliable and creates a consistent base. If you use something heartier, like a whole wheat loaf, the final result won’t be quite as delicate, and it might not crisp up as evenly. You might also want to lightly pre-toast the thicker slices a bit longer to compensate. For the best results on these savory toasts, stick to a standard sandwich bread, and remember to slice off those crusts!
If you’re curious about how others have seasoned and prepared their shrimp toast, this link shows a great alternative preparation: Baked Shrimp Toast.
Nutritional Estimate for Baked Shrimp Toast
I always like to give a general idea of what you’re looking at nutritionally, just so you can plan accordingly, especially if you’re serving these as part of a larger spread of appetizer recipes. Remember, this is estimated data for our baked shrimp toast! Since we skipped the deep fryer, things look pretty good, especially the lower fat content compared to traditionals seafood appetizers.
These numbers are calculated based on four pieces (one full slice of bread cut into halves) using the standard ingredients listed above. Realistically, your values might shift a little based on the exact bread thickness or how much olive oil you brush on, so please treat this as a helpful guideline, not gospel!
- Serving Size: 4 pieces
- Calories: Approximately 180
- Protein: 16g (That’s great fuel from the shrimp!)
- Fat: 5g
- Saturated Fat: 1g
- Carbohydrates: 18g
- Sugar: Only 1g!
- Sodium: 350mg
See? High protein and relatively low in fat because we baked it! It’s a fantastic finger food idea that won’t weigh everyone down. Enjoy these delicious Asian appetizers knowing you made a smart, light choice!
PrintEasy Baked Shrimp Toast Recipe for Crispy Appetizers

Make this easy baked shrimp toast for a crispy, savory appetizer that is lighter than the fried version. This recipe delivers big flavor and is perfect for parties or quick snacks.
- Prep Time: 15 min
- Cook Time: 15 min
- Total Time: 30 min
- Yield: 16 pieces 1x
- Category: Appetizer
- Method: Baking
- Cuisine: Asian Inspired
- Diet: Low Fat
Ingredients
- 1 pound raw shrimp, peeled and deveined
- 8 slices white bread or sandwich bread
- 2 tablespoons minced garlic
- 1 tablespoon soy sauce
- 1 teaspoon sesame oil
- 1 large egg white
- 1 tablespoon cornstarch
- 1/4 cup finely chopped scallions (green parts only)
- 1 tablespoon olive oil (for brushing)
- 1 tablespoon sesame seeds (optional, for topping)
Instructions
- Preheat your oven to 400°F (200°C). Line a baking sheet with parchment paper.
- Prepare the shrimp spread: Place the shrimp, minced garlic, soy sauce, sesame oil, egg white, cornstarch, and chopped scallions into a food processor. Pulse until the mixture forms a relatively smooth paste. Do not over-process.
- Trim the crusts from the bread slices. Cut each slice of bread in half diagonally to create triangles.
- Spread an even, generous layer of the shrimp mixture onto one side of each bread triangle.
- Place the toast triangles, shrimp-side up, on the prepared baking sheet.
- Lightly brush the edges of the bread with olive oil and sprinkle the shrimp topping with sesame seeds, if using.
- Bake for 12 to 15 minutes, or until the shrimp topping is cooked through and the edges of the bread are golden brown and crispy.
- Serve the baked shrimp toast immediately as a party snack or appetizer.
Notes
- For a Vietnamese shrimp toast variation, add a pinch of white pepper and a small amount of finely minced shallot to the shrimp mixture.
- To achieve extra crispiness, you can lightly toast the bread in the oven for 3 minutes before applying the shrimp topping.
- Serve this seafood appetizer with sweet chili sauce for dipping.
Nutrition
- Serving Size: 4 pieces
- Calories: 180
- Sugar: 1
- Sodium: 350
- Fat: 5
- Saturated Fat: 1
- Unsaturated Fat: 4
- Trans Fat: 0
- Carbohydrates: 18
- Fiber: 1
- Protein: 16
- Cholesterol: 110