
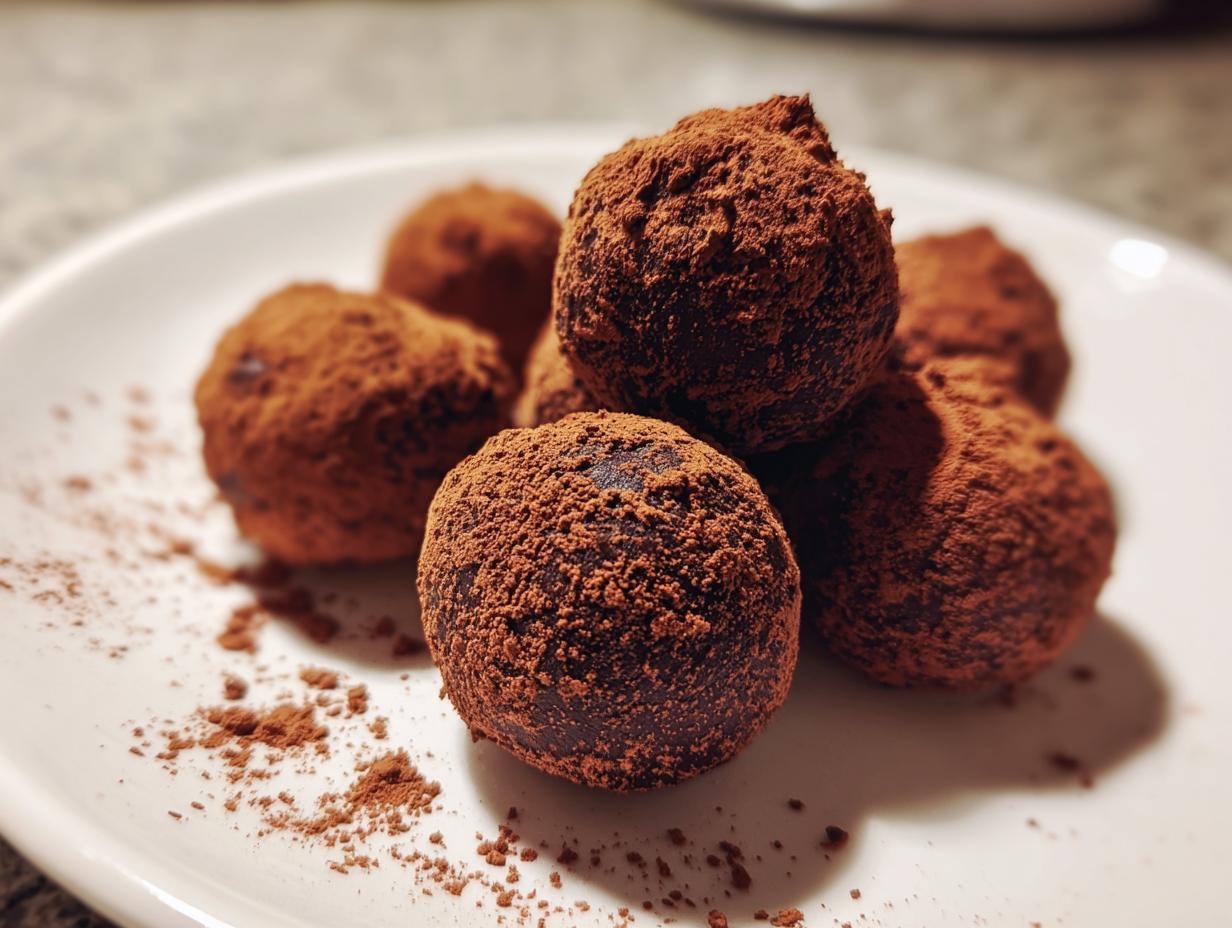
Oh, you know how much I love a good no-bake treat, especially when the holidays start rolling around or when I just need a little something sweet without firing up the oven! And let me tell you, these Chocolate Ricotta Truffles are an absolute dream. They’re unbelievably rich and fudgy, thanks to that secret ingredient – ricotta cheese! Seriously, it gives them this melt-in-your-mouth texture that’s just divine. They’re perfect for stuffing into gift boxes, piling onto a party platter, or just sneaking one (or five!) when no one’s looking. Making homemade candy should always feel this joyful and fuss-free, right?
- Why You'll Love These Chocolate Ricotta Truffles
- Gather Your Ingredients for Chocolate Ricotta Truffles
- Simple Steps to Make Your Chocolate Ricotta Truffles
- Tips for Perfect Chocolate Ricotta Truffles
- Variations for Your Ricotta Chocolate Truffles
- Make Ahead and Storage for Chocolate Ricotta Truffles
- Frequently Asked Questions About Chocolate Ricotta Truffles
- Nutritional Information for Chocolate Ricotta Truffles
- Share Your Chocolate Ricotta Truffle Creations!
Why You’ll Love These Chocolate Ricotta Truffles
Honestly, you’re going to adore making and eating these! They’re proof that you don’t need a fancy oven or hours of work to create something truly special. Here’s why they’ll become your new go-to:
- Super Easy & Quick: Like, seriously easy. No baking involved at all! You can whip these up in under 20 minutes.
- Incredibly Fudgy Texture: The ricotta brings this amazing creamy, fudgy texture to these chocolate bites. It’s like magic!
- Pure Yumminess: They’re rich, decadent, and taste way more indulgent than they are to make.
- Versatile Coatings: You can roll them in cocoa, nuts, coconut, or even sprinkles – they’re so adaptable!
- Perfect for Any Occasion: Whether it’s a holiday gift, a party treat, or just a Tuesday, these no-bake truffles always hit the spot.
Gather Your Ingredients for Chocolate Ricotta Truffles
Alright, let’s get down to business! The beauty of these chocolate ricotta truffles is how simple the ingredient list is. You probably have most of this stuff in your pantry right now. We’re talking rich, creamy, fudgy goodness made with just a few stars. You’ll need about 1 cup of whole milk ricotta cheese – and please, please make sure it’s drained really well! Also grab 8 ounces of semi-sweet chocolate, chopped up so it melts nicely, and then around 1/4 cup of powdered sugar and a teaspoon of vanilla extract to sweeten things up. For rolling, have about 1/2 cup of unsweetened cocoa powder, finely chopped nuts, or shredded coconut ready to go. Honestly, these are practically 3 ingredient truffles if you don’t count the sugar and vanilla!
Simple Steps to Make Your Chocolate Ricotta Truffles
Okay, let’s get these delicious little guys made! It’s so darn easy, you’ll be amazed. First things first, grab a baking sheet and line it with some parchment paper. This little step makes cleanup a breeze, trust me!
Preparing the Ricotta Mixture
Now, in a medium-sized bowl, we’re going to combine all our stars. Toss in the oh-so-important drained ricotta cheese, your chopped semi-sweet chocolate, that powdered sugar for a touch of sweetness, and the vanilla extract. Give it all a good mix until everything is beautifully combined and looks nice and smooth. If your mixture seems a little too soft to handle, don’t you worry! Just pop that bowl into the fridge for about 30 minutes to firm up a bit. It’s like a little spa break for your truffle dough!
Shaping and Coating Your Chocolate Ricotta Truffles
Once your mixture is a good consistence, it’s time for the fun part – rolling! Take about a tablespoon of the mixture and roll it between your palms to form little balls, roughly an inch in size. They don’t need to be perfectly round, you know? It adds to that charming homemade look. As you roll each one, immediately roll it in your chosen coating. You can use that lovely unsweetened cocoa powder for classic cocoa coated truffles, sprinkle on some chopped nuts for a little crunch, or go for shredded coconut for a tropical flair. Make sure they’re nicely covered all over. Then, just place them on that prepared baking sheet. You can even peek at how others have made theirs if you like to get ideas. If you want your truffles to be extra firm for serving (and trust me, you do!), pop them back into the fridge for at least an hour to let them chill out and set up.
Since this is a no-bake recipe, we don’t need any oven time, which is just the best! This whole process is so straightforward, it feels like you’re just playing with edible dough. It reminds me a bit of making homemade peanut butter cups – simple ingredients, big results! Just make sure the chocolate is chopped small so it melts in easily with the ricotta.
Tips for Perfect Chocolate Ricotta Truffles
Okay, so you’ve got the basic idea, but let me share a few little secrets from my kitchen to make sure your chocolate ricotta truffles turn out absolutely perfect every single time. The biggest thing, and I cannot stress this enough, is draining that ricotta! Seriously, excess water is the enemy of a good, firm truffle. I like to let my ricotta drain in a fine-mesh sieve lined with cheesecloth over a bowl for at least 30 minutes, sometimes even an hour if I have the time. This makes all the difference in getting that fudgy bite instead of a mushy mess. If your mixture still feels a bit too soft after mixing, don’t be tempted to skip the chilling step – it’s crucial for easy rolling!
Another tip? When you’re rolling them, try to work fairly quickly so the mixture doesn’t warm up too much in your hands. And when you’re coating them, just give them a good little roll in the cocoa or nuts. Oh, and if you’re making these for a special occasion or want them to last longer, you can totally prep them ahead of time! They’re like little make-ahead sweets that are perfect for busy times. Think of it like these quick pickled jalapeños – simple prep, great results!
Variations for Your Ricotta Chocolate Truffles
Now, while these chocolate ricotta truffles are delicious just as they are, you know I love to play around in the kitchen! You can totally jazz them up to make them even more special. Want a little something extra? Try adding a tiny splash of different extracts – a little almond or orange extract can be amazing! Or, for a warm spice kick, a pinch of cinnamon or even a tiny bit of espresso powder mixed into the chocolate would be divine. These little tweaks are perfect for making your party tray treats stand out or for crafting some seriously impressive easy homemade candy. It’s all about making them your own! They’re as versatile as my favorite zucchini bread recipe!

Make Ahead and Storage for Chocolate Ricotta Truffles
The best part about these chocolate ricotta truffles? They’re total rockstars when it comes to make-ahead sweets! You can totally whip these up a day or two before you need them, and they’ll be just as delicious. Store them in an airtight container in the fridge, and they stay nice and firm. They’ll keep well like this for about 5 days, making them perfect for holiday gifts or party prep. If you need them to last even longer, no problem! Just pop them in a single layer on a baking sheet and freeze them until they’re solid. Then, transfer them to a freezer-safe bag or container. When you’re ready to use them, just thaw them out in the refrigerator, and they’ll be good as new. It’s kind of like how my apple butter lasts forever!
Frequently Asked Questions About Chocolate Ricotta Truffles
Okay, I know you might have a few little questions buzzing around, and that’s totally normal! These chocolate ricotta truffles are pretty simple, but there are always a couple of things people ask about. Let’s clear them up! If you’ve got more, don’t hesitate to reach out via our contact page!
Can I really use any ricotta? Does draining it matter that much?
Oh, honey, yes! Draining the ricotta is probably the *most* important step for these no-bake truffles. Ricotta has a lot of water, and if you don’t get it out, your truffles will be way too soft and sort of… blobby. Trust me, take that extra 30 minutes to let it drain in a sieve. It makes all the difference for that perfect fudgy chocolate bite!
My mixture is too soft to roll! What did I do wrong?
Don’t panic! This happens sometimes, especially if your ricotta wasn’t drained quite enough or if your kitchen is warm. The mix just needs a little more chill time. Pop it back in the fridge for another 30-60 minutes until it’s firm enough to shape. You can even try making your balls a little smaller if the mixture is still a tad soft. Patience is key!
How long will these chocolate ricotta truffles last?
They’re pretty good for a few days! Stored in an airtight container in the refrigerator, they’ll stay fresh for about 5 days. Because they have ricotta, they really do best kept chilled. They’re also fantastic for making ahead, so you can tackle that party platter or gift box well in advance!
Can I add anything else to the truffle mixture?
Absolutely! While the base is simple and amazing, feel free to play around. A little orange zest stirred in can be lovely with the chocolate. Or try a pinch of cinnamon or chili powder for a little kick. You could even fold in some mini chocolate chips or chopped nuts *into* the mixture before rolling if you want extra texture!
Nutritional Information for Chocolate Ricotta Truffles
Just so you know, the nutrition facts here are estimates, okay? They can totally change depending on exactly what kind of chocolate you use and what delicious coating you decide on for your chocolate ricotta truffles. But roughly, you’re looking at about 100 calories per truffle, with around 6g of fat, 10g of carbs, and 2g of protein. Plus, there’s about 8g of sugar in each one. Pretty sweet deal for how easy they are!
Share Your Chocolate Ricotta Truffle Creations!
I just can’t wait to hear what you think of these little gems! Did you try them? What did you roll yours in? Please, tell me all about it in the comments below, and if you have a pic, be sure to tag us on social media. Sharing these homemade sweets is what it’s all about, like we talk about over on our About page!). Your creations make my day!
PrintChocolate Ricotta Truffles

Easy no-bake chocolate truffles with a fudgy texture, made with ricotta cheese and coated in your favorite toppings.
- Prep Time: 20 min
- Cook Time: 0 min
- Total Time: 20 min
- Yield: 24 truffles 1x
- Category: Dessert
- Method: No-Bake
- Cuisine: American
- Diet: Vegetarian
Ingredients
- 1 cup whole milk ricotta cheese, drained
- 8 ounces semi-sweet chocolate, chopped
- 1/4 cup powdered sugar
- 1 teaspoon vanilla extract
- 1/2 cup unsweetened cocoa powder, chopped nuts, or shredded coconut for coating
Instructions
- Line a baking sheet with parchment paper.
- In a medium bowl, combine the drained ricotta cheese, chopped semi-sweet chocolate, powdered sugar, and vanilla extract.
- Mix until well combined and smooth. If the mixture is too soft, chill it in the refrigerator for 30 minutes.
- Roll the mixture into small balls, about 1 inch in diameter.
- Roll each ball in your chosen coating (cocoa powder, chopped nuts, or shredded coconut) until evenly coated.
- Place the coated truffles on the prepared baking sheet.
- Chill the truffles in the refrigerator for at least 1 hour before serving to allow them to firm up.
Notes
- For best results, drain the ricotta cheese thoroughly to remove excess moisture. You can do this by placing it in a fine-mesh sieve lined with cheesecloth over a bowl for at least 30 minutes.
- Store the truffles in an airtight container in the refrigerator for up to 5 days.
- These truffles can also be frozen for longer storage. Place them in a single layer on a baking sheet and freeze until solid, then transfer to a freezer-safe bag or container. Thaw in the refrigerator before serving.
- Consider these as a delightful addition to your holiday dessert gifts or party platters.
Nutrition
- Serving Size: 1 truffle
- Calories: 100
- Sugar: 8g
- Sodium: 10mg
- Fat: 6g
- Saturated Fat: 3g
- Unsaturated Fat: 3g
- Trans Fat: 0g
- Carbohydrates: 10g
- Fiber: 1g
- Protein: 2g
- Cholesterol: 10mg