

Okay, so Halloween is just around the corner, and you need something fun, easy, and totally delicious for the kids (and let’s be honest, for yourself too)? Whether you’re gearing up for a party or just want to whip up some spooky sweets, these homemade peanut butter cups are an absolute game-changer! I remember my own mom, and Ellie Vance from DeliceRecipe always talked about how simple, home-cooked treats are the best for bringing everyone together. These aren’t just candy; they’re little bundles of joy that you can mold and decorate exactly how you like. We’re talking perfect for little hands to help with and even better for making a big batch that disappears in a flash!

- Why You'll Love These Homemade Peanut Butter Cups
- Essential Ingredients for Homemade Peanut Butter Cups
- Tips for Perfect Homemade Peanut Butter Cups
- How to Make Homemade Peanut Butter Cups: Step-by-Step
- Making Homemade Peanut Butter Cups Festive for Halloween
- Frequently Asked Questions About Homemade Peanut Butter Cups
- Nutritional Information for Homemade Peanut Butter Cups
- More Delicious Dessert Ideas
- Share Your Homemade Creations!
Why You’ll Love These Homemade Peanut Butter Cups
Trust me, these little cups are a total win, especially when you need easy kid-friendly Halloween treats that are actually fun to make! Here’s why you’ll be obsessed:
- Super Kid-Friendly: Little hands can totally help with pouring and filling!
- Crazy Easy to Make: No complicated steps, just simple layering.
- Perfect for Parties: Batch them up for costumes, school events, or just movie night.
- Totally Customizable: Decorate them to be as spooky or as silly as you want!
- No-Bake Magic: No oven needed, just a freezer and some patience.
Essential Ingredients for Homemade Peanut Butter Cups
Alright, let’s talk about what you’ll need to make these delightful homemade peanut butter cups! It’s a pretty short list, which is awesome, right? You’ll need about 1 cup of your favorite semi-sweet chocolate chips – I usually go for those because they have a nice balanced flavor. Then, grab about 1/2 cup of creamy peanut butter. If you like things a little sweeter, I totally understand! You can stir in 1 tablespoon of maple syrup or honey, or even about 1/4 cup of powdered sugar into the peanut butter to give it a bit more sweetness. And for that smooth melt, you’ll want 1/4 cup of melted coconut oil or just regular vegetable oil.
Tips for Perfect Homemade Peanut Butter Cups
You know, making these little guys is pretty foolproof, but there are always a few tricks I’ve picked up that make them *extra* special and ensure they come out just right every single time. It’s all about a little bit of care! First off, ingredient quality really matters here. For the chocolate, I find good quality chips melt like a dream, but if you want to go fancy, you could even chop up a nice chocolate bar. And for the peanut butter, creamy is usually best for that super smooth filling. If you’re using natural peanut butter, you might find it’s a bit greasier, so just give it a really good stir first! Oh, and if these remind you of our easy peanut butter cookies, that same kind of attention to detail makes all the difference.
How to Make Homemade Peanut Butter Cups: Step-by-Step
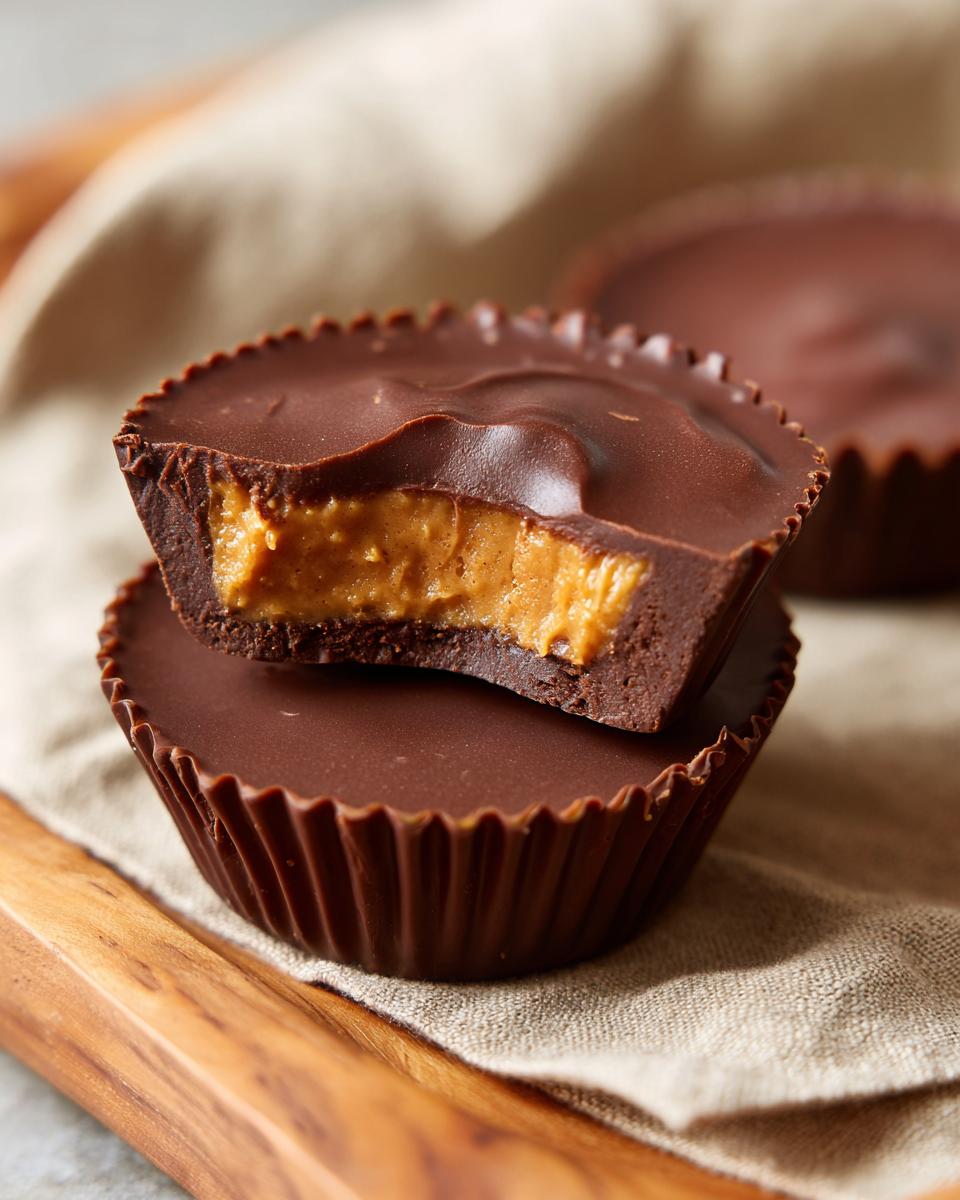
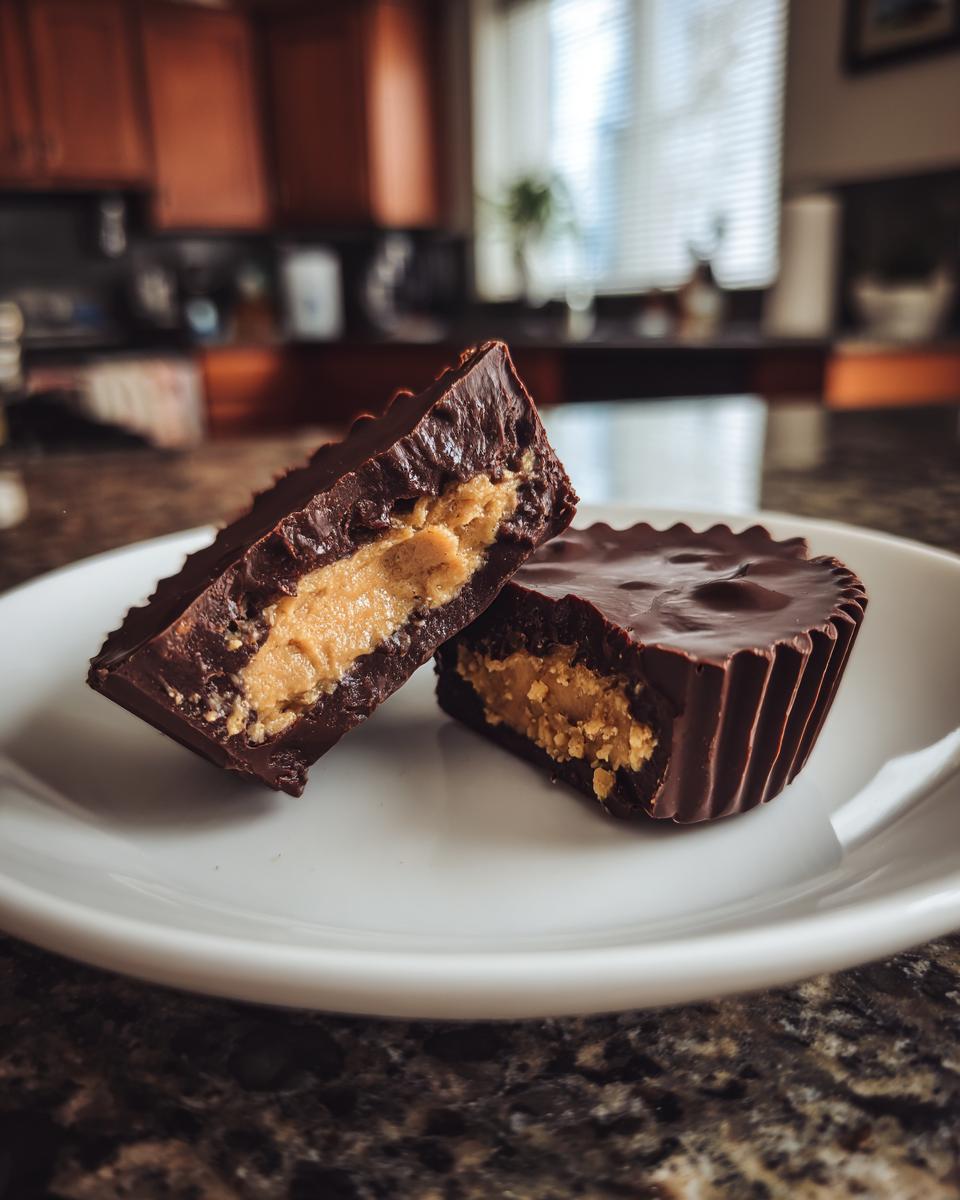
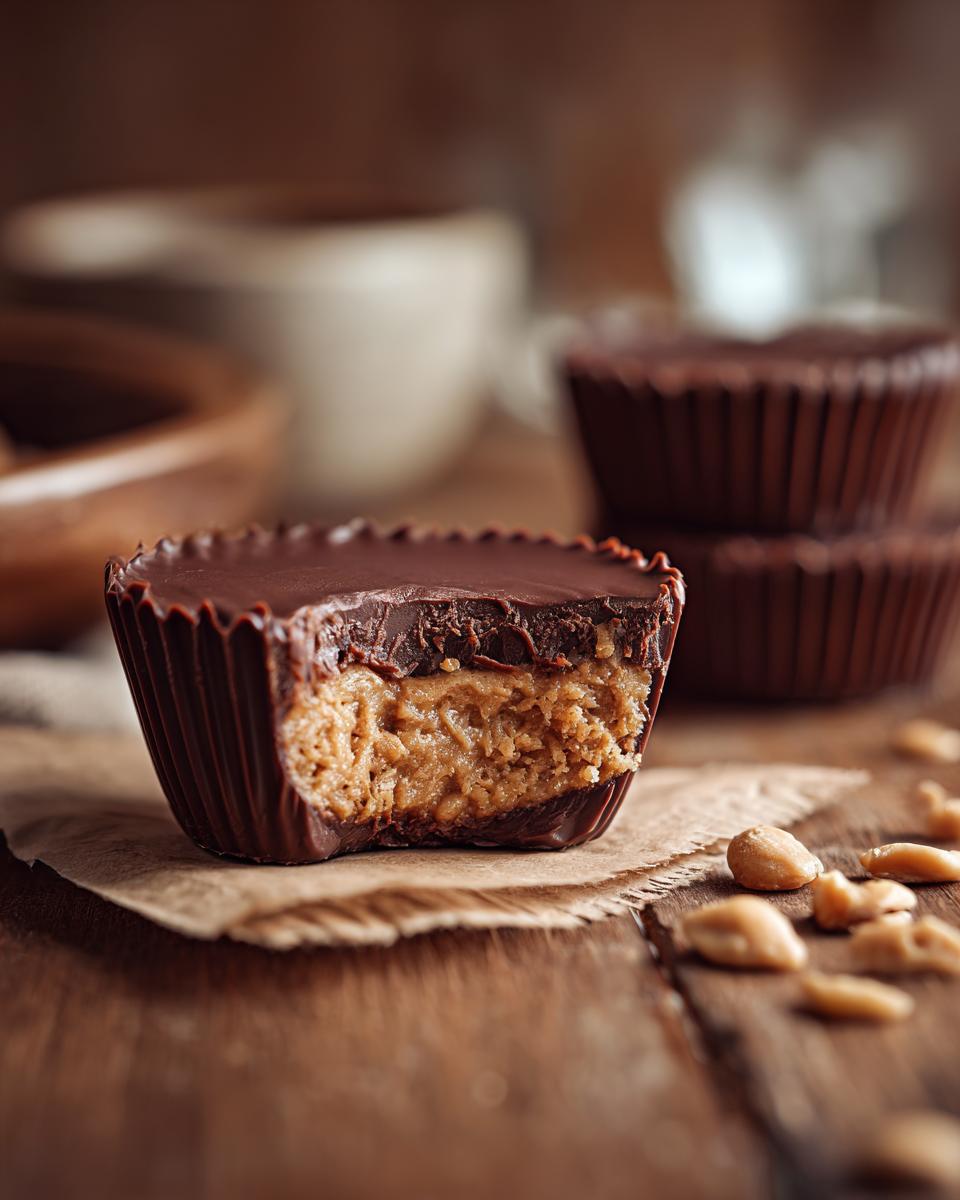
Alright, let’s get our hands a little messy and dive into making these amazing homemade peanut butter cups! It’s really as simple as layering and chilling. You’ll want to grab your molds – the little silicone ones are perfect, especially for Halloween! Here’s how we do it:
Melting the Chocolate for Your Homemade Peanut Butter Cups
First things first, we gotta get our chocolate ready. I usually melt the chocolate chips with that little bit of oil (about 1/4 cup of coconut or vegetable oil) either in a double boiler or just in the microwave. If you use the microwave, just be super careful and do it in short bursts, like 30 seconds at a time, stirring in between. We don’t want to scorch it! That bit of oil just helps make it super smooth and pourable.
Preparing the Peanut Butter Filling
While your chocolate is melting, let’s whip up that yummy peanut butter center. Just take your creamy peanut butter and stir in the maple syrup or powdered sugar if you’re using them. Mix it all up until it’s nice and smooth. You want it to be thick enough to spoon, but not so stiff that it’s hard to spread.
Assembling and Freezing Your Chocolate Peanut Butter Treats
Okay, here’s the fun part! Grab your peanut butter cup molds. Pour just a little bit of that melted chocolate into the bottom of each mold, and then use a spoon or a little brush to coat the sides a bit. Pop these into the freezer for just about 5-10 minutes so that chocolate bottom sets up nice and firm. Then, carefully spoon your peanut butter mixture into each mold. Top it off with the rest of your melted chocolate, making sure it covers the peanut butter completely. Back into the freezer they go for at least 30 minutes until they’re totally firm. Once they’re set, just pop them out and ta-da! You’ve got delicious chocolate peanut butter treats!
Making Homemade Peanut Butter Cups Festive for Halloween
Now, you could totally just leave these homemade peanut butter cups as they are, and they’d still be amazing. But since we’re talking Halloween, let’s make them extra spooky and fun! Before that final chocolate layer hardens, get a little creative! You could do a quick drizzle of white chocolate or even some orange candy melts for a festive look. Fun Halloween sprinkles are your best friend here – think little ghosts, bats, or just colorful jimmies. If you’re feeling super artistic, you can even use edible markers to draw little pumpkin faces or spooky eyes once the chocolate has set. Honestly, the possibilities are endless, and the kids will have a blast transforming them into truly spooky sweets!
Frequently Asked Questions About Homemade Peanut Butter Cups
Got questions about crafting these tasty little delights? I’ve got you covered! These homemade peanut butter cups are pretty straightforward, but it’s always good to know the little tricks. They’re such perfect kids party desserts for any occasion!
Storing Your Homemade Peanut Butter Cups
You’ll want to keep these goodies fresh! Store them in an airtight container in the refrigerator. They’ll stay yummy for about two weeks that way. Honestly, they usually don’t last that long because they’re just that good!
Can I Use Natural Peanut Butter?
Yes, you absolutely can! Just give your natural peanut butter a really good stir before using it to make sure any separated oil is mixed back in. You might find it’s a little runnier, so keep that in mind, but it’ll still taste amazing!
Nutritional Information for Homemade Peanut Butter Cups
Just a heads-up, the nutritional info for these delightful homemade peanut butter cups is an estimate, and it can change a bit depending on the exact ingredients you pick! This breakdown is for one delightful cup, assuming about 12-18 cups per batch. You’re looking at roughly 150 calories, around 10g of fat with about 5g of that being saturated, 15g of carbs with 1g of fiber, and about 3g of protein. Sugar content will be right around 12g, but remember, if you add extra sweeteners, that number will tick up!
More Delicious Dessert Ideas
If you’ve had fun making these cups, you’ve got to check out some of our other sweet treats on DeliceRecipe! They’re perfect for all sorts of occasions, and honestly, they make sticking to your meal planning a whole lot tastier. You should totally try our moist and quick pumpkin banana bread – it’s amazing for fall! And if you’re craving something truly festive, our apple pie cupcakes are like Thanksgiving in a mini cake. Both are super easy and always a hit!
Share Your Homemade Creations!
So, how did your homemade peanut butter cups turn out? I’d absolutely LOVE to hear about it! Did the kids get involved? How did you decorate them for your spooky sweets? Drop a comment below and tell me all about your experience, or even give the recipe a star rating right here! And don’t forget to share your amazing creations on social media – tag us so we can see your fantastic work!
PrintHomemade Peanut Butter Cups
Create your own delicious peanut butter cups with this easy recipe. Perfect for kids to help with and ideal for Halloween parties or any celebration.
- Prep Time: 20 min
- Cook Time: 10 min
- Total Time: 30 min
- Yield: 12-18 cups 1x
- Category: Desserts
- Method: No Bake
- Cuisine: American
- Diet: Vegetarian
Ingredients
- 1 cup semi-sweet chocolate chips
- 1/2 cup creamy peanut butter
- 1 tablespoon maple syrup or honey (optional, for natural sweetness)
- 1/4 cup powdered sugar (optional, for sweetness)
- 1/4 cup melted coconut oil or vegetable oil
Instructions
- Melt the chocolate chips and 1/4 cup of oil in a double boiler or microwave in 30-second intervals, stirring between each.
- Pour a small amount of melted chocolate into each peanut butter cup mold, coating the bottom and sides.
- Place the molds in the freezer for 5-10 minutes to set the chocolate.
- In a separate bowl, mix the peanut butter with maple syrup (if using) and powdered sugar (if using) until smooth.
- Spoon about a teaspoon of the peanut butter mixture into each mold on top of the hardened chocolate.
- Pour the remaining melted chocolate over the peanut butter filling, ensuring it is fully covered.
- Return the molds to the freezer for at least 30 minutes, or until firm.
- Once set, carefully remove the peanut butter cups from the molds.
Notes
- For a richer chocolate flavor, use dark chocolate chips.
- If you don’t have molds, you can line a baking sheet with parchment paper and drop spoonfuls of chocolate, peanut butter mixture, and then more chocolate.
- Decorate with sprinkles or a drizzle of contrasting chocolate before the final chocolate layer sets.
- These can be stored in an airtight container in the refrigerator for up to two weeks.
Nutrition
- Serving Size: 1 cup
- Calories: 150
- Sugar: 12g
- Sodium: 50mg
- Fat: 10g
- Saturated Fat: 5g
- Unsaturated Fat: 5g
- Trans Fat: 0g
- Carbohydrates: 15g
- Fiber: 1g
- Protein: 3g
- Cholesterol: 0mg