
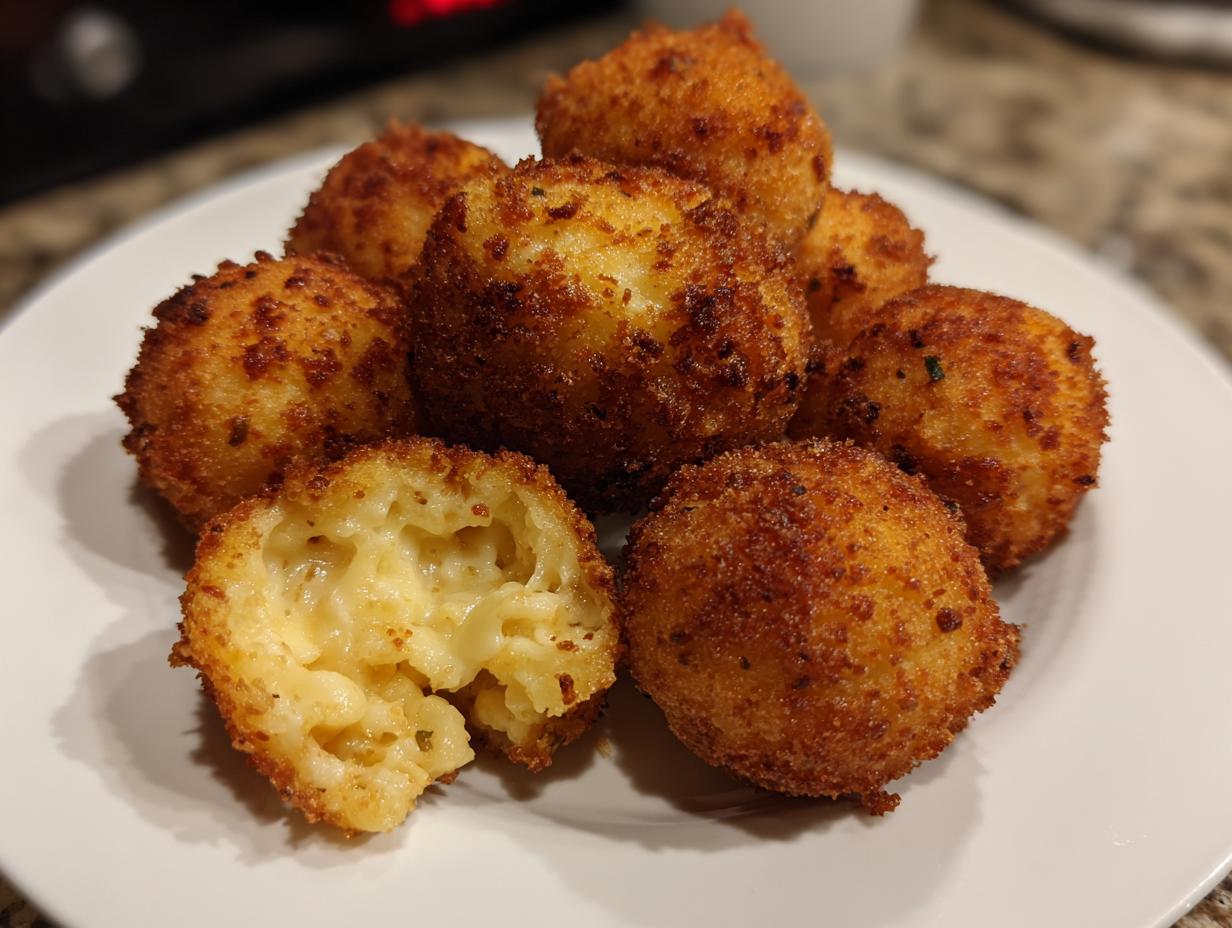
Oh boy, do I ever get those deep, soul-satisfying comfort food cravings! Sometimes only something hot, cheesy, and totally indulgent will do the trick, right? That’s exactly why I’m sharing my absolute favorite way to turn leftovers into gold: the ultimate **fried mac and cheese balls**!
Forget dry lumps; we are making balls that are shatteringly crispy on the outside while staying incredibly gooey and melty inside. These are the perfect party finger food, and honestly, they’re so easy to pull off. Here at DeliceRecipe, founder Ellie Vance built this site on the belief that good food should be simple and reliable, and this recipe fits that philosophy perfectly. You can read more about our mission over on the About Page. Trust me, once you make these, they’ll become your go-to appetizer for everything from game days to holidays.
- Why You'll Love These Ultimate Crispy Fried Mac and Cheese Balls
- Ingredients Needed for Perfect Fried Mac and Cheese Balls
- The Best Mac and Cheese Balls Recipe: Step-by-Step Instructions
- Expert Tips for Gooey Mac and Cheese Bites Every Time
- Make Ahead Party Food: Freezing Fried Mac and Cheese Balls
- Serving Suggestions for These Cheesy Appetizer Ideas
- Storage and Reheating Instructions for Your Fried Mac and Cheese Balls
- Frequently Asked Questions About Fried Mac and Cheese Balls
- What to Make Next After Mastering Fried Mac and Cheese Balls
Why You’ll Love These Ultimate Crispy Fried Mac and Cheese Balls
I honestly don’t know anyone who can resist these. They are the definition of a home run appetizer. If you need a quick win for your next gathering, this is it!
- These are seriously the best mac and cheese balls recipe because the texture is unmatched—crispy and golden, every single time.
- They are the perfect use for leftover mac and cheese, making cleanup after dinner even more delicious!
- Guaranteed crowd pleaser! They disappear fast at every party I bring them to.
- They are among the easiest appetizer recipes you’ll ever make, even with the breading steps involved. If you love dips, you might also enjoy my recipe for Buffalo Chicken Dip!
Ingredients Needed for Perfect Fried Mac and Cheese Balls
You probably already have the star of this show sitting in your fridge! The biggest secret to making these **fried mac and cheese balls** easy is starting with fully cooked, cold macaroni and cheese. Honestly, this is the ultimate way for using leftover mac and cheese. Here is exactly what you need for the coating:
- 4 cups cooked macaroni and cheese (It must be cold and firm, y’all!)
- 1 cup all-purpose flour
- 2 large eggs, beaten (we need the binder!)
- 1 cup panko breadcrumbs
- 1 teaspoon garlic powder
- 1/2 teaspoon paprika
- 1/4 teaspoon salt
- Vegetable oil, for frying (you’ll need a good 2 inches in your pot)
The Best Mac and Cheese Balls Recipe: Step-by-Step Instructions
Okay, this is where the magic happens! Getting that perfect, crisp shell wrapped around a pool of creamy cheese takes a little chilling and a good breading rhythm. If you skip the chill time, well, you’ll end up with a cheesy oil slick, and nobody wants that when they’re trying to make **fried mac and cheese balls**. Stick close to these steps, and I promise success!
Preparing the Mac and Cheese Base for Your Fried Mac and Cheese Balls
First things first, your mac and cheese needs a serious chill session. If you just made it, pop it in the fridge for at least two hours, or better yet, let it hang out overnight. It needs to be firm enough so you can actually scoop it and roll it into balls without it sticking to your hands like glue. Think of it like shaping meatballs—you need a solid structure! When you grab that cold mac and cheese, roll it—I aim for about 1.5 inches wide—you want them uniform so they cook evenly.

Breading Technique for Golden Fried Snacks
We are setting up a classic three-stage breading station, just like you see in restaurants trying to nail those **golden fried snacks**. Put your flour in the first dish. The second dish gets your whisked eggs. Now, the third dish is important: mix up your panko breadcrumbs with the garlic powder, paprika, and salt. This seasoning is what gives the outside so much flavor!
Take your cold mac and cheese ball and roll it through the flour first—shake off the excess! Then dip it well into the egg. Finally, and this is key, press that ball *firmly* into the seasoned panko. You want a complete, sealed coating. This seal stops the hot oil from soaking into the center and keeps everything gooey inside.
Frying for Crispy Mac and Cheese Balls Perfection
Time for the oil! Get your vegetable oil heated between 350°F (175°C). Don’t guess! If you don’t have a thermometer, just be patient until you see a tiny breadcrumb sizzle immediately when you drop it in. We are frying these in small batches—maybe four or five at a time. If you put too many in, the oil temperature drops instantly, and guess what? Soggy results. Nobody wants the soggy version of these **crispy mac and cheese balls**!
Drop them in gently and let them fry for just about 2 to 3 minutes. Turn them gently so they get that beautiful golden color all the way around. Scoop them out with a slotted spoon, get them drained quickly, and serve them hot. If you feel like trying something fun later, I’ve been testing a take on cheesy crackers that you might also love!
Expert Tips for Gooey Mac and Cheese Bites Every Time
Getting that beautiful contrast—hard shell, molten middle—that’s the goal when making **gooey mac and cheese bites**. Since this recipe is designed to work perfectly with whatever mac and cheese you have on hand, the chilling step is truly your secret weapon. Cold cheese is stiff cheese, and stiff cheese holds its shape against hot oil!
If you are making mac and cheese specifically for these balls and want to step it up, skip using just cheddar. Try grating in a little bit of Gruyère or smoked Gouda. Those cheeses melt beautifully and stretch nicely, giving you those amazing, long cheese pulls. That seriously upgrades them to the best option among **melty center snack ideas**.
Also, a quick note on oil management: If your oil drops below 325°F while frying, they will instantly start sucking up grease, and no one needs greasy **cheesy appetizer ideas**. Keep that temperature steady, trust me! If you are interested in other rich, cheesy favorites, you have to check out my pimento cheese recipe; it’s just fantastic.
Make Ahead Party Food: Freezing Fried Mac and Cheese Balls
I am a huge advocate for making my life easier, especially when hosting! Trying to deep fry 30 little balls right before guests arrive is a recipe for stress, not fun, right? That’s why these work so perfectly as **make ahead party food**.
The absolute best part about this recipe for **fried mac and cheese balls** is that you can totally freeze them before they ever see the hot oil. You just follow the instructions exactly—chill the balls first, make sure they are totally coated in that lovely panko crust, and then lay them out on a baking sheet. No overlap! Pop that sheet into the freezer until the balls are rock solid. Once they are frozen hard, you can toss them right into a freezer bag. Easy peasy!
When party time rolls around, skip the thawing step. You just drop those frozen bites straight into the hot oil. You’ll need to cook them a little longer—maybe an extra minute or two—but they come out just as perfectly crispy and cheesy. It saves so much time and lets you focus on making my favorite Christmas snack mix or setting out the drinks!
Serving Suggestions for These Cheesy Appetizer Ideas
We’ve made the **fried mac and cheese balls**, they are golden, they are crisp, and now everyone is staring at them waiting for the signal to dive in! These are truly the perfect **game day snacks** because they are so easy to grab and eat while cheering your team on.
When it comes to dipping, you have two wonderful paths to go down. For a classic, slightly tangy contrast that cuts through the richness, you absolutely have to try them with warm marinara sauce—it’s surprisingly delicious. My second recommendation, which always gets devoured first, is a creamy ranch dressing. It’s just pure comfort food heaven!
If you are prepping these as an **appetizer for holidays**, you can always dress up your dips a little. I sometimes stir a little chopped green onion or a dash of hot sauce into plain ranch to make it feel a bit fancier. Or, if you’re feeling ambitious, you could whip up my easy dirty martini dip—that salty kick is amazing with fried cheese!
Storage and Reheating Instructions for Your Fried Mac and Cheese Balls
Okay, so sometimes, just sometimes, you have leftover **savory fried treats**—which is truly a miracle! If you do find yourself with a few of these golden bites the next day, don’t just toss them. You can totally enjoy them again, but we have to be smart about reheating if we want that crispness back!
Store any leftovers in an airtight container in the fridge for up to three days. Seriously, skip the microwave! The microwave is the enemy of crunch; it just makes things soggy. To bring them back to life, pop them in an air fryer at about 375°F for about 4 to 5 minutes until they warm through and get that snap back on the crust. If you don’t have an air fryer, a quick bake on a cookie sheet in an oven preheated to 400°F works wonders too! You can find great tips on reheating other fried goodies on my air fryer french fries post.
Frequently Asked Questions About Fried Mac and Cheese Balls
I get so many messages about these cheesy bites! They are so popular, and I want to make sure everyone gets that perfect contrast of crispy outside/creamy inside. Here are some of the questions I hear most often about achieving the perfect **fried mac and cheese balls**!
Can I make these fried mac and cheese balls in an air fryer?
Oh yes, you absolutely can! If you are looking for a slightly healthier approach or just don’t want to deal with deep frying, the air fryer is your friend here. I definitely have a whole section dedicated to that on the blog because they are fantastic as **air fryer mac and cheese balls**! Just remember, because the air fryer cooks with circulating dry heat versus hot oil immersion, the coating might not get quite as deeply golden or quite as shatteringly crisp as the deep-fried ones. But they are still amazing and very cheesy!
What is the best way to keep the center of the fried mac and cheese balls gooey?
This is the number one concern for anyone wanting those incredible **gooey mac and cheese bites**, and I can’t stress this enough: the chill time is non-negotiable! You must use mac and cheese that is completely cold—either fully chilled in the fridge for hours or frozen solid for at least 30 minutes before they go into the breading station. When that cold ball hits the 350°F oil, the outside crust cooks almost instantly, sealing in the moisture. If the center is warm, it melts too quickly and leaks out before that seal can form. So, keep them cold!
We also talk a lot about **meal planning** appetizers, and honestly, this step makes them perfect for that because pre-chilling them is part of the prep work. Speaking of planning, if you need some other ideas for quick weeknight meals that are just as comforting, check out my list of easy weeknight dinners!
What to Make Next After Mastering Fried Mac and Cheese Balls
Whew! You did it! You walked through the steps and now you have a beautiful batch of the best **fried mac and cheese balls** anyone has ever tasted. Doesn’t that feel good? Taking a simple dish and turning it into the ultimate party finger food is what home cooking is all about around here.
Now that you’ve mastered this crowd-pleaser, maybe you’re wondering what else we can whip up for the next big gathering. If you are working on your overall party strategy, checking out my comprehensive guide on meal planning will help keep your appetizer schedule stress-free!
If you are sticking with that cheesy, savory vibe, you really need to try my recipe for Cheesy Chicken and Rice Casserole Bake next time. It’s warm, it’s gooey, and it’s everything we love about comfort food, just in a main dish format instead of a perfect little golden ball!
PrintThe Ultimate Crispy Fried Mac and Cheese Balls (Gooey Center & Easy Freezer Instructions)

Make these crispy fried mac and cheese balls for an irresistible party appetizer. They feature a crunchy exterior and a warm, gooey center, perfect for game day or gatherings. This recipe works well using leftover mac and cheese.
- Prep Time: 20 min
- Cook Time: 15 min
- Total Time: 35 min
- Yield: 12 servings 1x
- Category: Appetizer
- Method: Deep Frying
- Cuisine: American
- Diet: Vegetarian
Ingredients
- 4 cups cooked macaroni and cheese (cold, preferably leftover)
- 1 cup all-purpose flour
- 2 large eggs, beaten
- 1 cup panko breadcrumbs
- 1 teaspoon garlic powder
- 1/2 teaspoon paprika
- 1/4 teaspoon salt
- Vegetable oil, for frying
Instructions
- If your macaroni and cheese is not firm, mix it well and chill it in the refrigerator for at least 2 hours, or until very cold and firm enough to scoop.
- Prepare a standard breading station using three shallow dishes. Place the flour in the first dish. Whisk the eggs in the second dish. In the third dish, combine the panko breadcrumbs, garlic powder, paprika, and salt.
- Scoop the cold mac and cheese mixture, forming balls about 1.5 inches in diameter. Roll each ball first in the flour, shaking off excess.
- Dip the floured ball into the beaten egg, allowing excess to drip off.
- Roll the egg-coated ball thoroughly in the seasoned panko breadcrumbs, pressing gently to make sure the coating adheres completely.
- Place the coated balls on a baking sheet lined with parchment paper. Chill the balls in the freezer for at least 30 minutes. This step helps them hold their shape during frying.
- Pour vegetable oil into a deep, heavy-bottomed pot or deep fryer to a depth of about 2 inches. Heat the oil to 350°F (175°C). Use a thermometer to monitor the temperature.
- Carefully place 4 to 5 chilled mac and cheese balls into the hot oil, ensuring you do not overcrowd the pot.
- Fry for 2 to 3 minutes, turning occasionally, until they are deep golden brown and crispy on all sides.
- Remove the balls with a slotted spoon and place them on a wire rack set over a paper towel-lined plate to drain excess oil.
- Serve immediately while the center is hot and melted.
Notes
- For make-ahead convenience, you can freeze the breaded, uncooked balls. Place them on a baking sheet and freeze until solid, then transfer them to a freezer-safe bag. Fry directly from frozen, adding 1 to 2 minutes to the cooking time.
- If you are interested in meal planning for appetizers, these freeze well.
- Serve these bites with marinara sauce or ranch dressing for dipping.
Nutrition
- Serving Size: 3 balls
- Calories: 350
- Sugar: 3
- Sodium: 550
- Fat: 22
- Saturated Fat: 10
- Unsaturated Fat: 12
- Trans Fat: 0.5
- Carbohydrates: 28
- Fiber: 1
- Protein: 10
- Cholesterol: 85