
If you’ve ever stood staring into your pantry, dreaming of a dessert that marries two absolute classics, then I have the answer for you! Forget choosing between creamy perfection and spiced fruit goodness. This layered apple pie cheesecake with its buttery crumble topping is the ultimate dessert fusion, and trust me, it’s going to be the star of your next holiday table. When I first developed this recipe—right here in my own home kitchen, just like my grandmother taught me—I knew it had to be perfect. It carries all the heart of classic American baking you can read more about over on our About Page. This version is tested, tweaked, and guaranteed to deliver that show-stopping texture you crave.
- Why This Layered apple pie cheesecake Recipe is Your New Favorite Fall Cheesecake Recipes
- Ingredients for the Ultimate apple pie cheesecake
- How to Prepare Your Show Stopping apple pie cheesecake
- Tips for Success with Your apple pie cheesecake
- Making the apple pie cheesecake Ahead of Time
- Serving Suggestions for this Cheesecake Fusion Desserts
- Storage and Reheating Instructions for apple pie cheesecake
- Frequently Asked Questions about apple pie cheesecake
- Understanding Dessert Planning and apple pie cheesecake
- Share Your apple pie cheesecake Creations
Why This Layered apple pie cheesecake Recipe is Your New Favorite Fall Cheesecake Recipes
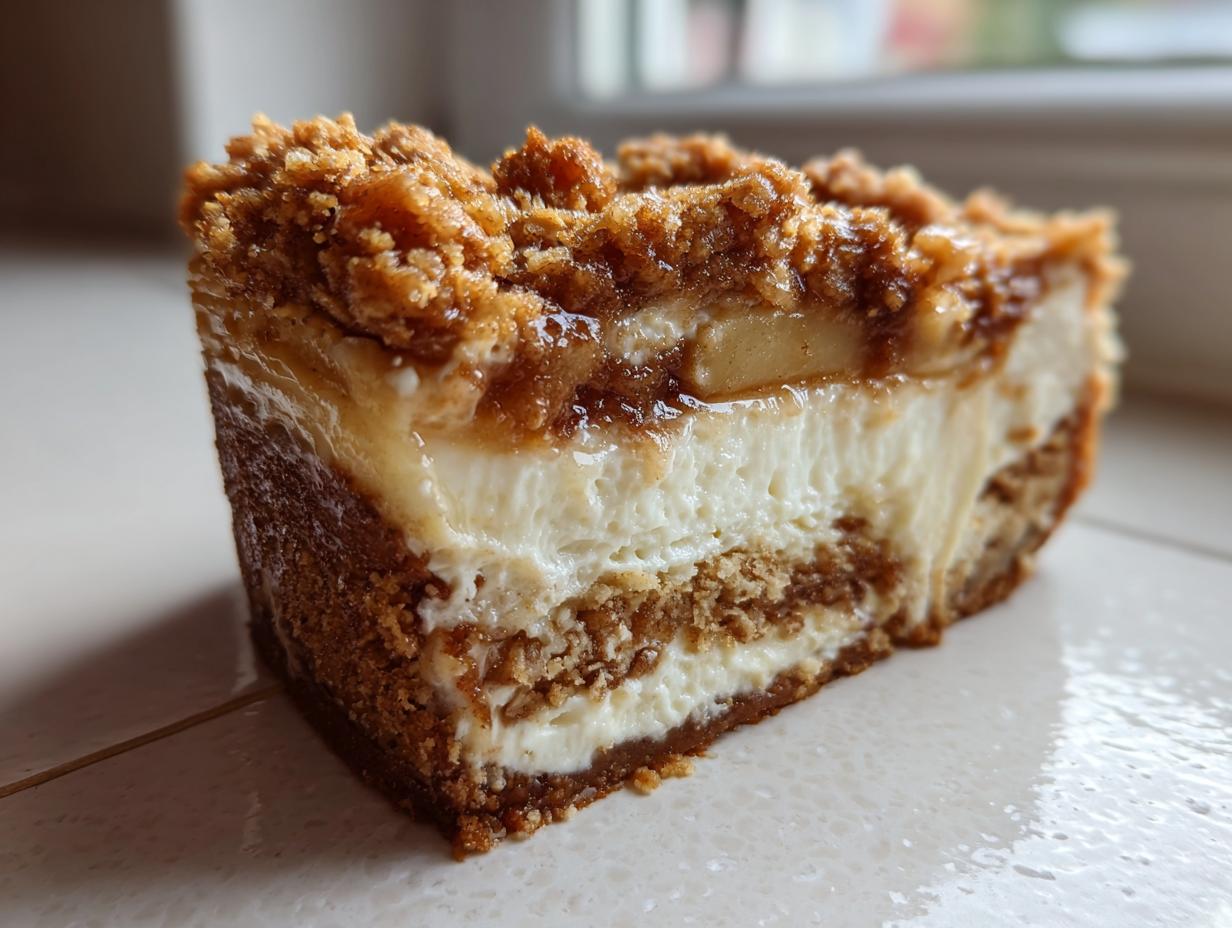
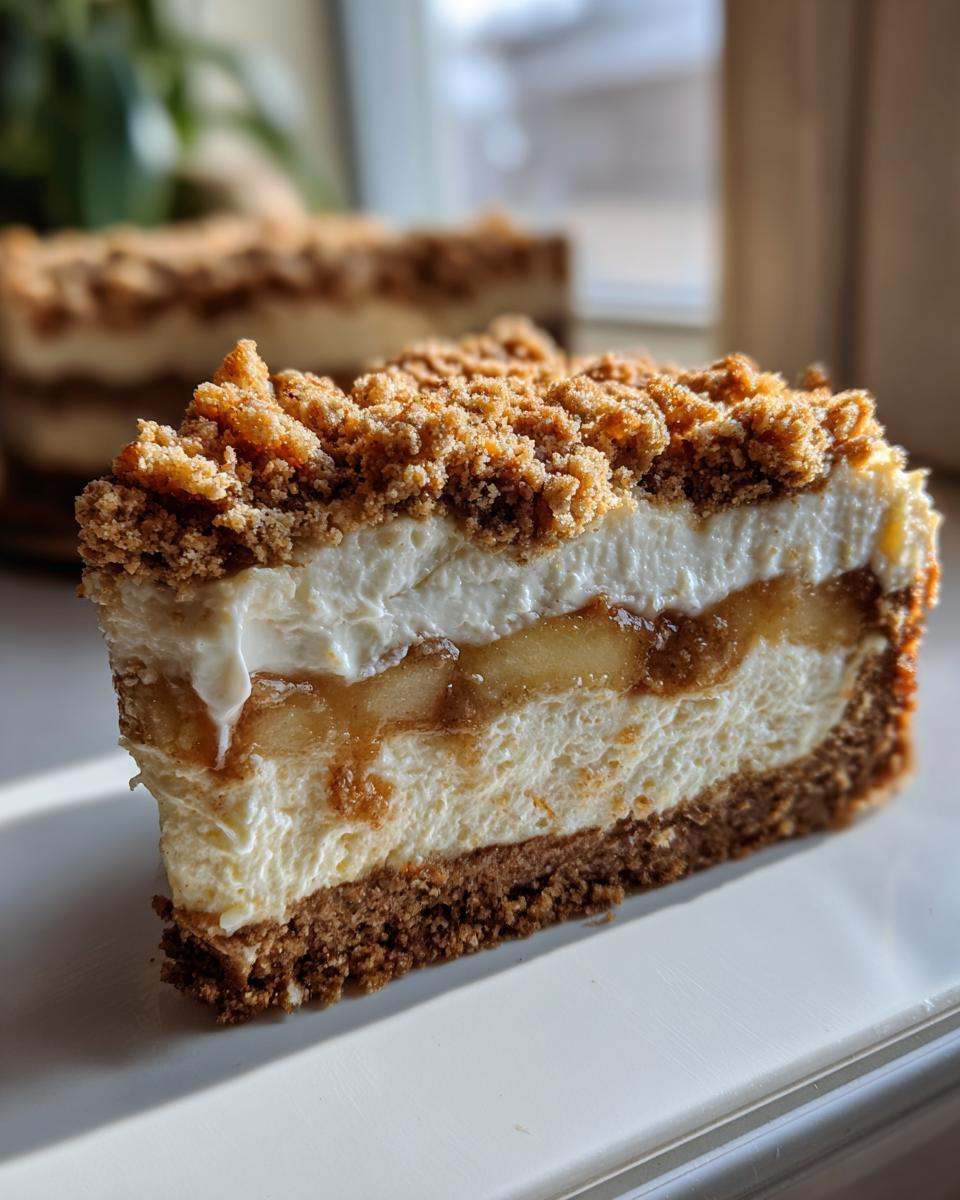
Seriously, if you are looking for the Best Apple Cheesecake Dessert for the holidays, stop scrolling now. This isn’t just another dessert; it’s officially one of my favorite Show Stopping Fall Desserts! What sets this apart is the way we build the layers—you get that smooth, tangy cheesecake hugging warm, spiced apple pie filling right in the middle. And then you hit that buttery crumble topping? Wow! I have tested this dozens of times to make sure it holds up when slicing. You won’t have to worry about those terrible cracks popping up right when these come out of the oven. If you love fall spices, you might also want to see my recipe for Pumpkin Cobbler!
Achieving the Perfect Creamy Apple Cheesecake Texture
The absolute secret weapon for a perfect, non-cracked apple pie cheesecake is twofold, and it’s all about patience! First, you must use a water bath when baking. I know, it sounds intimidating, but wrapping that pan tightly in foil and setting it in a roasting pan of hot water creates the most beautiful, even temperature. It basically steams the cheesecake gently. But the real trick is the slow cool-down. Once baking time is up, you turn the oven off, crack the door open, and let it sit in there for an entire hour. Trust me on this; this slow temperature decrease prevents thermal shock, which is what causes those frustrating cracks!
Ingredients for the Ultimate apple pie cheesecake
Okay, deep breath! Gathering your supplies for this apple pie cheesecake is super straightforward, but precision matters here. If the cream cheese isn’t softened, you’ll end up with lumps, and nobody wants a lumpy cheesecake, right? Also, make sure your butter measurements for the crust and crumble are exact. We have three main sections here: the base, the creamy middle, and that lovely crunchy topping. For the topping, remember we are using store-bought apple pie filling to keep things easy—it’s my secret sanity saver during the holidays! But if you want to see my favorite homemade pie filling recipe, check out my side dish post on Buttery Garlic recipes, just kidding, maybe save that for another time!
For the Buttery Graham Cracker Crust
This is the foundation, so we need it sturdy! Make sure you are pressing this mixture down firmly into the bottom of that springform pan. A solid base means a solid slice later on!
- 1 1/2 cups graham cracker crumbs
- 1/4 cup granulated sugar
- 6 tablespoons unsalted butter, melted
For the Layered Cheesecake Filling
Remember, the cream cheese MUST be softened—I mean really soft. When you add the eggs, just mix until they disappear; over-mixing here is how you invite air bubbles, and we are trying to avoid air bubbles!
- 3 (8 ounce) packages cream cheese, softened
- 1 1/2 cups granulated sugar
- 1 teaspoon vanilla extract
- 1/4 cup sour cream
- 3 large eggs
For the Spiced Apple Topping and apple Crumble Cheesecake Ideas
This part is where the ‘apple pie’ really shines through! The best part about using pre-made filling is that the spices are already perfect, saving you time. If you prefer a crispier topping, remember you can bake this crumble mix separately before it ever sees the cheesecake batter.
- 2 cups prepared apple pie filling (store-bought or homemade)
- 1/2 cup all-purpose flour
- 1/2 cup packed light brown sugar
- 1/4 cup cold unsalted butter, cut into small pieces
- 1/4 cup rolled oats
How to Prepare Your Show Stopping apple pie cheesecake
Ready to put this beauty together? Since we are aiming for that smooth, flawless top—the sign of a truly Layered Cheesecake with Apple Pie Filling—we can’t rush the steps. Follow these closely! I’ll walk you through making sure that water bath works its magic and that cooling process is slow enough to keep everything perfect. It takes time, but trust me, knowing you have this beautiful dessert ready for your guests totally pays off. You can check out my Easy Apple Strudel Recipe if you want another fall apple favorite!
Crust Preparation and Preheating
First things first, heat your oven up to 325°F (160°C). Now, grab that 9-inch springform pan. This is super important: wrap the entire outside—bottom and sides—tightly in heavy-duty aluminum foil. We need at least two layers of foil because water needs to stay strictly OUT of the crust! Once wrapped, mix up your crust ingredients—the crumbs, the sugar, and the 6 tablespoons of melted butter. Press that mix firmly into the bottom of your prepared pan. Pop it into the oven for just 10 minutes to set up. When that’s done, pull it out, and let it cool down just a tiny bit while you start on the creamy part.
Mixing the Creamy Cheesecake Batter
Get your softened cream cheese and that 1 1/2 cups of sugar into a big bowl. Beat them together until they look completely smooth—no lumps allowed! Now, mix in the vanilla and the sour cream. This is where you need to take a breath before adding the eggs. Add them one at a time, mixing just until each egg is incorporated. If you overbeat, you introduce air, and air causes cracks later. We want this batter dense and smooth, not fluffy like a sponge cake!
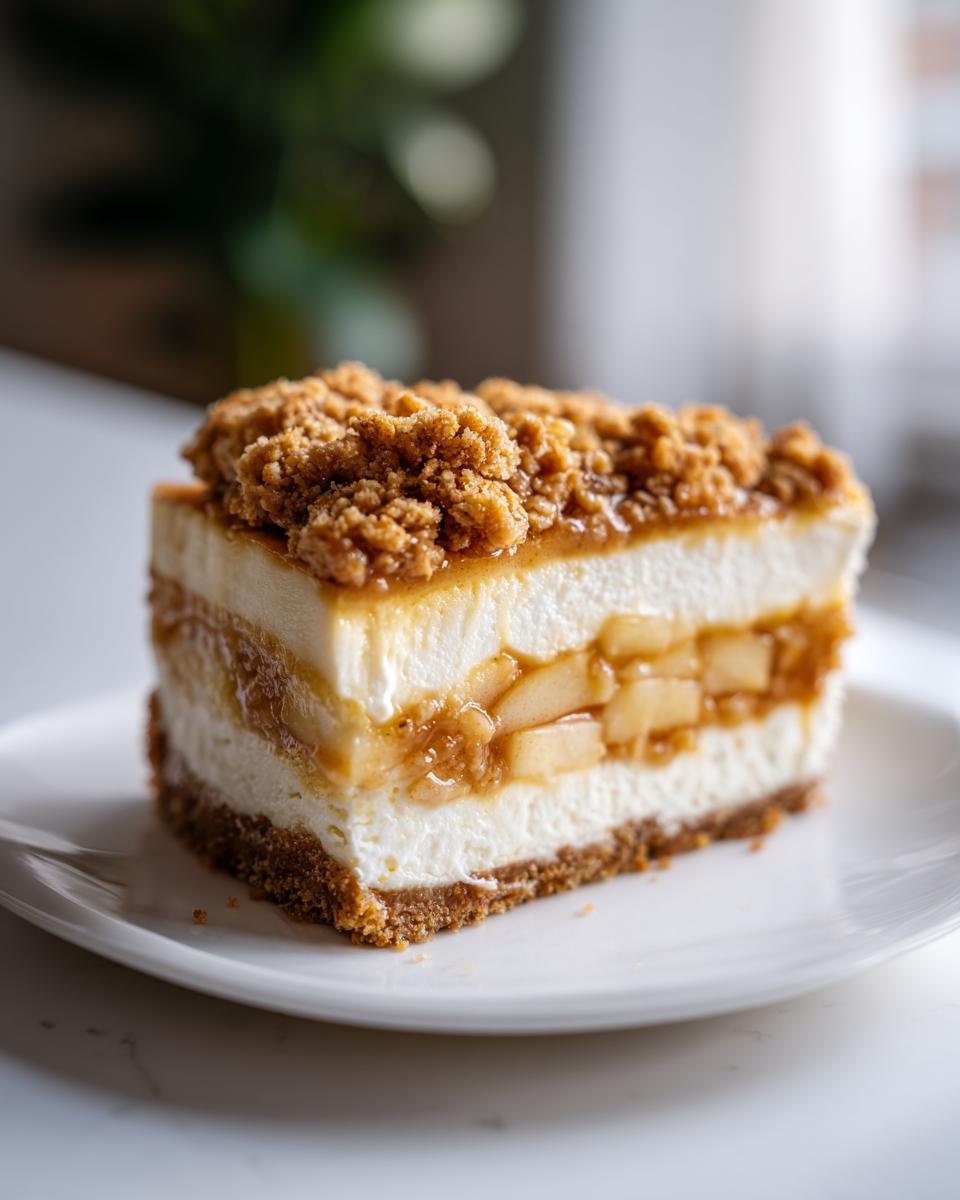
Layering and Applying the apple Crumble Cheesecake Ideas Topping
Time for the fun part! Pour about half of that smooth cheesecake batter right over your slightly cooled crust. Now, grab your 2 cups of apple pie filling and spoon it carefully right over that first layer. Try to keep the apples mostly centered. Next, spoon the rest of the cheesecake batter over the apples, spreading it gently so you don’t push the apple layer down too much. While that’s happening, quickly pinch together the flour, brown sugar, oats, and that cold butter until you have nice coarse crumbs. Sprinkle that awesome Apple Crumble Cheesecake Ideas topping evenly over the top layer of batter.
Baking the apple pie cheesecake in a Water Bath
This step guarantees that Creamy Apple Cheesecake! Take your foil-wrapped springform pan and place it inside a larger roasting pan. Carefully pour hot water into the roasting pan so it comes about halfway up the sides of your springform pan. Place the whole setup gently into the oven. Bake this beauty for about 60 to 75 minutes. You’ll know it’s ready when the edges look set firm, but if you gently nudge the pan, the very center still has a tiny, adorable jiggle. Not runny, just a little wobble.
Cooling and Chilling for the Best apple pie cheesecake
Don’t you dare pull this out right away! Remember what I said about cracks? The transition from hot oven to cool counter is too harsh. Turn the oven off, crack that door open just an inch or so, and let the cheesecake hang out in that environment for a full hour. Seriously. After that hour, remove it from the water bath and let it cool completely on a wire rack on the counter until it hits room temperature. The last, and perhaps hardest, step is chilling: cover it up and stick it in the fridge for at least six hours, but ideally, let it sit overnight. This lets the whole structure firm up perfectly for slicing.
Tips for Success with Your apple pie cheesecake
We’ve worked hard to get those layers stable, so let’s talk about how to make this apple pie cheesecake truly unforgettable! Since this is one of those special desserts, it’s wonderful because it’s great for meal planning; you can totally make it the day before your big event. Remember all that cooling time we talked about? That actually makes life easier later on! Don’t feel like you need to buy a bunch of separate ingredients either, unlike having to rely completely on meal delivery companies when life gets busy.
Also, keep in mind that if you were leaning towards a more textural topping, you could try taking that crumble mixture and baking it on a small sheet pan for about 8 minutes until golden brown before you sprinkle it on. That gives you an extra blast of crunch, which is fun!
Making This a Salted Caramel apple pie cheesecake
If you want to kick this up from delicious to legendary, you absolutely need some salted caramel sauce drizzled over the top right before serving. You can absolutely make your own from scratch, which is always fun if you have the time, but honestly, grabbing a high-quality store-bought jar works just fine for me when I’m busy! Just make sure it’s warmed slightly so it pours beautifully over those cold slices. Seriously, the combination of the tang from the cream cheese, the spice from the apples, and that salty-sweet caramel drizzle is something I always recommend. For another caramel delight, you should check out my Caramel Apple Crescent Rolls!
If you’re curious about other delicious layered options, my friend over at The Homemade Bite made a stunning version that really shows off the way the apple filling looks when set!
Making the apple pie cheesecake Ahead of Time
One of the best things about making this show-stopping apple pie cheesecake is that it actually forces you to plan ahead! This isn’t the kind of dessert you can whip up an hour before guests arrive. And honestly? That works out perfectly for our busy schedules, especially when planning big holiday menus for Thanksgiving Cheesecake Options.
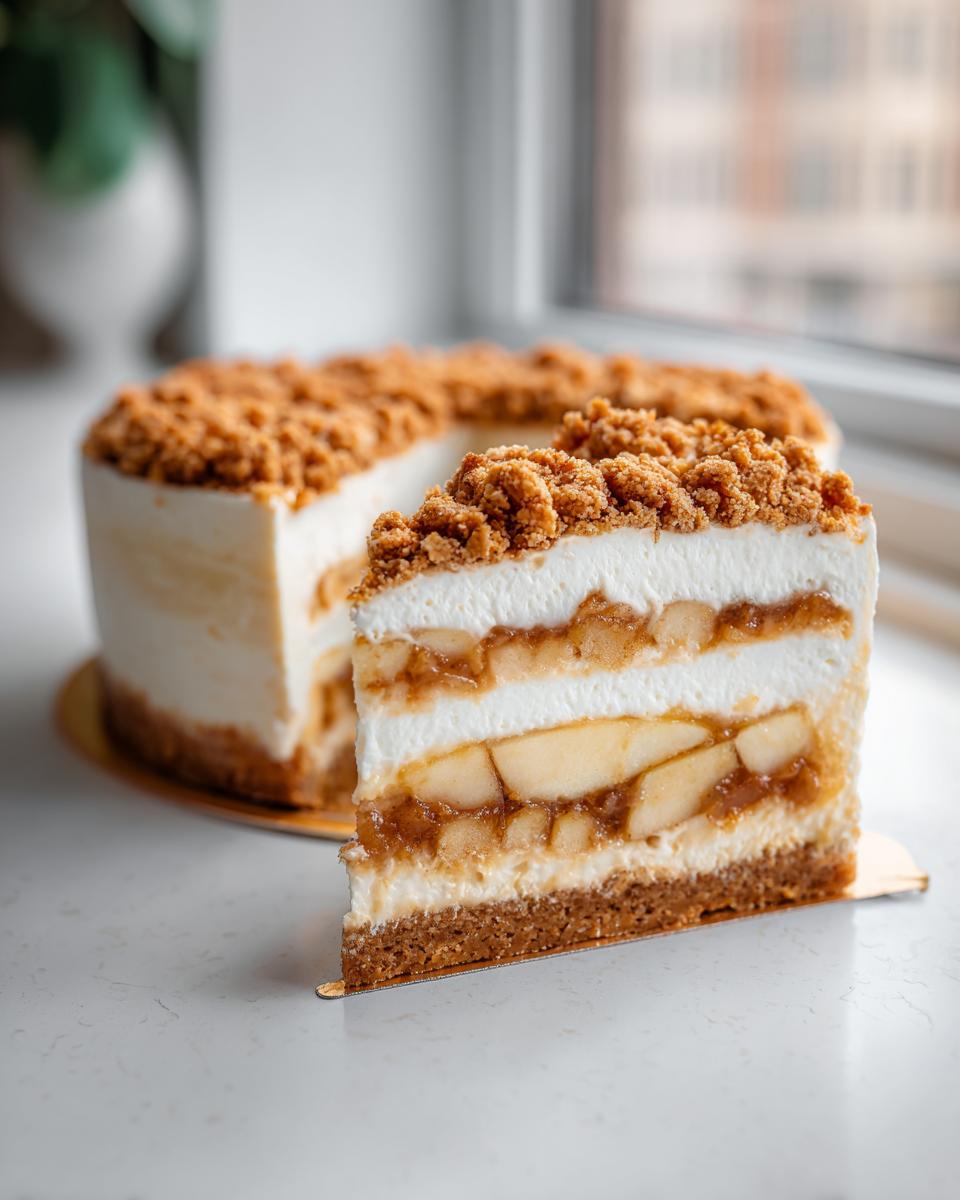
The absolute, non-negotiable best time to serve this is after it has chilled overnight. Like I mentioned during the cooling steps, those long hours in the fridge let the cream cheese filling truly set up firm. This means when you go to slice it, those beautiful layers—crust, cheesecake, apple, crumble—stay stacked perfectly. If you try to cut it after just 4 or 6 hours, it tends to get a little smooshed.
Once the cheesecake is completely cooled down from the counter, cover the pan.** Do not use plastic wrap directly on top** because it will stick to the crumble topping and ruin the look! Instead, use a large cake dome or cover the whole pan loosely with foil, making sure the foil doesn’t touch the top layer. Keep it chilled that way. It holds up beautifully for about three to four days in the refrigerator. It’s such a relief knowing one big dessert is totally handled days before the party starts! It gives you more time to focus on other fun things, like maybe mastering those Christmas Cookie Bars!
Serving Suggestions for this Cheesecake Fusion Desserts
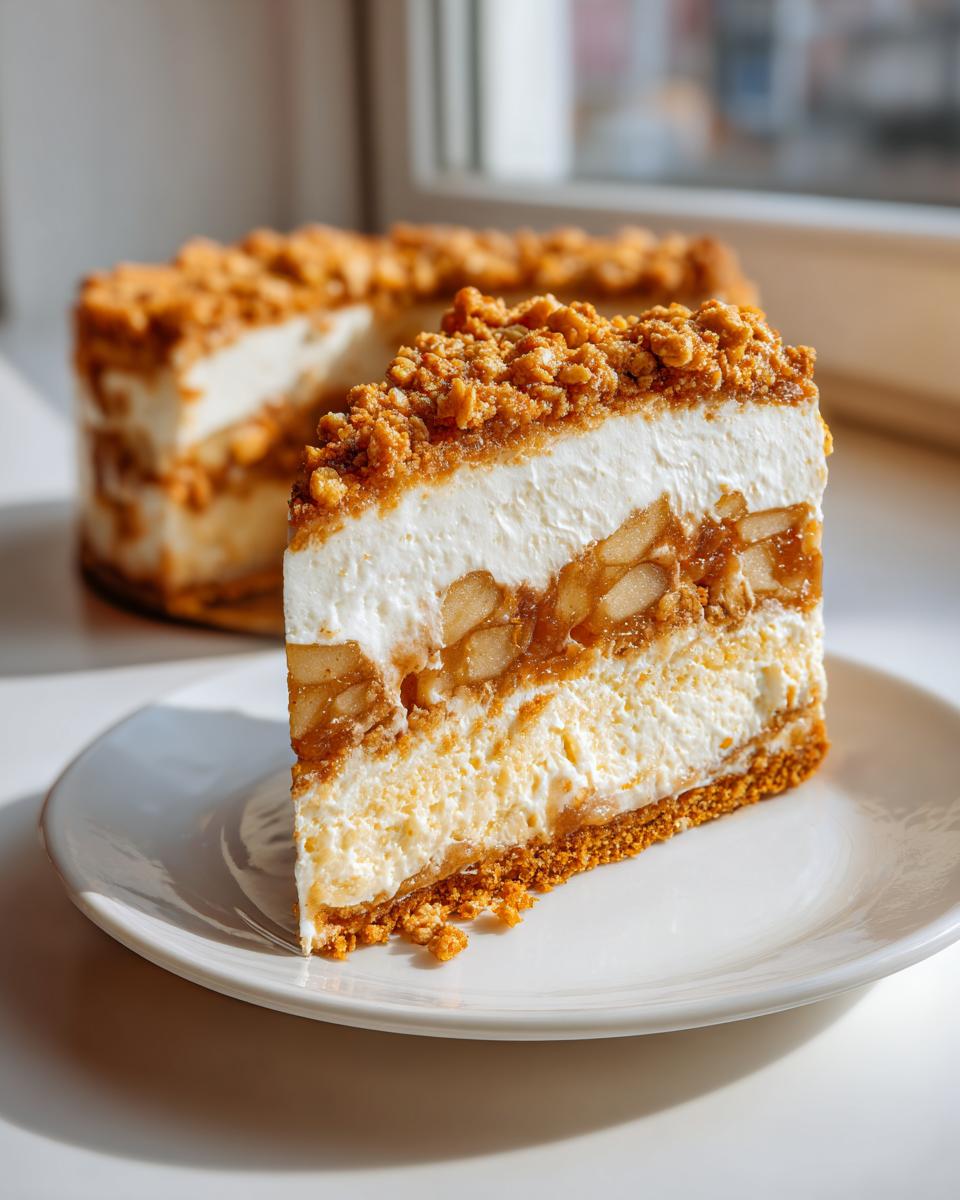
Now that you’ve managed to create this masterpiece—this incredible, show-stopping apple pie cheesecake—the final hurdle is deciding how to serve it! Since this dessert is incredibly rich, combining creamy cheese with spiced apples and a buttery crust, you don’t want to weigh down the plate with more heavy sides. Think contrasting textures and lighter drinks.
For me, the only pairing needed is simple: a tiny dollop of fresh, unsweetened whipped cream. That little bit of lightness just cuts through the richness perfectly. If you served this after a huge Thanksgiving meal, you definitely want something tart to cleanse the palate! That’s why I often throw together a batch of my Apple Cranberry Coleslaw earlier in the week; it sounds weird as a pairing, but the tartness works wonders!
Another big question is temperature! You might be tempted to let it sit out all day, but Creamy Apple Cheesecake is best served just slightly chilled. You want it cold enough to hold its gorgeous layers when you slice it, but not so cold that the flavor is muted. When the cheesecake is straight out of the fridge, that cream cheese flavor is locked down tight. Let it sit on the counter for about 20 to 30 minutes before you cut into it. It warms up just enough for you to really taste the cinnamon, brown sugar, and tartness of the apples.
Beverage-wise, skip heavy cordials. A strong, quality black coffee or a nice cup of spiced cider really compliments the fall flavors in these Cheesecake Fusion Desserts without competing with them.
Storage and Reheating Instructions for apple pie cheesecake
Alright, let’s talk about making that apple pie cheesecake last, assuming you have any left over! Because this dessert has both a dairy filling and fruit topping, we have to be smart about storage. You absolutely must keep this covered and refrigerated. Don’t skimp on covering it well; plastic wrap touching that crumble topping can make a real sticky mess, which ruins the beautiful presentation we worked so hard for!
The good news is that because this is a baked cheesecake, it keeps really well. Generally, if you’ve stored it properly in the fridge—covered tightly with foil or in an airtight container—it lasts a solid three to four days. Four days if I’m being optimistic, but three days if my husband gets to it first!
Now, about reheating—honestly, you almost never want to reheat a cheesecake. Cheesecake should always be served chilled or slightly cool. Trying to warm up a dense cream cheese layer just turns it into a melty, slightly soupy mess, and the texture totally disappears. The crumble topping will get soggy, too. So, skip the microwave!
The best way to handle leftovers is just taking your slice out of the refrigerator about 20 to 30 minutes before you plan to eat it. This lets it warm up just enough from rock-hard cold to room temperature perfection. That little bit of warmth really wakes up the spices in the apple layer and softens the cream cheese just perfectly, making it taste fresh again!
Frequently Asked Questions about apple pie cheesecake
I know you all have questions! Anytime you attempt a huge dessert fusion like this, you want to make sure it turns out right. I’ve gathered the most popular questions I get about this apple pie cheesecake recipe to make sure your baking experience is smooth sailing. These tips should help secure you a spot as the holiday baking champion!
Can I make a No Bake apple pie cheesecake recipe version?
That’s a super popular question, especially when the weather is warm, or you just need something fast! This specific recipe is definitely baked because you need that oven heat to set the structure around the apple filling and toast the crumble topping perfectly. While I adore my No Bake Cookie Dough Cheesecake, a no-bake version of this dessert would require stabilizers like gelatin or needing to use pre-whipped cream cheese mixtures. If you’re craving something instant, you might want to search for a dedicated No Bake Apple Pie Cheesecake recipe, but for this rich, layered experience, you need the oven to work its magic!
What is the best way to prevent my apple pie cheesecake from cracking?
Oh, the nemesis of every cheesecake baker! Preventing cracks is so important if you want that gorgeous, smooth surface for drizzling caramel over. You must follow two non-negotiable rules: the water bath and the slow cool-down. The water bath insulates the cake gently—no hot spots! Then, after baking, turn the oven off, crack the door open, and leave the cheesecake inside that warm, steamy environment for a full hour. That gradual temperature drop is key to keeping things smooth. Honestly, mastering that cooling process is almost as important as getting the batter mixed right!
Can I use my own homemade pumpkin filling instead of the apple pie filling?
While this recipe is perfectly balanced for spiced apples, you asked about using homemade filling, and yes, absolutely you can! If you have a favorite homemade apple pie filling that you simmered up, feel free to use it instead of the store-bought kind. Just make sure that homemade filling is fully cooled before you layer it onto that first layer of batter; hot fruit will definitely start cooking your cream cheese layer prematurely! This is a great way to customize your Fall Cheesecake Recipes and make it truly your own.
Will the buttery crumble topping get soggy on top of the apple pie cheesecake?
That is an excellent thought, especially since we want that lovely texture contrast. The good news is that because the crumble is sprinkled on top of the raw cheesecake batter *before* it goes into the water bath, it actually bakes and toasts a bit during that 60-75 minute bake time. It becomes wonderfully crisp! If you are worried, or if you plan to serve this a day later, you can try baking that crumble mixture alone for about 8 minutes until golden, let it cool completely, and then sprinkle it on right before serving. That guarantees a super crisp textural element for your Cheesecake Fusion Desserts!
Understanding Dessert Planning and apple pie cheesecake
When you are hosting for the holidays, you realize that effective meal planning is the single most important thing you can do to keep your stress level low! This gorgeous apple pie cheesecake is actually a hero dessert because you *must* make it ahead of time. That means one huge item is checked off your list early! I know sometimes it feels easier to just rely on third-party options like the best meal delivery services, but making something this special yourself is worth the prep work. Just knowing this show-stopper is chilling in the fridge lets you focus on getting those main dishes perfect. For other great make-ahead ideas, take a peek over at my thoughts on easy weeknight dinners!
Share Your apple pie cheesecake Creations
Now that you have wrestled this stunning, creamy, spiced delight into submission, I really want to see what you made! Every time someone tells me they made one of my recipes for their family gathering, it just makes my day. If you loved this apple pie cheesecake as much as we do—and seriously, how could you not?—please head back up and give it a full 5-star rating!
If you took photos of your beautiful finished cake, especially if you added that drizzle of salted caramel we talked about, please share them! Tag me on social media so I can swoon over your perfect layers. I love seeing how this recipe fits into your own celebrations, whether you served it for a cozy Sunday dessert or as a centerpiece for your Comfort Food Cheesecake Baking week.
And don’t be shy in the comments below! Tell me everything: Did you use homemade apple filling? Did you manage to keep it crack-free? Hearing your small victories and any little tweaks you made helps me and everyone else reading this! I am always looking for more ways to enjoy these Delicious Dessert Recipes, so share your tips below!
PrintLayered Apple Pie Cheesecake with Buttery Crumble
Make this show-stopping dessert that combines creamy cheesecake with spiced apple pie filling and a buttery crumble topping. This recipe delivers a rich, layered fusion perfect for fall gatherings or holidays.
- Prep Time: 30 min
- Cook Time: 75 min
- Total Time: 13 hours 45 min
- Yield: 12 servings 1x
- Category: Dessert
- Method: Baking
- Cuisine: American
- Diet: Vegetarian
Ingredients
- 1 1/2 cups graham cracker crumbs
- 1/4 cup granulated sugar
- 6 tablespoons unsalted butter, melted
- 3 (8 ounce) packages cream cheese, softened
- 1 1/2 cups granulated sugar
- 1 teaspoon vanilla extract
- 1/4 cup sour cream
- 3 large eggs
- 2 cups prepared apple pie filling (store-bought or homemade)
- 1/2 cup all-purpose flour
- 1/2 cup packed light brown sugar
- 1/4 cup cold unsalted butter, cut into small pieces
- 1/4 cup rolled oats
Instructions
- Preheat your oven to 325°F (160°C). Wrap the outside of a 9-inch springform pan tightly with heavy-duty aluminum foil.
- Prepare the crust: Mix graham cracker crumbs, 1/4 cup sugar, and 6 tablespoons melted butter. Press the mixture firmly into the bottom of the prepared springform pan. Bake for 10 minutes. Set aside to cool slightly.
- Prepare the cheesecake layer: Beat the softened cream cheese and 1 1/2 cups sugar in a large bowl until smooth. Beat in the vanilla extract and sour cream. Add eggs one at a time, mixing just until combined after each addition. Do not overmix.
- Pour half of the cheesecake batter over the cooled crust. Spoon the 2 cups of apple pie filling evenly over the batter layer. Gently top with the remaining cheesecake batter.
- Prepare the crumble topping: In a small bowl, combine the flour, brown sugar, oats, and 1/4 cup cold butter. Use your fingers or a pastry blender to cut the butter into the dry ingredients until coarse crumbs form. Sprinkle this topping evenly over the cheesecake batter.
- Bake the cheesecake in a water bath: Place the foil-wrapped springform pan inside a larger roasting pan. Carefully pour hot water into the roasting pan until it reaches halfway up the sides of the springform pan.
- Bake for 60 to 75 minutes, or until the edges are set but the center still has a slight jiggle.
- Turn off the oven, crack the oven door open slightly, and let the cheesecake cool inside the oven for 1 hour. This slow cooling prevents cracking.
- Remove the cheesecake from the water bath and foil. Cool completely on a wire rack. Once cool, cover and refrigerate for at least 6 hours, or preferably overnight, before serving.
Notes
- For a truly show-stopping dessert, drizzle with salted caramel sauce just before serving.
- If you prefer a crispier topping, bake the crumble topping separately for 8 minutes before sprinkling it on the cheesecake batter in step 5.
- This recipe works well for meal planning; the overnight chill allows you to prepare it well ahead of your event.
Nutrition
- Serving Size: 1 slice
- Calories: 450
- Sugar: 35g
- Sodium: 280mg
- Fat: 28g
- Saturated Fat: 17g
- Unsaturated Fat: 11g
- Trans Fat: 0.5g
- Carbohydrates: 45g
- Fiber: 1g
- Protein: 6g
- Cholesterol: 110mg