
Listen, sometimes you just need pure, simple comfort food, right? There’s nothing quite as satisfying as digging into a steaming hot sweet potato, especially when the skin is just a little bit crisp. Forget those complicated recipes! Here at DeliceRecipe, we believe in getting that foundational flavor right every single time. That’s why I’m sharing Eleanor Vance’s foolproof oven method for making amazing baked sweet potatoes. Trust me, after testing this over and over in home kitchens, we nailed the technique that guarantees a fluffy center and unbeatable flavor. It’s the easiest, most reliable side dish you’ll ever make!
- Why This is the Best Way to Bake Sweet Potatoes
- Ingredients for Perfect Baked Sweet Potatoes
- Simple Steps for Easy Oven Baked Sweet Potatoes
- Tips for Crispy Skin Sweet Potato Results
- Serving Your Tender Baked Sweet Potatoes
- Making Baked Sweet Potatoes a Healthy Baked Potatoes Option
- Storage and Reheating Instructions for Baked Sweet Potatoes
- Frequently Asked Questions About Baked Sweet Potatoes
- Share Your Simple Sweet Potato Recipe Experience
Why This is the Best Way to Bake Sweet Potatoes
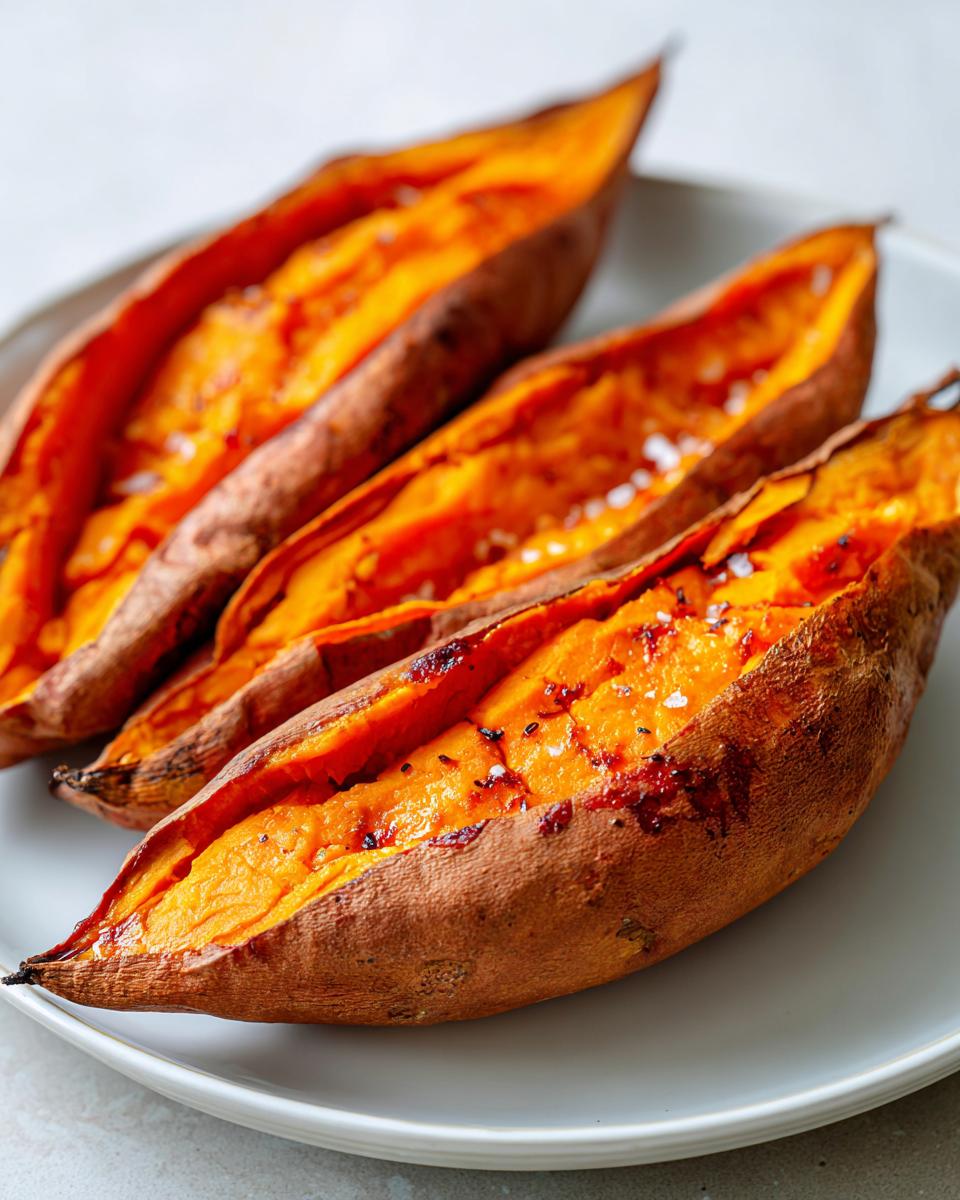
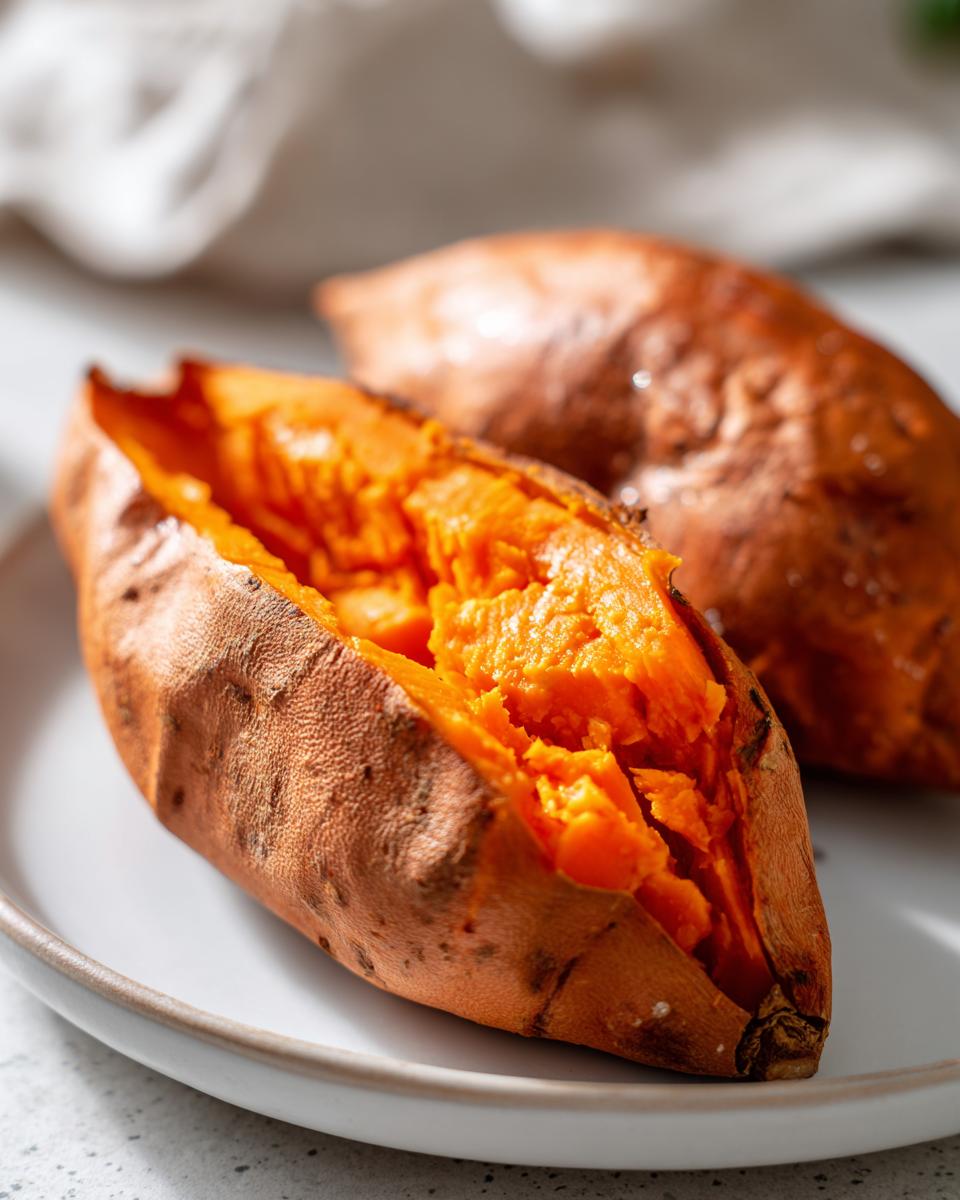
When you’re aiming for that perfect baked sweet potato—the kind that looks gorgeous on the plate and tastes like pure autumn comfort—it really comes down to ditching the foil! I know, I know, wrapping things in foil seems safer, like a culinary safety net. But Eleanor found early on that wrapping them traps steam inside and actually makes the skins soggy, which is the opposite of what we want here. Direct heat is the secret weapon for a naturally caramelized skin.
We want that contrast: skin that’s slightly chewy and browned, paired with an interior that’s smooth as velvet. This is why we skip the pan underneath them and let them sit right on the rack. This simple method is what unlocks the best flavor and texture combo.
Achieving a Fluffy Baked Sweet Potato Recipe
The key to getting that amazing fluffy feeling isn’t about adding baking soda or anything tricky. It’s about letting the built-up moisture escape properly. That’s why we grab a sharp fork—don’t be shy!—and poke each potato at least six or seven times all over. Think of it like little steam vents! If you skip this pricking step, the internal steam gets trapped, and you risk a potato explosion, which is definitely messy and absolutely stops you from getting that light, fluffy baked sweet potato recipe outcome.
By letting that steam manage itself while baking directly over the heat, the flesh dries out just enough to become light and airy. It’s pure science, but done the easiest way possible. If you want more ideas for turning these simple sides into showstoppers, check out my favorite easy vegetable side dishes!
Ingredients for Perfect Baked Sweet Potatoes
You don’t need a pantry full of specialty items for this, honestly. That’s the beauty of perfect baked sweet potatoes; they shine with just a few simple things. I always grab my produce right before I need it, but you can certainly prep these ahead of time.
- 4 medium sweet potatoes, scrubbed clean—make sure they’re roughly the same size so they cook evenly!
- 1 tablespoon olive oil—just enough to help the skin get that nice texture.
- 1 teaspoon coarse salt—I use kosher salt here; it sticks better.
- 1/2 teaspoon black pepper—freshly cracked, if you have it, makes a big difference.
Simple Steps for Easy Oven Baked Sweet Potatoes
Okay, ready for the easiest part? This is where you turn those simple ingredients into those truly fantastic easy oven baked sweet potatoes we all crave. It’s fast to prep, but you do need a little patience while the oven does its magic! First thing I always do is crank the oven up to 400 degrees Fahrenheit. Get that heat going right away because you don’t want your potatoes relaxing while the oven warms up.
Once it’s hot, lay your seasoned potatoes right on the middle rack. Remember what I said? No sheet pan! We want maximum air circulation for that skin. From here, it’s just waiting and watching the clock. If you’re making a big batch of oven roasted potatoes, just make sure they have a little breathing room between them so the heat gets everywhere.
My biggest tip for knowing they are done—beyond following general time guidelines—is touching them. I gently squeeze the side of the potato. If it gives easily, like a stress ball you’ve squeezed a hundred times, it’s ready. Eleanor always said, “If you have to fight it, it needs five more minutes.” Another good cue is checking the internal temperature if you happen to have a thermometer handy, but usually, the gentle squeeze test is perfect for this how long to bake sweet potatoes question we all have.
Determining How Long to Bake Sweet Potatoes
This is the question I get asked the most! The truth about baked sweet potatoes time is that it really depends on how big your potatoes are. For standard, medium-sized sweet potatoes, you’re usually looking at 45 to 60 minutes total. If you grabbed some giants from the market, you might be closer to an hour or even an hour and ten minutes, so always err on the side of checking.
For the best results, try to choose potatoes that are nearly equal in size. If you absolutely can’t, just monitor the smaller ones more closely. When they are perfectly done—tender and ready for slicing—a sharp knife should slide right into the center without bumping into any hard spots. That means you nailed that fluffy interior!
Tips for Crispy Skin Sweet Potato Results
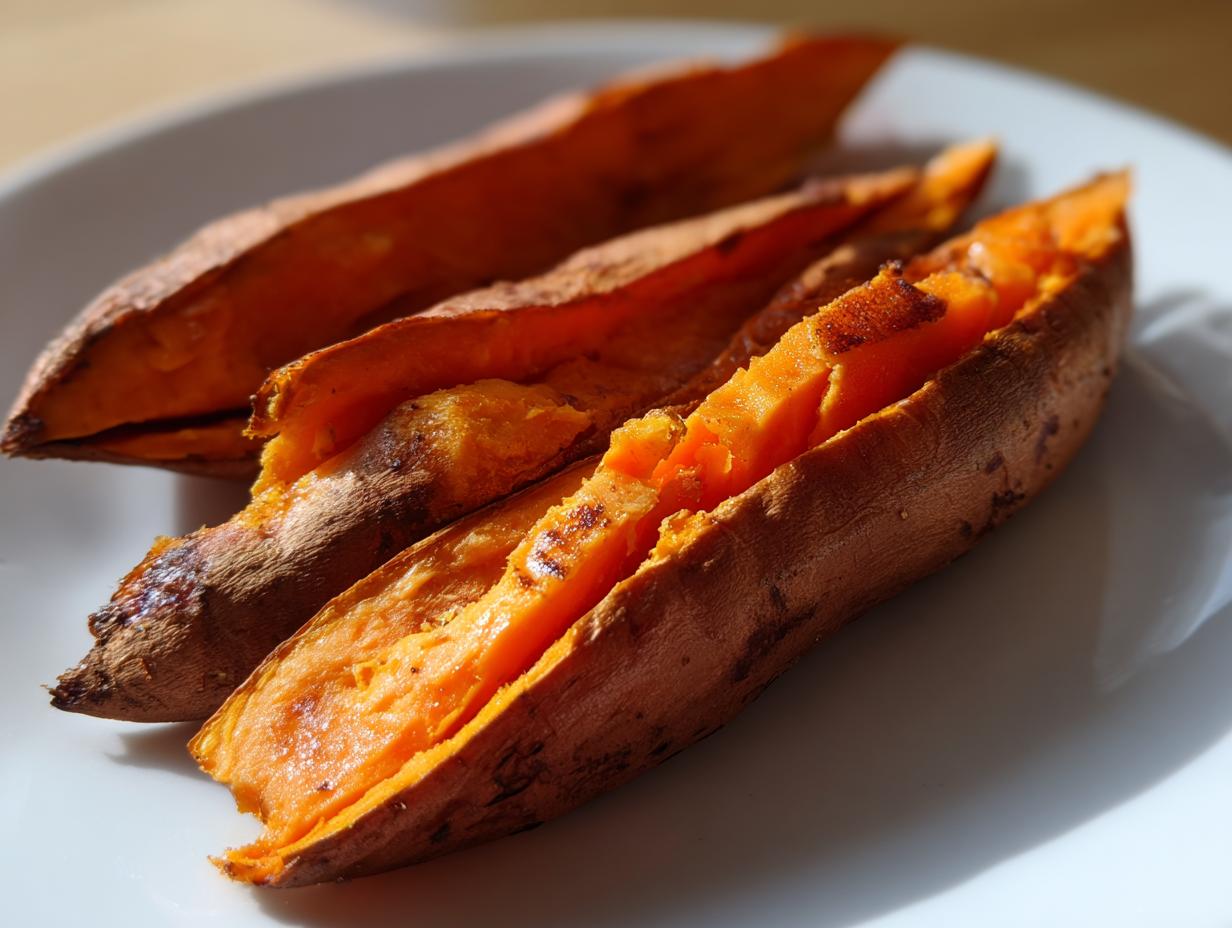
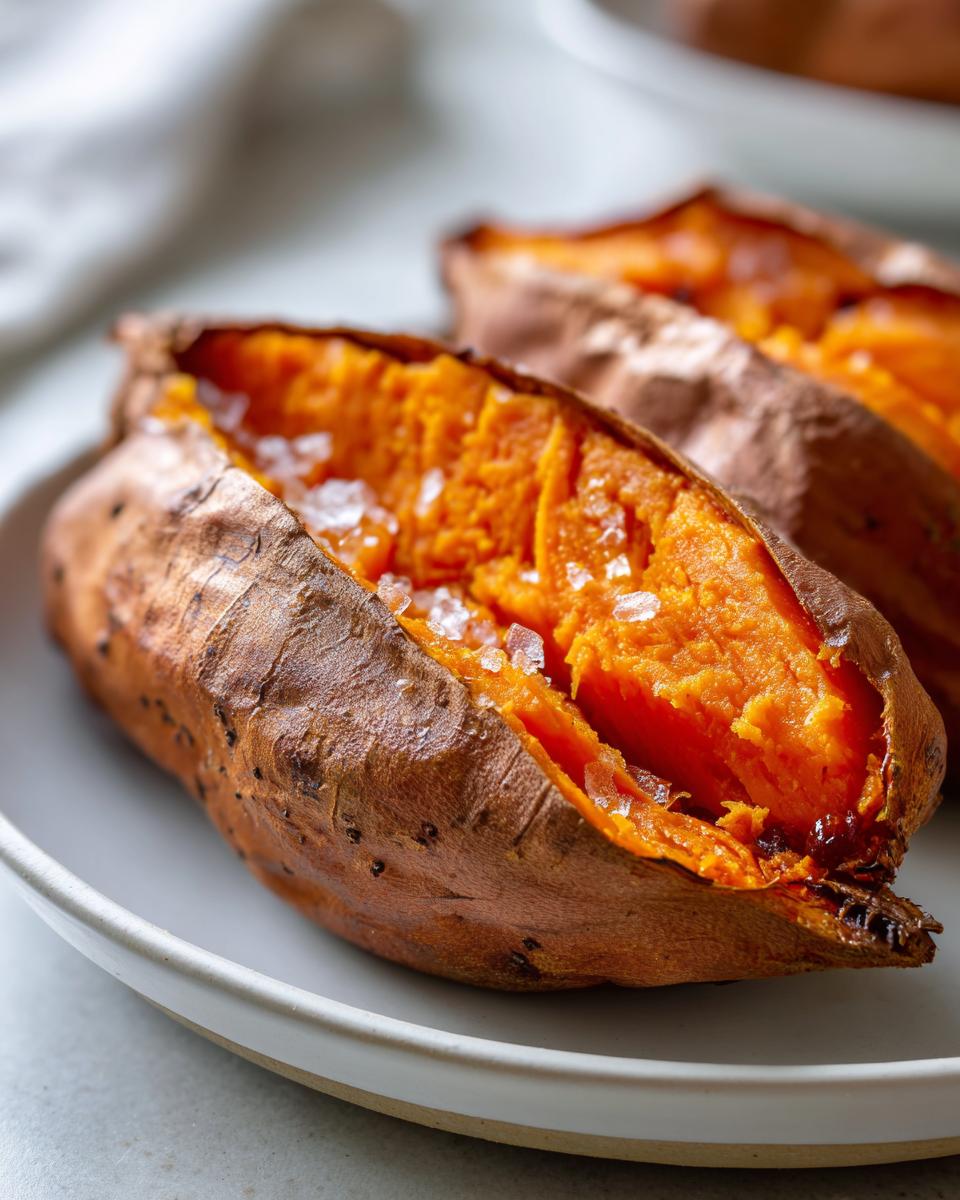
If you want that top-tier texture—the one where the skin stands up to slicing and has a little bit of crunch—you absolutely cannot skip the skin prep. We are aiming for that truly satisfying crispy skin sweet potato here. As I mentioned before, this whole goal hinges on ditching the aluminum foil. Seriously, toss the foil aside for this recipe! Foil acts like a mini-steamer pot, keeping the moisture locked against the skin, which results in that soft, almost rubbery outer layer we are trying to avoid.
When you place the potatoes directly onto the oven rack, like the recipe calls for, you allow the high, dry heat of the oven to work its magic on the exterior. This direct exposure is crucial for developing intense flavor and that sought-after chewiness. It’s the difference between a steamed vegetable and a beautifully roasted one, even though we aren’t technically roasting them here!
Creating a Caramelized Sweet Potato Skin
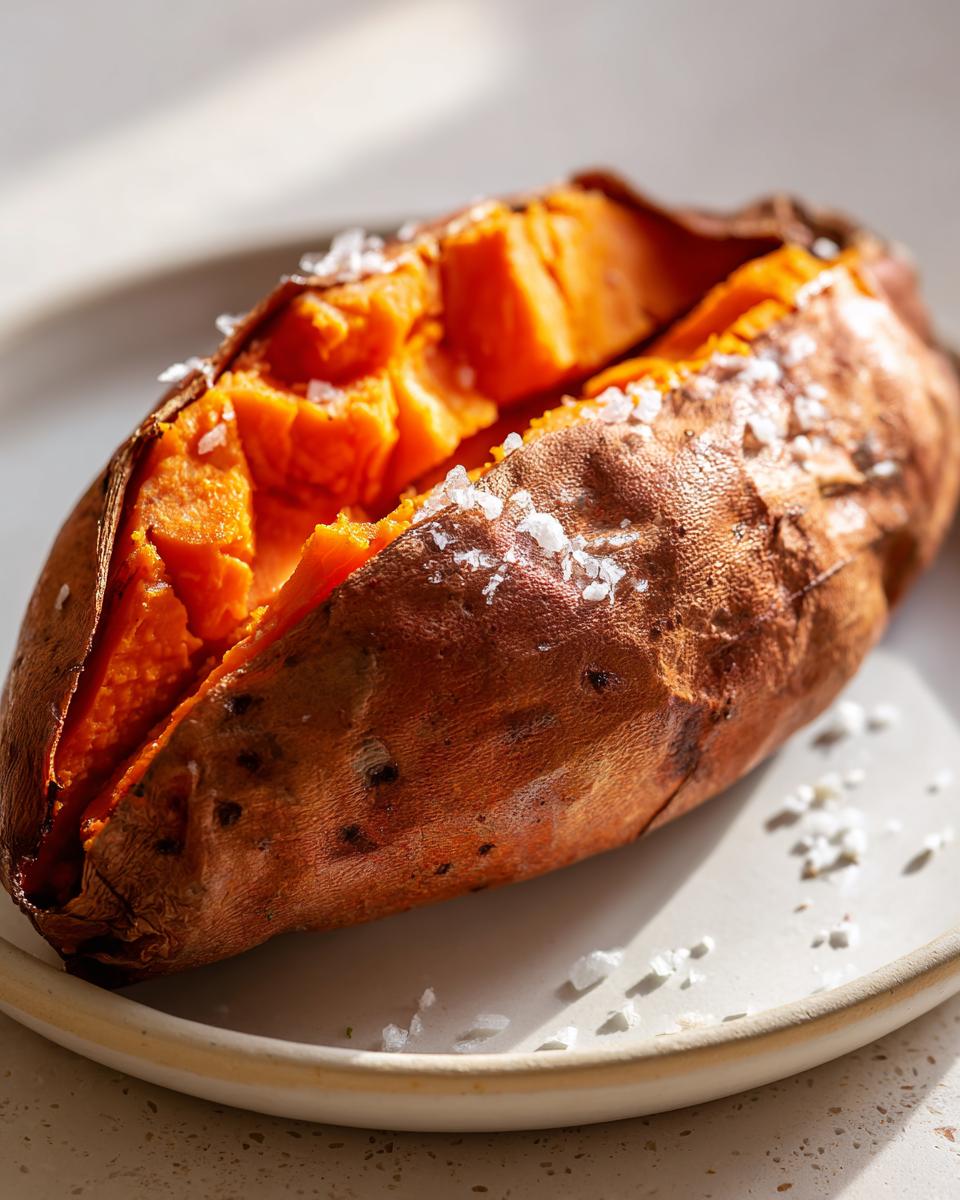
So, how do we encourage that lovely brown crust? It’s all in the rubbing! That little bit of olive oil you put on isn’t just for show; it’s the conductor for crispness. The oil helps the salt and pepper essentially stick to the skin and prevents the natural sugars beneath from burning too quickly.
Once you rub the oil around your sweet potatoes, take that coarse salt and pepper and really make sure you cover the entire surface area. When the high heat hits that salty surface, it actually helps draw out a tiny bit of moisture from the skin immediately, which kickstarts the drying and crisping process. It creates this really thin, savory jacket around the starchiness inside, finishing off with that slight caramelized sweet potato skin sweetness mingling with the salt. It’s just so good when you slice into it!
Serving Your Tender Baked Sweet Potatoes
Once they’re out of the oven and fragrant, you have achieved the ultimate sweet potato side dish! Don’t let them sit around too long, though, because these are absolutely best eaten right away while that steam is still making the inside perfectly tender. Peeling away the skin is half the fun, and I love just slitting them lengthwise and fluffing that gorgeous orange flesh with a fork right there on the plate. It’s simple comfort food at its finest, perfect for upgrading a standard weeknight sweet potato side!
Sweet Potato Toppings Inspiration
While a little pat of butter and a sprinkle of salt are perfection, you can obviously dress these up! My goal is always to have a savory option and a sweet option ready for whoever is eating. For a savory twist that pairs great with chicken or pork, try topping it with a dollop of sour cream, some chopped green onions, and maybe a tiny sprinkle of sharp cheddar cheese.
If you’re leaning into the sweetness—and who can blame you?—a drizzle of pure maple syrup or a sprinkle of cinnamon and brown sugar is fantastic. We even make a little crushed pecan and cinnamon topping sometimes! You can find some other great veggie pairings in my favorite roasted potatoes and carrots recipe post, but these baked beauties stand perfectly well on their own, topped simply or loaded up!
Making Baked Sweet Potatoes a Healthy Baked Potatoes Option
One of the things I absolutely adore about this simple preparation is that it serves up incredible flavor without loading us down with extra fats or complicated additions. When you’re looking for truly healthy baked potatoes, you just can’t beat nature’s packaging! We aren’t deep-frying these or smothering them in heavy sauces; we’re just using the oven to unlock the nutrients packed inside. That beautiful orange flesh is loaded with Vitamin A and fiber, so these are a winner for feeling full and energized through the afternoon.
Because this method is so simple and requires such little active work, it fits perfectly into any general meal planning system you might be using. You just wash them, rub them down, and let them bake while you focus on your main course or perhaps researching best meal delivery services for those super busy days when even 5 minutes of prep feels like too much!
Seriously, if you’re trying to incorporate more whole, recognizable foods into your routine, these are your new best friend. They are naturally sweet, meaning you don’t need to rely on high-sugar toppings to make them satisfying. It ticks all the boxes for a nutritious, budget-friendly side that tastes like comfort food!
Storage and Reheating Instructions for Baked Sweet Potatoes
We all know these are best fresh out of the oven, but let’s be real—sometimes you just can’t eat four giant potatoes in one sitting! Good news: leftover baked sweet potatoes are fantastic, and they really help out with future quick meals. Once they cool down completely, wrap them tightly. I usually use plastic cling wrap first, and then maybe an airtight bag or container just to be safe.
You can keep these beauties in the fridge for about three to four days. Any longer than that, and I start to get worried about texture, even though they are technically safe for longer. The crucial part comes next: reheating them to get that wonderful fluffy inside back!
If you have time and want the best result, definitely use the oven again. Reheat them whole or halved at about 350 degrees for about 10 to 15 minutes. This brings back that lovely warmth and dries out any moisture that condensed during chilling, keeping the inside light.
Now, if you’re starving and need it *now*, the microwave will work. Be warned, though! Microwaving heats them unevenly and can make the flesh slightly gloopy if you overdo it. If the microwave is your only option, slice the potato in half first, and heat it in 30-second bursts until just warm. It won’t have that beautiful oven-fresh texture, but it’ll still be tasty and ready for toppings!
Frequently Asked Questions About Baked Sweet Potatoes
I know you might still have a few nagging questions swirling around after reading through all that detail, and that’s totally fine! Baking potatoes can feel intimidating just because there’s so much conflicting advice out there. But don’t worry, I’ve rounded up the few things that folks always ask about when they’re trying to nail the baked sweet potatoes time.
Can I use aluminum foil when making baked sweet potatoes?
This is the big one! And my answer, coming straight from Eleanor’s testing notes, is a firm no if you want that great texture. If you wrap the potatoes in aluminum foil, you are basically steaming them in their own jacket. That traps all the moisture right against the skin, making it soft and preventing you from getting that really beautiful, slightly chewy, crispy skin sweet potato we talked about earlier. For the best results, always place them directly on the middle rack!
What is the best way to check if my whole baked sweet potato recipe is done?
When you’re following a whole baked sweet potato recipe, you need reliable checks! The oven time is just a guideline because every potato varies in size and density. My favorite, most reliable method is the gentle squeeze: grab the potato with an oven mitt—careful, it’ll be hot!—and give it a gentle squeeze on the side. If it yields easily and feels soft throughout, it’s done. If you feel any hard resistance inside, it needs just a little more time at that 400 degrees. If you are nervous, you can always slide a thin knife into the center; it should glide in without any pressure at all, confirming you have those lovely, tender baked sweet potatoes inside!
Another thing people often ask about is how to turn this into a more complex meal—like maybe some fun easy Mexican potatoes recipe variation later on! My advice is always to start simple first, get the base right, and then get creative with your toppings later on.
Are these potatoes okay for weekly meal prep?
Absolutely! These are one of the best foundations for reliable meal planning. Once they are baked and cooled, they store really well in the fridge. They are already a wonderful base for a healthy side dish that just needs to be reheated throughout the week. I find they are much better reheated in a toaster oven or conventional oven rather than the microwave if you care about keeping that fluffy texture.
Can I use a lower oven temperature for baked sweet potatoes?
You certainly can, but you’ll be trading time for temperature control! If you set your oven lower, say 375 degrees, your baked sweet potatoes are going to take much longer—probably leaning toward 75 or even 80 minutes depending on the size. I stick to 400 degrees because it’s the sweet spot where the inside cooks beautifully through before the outside burns, giving you that gorgeous contrast in texture we love. It’s the speediest way to get that classic result!
Share Your Simple Sweet Potato Recipe Experience
Well, that’s it! You now have the secret to genuinely perfect baked sweet potatoes. No more guessing games or soggy skins here. This simple method is one I rely on constantly, especially when I need an easy, hearty side dish that impresses without tasting like I spent all afternoon slaving over it.
Now I want to hear from you! Did you try this direct-on-the-rack trick? Tell me what you put on top! Did you go savory with chives, or were you all about that butter and cinnamon swirl? Please take a moment to drop a rating below so I know how this worked out in your oven, and let me know about your favorite sweet potato toppings inspiration. Your feedback helps me keep testing and sharing only the most reliable recipes here at DeliceRecipe. Happy baking, friends!
PrintHow to Bake Perfect Sweet Potatoes (The Foolproof Oven Method)

Follow this simple, reliable method to achieve fluffy baked sweet potatoes with naturally caramelized skin, perfect for any weeknight dinner or side dish.
- Prep Time: 5 min
- Cook Time: 60 min
- Total Time: 65 min
- Yield: 4 servings 1x
- Category: Side Dish
- Method: Baking
- Cuisine: American
- Diet: Vegetarian
Ingredients
- 4 medium sweet potatoes, scrubbed clean
- 1 tablespoon olive oil
- 1 teaspoon coarse salt
- 1/2 teaspoon black pepper
Instructions
- Preheat your oven to 400 degrees Fahrenheit (200 Celsius).
- Prick each sweet potato several times deeply all over using a fork. This allows steam to escape.
- Rub the exterior of each potato lightly with olive oil.
- Sprinkle the salt and pepper evenly over the skins of the potatoes.
- Place the seasoned potatoes directly onto the center rack of the preheated oven. Do not use a baking sheet or foil for the best skin crispness.
- Bake for 45 to 60 minutes, depending on the size of the potatoes. Smaller potatoes may take 45 minutes, while larger ones may need the full hour.
- Check for doneness by squeezing gently; the potato should yield easily, or insert a sharp knife into the center; it should slide in with no resistance.
- Remove from the oven. Let them cool for 5 minutes before slicing open lengthwise. Serve immediately with your favorite toppings.
Notes
- For a crispier skin, place the potatoes directly on the oven rack instead of on a pan.
- If you are planning your meals, these are a great base for a healthy side dish that fits well with general meal planning.
- Toppings ideas include butter, cinnamon, brown sugar, sour cream, chives, or black beans.
Nutrition
- Serving Size: 1 potato
- Calories: 180
- Sugar: 13g
- Sodium: 230mg
- Fat: 0.5g
- Saturated Fat: 0.1g
- Unsaturated Fat: 0.4g
- Trans Fat: 0g
- Carbohydrates: 41g
- Fiber: 7g
- Protein: 4g
- Cholesterol: 0mg