

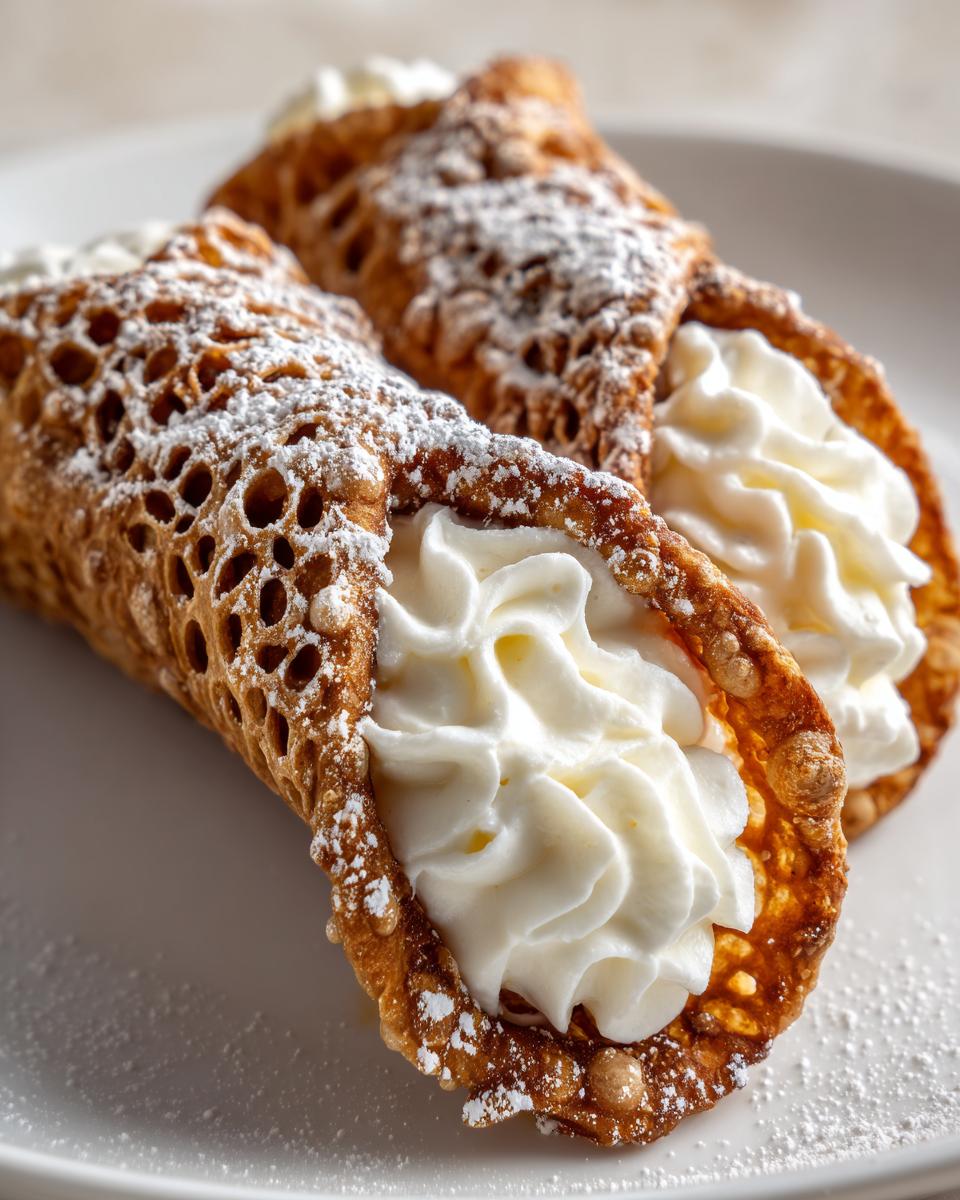
When you think of true Italian Desserts, you probably picture something rich, something utterly decadent, and something that takes a little love to make right. That’s where our cannoli recipe comes in! Here at DeliceRecipe, we believe that those incredible, crispy fried shells and that perfectly sweet, creamy ricotta filling shouldn’t be reserved just for the Sicilian bakery down the street. I’m Ellie Vance, and my goal is to bring you traditional recipes that actually work beautifully in your own kitchen without needing a culinary degree. This authentic recipe is all about achieving that perfect crunch coupled with the smoothest filling, giving you the absolute best homemade cannoli imaginable. If you love this classic Italian treat, you’ll also want to check out my recipe for easy tiramisu!
- Why This Classic Homemade Cannoli Recipe Works (EEAT)
- Ingredients for the Perfect Cannoli Recipe: Shells and Filling
- How To Make Cannoli: Step-by-Step Instructions for Your Cannoli Recipe
- Tips for the Best Cannoli Recipe Success
- Variations on Your Traditional Italian Baking Cannoli Recipe
- Serving Suggestions for Your Italian Desserts
- Storage and Reheating for This Classic Italian Pastries Cannoli Recipe
- Frequently Asked Questions About Making Cannoli Recipe
- Nutritional Estimates for This Cannoli Recipe
Why This Classic Homemade Cannoli Recipe Works (EEAT)
I know you’ve seen recipes that promise the world, but this Authentic Cannoli Recipe delivers every time because we focus on tradition. The shells *must* be fried for that incredible bubble texture and crispness that lasts—no shortcuts there! More importantly, success lives or dies with the ricotta; we ensure ours is drained thoroughly so your filling stays perfectly creamy and never watery. Trust me, these foolproof steps, tested right here in my home kitchen, guarantee bakery-style results.
Quick Overview of Our Cannoli Recipe Results
- Prep Time: 45 min
- Total Time: 60 min
- Yield: 12 servings
Ingredients for the Perfect Cannoli Recipe: Shells and Filling
Okay, time to get serious about our ingredients! Remember, this cannoli recipe shines because we respect the components. Whether you’re making my favorite pie crust or these shells, quality matters. We need everything ready, measured out, and prepped before we start rolling. Getting the ricotta perfectly dry is the biggest secret here, so don’t skip that step!
For the Homemade Cannoli Shells Dough
- 2 cups all-purpose flour
- 1/4 cup granulated sugar
- 1/4 teaspoon salt
- 1 large egg
- 1/2 cup dry white wine (like Pinot Grigio—this is key for those bubbles!)
- 1 tablespoon unsalted butter, melted
- 1 teaspoon white vinegar
- Vegetable oil, for frying (you’ll need plenty!)
For the Creamy Ricotta Cream Filling Recipe
This is where we build that smooth, sweet center. Make sure your cheese is drained, drained, drained!
- 15 ounces whole milk ricotta cheese, drained well
- 1/2 cup powdered sugar, plus more for dusting later
- 1 teaspoon vanilla extract
- 1/4 teaspoon ground cinnamon
- 1/4 cup mini chocolate chips (optional, but highly recommended!)
How To Make Cannoli: Step-by-Step Instructions for Your Cannoli Recipe
Alright, deep breath! Making cannoli from scratch seems scary, but it’s really just a series of straightforward moves. We’re going to tackle the dough first, then the frying, and finally that glorious filling. Follow these steps exactly, and you’ll have the best cannoli recipe on the block. Even though making the shells is a bit involved, once you see how they puff up, you’ll be hooked! If you like this kind of baking project, you should definitely try my recipe for easy super moist pumpkin bread recipe, too! It’s another one where precision makes all the difference.
Making the Dough for Crispy Fried Pastry
First things first, we build the shell dough. Whisk your flour, sugar, and salt together in a big bowl. Then, make a little well—that’s where the wet stuff goes! Add your egg, the white wine, melted butter, and vinegar to the middle. Use your hands or a sturdy spoon to bring it all together into a shaggy mess. Now, turn it out onto a floured counter. You have to knead this until it’s smooth and elastic, which usually takes about 5 to 7 minutes. Don’t rush this part; nice kneading makes for great Crispy Fried Pastry! If you’re looking for icing ideas for another project, check out how I make easy cookie icing recipe hardens perfectly! Once the cannoli dough feels right, wrap it up TIGHTLY in plastic wrap. It absolutely needs to rest for at least one full hour at room temperature. Patience pays off here!
Shaping and Frying Homemade Cannoli Shells
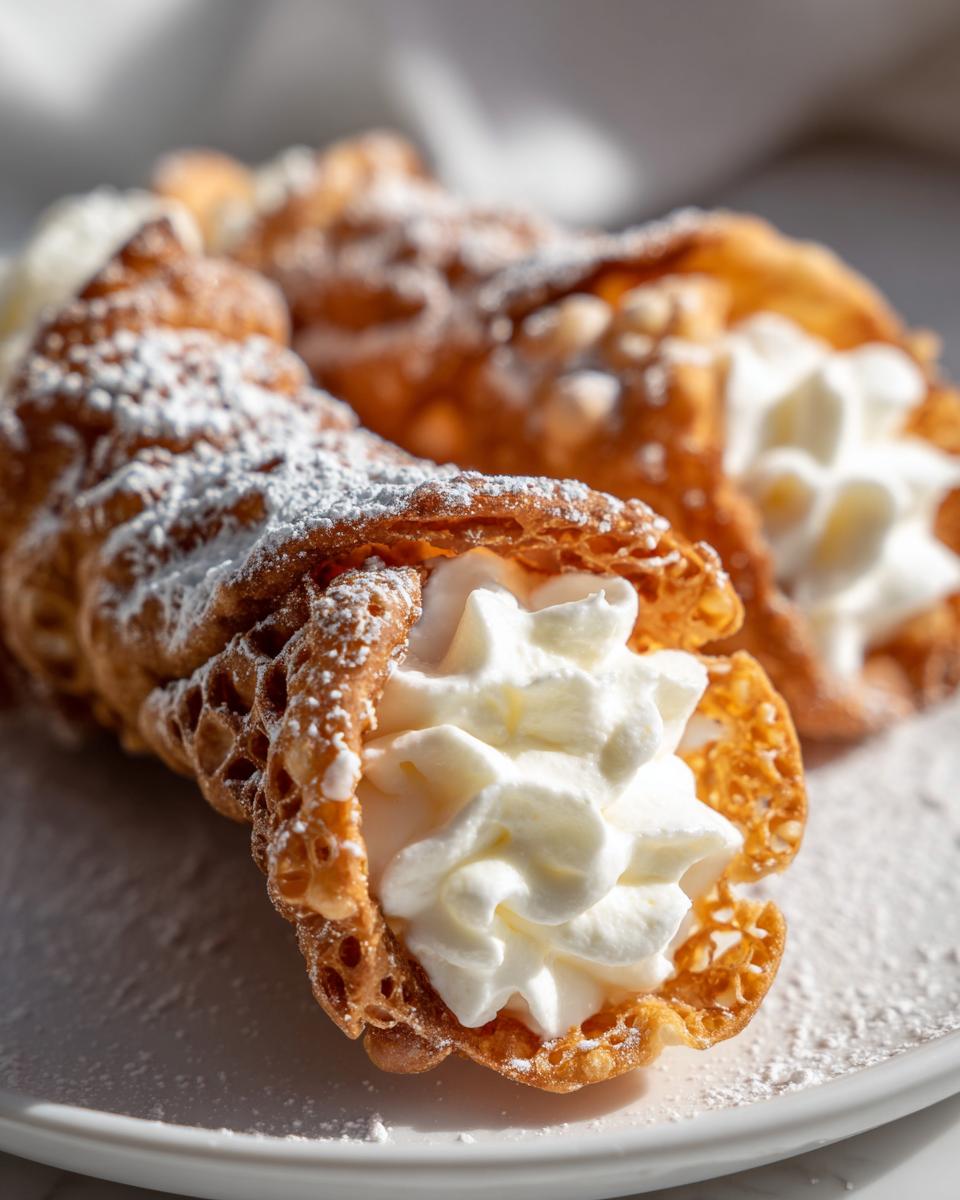
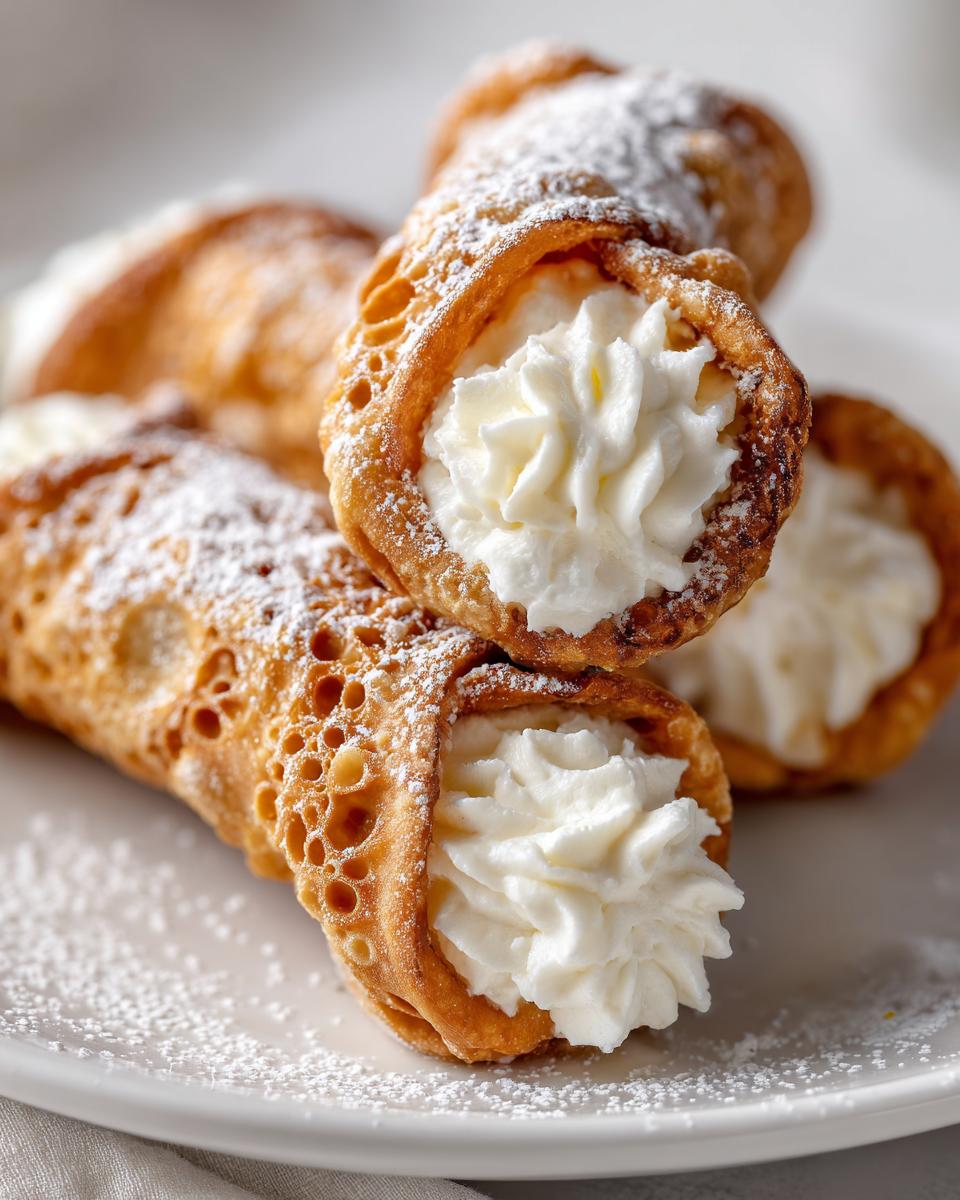
When that hour is up, divide your rested dough into four equal chunks—keep the ones you aren’t working with covered so they don’t dry out. Whether you use a pasta machine or a rolling pin, you need to roll this dough *super* thin. I mean almost see-through! Next, cut out 4-inch circles or squares. Now, grab those cannoli tubes and grease them up a bit. Wrap your dough piece around the tube, making sure the edges overlap just a little bit. Press that seam down firmly; if it doesn’t stick, use a tiny bit of water or egg white glue. While you work, heat your oil in a deep pot to exactly 375°F (190°C). Fry 2 or 3 Homemade Cannoli Shells at a time. Keep the mold submerged until they are beautifully golden brown, which takes about 2 to 3 minutes per side. When the bubbling stops, pull them out, place them on a paper towel-lined plate to drain excess oil, and immediately slide the pastry off the metal tube while it is still hot. If you wait, they stick! Let the shells cool completely. You can see a great visual guide for rolling over on Traditional Italian Cannoli Recipe if you need that extra nudge!
Assembling the Creamy Dessert Filling
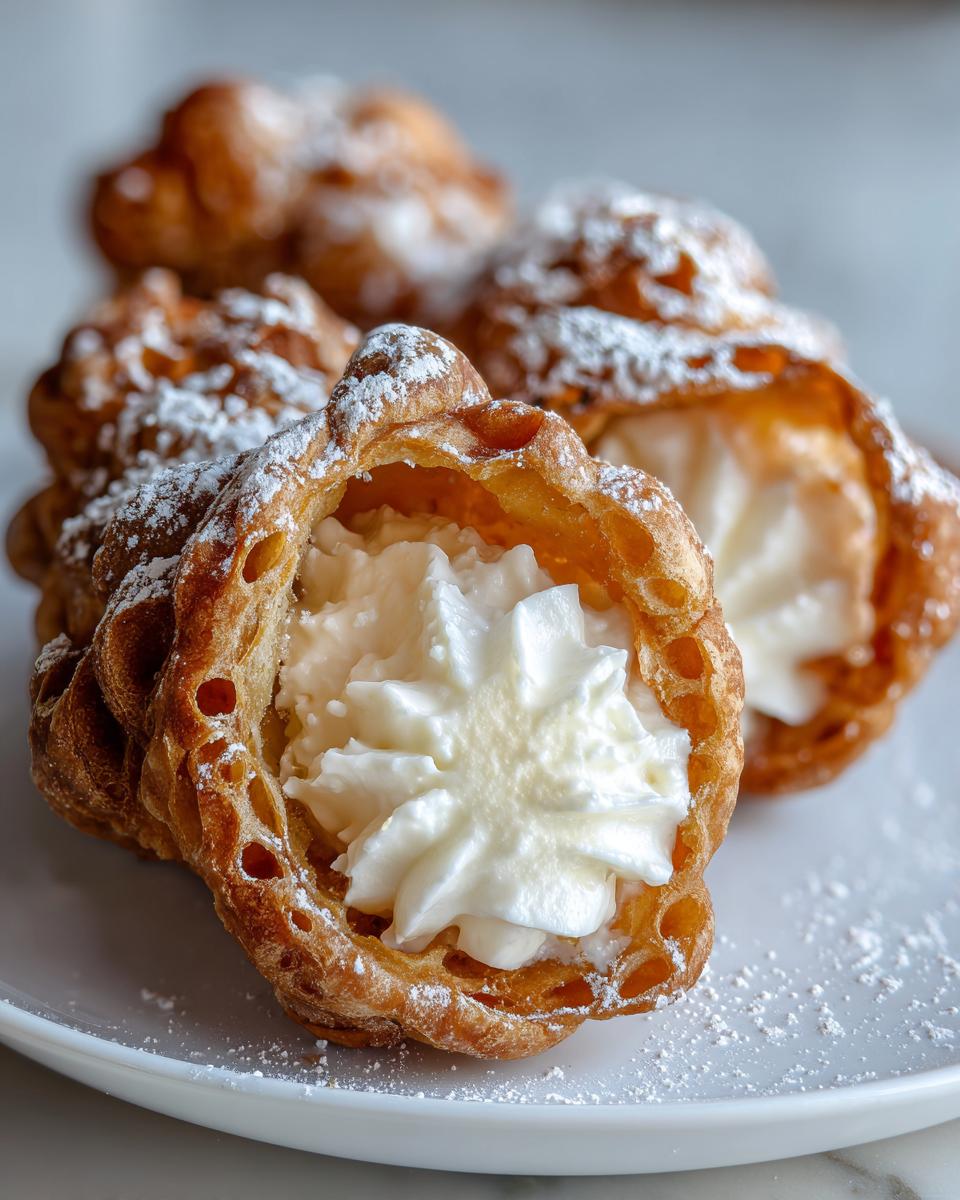
While those shells cool, we whip up the amazing filling. Make sure your ricotta is drained—seriously, I can’t stress that enough—or your Creamy Dessert Filling will be soup! Beat the drained ricotta until it looks smooth using a hand mixer or stand mixer. Now, mix in the powdered sugar, vanilla extract, and cinnamon. Only mix until it’s just combined. If you’re adding those chocolate chips, fold them in gently by hand so you don’t deflate all the air we just incorporated. Cover this and let it chill in the refrigerator for at least 30 minutes! When you’re ready to serve, load that lovely cream into a piping bag with a large star tip and fill those crispy shells.
Tips for the Best Cannoli Recipe Success
Every baker needs a few insider secrets, and for this cannoli recipe, mine revolve around avoiding the dreaded soggy shell! The absolute must-do step? Draining that whole milk ricotta until it barely drips. Seriously, I often let mine drain overnight in the fridge using cheesecloth; that moisture ruins the texture. Another rule I never break: only fill the shells right before you plan to serve them. Once the humidity from the cream hits that fried pastry, it starts softening almost instantly.
When I’m handling the dough, my personal trick is to work fast and keep everything cool. If the dough starts feeling sticky or warm while you’re rolling it out for the shells, just pop the whole covered lump back in the fridge for 10 minutes. It prevents tearing and keeps the structure tight. If you master these key waiting periods and temperature checks, you’ll find making this easy parmesan pasta dish seems complicated by comparison!
Variations on Your Traditional Italian Baking Cannoli Recipe
Part of the fun of exploring Traditional Italian Baking is making a classic recipe your own, right? While sticking to the original ricotta, vanilla, and cinnamon is pure perfection, I often like to throw a little twist into the filling, especially when I’m serving cannoli for a special gathering. You don’t need a whole new recipe; just a little creativity in the mixing bowl!
If you want to elevate that creamy ricotta filling just a bit, try adding a teaspoon of finely grated orange zest. That little bit of citrus brightens everything up beautifully and pairs wonderfully with the fried dough. Or, maybe you’re not a fan of chocolate chips? Don’t worry! You can easily swap those out for finely chopped, toasted pistachios. They add a fantastic crunch and a gorgeous color. If you happen to be making one of my favorite breakfast treats, like my easy blueberry scones from scratch, you know how a contrasting texture can make the whole thing better!
Another fun thing you can do is experiment with extracts. If you want a deeper flavor profile, swap out half of that vanilla extract for almond extract. Just be careful—almond is strong, so start small! These little tinkerings keep making this cannoli recipe exciting year after year, even though the technique for that crispy shell stays exactly the same.
Serving Suggestions for Your Italian Desserts
Now that you’ve made the absolute best cannoli recipe known to humanity—seriously, those shells are amazing—it’s time for the fun part: decorating and serving! While the recipe already calls for a generous dusting of powdered sugar, which is classic and beautiful, I always feel like these rich Italian Desserts deserve a little extra flair right at the edges. It adds texture contrast and helps keep the filling from touching your fingers too much, which is always a win in my book!
My favorite way to finish them off is by dipping the ends of the filled cannoli (right where that ricotta cream is peeking out) into some finely chopped, toasted pistachios. They give you a gorgeous pop of green and a salty counterpoint to the sweet filling. If you’ve got some of those mini chocolate chips left over from when you made the filling, that works just as well! Just press the open ends lightly into a small bowl of the chips until you get a nice coating.
If you’re serving these right away, you can even drizzle just a tiny bit of warm chocolate over the top—but be quick about it! You want that drizzle to set before anyone grabs one. If you’re looking for another impressive Italian finale for your meal, don’t forget to check out my linked easy tiramisu recipe! For more inspiration on making bakery-worthy Italian treats, check out this recipe shared over on From Scratch Dishes.
Storage and Reheating for This Classic Italian Pastries Cannoli Recipe
This is probably the most common question I get about making any kind of filled pastry, especially amazing Classic Italian Pastries like these cannoli: “How far ahead can I make them?” And my answer is always the same: you can prep almost everything, but assembly needs to happen right before the party!
Here’s the deal: the shells and the ricotta cream filling need to be stored completely separately. The shells are fried and utterly crisp, and that moisture from the filling will attack them the second they meet. If you fill your cannoli shells more than an hour or two before serving, they will start to get soft, and you absolutely lose that glorious crunch that makes this cannoli recipe so special.
Keep the cooled, empty shells in a dry, airtight container on your counter. Never put them in the fridge, though! Low temperatures encourage moisture absorption, and we don’t want that. The ricotta filling, on the other hand, really benefits from chilling—it firms up nicely after being mixed. So, store that creamy filling in the fridge, covered, until you are ready to pipe it in.
Now, about reheating? Don’t even try it! These aren’t meant to go back into the oven or the microwave. If you want perfectly crispy shells, you have to fill them fresh. If you’re making them for a big gathering, just bake your shells the day before, make the filling the morning of, and assemble them 30 minutes before you serve them. That way, they are perfect every single time. If you want to see another great fruit-based baked good, check out my blueberry pie recipe for storage tips!
If you’re looking for other delicious ideas that are easy to store, pop over and see how they handle make-ahead items in this recipe from Recipe Kind.
Frequently Asked Questions About Making Cannoli Recipe
I totally get it—when you’re making something as classic as this cannoli recipe, you’ve probably got a few jitters, especially around the frying! People always ask me the same few things as they get ready to tackle this project. Don’t you worry one bit, though; we’re going to iron out all the little wrinkles before you even turn on the oil. If you’re looking for other great recipes that minimize hassle, you should try my easy chicken pot pie casserole recipe!
Can I use store-bought shells for this cannoli recipe?
You absolutely can, and I won’t tell anyone! If you’re feeling rushed or you’ve just had a long week, using quality store-bought shells is a great shortcut to enjoying these Easy Dessert Recipes sooner. However, I have to be honest: nothing beats the flavor and the tiny, delicate bubbles you get when you make the dough from scratch and fry it fresh. The store-bought ones tend to be a bit thicker and can lose their crispness faster, but if time is the enemy, go for it!
What is the secret to the best Sicilian Pastry texture?
Ah, the glorious crunch of a perfect Sicilian Pastry! There are two secrets, and they are linked to moisture control. For the shells, it’s the combination of white wine and vinegar in the dough that reacts during frying to make those beautiful, brittle bubbles. For the filling, the secret is draining your ricotta overnight in the fridge. If that cheese is even slightly wet, your gorgeous cream filling turns soupy, and what’s worse, it immediately makes your crispy shells soggy! Do the draining prep work ahead of time, and you’ve nailed the texture.
Nutritional Estimates for This Cannoli Recipe
Now, I always want you to eat your food without worrying too much about labels, but I know that for some of you, knowing the basics is really helpful! Since this cannoli recipe involves frying the delicate pastry shells and using rich whole milk ricotta for the filling, the numbers are what you’d expect for a truly indulgent Italian dessert. Remember, these figures are just estimates based on the ingredients listed, and they’ll change a bit if you use non-fat ricotta or skip the chocolate chips.
If you’re interested in more satisfying meals that still fit into your week, I highly recommend checking out my recipe for creamy chicken wild rice soup recipe later this week! For one single cannoli made with this recipe, here are the approximate breakdowns:
- Calories: Around 350 per serving
- Total Fat: Approximately 18g
- Carbohydrates: About 40g
- Protein: Roughly 10g
Keep in mind that the serving size is one cannoli, and this recipe yields about 12 of these amazing treats. Enjoy them knowing you made them with the best ingredients!
PrintClassic Homemade Cannoli Recipe with Crispy Fried Shells

Make authentic Italian cannoli at home. This recipe gives you crispy fried shells and a smooth, sweet ricotta filling for a traditional Sicilian pastry.
- Prep Time: 45 min
- Cook Time: 15 min
- Total Time: 60 min
- Yield: 12 servings 1x
- Category: Dessert
- Method: Frying
- Cuisine: Italian
- Diet: Vegetarian
Ingredients
- 2 cups all-purpose flour
- 1/4 cup granulated sugar
- 1/4 teaspoon salt
- 1 large egg
- 1/2 cup dry white wine (like Pinot Grigio)
- 1 tablespoon unsalted butter, melted
- 1 teaspoon white vinegar
- Vegetable oil, for frying
- 15 ounces whole milk ricotta cheese, drained well
- 1/2 cup powdered sugar, plus more for dusting
- 1 teaspoon vanilla extract
- 1/4 teaspoon ground cinnamon
- 1/4 cup mini chocolate chips (optional, for filling)
Instructions
- Make the Dough: In a large bowl, whisk together the flour, granulated sugar, and salt. Create a well in the center and add the egg, white wine, melted butter, and vinegar. Mix until a shaggy dough forms, then turn it out onto a lightly floured surface. Knead for 5 to 7 minutes until the dough is smooth and elastic. Wrap the dough tightly in plastic wrap and let it rest at room temperature for at least 1 hour.
- Roll the Shells: Divide the rested dough into four equal pieces. Working with one piece at a time (keep the others covered), roll the dough out very thin, either using a pasta machine or a rolling pin, until it is almost translucent. Cut the dough into 4-inch circles or squares.
- Shape and Fry: Lightly grease your cannoli tubes (molds). Wrap each dough piece around a tube, overlapping the edges slightly, and press the seam firmly to seal. You can brush the seam with a little water or egg white if it does not stick.
- Heat the oil in a deep, heavy-bottomed pot or deep fryer to 375°F (190°C). Carefully place 2 or 3 shells at a time into the hot oil, using tongs to hold the mold submerged until the shell is golden brown and bubbles stop forming, about 2 to 3 minutes per side.
- Remove the shells from the oil, place them on a paper towel-lined plate to drain excess oil, and immediately slide the pastry off the metal tube while it is still hot. Let the shells cool completely.
- Prepare the Filling: Place the well-drained ricotta cheese in a medium bowl. Use a hand mixer or stand mixer to beat the ricotta until it is smooth. Add the powdered sugar, vanilla extract, and cinnamon. Mix until just combined and creamy. If using, gently fold in the mini chocolate chips.
- Chill the Filling: Cover the ricotta filling and chill in the refrigerator for at least 30 minutes to firm up slightly.
- Fill and Serve: Just before serving, transfer the chilled filling to a piping bag fitted with a large star tip. Pipe the ricotta cream into both ends of the cooled cannoli shells. Dust the filled cannoli generously with extra powdered sugar.
Notes
- Drain the ricotta cheese thoroughly; excess moisture makes the filling runny and softens the shells quickly. You can drain it overnight in the refrigerator using a fine-mesh sieve lined with cheesecloth.
- For the crispiest shells, fill them immediately before serving. If you fill them too far in advance, the moisture from the cream will soften the pastry.
- If you do not have cannoli molds, you can use aluminum foil shaped into tight tubes, though metal molds work best for maintaining shape during frying.
Nutrition
- Serving Size: 1 cannoli
- Calories: 350
- Sugar: 25
- Sodium: 110
- Fat: 18
- Saturated Fat: 10
- Unsaturated Fat: 8
- Trans Fat: 0
- Carbohydrates: 40
- Fiber: 1
- Protein: 10
- Cholesterol: 55