
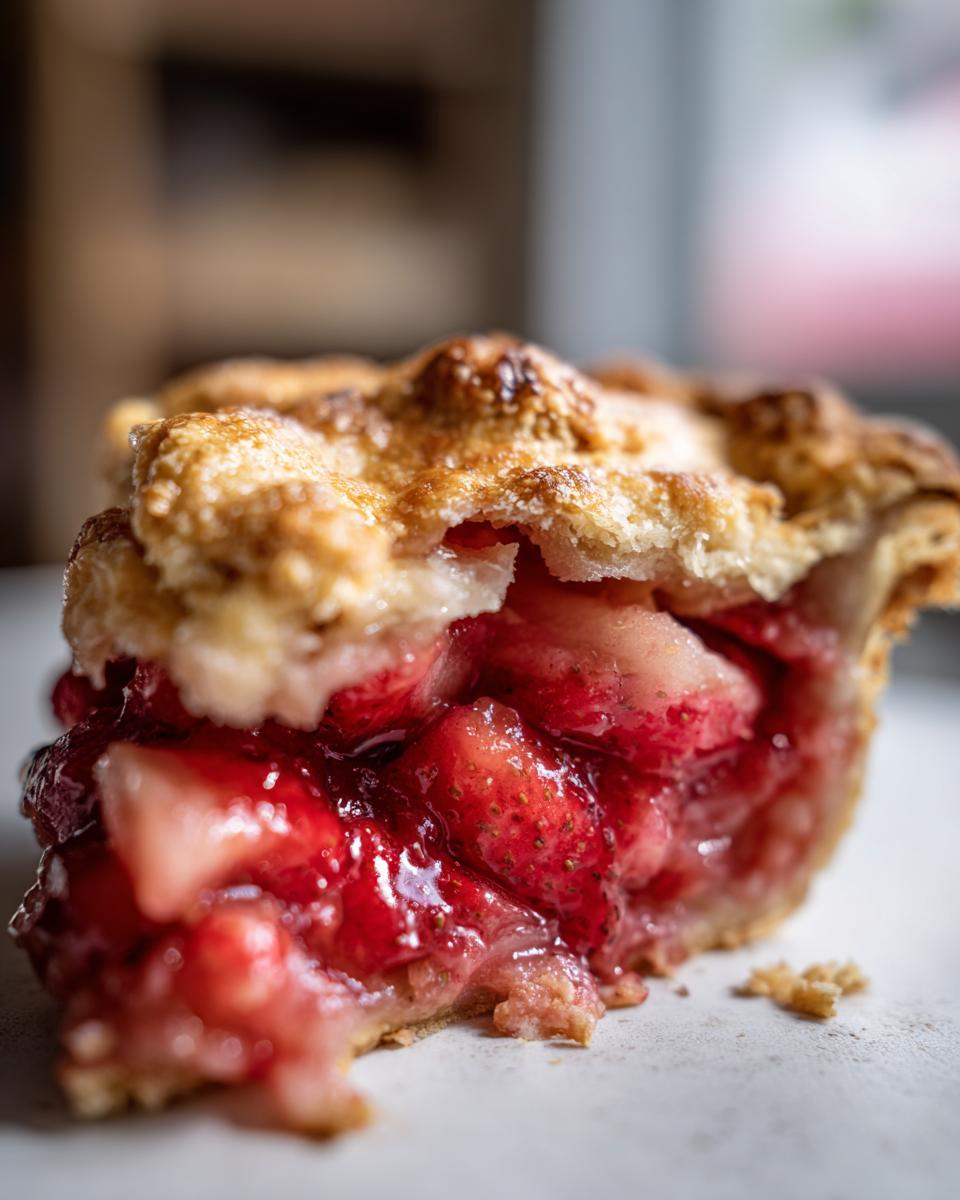
Oh, the arrival of spring always sends me straight to the farmers market! There’s just nothing that screams summer sunshine and nostalgia quite like that brilliant pink rhubarb paired with the first sweet strawberries. Forget fussy desserts; what we really need is a showstopper that tastes like pure celebration. That’s why I’m sharing my recipe for what I honestly call the Ultimate Strawberry Rhubarb Pie. This isn’t just any fruit pie; it’s a Classic American Pie that reminds me so much of the big holiday gatherings my grandmother used to host. We’re going to make sure your crust is flaky, and your filling is perfectly set. You’re going to love this!
- Why This Strawberry Rhubarb Pie is Your New Favorite Easy Summer Pie
- Gathering Ingredients for Your Homemade Rhubarb Filling and Pastry
- The Flaky Pie Crust Tutorial: Making the Buttery Pie Pastry
- How to Make Strawberry Rhubarb Pie Filling and Assembly
- Essential Baking Tips for Pies: Achieving the Perfect Strawberry Rhubarb Pie
- The Most Important Step: Cooling Your Strawberry Rhubarb Pie
- Strawberry Desserts Seasonal Variations: Crust or Crumble Topping Pie
- Storage and Reheating Instructions for Your Classic American Pie
- Frequently Asked Questions About Making Strawberry Rhubarb Pie
Why This Strawberry Rhubarb Pie is Your New Favorite Easy Summer Pie
This recipe is everything you want when you bring out that summer fruit. It cuts through the heat with that perfect sweet and tart punch, and it’s honestly much simpler than you might think. It’s now my go-to Spring Baking Classic.
- Perfect Balance: We nail the sweet-tart ratio so you don’t get pucker-face.
- Flaky Crust Guarantee: My crust technique ensures you get those beautiful, buttery flakes every single time.
- Foolproof Filling: I give you the trick to stop that gooey, runny filling problem once and for all!
Gathering Ingredients for Your Homemade Rhubarb Filling and Pastry
Making a great strawberry rhubarb pie starts with caring about what goes into it. This is where we build that amazing structure and flavor, so please, don’t rush getting your ingredients ready! Since rhubarb and strawberries are seasonal superstars, try hitting up your local farmers market if you can. Getting fresh fruit makes a huge difference, trust me.
We need two main components: the pastry that will hold everything together, and that brilliant filling. Remember, chilling everything is non-negotiable for a perfect buttery pie pastry!
For the Buttery Pie Pastry
For our amazingly flaky bottom and top crust, we need everything ice-cold. If the butter heats up even a little bit, we lose those beautiful layers we are trying to build. I always cube my butter and then pop it back into the freezer for about 15 minutes right before I start mixing.
- 2 1/2 cups all-purpose flour
- 1 teaspoon salt
- 1 cup (2 sticks) unsalted butter, cut into cubes (must be VERY cold!)
- 1/2 cup ice water, plus more if needed
For the Sweet Tart Fruit Pie Filling
The filling is where the magic happens! We use just enough sugar to balance the rhubarb’s natural tartness, and cornstarch is our best friend here. Seriously, this is how we avoid that dreaded runny pie mess. That cornstarch locks everything in place perfectly.
- 6 cups fresh rhubarb, cut into 1-inch pieces
- 4 cups fresh strawberries, hulled and halved
- 1 1/2 cups granulated sugar (taste your fruit first, you might adjust this!)
- 1/4 cup cornstarch
- 1 tablespoon lemon juice
- 1 teaspoon vanilla extract
The Flaky Pie Crust Tutorial: Making the Buttery Pie Pastry
Okay, this is the foundational step, and honestly, if you master this pastry, you can conquer any pie, from apple to this gorgeous strawberry rhubarb pie. The secret to a ridiculously flaky crust is keeping everything frigid! We aren’t creaming butter here; we want butter pieces; those pieces create steam pockets when they bake, turning into those lovely flaky layers.
Mix your flour and salt, then get that super-cold butter cut in. I use my fingers for a quick minute or a pastry blender. You’re looking for mixtures that look like coarse crumbs—think small peas or maybe slightly larger pieces. If you see any butter chunk bigger than a lima bean, squish it down a bit more.
When you add the ice water, go slowly! Seriously, add one tablespoon at a time, maybe just pulsing it in a food processor or stirring quickly with a fork. Stop as soon as the dough manages to stick together when you squeeze a bit. Overmixing brings out the gluten, and that’s how you get tough, cracker-like pastry instead of tender flakiness. Divide that dough into two disks, wrap them tight, and let them chill out in the fridge for at least one whole hour. Don’t even think about skipping that chilling time!
How to Make Strawberry Rhubarb Pie Filling and Assembly
Now that our dough is sleeping happily in the fridge, we can get back to that beautiful filling we mixed earlier. Remember how we tossed the fruit with the sugar and cornstarch? After it sat for 15 minutes, the fruit starts releasing its juices—that sweet, tart liquid is what will thicken into that wonderful sauce! Give the mixture a really gentle stir with a spatula. We don’t want to mash up those beautiful strawberries; we want them to hold their shape!
Time to roll! Take one chilled disk of dough and put it on a lightly floured surface. Roll it out into a circle about 12 inches across, aiming for that perfect, even thickness. Carefully drape this bottom crust into your 9-inch pie plate and trim the edges, leaving about an inch hanging over the rim. Now, gently pour all that fruit mixture right into the shell. Don’t leave any juice behind!
Finishing the Strawberry Rhubarb Pie with a Top Crust or Lattice Crust Pie Design
This is the presentation moment! Roll out your second disk of dough. If you’re feeling brave, this is when you cut strips for a gorgeous lattice crust pie design—it looks so impressive when it bakes up golden brown, and it lets steam escape so perfectly. If lattice stresses you out, that’s okay! Just lay the whole second crust over the fruit.
If you use a full top crust, you absolutely must cut vents, otherwise, the steam builds up and tries to tear the top apart while baking. Use a small knife to slice maybe four or five little slits. Then, seal your edges! Crimp the top and bottom crusts together tightly. Before it goes anywhere near the oven, mix that egg with a teaspoon of water for a nice wash, brush it all over the top, and then sprinkle generously with coarse sugar. That sugar gives you the crunchiest, shiniest finish!
Essential Baking Tips for Pies: Achieving the Perfect Strawberry Rhubarb Pie
We are so close to slicing into this perfection! The baking part is actually really straightforward, but there are two small tricks that make all the difference for your strawberry rhubarb pie. First off, pop a baking sheet—even an old, slightly stained one—onto the lowest rack in the oven before you even preheat it. We do this because the bottom crust needs a blast of direct heat to start setting up immediately. This is honestly the secret weapon against a soggy bottom! If you want to see how I handle other baked goods, like my easy chicken pot pie casserole, know that good heat management is always key.
Start baking at a nice hot 400°F (200°C) for the first 20 minutes. That initial heat sets that crust we worked so hard on. Then, you need to turn the heat down to 375°F (190°C) for the remainder of the time. You’re looking for tell-tale signs that it’s done: the crust should be deeply golden brown, and you absolutely must see the filling bubbling thick right through the vents or lattice work. If it isn’t bubbling, the cornstarch hasn’t activated fully, and you risk a runny mess, which we simply won’t have! If the edges look like they are browning too fast, grab some strips of aluminum foil—I keep a roll ready just for this—and drape them loosely over the edges. Otherwise, let it bake until bubbly!
The Most Important Step: Cooling Your Strawberry Rhubarb Pie
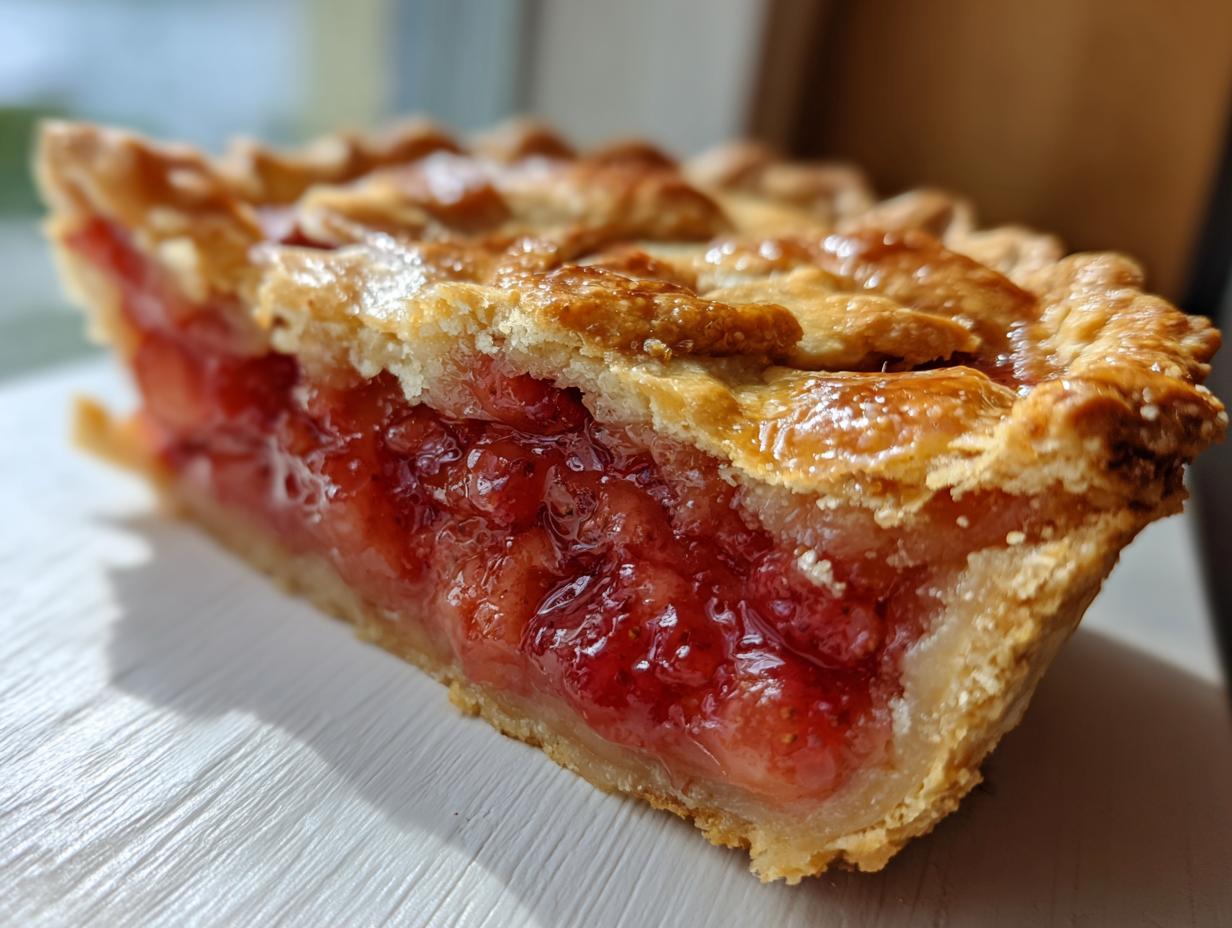
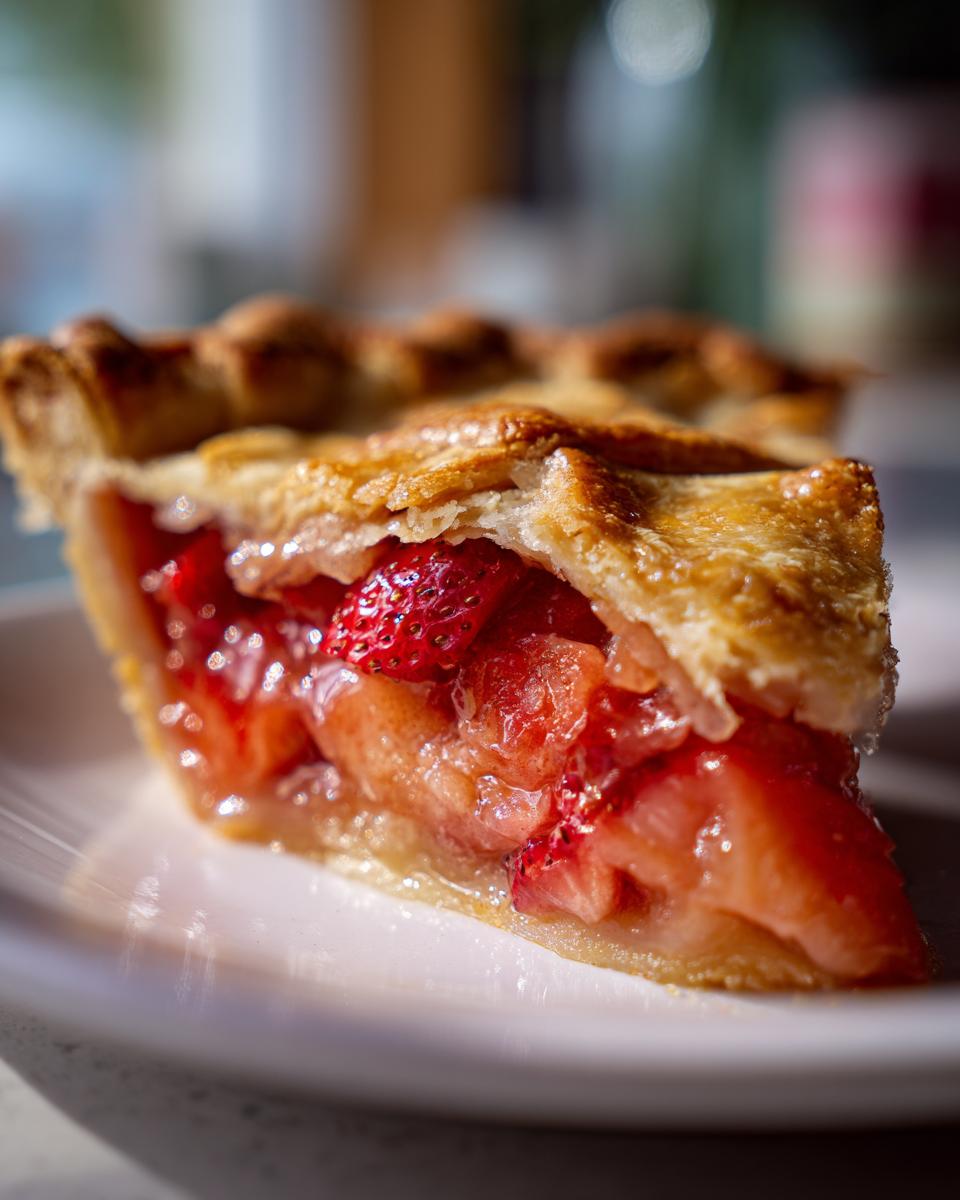
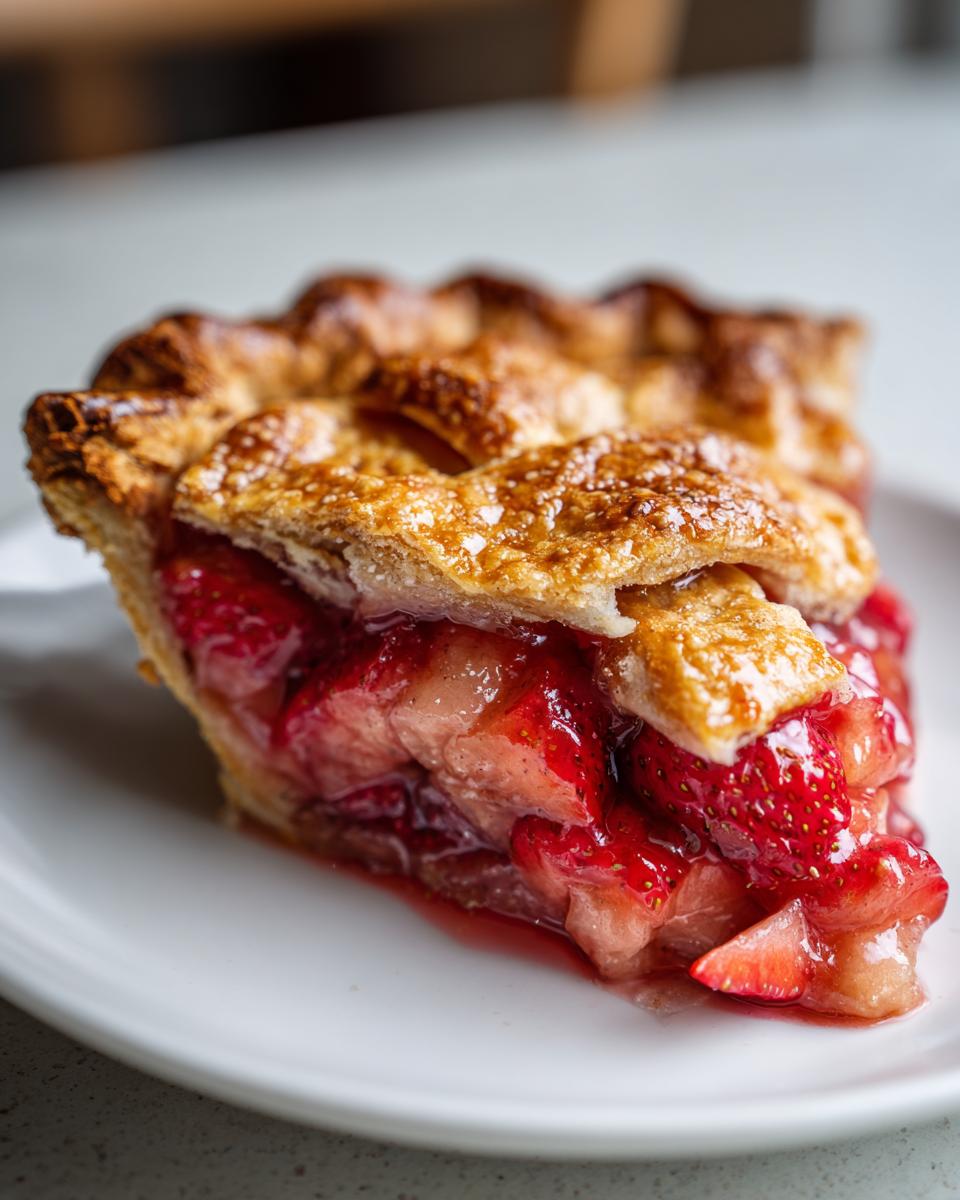
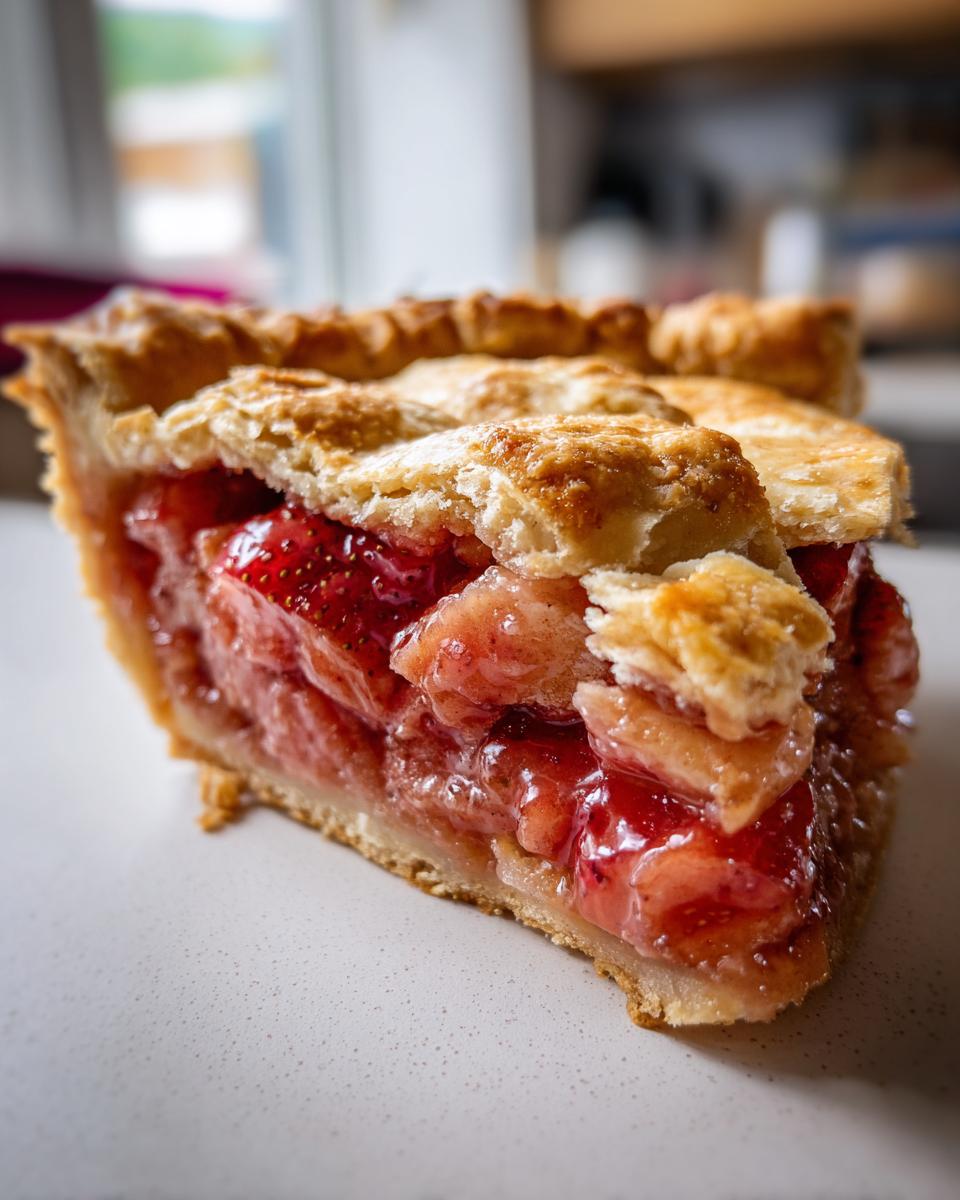
I know, I know. You pull that gorgeous, golden-brown strawberry rhubarb pie out of the oven, it smells like heaven, and you want to grab a fork immediately. Resist the urge! This is where so many bakers mess up their otherwise perfect work. You absolutely must let this pie cool on a wire rack for a minimum of four hours before you even think about slicing it.
Seriously, four hours! That cornstarch we added needs that time to cool down so it can grab onto all those lovely fruit juices and set up properly. If you rush it, you’ll end up with a pool of sweet liquid on your plate. Patience here earns you that perfectly thick, dreamy **homemade rhubarb filling**.
Strawberry Desserts Seasonal Variations: Crust or Crumble Topping Pie
One of the best things about this base recipe for strawberry rhubarb pie is how easily we can switch things up when we feel like a change! If you’re not feeling the traditional top crust or the lattice work, turning this into a crumble topping pie is maybe the easiest path to an amazing sweet tart fruit pie. You simply skip rolling out that second disk of dough and instead use your favorite streusel recipe right over the filling. It gives you that delightful crunch!
Also, for those of you who love a little extra warmth in your spring baking classics, I highly encourage you to sneak in some spice! I saw a few recipes use cardamom or even a tiny pinch of black pepper—sounds weird, I know, but it really brings out the strawberry flavor. You can find some really fun inspiration on how others have adapted theirs, like over at The Kitchn. If you’re sticking with berries, don’t forget to check out my simple strawberry muffins recipe for breakfast!
Storage and Reheating Instructions for Your Classic American Pie
So you managed to save a slice—or maybe you just have leftovers! That’s great because I think this strawberry rhubarb pie actually tastes even better the next day once the filling is totally set up. Storing it is quite simple, but you have to remember one thing: this is a fruit pie, and fruit loves the cold!
You absolutely need to cover this pie loosely and keep it in the refrigerator. It’s not like a pumpkin pie that can sit out. The crust tends to absorb moisture quicker if left at room temperature after being cut, and we don’t want that! Wrap the cut edges with small pieces of aluminum foil or plastic wrap to protect them from drying out, but don’t seal the whole thing up tightly, or you risk making the crust soft.
When you’re ready for a second slice, try to let it sit on the counter for about 30 minutes to take the chill off. If you like things warm, I suggest reheating only individual slices. Pop them on a baking sheet at about 300°F (150°C) for about 10 minutes. This warms the fruit through without sweating out all the moisture. If you need other easy recipes for make-ahead desserts, take a look at my easy super moist pumpkin bread recipe—it stores beautifully too!
Frequently Asked Questions About Making Strawberry Rhubarb Pie
I get so many questions about this strawberry rhubarb pie, especially around those tricky spots like the filling setting up or making sure that bottom crust is perfectly crisp! Don’t worry, even though this is the best rhubarb pie recipe out there, making it should still feel easy. Here are some of the things I hear most often from fellow bakers!
Can I use frozen rhubarb or strawberries in this strawberry rhubarb pie recipe?
Yes, you absolutely can! This is common when folks are baking outside of peak season. The key here is do not thaw the fruit first. Just toss the frozen fruit straight into the bowl with your sugar and starch mixture. Because the frozen fruit releases more moisture as it bakes, I always recommend bumping up the cornstarch slightly—maybe add one extra tablespoon to be safe. If you don’t, you might end up with a soupier filling, and we want that perfect set!
What is the best way to prevent the strawberry rhubarb pie crust from getting soggy?
This is the eternal struggle, isn’t it? We fought hard for that flaky crust! First off, remember how cold that butter needed to be? That cold fat hitting the hot oven helps steam the dough layers *before* the filling juices can soak through. Secondly, the pre-bake is your friend, especially if you are making a very juicy pie like this one. For an extra layer of defense on this classic American pie, try brushing the raw bottom crust with a thin layer of egg white—yes, just the white—before adding your fruit. It basically seals the dough like shellac and keeps that bottom crisp!
What temperature should I bake my Easy Summer Pie at?
We use a two-stage approach for the absolute best bake! We start hot, which is crucial for setting the structure of that buttery crust quickly. So, you start by baking at 400°F (200°C) for about 20 minutes. Then, just like turning down the heat to let any cake bake through, we drop the oven temp down to 375°F (190°C) for the remaining 35 to 45 minutes. This prevents the top from burning while allowing the fruit filling the time it needs to simmer and bubble thickly. It works like a charm every time for my easy summer pie!
PrintThe Ultimate Strawberry Rhubarb Pie with Flaky Butter Crust (Tips for Perfect Filling)

This recipe gives you the best strawberry rhubarb pie, featuring a perfectly balanced sweet and tart filling and a ridiculously delicious, flaky butter crust. Follow these simple steps to achieve summer baking success.
- Prep Time: 45 min
- Cook Time: 65 min
- Total Time: 110 min
- Yield: 8 servings 1x
- Category: Dessert
- Method: Baking
- Cuisine: American
- Diet: Vegetarian
Ingredients
- 2 1/2 cups all-purpose flour
- 1 teaspoon salt
- 1 cup (2 sticks) cold unsalted butter, cut into cubes
- 1/2 cup ice water, plus more if needed
- 6 cups fresh rhubarb, cut into 1-inch pieces
- 4 cups fresh strawberries, hulled and halved
- 1 1/2 cups granulated sugar (adjust based on fruit tartness)
- 1/4 cup cornstarch (for thickening)
- 1 tablespoon lemon juice
- 1 teaspoon vanilla extract
- 1 large egg, beaten with 1 teaspoon water (for egg wash)
- 1 tablespoon coarse sugar (for sprinkling)
Instructions
- Prepare the Pie Crust: In a large bowl, whisk together the flour and salt. Cut in the cold butter using a pastry blender or your fingers until the mixture resembles coarse crumbs with some pea-sized pieces of butter remaining. Gradually add the ice water, one tablespoon at a time, mixing until the dough just comes together. Do not overmix. Divide the dough in half, form each half into a disk, wrap in plastic, and chill for at least 1 hour.
- Prepare the Filling: In a separate large bowl, gently combine the rhubarb pieces and strawberries. In a smaller bowl, whisk together the granulated sugar, cornstarch, lemon juice, and vanilla extract. Pour the sugar mixture over the fruit and toss gently to coat everything evenly. Let the filling sit for 15 minutes while you roll out the dough.
- Assemble the Pie: Preheat your oven to 400°F (200°C). On a lightly floured surface, roll out one disk of dough into a 12-inch circle. Carefully transfer the dough to a 9-inch pie plate. Trim the edges, leaving a 1-inch overhang. Pour the fruit filling into the crust.
- Create the Top Crust: Roll out the second disk of dough. You can cut strips for a lattice crust or place the whole circle over the filling. If using a full top crust, cut several slits in the top to allow steam to escape. Crimp the edges of the top and bottom crusts together to seal.
- Bake: Brush the top crust with the egg wash and sprinkle with coarse sugar. Place the pie on a baking sheet (to catch drips). Bake at 400°F (200°C) for 20 minutes. Reduce the oven temperature to 375°F (190°C) and continue baking for another 35 to 45 minutes, or until the crust is golden brown and the filling is bubbling thickly.
- Cool Completely: This step is critical for a set filling. Let the pie cool on a wire rack for at least 4 hours before slicing. This allows the cornstarch to fully set the juices.
Notes
- For an extra flaky pie crust, keep all butter and water extremely cold. Do not let the butter melt while mixing.
- If the edges of your crust start browning too quickly during baking, cover them loosely with aluminum foil strips.
- If you prefer a crumble topping instead of a top crust, prepare a standard streusel topping and sprinkle it over the filling before baking.
Nutrition
- Serving Size: 1 slice
- Calories: 450
- Sugar: 35g
- Sodium: 250mg
- Fat: 25g
- Saturated Fat: 15g
- Unsaturated Fat: 10g
- Trans Fat: 0g
- Carbohydrates: 55g
- Fiber: 3g
- Protein: 5g
- Cholesterol: 60mg