
If you’re anything like me, sometimes you just need a dessert that screams indulgence but doesn’t require you to stand over a hot stove for an hour. That’s where the magic of the best no-bake recipes comes in! Today, we’re diving into a true legend: the **Million Dollar Pie**. This isn’t just any pie; it’s a classic, creamy Southern favorite that packs a punch of flavor without ever seeing an oven. When I started DeliceRecipe, my goal, just like my grandmother taught me, was to share reliable food that tastes incredible. And trust me, this pie absolutely delivers on its high-end name with simple ingredients you probably already have.
- Why This Old-Fashioned Million Dollar Pie is a Home Cook Favorite
- Gathering Ingredients for Your Million Dollar Pie
- Step-by-Step Instructions for the No Bake Pie Recipe
- Tips for the Perfect Million Dollar Pie Success
- Variations on the Classic Southern Pie
- Serving Suggestions for This Creamy Dessert
- Storage and Reheating Instructions for Your Make Ahead Dessert
- Frequently Asked Questions About Million Dollar Pie
- Nutritional Estimate for One Slice of Million Dollar Pie
- Nutritional Estimate for One Slice of Million Dollar Pie
Why This Old-Fashioned Million Dollar Pie is a Home Cook Favorite
Honestly, the reason this dessert has stuck around forever is because it does all the heavy lifting without turning on the oven. It’s the ultimate easy summer pie when you just can’t deal with the heat. You get this gorgeously rich and fluffy pie that tastes like it took days, but we’re talking about maybe 20 minutes of active work. That’s the kind of recipe I want in my rotation, especially when I’m asked to bring a dish to an impromptu gathering. It travels well, it chills beautifully, and it never, ever gets left behind on the table at a potluck!
Quick Prep Time for Your Million Dollar Pie
Seriously, this is the definition of a quick dessert recipe. When I say 20 minutes of active time, I mean it. You’re mixing up a crust, beating a few things together, folding gently, and then the refrigerator handles the rest of the work. If you’re bringing this to a party later that evening, getting the crust done first thing in the morning means you have nothing to worry about but making sure you packed a good serving spatula!
The Creamy Texture: A True Cream Cheese Dessert
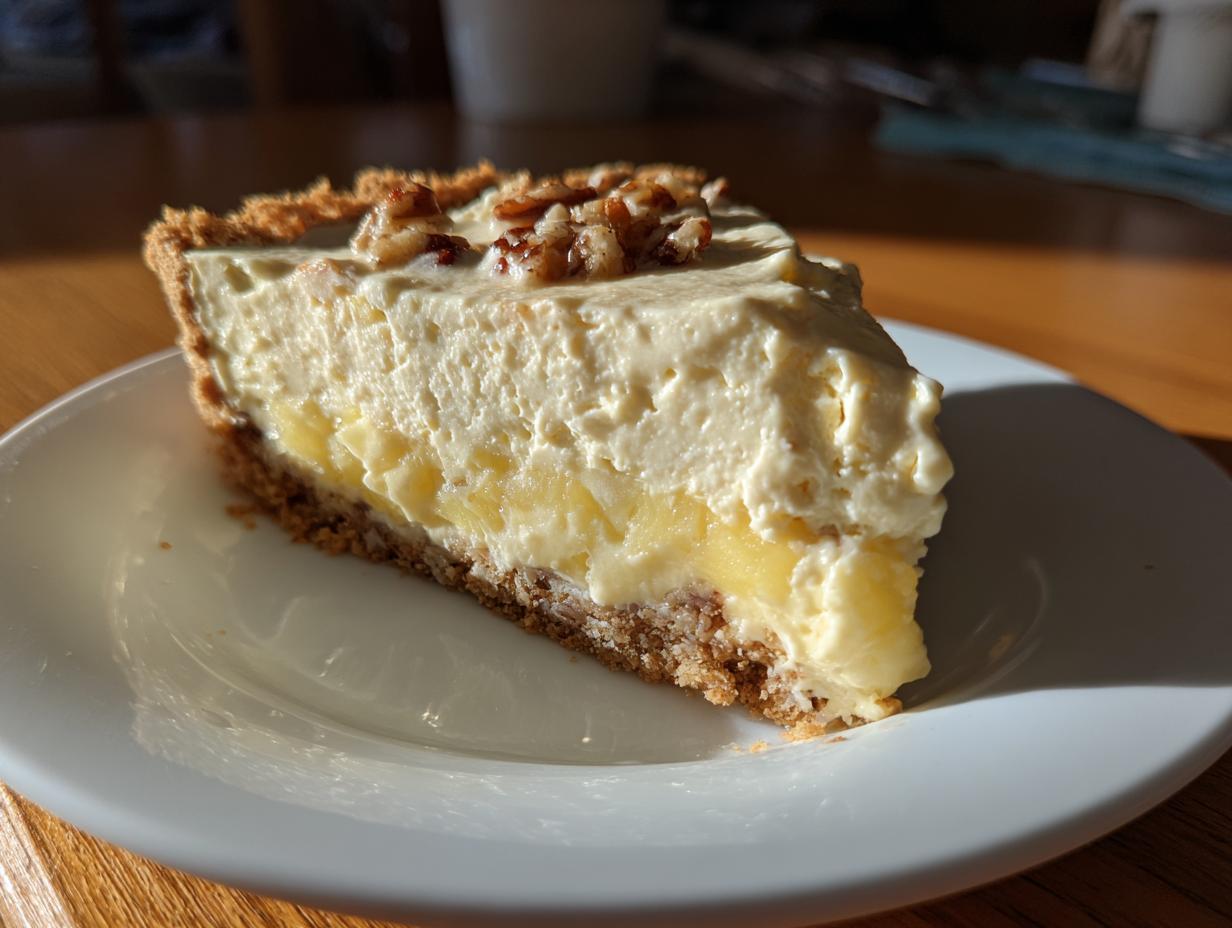
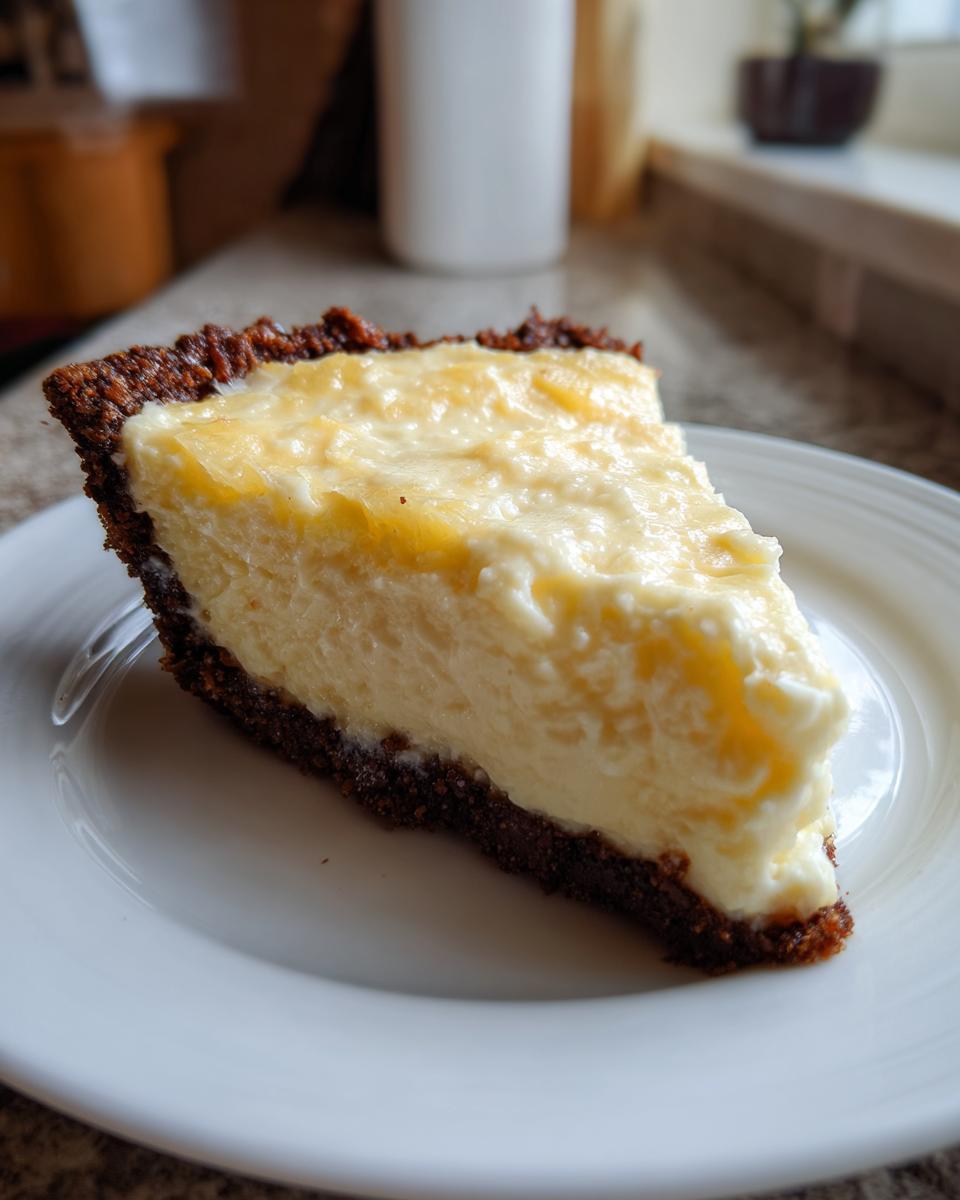
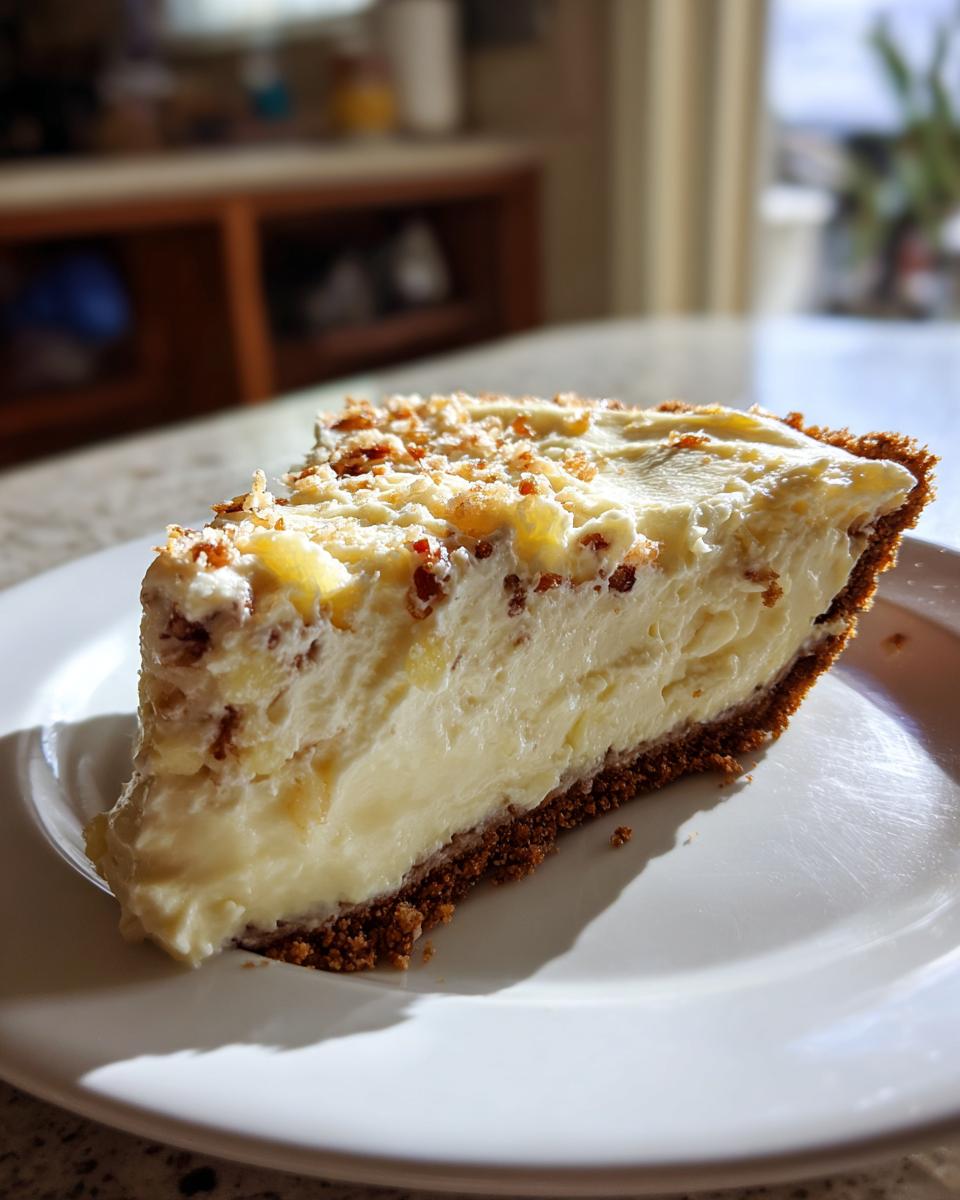
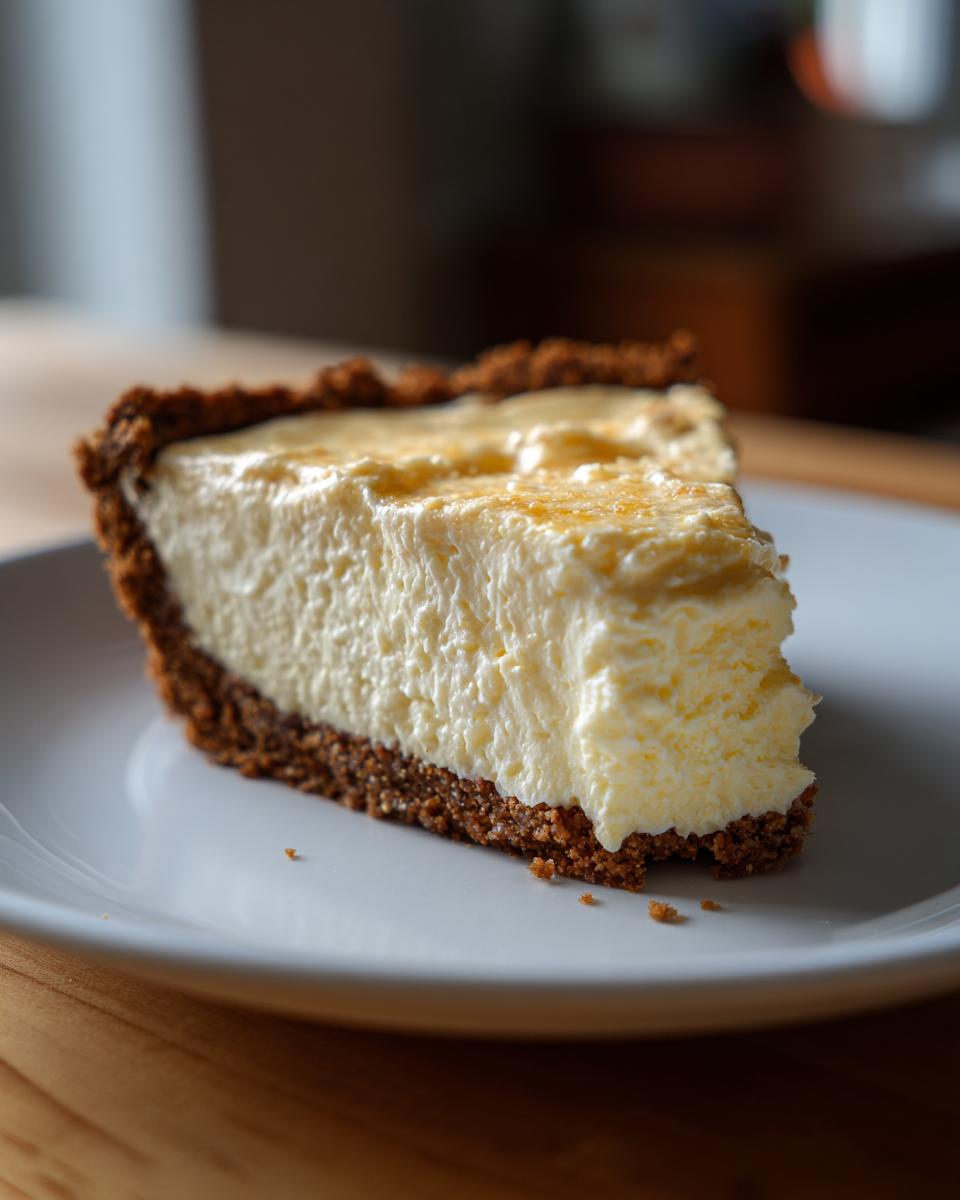
What elevates this above just a simple pudding pie? It’s that amazing tang and stability we get from the cream cheese paired with the sheer sweetness of the condensed milk. That foundation is what makes this a standout cream cheese dessert. It sets up so beautifully firm—not stiff like a cheesecake, but perfectly sliceable and unbelievably smooth. It’s that perfect contrast to the crunch of the pecans, which is why everyone goes back for a second slice.

Gathering Ingredients for Your Million Dollar Pie
Okay, before we get mixing—and trust me, you’re going to want to mix this immediately—we need to talk ingredients. This is where our **Million Dollar Pie** really earns its name because the flavor payoff is huge, but gathering the supplies is easy. Since this is a no-bake recipe, ingredient preparation is key! You want to make sure your cream cheese is soft enough to be completely smooth, and your pineapple? It has to be drained like there’s no tomorrow. I learned that lesson the hard way once; a little extra liquid turns this dreamy filling into a soupy mess!
When you look at the list, notice we’re using real butter and good cream cheese. These aren’t places to skimp; they give us that incredibly rich body we’re aiming for. I always keep the toasted pecans ready for topping because a little crunch always beats a flat texture, right? You can check out my tips for making moist pumpkin bread, but the same principle applies here: quality base ingredients make the finished product shine.
For the Graham Cracker Crust Dessert Base
The crust is simple, buttery, and the perfect anchor for all that creamy goodness. Here’s what you’ll need just for the base:
- 1 1/2 cups graham cracker crumbs (a full sleeve of crackers!), crushed fine
- 1/4 cup granulated sugar (to balance the butter)
- 6 tablespoons unsalted butter, melted (this is the glue!)
Mix this until it looks like wet sand, press it in tight, and give it a quick freeze while you work on the star of the show.
For the Rich and Fluffy Million Dollar Pie Filling
Now for the magic that makes this a genuine **Million Dollar Pie**. Have these items ready before you even touch the mixer:
- 8 ounces cream cheese, softened (get this out early!)
- 1 (14 ounce) can sweetened condensed milk (don’t substitute this, please!)
- 1/2 cup crushed pineapple, well drained (I mean *really* well drained)
- 1 teaspoon vanilla extract (pure vanilla always tastes better)
- 1 cup heavy whipping cream, cold (must be cold for whipping!)
- 1/2 cup chopped pecans, toasted, plus more for topping
See? Nothing complicated, but that combination is pure alchemy when you bring it all together!
Step-by-Step Instructions for the No Bake Pie Recipe
Okay, the mixing begins! Follow these steps precisely, and you’ll have the best no bake pie recipe you’ve ever tried. Remember, this isn’t baking; it’s assembly, so taking your time on the mixing steps keeps the texture light and airy instead of dense and sad. We want light and fluffy, not cement! If you want a head start on another classic base, I always talk about getting a good flaky butter pie crust ready, but for this one, we stick to the crumbs.
Preparing the Graham Cracker Crust Dessert
First things first: we need that crust chilled hard. Take the graham cracker crumb mixture we made and press it firmly into the bottom and all the way up the sides of your 9-inch pie plate. I use the bottom of a measuring cup to really pack it in tight—we don’t want any gaps where the yummy filling can seep out. Once it’s packed like concrete, pop that entire plate into the freezer for at least 15 minutes while you handle the filling. That chilling period helps it set up so it doesn’t crumble away when slicing later.
Creating the Condensed Milk Dessert Base
Grab a big bowl for this part. Your very first move needs to be beating that softened cream cheese until it’s completely smooth—no lumps allowed! You absolutely must get it silky smooth *before* you start drizzling in that can of sweetened condensed milk. Once they are combined into one cohesive, thick base, gently mix in your vanilla extract and that well-drained crushed pineapple. Keep mixing just until everything barely comes together. We’re building flavor here, but we’re not developing tough gluten, so don’t overdo it!
Folding for a Rich and Fluffy Pie Finish
This is where most people rush, but don’t! In a separate, clean bowl, whip your cold heavy whipping cream until you have stiff peaks—when you lift the whisk, the peaks should stand straight up. Now, take about a third of that whipped cream and gently fold it into the cream cheese mixture. This “lightening” step makes the final folding seamless. Then, fold in the rest of that beautiful whipped cream—go easy! You just want to incorporate it. Finally, fold in your 1/2 cup of toasted pecans. That’s it! Spoon this gorgeous, rich and fluffy pie filling right into your frozen crust and smooth the top. Then, cover it loosely and let the fridge work its magic for at least four hours. Don’t peak!
Tips for the Perfect Million Dollar Pie Success
You know, even with a great recipe, little details make the difference between a good pie and that show-stopping **Million Dollar Pie** everyone talks about for weeks. Because we aren’t baking this treasure, technique around temperature and moisture is everything. This is why I love sharing these extra pointers; they turn a simple recipe into a proven, reliable make ahead dessert masterpiece. Once you get these few things down, you’ll never worry about a runny filling again!
I remember the first time I rushed the pineapple draining. Oh boy. I thought a quick squeeze in the strainer was enough. Nope! The resulting pie was delicious, but it seeped right into the crust, making that gorgeous base soggy. Since then, I’ve stopped messing around. Now? I press that crushed pineapple between layers of thick paper towels until hardly any juice comes out. That dry fruit is essential for a firm set!
Ingredient Preparation for Best Results
For the filling, treat your ingredients right! Your cream cheese absolutely must be soft—I mean room temperature soft—so you can whip it until it’s airy before you add that thick condensed milk. If there’s a single hard lump in there, it will translate to a lump in your finished pie, and that’s just not luxurious, is it? Also, remember that heavy whipping cream needs to be ice cold. Cold cream whips up faster and holds those stiff peaks way better than anything that’s even slightly tepid.
Achieving the Ideal Set Time
Patience, darling, patience! That four-hour minimum chill time isn’t a suggestion; it’s mandatory. The chilling process is what allows the stabilizers in the cream cheese and condensed milk to firm up around the air bubbles from the whipped cream. If you cut it short, you risk structural collapse when you try to slice it. Cover it loosely with plastic wrap so it doesn’t get any weird fridge smells, and let it sit undisturbed. That cold, firm slice waiting for you is totally worth the wait!
Variations on the Classic Southern Pie
While my heart belongs to the pineapple and pecan version—that’s the authentic path my family always took for this classic Southern pie—I know sometimes you want to shake things up a little! This recipe is so dependable because it is built on a fantastic, creamy foundation that can handle a few tweaks. You can easily swap out some things and still have a showstopper ready for dessert. It’s all about using that same rich base to showcase different flavors.
Substituting Fruit in Your Million Dollar Pie
If you’re absolutely sick of pineapple, or maybe you just want something a little more festive, the notes mention a fantastic switch! You can ditch the pineapple entirely and use 1 cup of drained maraschino cherries instead. Now, you have to drain those cherries really, really well—we don’t want red liquid leaking everywhere. But when you fold those bright red beauties in, you get this vibrant, slightly almond-tinged flavor that’s just wonderful. It feels extra fancy, like something you’d serve at Easter!
I’ve also seen folks add shredded coconut right along with the pecans. You get a little tropical vibe there, which is lovely. For a truly decadent twist, you can even mix in some mini chocolate chips! I try to stick closer to my roots, but honestly, this base is so reliable, you can experiment a little bit. If you’re curious about other coconut treats, you should check out my recipe for coconut poke cake; it has that same sweet, creamy vibe but in cake form!
Serving Suggestions for This Creamy Dessert
Now that you have this stunning, chilled, and perfectly set **Million Dollar Pie**, what do you serve alongside it? Because this is such a creamy dessert—rich with cream cheese and condensed milk—you want pairings that cut through that richness without fighting the lovely pineapple and pecan notes. Frankly, it’s so good it can stand alone, but serving it up just right makes the whole experience feel extra special.
When I take this to a church dinner or a summer barbecue, I usually focus on pairing it with something very light in texture or something bright in flavor. For instance, a scoop of vanilla ice cream just doesn’t do it justice, you know? It’s already so cold and rich, packing ice cream next to it feels redundant.
Instead, think about a palate cleanser! A side of lightly warmed cinnamon applesauce is surprisingly wonderful. I know, it sounds odd, but the slight tartness and warmth of the spice contrast beautifully with the cool, sweet filling. You can learn how I make easy stovetop cinnamon applesauce; it comes together quicker than the pie chills!
And of course, we have to talk drinks. You need something to sip on when you take that first decadent bite. Forget heavy sodas. I always serve this with either strong, black iced tea—unsweetened, please!—or a very mild, medium-roast hot coffee. The slight bitterness of the coffee or the briskness of the tea just refreshes your palate between bites of that sweet, sweet pie. It just makes the whole dessert sing!
Storage and Reheating Instructions for Your Make Ahead Dessert
This **Million Dollar Pie** is truly the champion of the make ahead dessert world, isn’t it? Since we’re dealing with a cream-based filling and no eggs cooked into a structure, pretty much all of the storage instruction revolves around keeping it cold and covered. You absolutely cannot reheat this pie; putting it in the oven would result in a sweet, rapidly melting puddle of disappointment on your counter, so please skip that idea entirely!
The great news is that this beauty actually tastes *better* the next day because the graham cracker crust absorbs just a tiny bit of moisture from the filling, making it tender on the bottom edge, which I personally love. If you look at my recipe for easy tiramisu recipe, you know how chilling time really benefits creamy desserts, and this is the same situation.
When you wrap it up, you need to be gentle. Because the top is covered in those toasted pecans, you can’t just slap plastic wrap right onto the surface. That will just stick to the nuts and pull them right off when you unwrap it! Instead, I cover the pie plate loosely with plastic wrap, making sure there’s a good inch or two of air gap between the wrap and the top of the pie. It gives the pecans room to breathe while still protecting the filling from drying out or absorbing any unwanted fridge smells.
Stored this way, tightly covered in the refrigerator, this pie will stay perfectly fresh and sliceable for about three to four days. Any longer than that, and the texture starts to degrade a bit, and those pecans lose their crunch. But honestly? With how good this **Million Dollar Pie** tastes, I’ve never had leftovers past day two. You’ll want to get it chilling right after you finish assembling it, especially if you’re serving it the next day!
Frequently Asked Questions About Million Dollar Pie
I know when you’re making something this wonderfully rich, you’re going to have questions. That’s totally normal! My job here at DeliceRecipe is to make sure you feel completely confident when you start mixing. Since this is such a loved, classic recipe, most folks are wondering about structural integrity—which makes total sense when you’re relying on chilling instead of baking. I’ve gathered up the questions I get most often about this easy, creamy treat. If you’ve got a sugary query, I bet it’s answered right here!
Can I use a pre-made crust for this no bake pie recipe?
Absolutely! That’s the beauty of a lightning-fast no bake pie recipe—we want to keep things simple when we can. If you are truly pressed for time, go ahead and grab an already-made graham cracker crust from the store. Just make sure it’s a 9-inch size! If you use a pre-made crust, you can skip step one entirely (mixing crumbs, butter, and chilling) and jump straight to beating that cream cheese. It saves you about 10 minutes of active time, meaning you get to that fridge faster. You should still chill it for that 15 minutes before filling though, just to make sure it’s firm.
What makes this pineapple pecan pie set without baking?
That’s the million-dollar question, isn’t it? You might think anything that creamy needs the oven, but nope! The stability in this pineapple pecan pie comes entirely from chilling the chemistry of the rich ingredients. The secret is the pairing of the softened cream cheese and the thick, sugary sweetened condensed milk. When you whip them together, you create a thick matrix. Then, when you gently fold in the whipped heavy cream—which is full of air—that air gets suspended in the cream cheese base. When it chills in the fridge, that suspension firms up completely. It’s magic, but really, it’s science, darling! That’s why draining that pineapple so thoroughly in my instructions is so vital; water interferes with that dairy structure!
How long can I keep this old fashioned pie recipe refrigerated?
This is a fantastic make ahead dessert, which is why I love it for holiday gatherings! Because this **Million Dollar Pie** relies on fresh dairy—the cream cheese and the whipped cream—it’s best enjoyed when it’s freshest. If you cover it loosely like I mentioned (so the plastic doesn’t stick!), it will hold up beautifully in the refrigerator for a solid 3 to 4 days. After day four, the texture starts to soften just a bit, and the pecans definitely lose some of that glorious snap. My advice? Make it the day before you plan to serve it for the absolute best texture. If you’re curious about how to keep other things fresh, I talk about icing storage over on my post about hard-setting cookie icing!
Nutritional Estimate for One Slice of Million Dollar Pie
Now, let’s talk numbers for a second. When you have a dessert this rich—made with cream cheese, butter, and sweetened condensed milk—you know it’s going to be decadent, and the nutrition label reflects that luxury! Please just remember that these numbers are estimates based on my standard recipe using toasted pecans; if you use coconut or chocolate, the counts will shift a bit. I’m sharing this just for rough counting, not as a strict health decree. Because we need to cover all our bases here at the blog, here’s the breakdown for one generous slice of this wonderful southern classic:
- Calories: approximately 410 per slice
- Fat: around 24g
- Carbohydrates: 45g
- Protein: about 6g
See? It’s definitely in the “enjoy in moderation” zone, but honestly, one slice of this creamy goodness is all you need. It truly tastes like a million bucks!
Nutritional Estimate for One Slice of Million Dollar Pie
Now, let’s talk numbers for a second. When you have a dessert this rich—made with cream cheese, butter, and sweetened condensed milk—you know it’s going to be decadent, and the nutrition label reflects that luxury! Please just remember that these numbers are estimates based on my standard recipe using toasted pecans; if you use coconut or chocolate, the counts will shift a bit. I’m sharing this just for rough counting, not as a strict health decree. Because we need to cover all our bases here at the blog, here’s the breakdown for one generous slice of this wonderful southern classic:
- Calories: approximately 410 per slice
- Fat: around 24g
- Carbohydrates: 45g
- Protein: about 6g
See? It’s definitely in the “enjoy in moderation” zone, but honestly, one slice of this creamy goodness is all you need. It truly tastes like a million bucks! If you’re looking for something lighter next time, maybe check out my creamy, healthy banana smoothie. But for this pie? You just embrace the richness!
PrintOld-Fashioned No-Bake Million Dollar Pie with Pineapple and Pecans

Make this rich and creamy Million Dollar Pie without turning on your oven. This classic Southern dessert uses a graham cracker crust, cream cheese, condensed milk, pineapple, and pecans for a quick, indulgent treat.
- Prep Time: 20 min
- Cook Time: 0 min
- Total Time: 4 hr 20 min
- Yield: 8 servings 1x
- Category: Dessert
- Method: No-Bake
- Cuisine: American
- Diet: Vegetarian
Ingredients
- 1 1/2 cups graham cracker crumbs
- 1/4 cup granulated sugar
- 6 tablespoons unsalted butter, melted
- 8 ounces cream cheese, softened
- 1 (14 ounce) can sweetened condensed milk
- 1/2 cup crushed pineapple, well drained
- 1 teaspoon vanilla extract
- 1 cup heavy whipping cream, cold
- 1/2 cup chopped pecans, toasted, plus more for topping
Instructions
- Prepare the crust: In a medium bowl, mix the graham cracker crumbs and 1/4 cup sugar. Pour in the melted butter and stir until the crumbs are evenly moistened. Press the mixture firmly into the bottom and up the sides of a 9-inch pie plate. Place the crust in the freezer while you prepare the filling.
- Make the cream cheese base: In a large bowl, beat the softened cream cheese with an electric mixer until it is smooth and fluffy. Gradually beat in the sweetened condensed milk until fully combined.
- Add flavorings: Mix in the well-drained crushed pineapple and vanilla extract until just combined.
- Whip the cream: In a separate, clean bowl, beat the cold heavy whipping cream until stiff peaks form.
- Fold together: Gently fold about one-third of the whipped cream into the cream cheese mixture to lighten it. Then, fold in the remaining whipped cream until no streaks remain. Be careful not to deflate the mixture.
- Add nuts: Fold in the 1/2 cup of chopped pecans.
- Assemble the pie: Spoon the filling evenly into the chilled graham cracker crust. Smooth the top with a spatula.
- Chill: Cover the pie loosely with plastic wrap and refrigerate for at least 4 hours, or until the filling is firm.
- Serve: Before serving this rich and fluffy pie, sprinkle the top with extra toasted pecans. Slice and serve cold.
Notes
- Drain the crushed pineapple very well; excess liquid will prevent the filling from setting properly. Press it between paper towels if needed.
- For a slightly different flavor, you can substitute the pineapple with 1 cup of drained maraschino cherries.
- If you do not have heavy cream, you can substitute with 1 cup of frozen whipped topping (like Cool Whip), thawed, folding it in at the end.
Nutrition
- Serving Size: 1 slice
- Calories: 410
- Sugar: 35g
- Sodium: 280mg
- Fat: 24g
- Saturated Fat: 14g
- Unsaturated Fat: 10g
- Trans Fat: 0.5g
- Carbohydrates: 45g
- Fiber: 1g
- Protein: 6g
- Cholesterol: 65mg