
If you’re anything like me, you’ve stood over a roasting pan dealing with the age-old chicken dilemma: the breast meat is dry as sawdust, but you still haven’t reached a safe temperature in the thick thigh joint. It’s frustrating, right? We want that picture-perfect, golden-brown roast chicken, but that traditional shape just makes the thighs and breasts cook at completely different speeds. Well, I’m here to tell you to trust me on this shift. We’re ditching the awkward mound shape and embracing the absolute game-changer: learning how to spatchcock chicken. Flattening the bird—or butterflying it, as some call it—is the secret professional chefs use to guarantee amazingly crispy skin and an unbelievably juicy whole chicken recipe, often cutting your cook time in half. Say goodbye to uneven roasting!
- Why You Should Always Use the Spatchcock Chicken Method
- Essential Tools for Your Spatchcock Chicken Recipe
- Ingredients for Ultimate Lemon Herb Spatchcock Chicken
- How to Prepare and Spatchcock Chicken Step-by-Step
- Roasting Your Spatchcock Chicken for Perfect Results
- Tips for Achieving Ultimate Crispy Skin Roast Chicken
- Spatchcock Chicken Variations and Flavor Profiles
- Serving Suggestions for Your Spatchcock Chicken Dinner
- Frequently Asked Questions About Spatchcock Chicken
Why You Should Always Use the Spatchcock Chicken Method
I realize that cutting a chicken open might sound a little intimidating at first. When I first learned this technique, I worried I’d ruin the bird! But truly, learning to spatchcock chicken is the single best kitchen hack you’ll ever adopt for poultry. The main reason is physics, plain and simple. When you lay the chicken flat, the legs and thighs—the parts that need more heat and time—are exposed directly to the oven’s heat. This means you get an even cooked chicken from edge to edge.
Forget those long, two-hour roasting times! Because the chicken is lying flat, the heat penetrates faster. We’re talking about a total cook time that often nets you a tender, juicy whole chicken recipe ready in under an hour. And the skin? Oh, the skin is the real reward. Since the entire breast and back are exposed to dry heat, you achieve the most spectacular, shatteringly crispy skin roast chicken you can imagine. It truly transforms the meal from a standard Sunday roast into something that tastes like you pulled it straight from an expensive restaurant!
Essential Tools for Your Spatchcock Chicken Recipe
Okay, before we start cutting into this bird, let’s make sure your kitchen has the right gear. You don’t need a ton of fancy gadgets for this, which is why I love this technique for a quick weeknight meal. But there is one tool that is absolutely non-negotiable if you want this to go smoothly. Trust me, trying to force your way through the bones with the wrong tool is just messy and frustrating!
The Key Tool: Sharp Kitchen Shears
You simply cannot effective learn how to spatchcock a chicken without a serious pair of kitchen shears. I mean, *sharp*. We are cutting through thin bone and cartilage here, and if your shears are dull, you’ll end up sawing away like you’re trying to cut lumber, not poultry. That sawing action can tear the meat and create jagged edges, which really messes up how the chicken lays flat.
My tip? If you have a pair of heavy-duty shears that you use for hacking herbs or cutting twine, save those for those jobs. Get yourself a dedicated, sturdy pair that opens wide, usually with a spring-loaded hinge. You’ll need to be able to get deep into the chicken cavity easily. If you’re worried about your wrist or hand strength, look for a pair designed for high leverage; it makes all the difference when you hear that satisfying *snap* as you cut through the spine!
Ingredients for Ultimate Lemon Herb Spatchcock Chicken
We’re keeping the seasoning bright and simple for this version, which is perfect for letting the flavor of that beautifully roasted chicken really shine through. Remember, having everything prepped before you start cutting is half the battle! You’ll need one whole chicken, and I always aim for around four pounds—it fits perfectly on a standard rimmed baking sheet. For the seasoning, we’re using just a little olive oil to help everything stick, along with dried oregano and thyme.
Don’t skip the essentials: a good tablespoon of kosher salt and black pepper really wakes up the flavor, supported by a teaspoon of garlic powder. Lastly, we’re using one fresh lemon, cut right in half, to tuck inside the cavity opening. This flavor combination is my go-to lemon herb chicken roast when company is coming over!
How to Prepare and Spatchcock Chicken Step-by-Step
This is where the magic happens, friends. I remember the first time I tried to spatchcock a chicken; I was so nervous about cutting! But honestly, once you see how much faster this cooks, you’ll never go back. Before we even touch the bird, make sure your oven is humming along at 425 degrees Fahrenheit with your center rack positioned correctly—this high heat is key for that crispy finish.
Removing the Backbone and Flattening the Bird
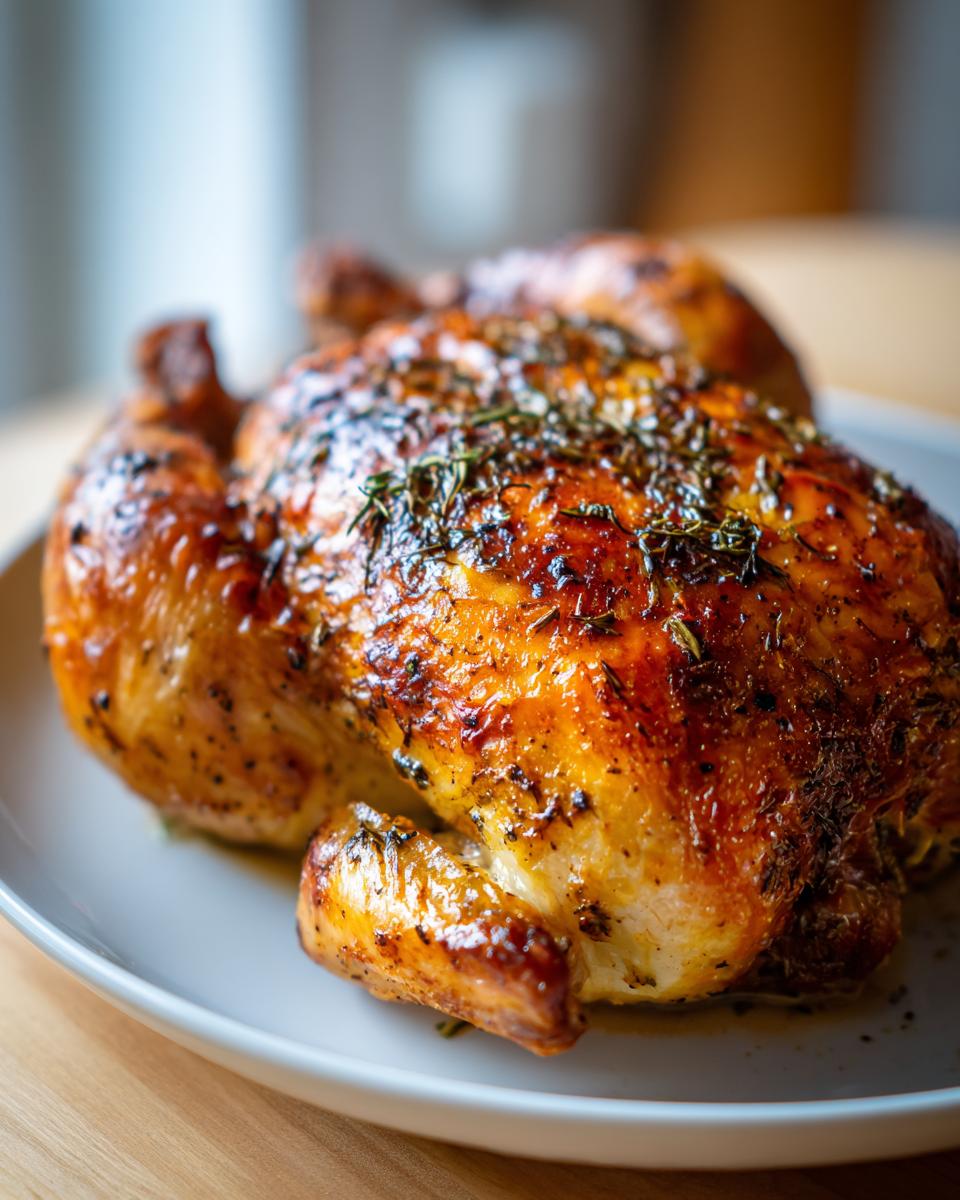
Grab your cutting board and place the chicken breast-side down. Find that spine, running right down the middle from tail to neck. Take your sharp shears and make a clean cut right along one side of that backbone. Keep going all the way up. You’ll repeat that cut on the other side to completely remove the backbone. Don’t toss it; save it for making a stock later! Now, flip your chicken over so it’s breast-side up. This takes a little muscle, but just press down really hard right on the middle of the breastbone. You’re looking for a distinct *crack* sound. Once it cracks, the bird will lie completely flat! Tuck those wing tips securely underneath so they don’t burn during roasting.
Applying the Best Spatchcock Seasoning Rub
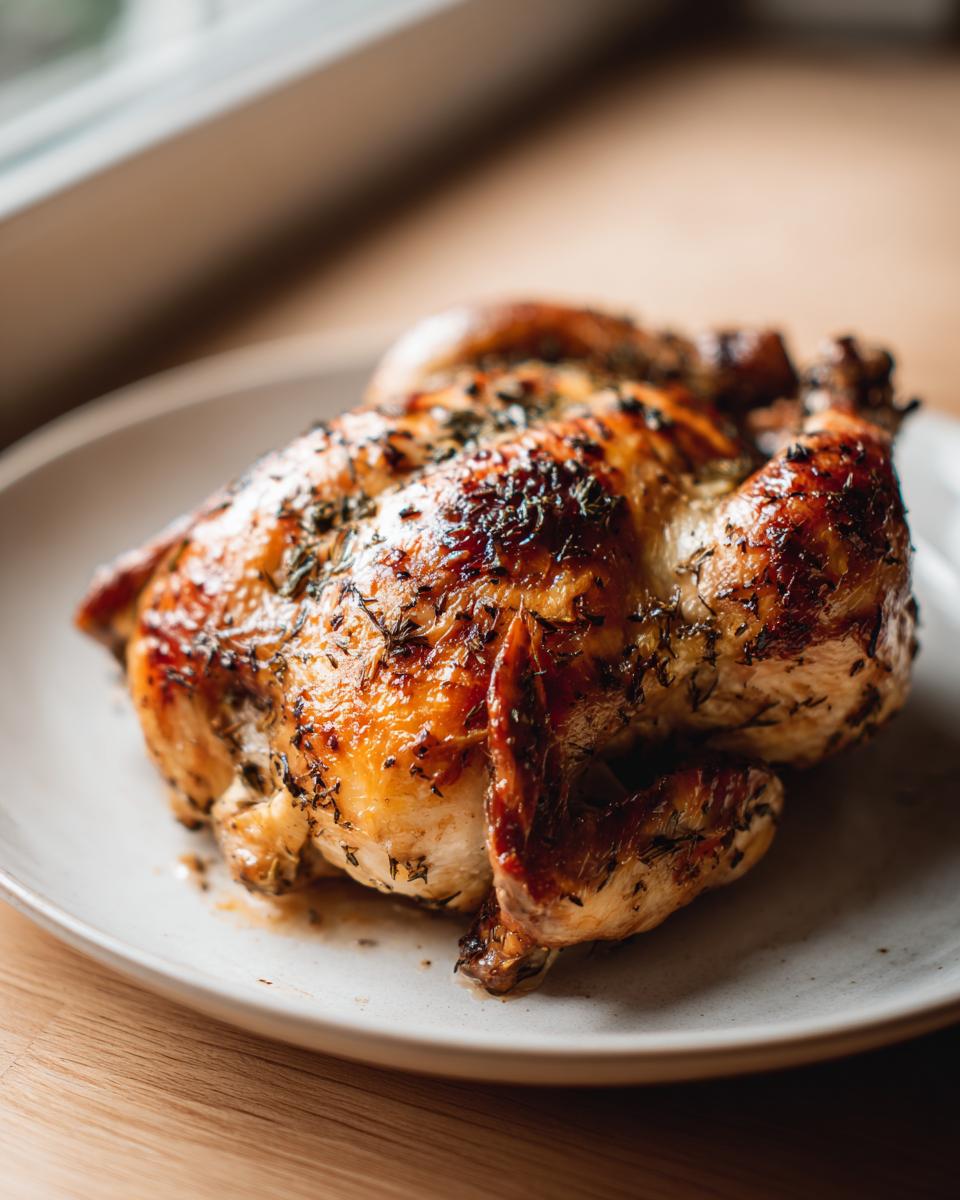
Now for the flavor! Take that olive oil and mix it vigorously with the oregano, thyme, salt, pepper, and garlic powder. This is the best spatchcock seasoning blend if you ask me. Take your time coating everything. I mean *everything*! The true secret to a juicy whole chicken recipe is working the rub *under* the skin over the breast meat. Gently lift the skin away from the breast and push some of that herb mixture directly onto the meat. That way, the inside stays flavorful while the outside gets crispy. Finally, shove those two lemon halves right into the cavity opening, put the whole thing on your rimmed baking sheet, and we’re ready for the oven!
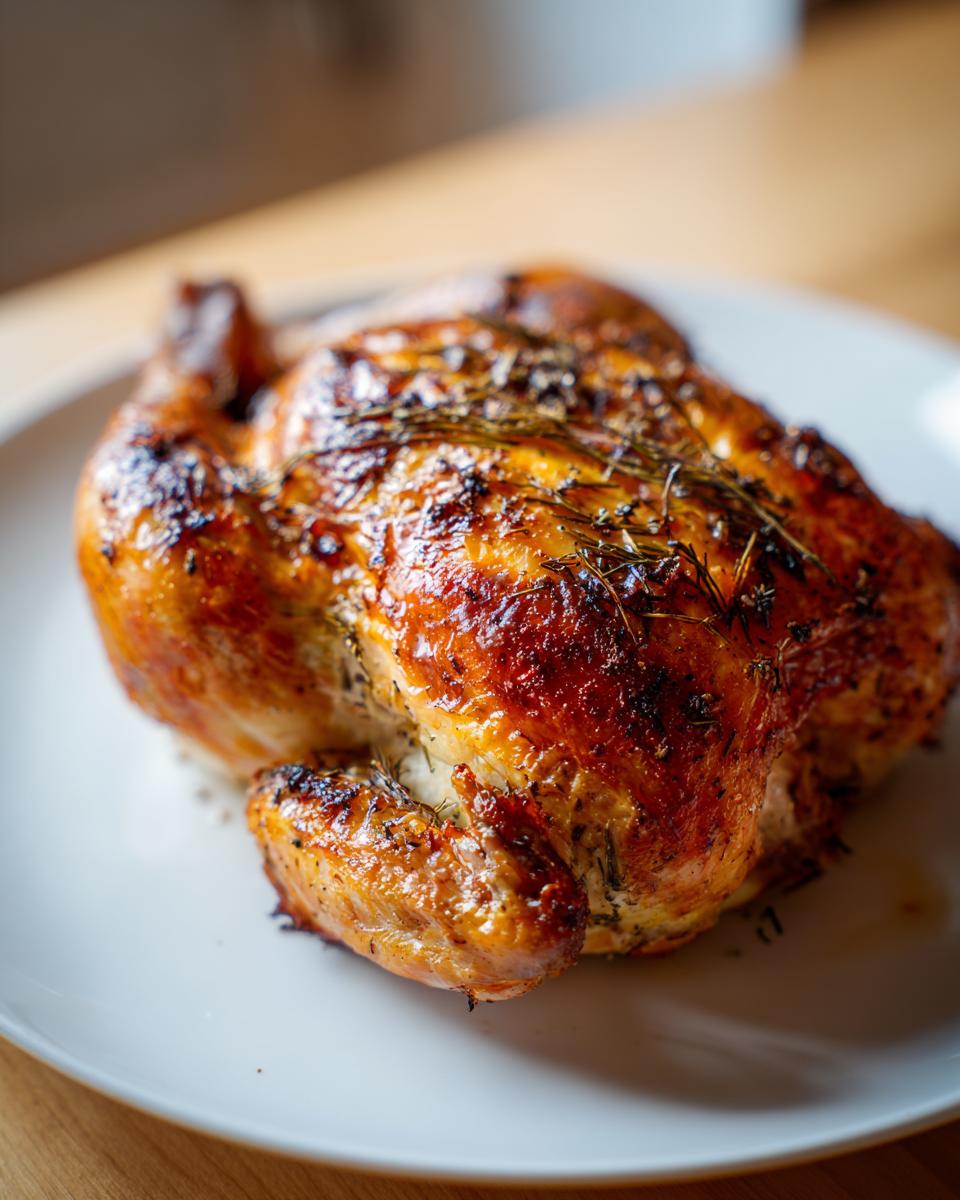
Roasting Your Spatchcock Chicken for Perfect Results
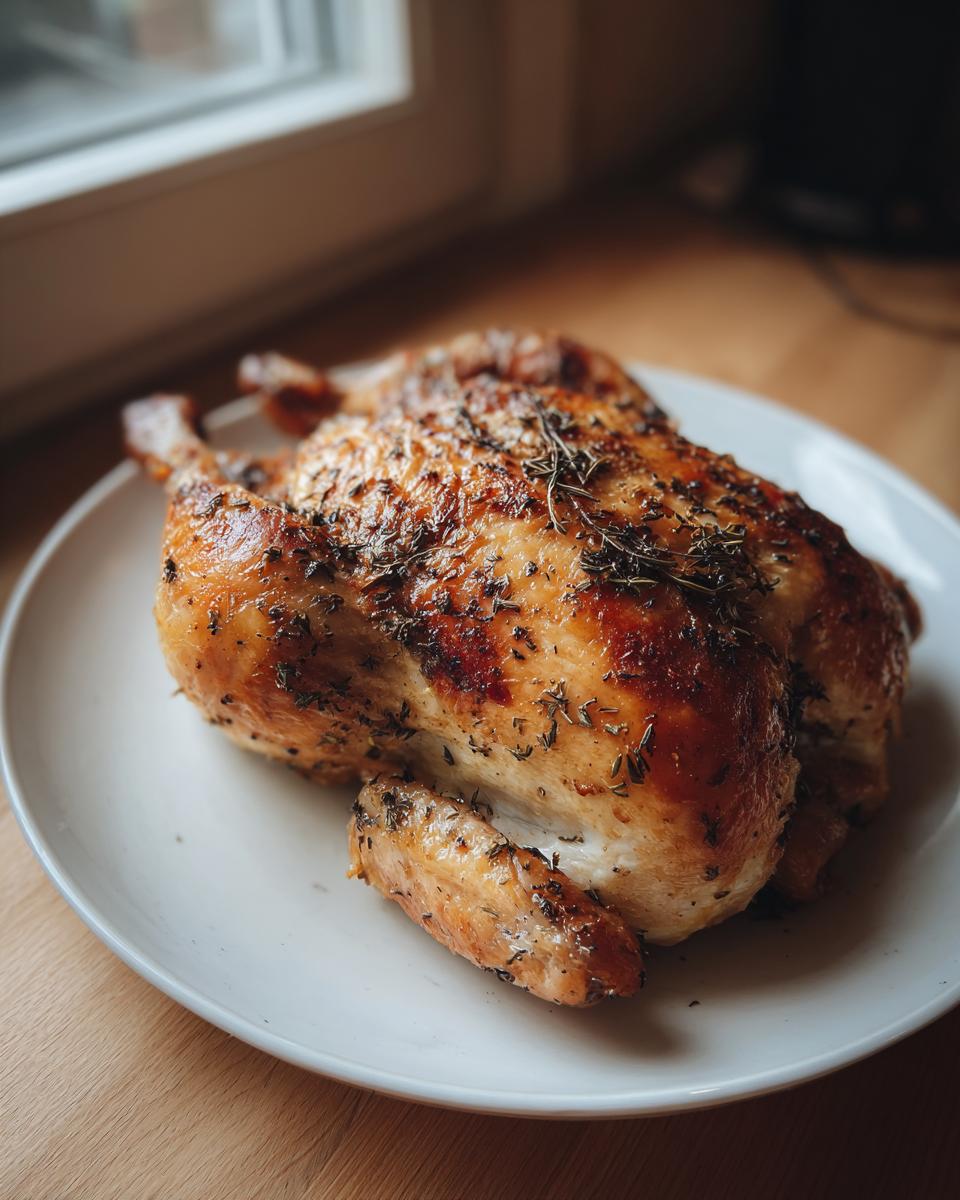
Alright, our beautifully butterflied chicken, seasoned and tucked in with those bright lemon halves, is ready for its main event! Because we took the time to flatten it out, we can hit it with some serious heat. Preheat that oven (if you haven’t already) to a nice hot 425 degrees Fahrenheit. This high temperature is a game-changer; it’s what helps render out that fat quickly and gets us to that gorgeous, even color we’re aiming for.
You’ll place that baking sheet right in the center of the oven. From here on out, it’s mostly hands-off, which is why this is such a great option for fast chicken dinner ideas! We are generally looking at 40 to 50 minutes total. However, don’t just trust the clock; trust your thermometer! You absolutely must check that internal temperature. Stick a good meat thermometer right into the thickest part of the thigh, making sure you aren’t touching any bone.
When that thermometer reads 165 degrees Fahrenheit, you’re done! Pull it out immediately. Resting is non-negotiable, even with this fast cooking method, so don’t skip the 10 minutes. If you are looking for alternative cooking methods that still focus on that crispy outcome, you might check out how others handle a cast iron spatchcock chicken—though this oven method is my personal favorite for reliability!
Tips for Achieving Ultimate Crispy Skin Roast Chicken
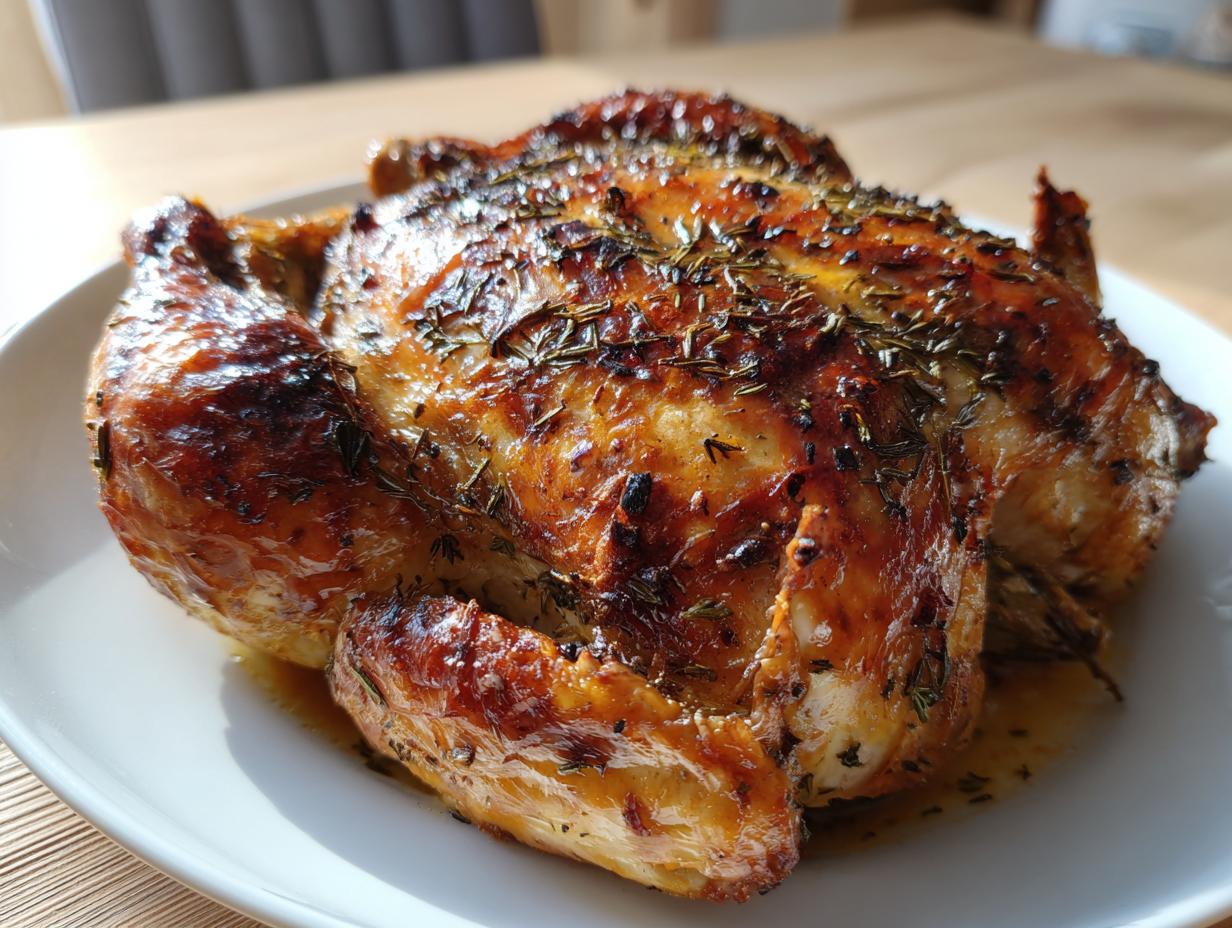
You put in all that work flattening the bird and applying the rub, so we absolutely have to nail the skin finish. Remember, the goal here is that ultimate crispy roast chicken texture!
Before you even think about seasoning, take a stack of paper towels and pat that chicken skin bone-dry. I mean aggressively dry. Any moisture left on the skin turns into steam in the oven and prevents that beautiful browning we want. That’s rule number one for great skin.
Rule number two, which I mentioned in my notes, is all about air circulation. If you have a wire rack that fits neatly inside your baking sheet, use it! Lifting the chicken even an inch off the pan lets hot air circulate completely around the bottom. This stops the underside from getting soggy while the top crisps up. It’s a small step that makes a huge difference in getting that crackly texture all over. If you’re looking for even more professional-level tips on roasting, checking out what others do with techniques like those shared on roast spatchcock chicken guides can give you more confidence!
Spatchcock Chicken Variations and Flavor Profiles
While I absolutely adore this bright lemon herb combination—it’s just classic, isn’t it?—one of the huge bonuses of the spatchcock chicken method is how versatile the seasoning becomes! Since we get such even cooking, you can really experiment with flavor without worrying about burning one part while another part undercooks.
If you want something bolder next time, try a smoky paprika rub. Mix smoked paprika, brown sugar (just a little for caramelization), onion powder, and a touch of cayenne. That gives you a deep, BBQ-style crust. Or maybe you’re feeling adventurous? A quick Asian glaze using soy sauce, grated ginger, garlic, and a drizzle of honey painted on during the last 15 minutes of roasting works wonders. The high heat helps the glaze set up beautifully. If you are looking for ideas that feature strong profiles, I saw a fantastic garlic-lime version that looked incredible over here—it shows just how flexible this simple base recipe is!
Serving Suggestions for Your Spatchcock Chicken Dinner
After you’ve rested that glorious, golden bird and carved your perfectly roasted chicken, you need sides that keep up with the pace! Because this recipe is designed as a fantastic weeknight roast chicken option, I usually stick to things that can finish cooking right alongside the bird, or things that don’t require any oven space at all.
Roasted potatoes are always a winner. If you toss them with a little olive oil, salt, and pepper, you can throw them onto the same baking sheet around the 25-minute mark, or just roast them separately until they are salty and crisp—try my recipe for crispy oven roasted potatoes. For something green and fresh to cut through the richness of the skin, I often toss together a simple arugula salad dressed with red wine vinegar and olive oil.
If you want something heartier that melts in your mouth, you simply can’t beat smooth mashed potatoes, like my recipe for creamy roasted garlic mashed potatoes. They soak up all those delicious pan juices beautifully!
Frequently Asked Questions About Spatchcock Chicken
I know that trying a new technique always brings up a few questions! Cooking a whole chicken can feel like a big deal, but I promise this method simplifies everything. I’ve pulled together some of the most common things folks ask me when they’re first trying out their very first roast. If you’re wondering if you can use a smaller bird or what on earth to do with the leftovers, pop your concern right here!
What temperature should I cook a spatchcock chicken to?
This is the most important question for safety and texture! To guarantee that you have perfectly cooked, safe meat that is still incredibly tender, you need a reliable instant-read thermometer. You’re aiming for 165 degrees Fahrenheit. Make sure you insert that probe deep into the thickest part of the thigh, making absolutely sure you’re not touching any bone underneath. Hitting that temperature means the darker meat is cooked just right without drying out the breast. That’s the key to making this a winning juicy whole chicken recipe every single time.
Can I make this spatchcock chicken recipe ahead of time?
Yes, you absolutely can do some prep work ahead of time to make your weeknight even faster! Now, you don’t want to actually *cut* the bird until the day you plan to cook it, just because the raw meat might dry out a bit in the fridge after being exposed. But what you *can* do is prepare that fantastic lemon herb rub, mix it up, and keep it covered at room temperature. Then, 24 hours before you plan to roast, you can apply the rub everywhere—under the skin and all over the outside. Keeping it refrigerated overnight after seasoning lets those herbs really sink into the meat. Just pull it out of the fridge about 45 minutes before it goes into the oven so it can warm up slightly!
Also, people often ask if they can grill this! The answer is a huge yes! Since the bird is flat, it grills beautifully over indirect heat. Just make sure your grill grates are clean and oiled, and keep the heat moderate so you don’t burn that beautiful crispy skin before the inside is cooked.
PrintUltimate Lemon Herb Spatchcock Chicken for Crispy Skin

Learn the simple technique to spatchcock a whole chicken for fast, even cooking. This recipe delivers incredibly juicy meat and perfectly crispy skin using a bright lemon herb seasoning, ready in under an hour.
- Prep Time: 15 min
- Cook Time: 45 min
- Total Time: 60 min
- Yield: 4 servings 1x
- Category: Dinner
- Method: Roasting
- Cuisine: American
- Diet: Low Fat
Ingredients
- 1 whole chicken (about 4 pounds)
- 2 tablespoons olive oil
- 1 tablespoon dried oregano
- 1 tablespoon dried thyme
- 1 tablespoon kosher salt
- 1 teaspoon black pepper
- 1 teaspoon garlic powder
- 1 lemon, halved
Instructions
- Preheat your oven to 425 degrees Fahrenheit. Place an oven rack in the center position.
- Place the chicken breast-side down on a sturdy cutting board. Locate the backbone running down the center of the chicken.
- Using strong kitchen shears, cut along one side of the backbone, from the tail end up to the neck cavity. Repeat this cut on the other side of the backbone to remove it completely. Discard the backbone or save it for stock.
- Flip the chicken over so it is breast-side up. Press down firmly on the center of the breastbone until you hear a crack and the chicken lies flat.
- Tuck the wing tips underneath the body of the chicken.
- In a small bowl, mix the olive oil, oregano, thyme, salt, pepper, and garlic powder to create the herb rub.
- Rub the herb mixture all over the chicken, making sure to get some under the skin over the breast meat. Place the lemon halves inside the cavity opening.
- Place the flattened chicken skin-side up on a rimmed baking sheet or a sturdy roasting pan.
- Roast for 40 to 50 minutes, or until a meat thermometer inserted into the thickest part of the thigh reads 165 degrees Fahrenheit.
- Remove the chicken from the oven and let it rest on a cutting board for 10 minutes before carving.
Notes
- To spatchcock, you need sharp kitchen shears to cut through the rib bones easily.
- For extra crispy skin, place the chicken on a wire rack set inside the baking sheet so air circulates underneath.
- If you want to cook vegetables, add them to the pan around the chicken during the last 25 minutes of roasting.
Nutrition
- Serving Size: 6 oz cooked meat
- Calories: 350
- Sugar: 0
- Sodium: 450
- Fat: 18
- Saturated Fat: 5
- Unsaturated Fat: 13
- Trans Fat: 0
- Carbohydrates: 0
- Fiber: 0
- Protein: 45
- Cholesterol: 150