
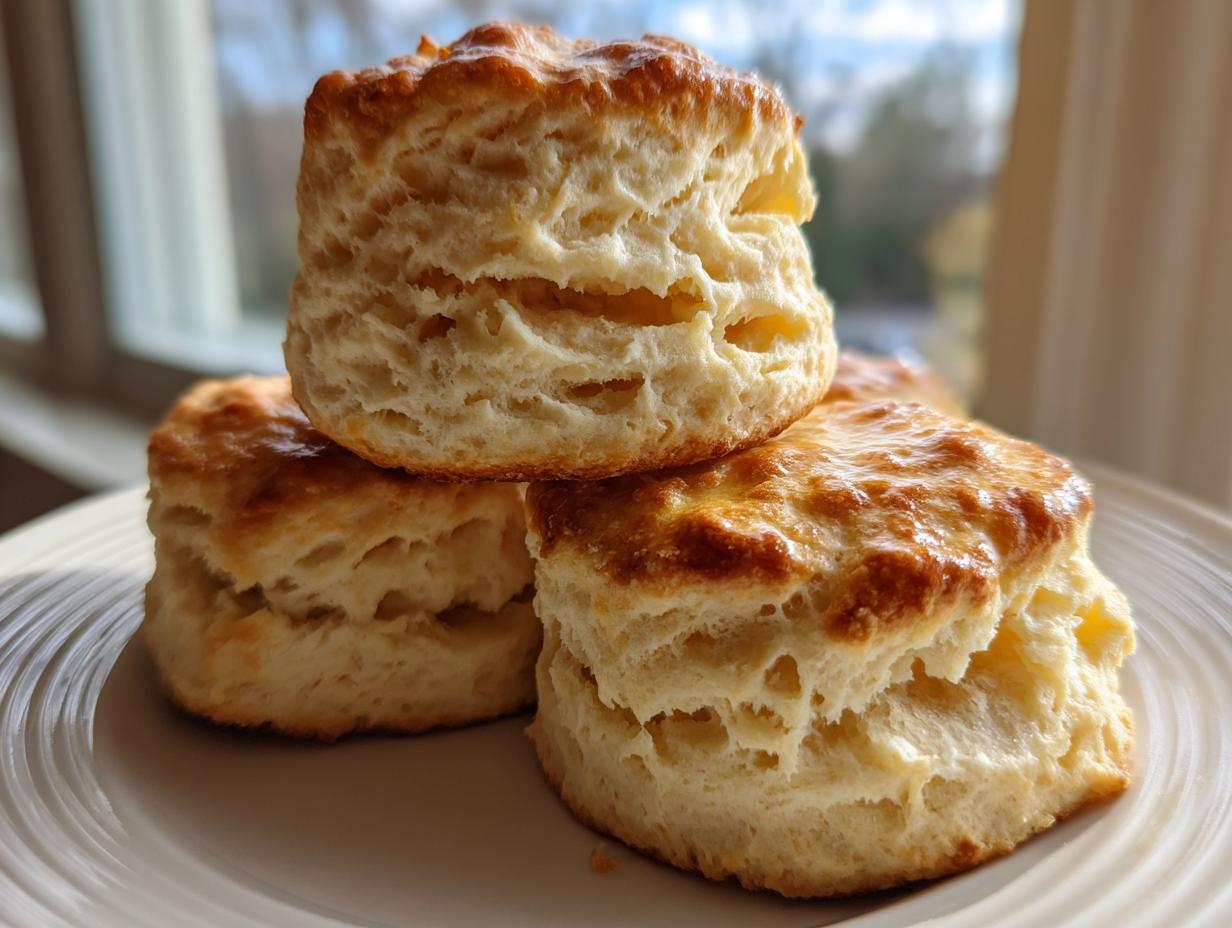
Oh, my friends, if you’ve ever dreamed of biting into a scone so tall, so buttery, and so perfectly flaky that you thought you had to buy it from a specialty coffee shop, stop dreaming right now! I promise you, achieving those incredible bakery results at home is easier than you think. This recipe, The Ultimate Bakery-Style Scones, is the one I always come back to. It’s my absolute favorite when I need a quick breakfast baking win but still want that ‘wow’ factor. As Eleanor Vance, I can tell you that I’ve tested these scones using every mixer, every oven—and they work every single time. You just need to keep a few things super cold, and we’ll get that beautiful rise!
- Why This Is The Best Homemade Scones Recipe You Will Ever Make
- Ingredients for The Ultimate Bakery-Style Scones
- How to Make Scones From Scratch: Step-by-Step Instructions
- Tips for Perfect Flaky Scones Every Time
- Customizable Scone Recipe: Flavor Variations
- Serving Suggestions for Your Classic Plain Scones
- Storage and Reheating Instructions for Scones
- Frequently Asked Questions About Making Scones
- Share Your Homemade Scones Creations
Why This Is The Best Homemade Scones Recipe You Will Ever Make
Look, I’ve made dense scones. I’ve made dry, crumbly rocks that just refuse to rise. It’s heartbreaking! But those days are over, trust me. This recipe nails the flaky scones technique because we focus on science—the right science for buttery tender scones. We aren’t messing around with room-temperature butter here; everything has to be ice-cold. That’s step one to true bakery style scones.
Here’s what sets this recipe apart:
- Cold, Cold, Cold Butter: If that butter melts before it hits the oven, you get cake, not flaky layers. We want those little butter pockets to create steam and push the dough upwards.
- Minimal Mixing: We stop mixing the second the dough comes together. Overworking gluten is the enemy of tender scones!
- The Fold: That little folding step I use? It builds layers right into the dough, guaranteeing height without needing fancy equipment. I even link to a quick guide on fruit scones right here, which uses the same basic structural approach.

Ingredients for The Ultimate Bakery-Style Scones
When it comes to scones, you have to treat your ingredients with respect! The quality here really matters, especially since we aren’t complicating things with tons of sugar or heavy flavorings in the base.
For our essential batch of eight bakery-style beauties, here is what you’ll need:
- 2 cups all-purpose flour
- 1/4 cup granulated sugar
- 1 tablespoon baking powder (make sure this isn’t old!)
- 1/2 teaspoon salt
- 1/2 cup (1 stick) cold unsalted butter, cut into small pieces
- 3/4 cup cold heavy cream or buttermilk
- 1 teaspoon vanilla extract (optional, but I love the warmth it adds)
- 1 cup mix-ins (This is where you get creative later!)
- 1 large egg, beaten with 1 teaspoon water (for that pretty, shiny egg wash)
Remember, the colder that butter is, the flakier your final texture will be—don’t skip that crucial detail!
How to Make Scones From Scratch: Step-by-Step Instructions
Alright, let’s get our hands messy! This is where we turn simple pantry staples into those incredible scones you dream about. This process should take you less than 15 minutes of actual work time, which is why I call it my favorite quick scone recipe. Preheat your oven to 400°F (200°C) right now, and line up a baking sheet—we want everything ready to go!
Mixing the Dry Ingredients and Cutting in Butter for Tender Scones
First, whisk your flour, sugar, baking powder, and salt together in a big bowl. Now for the moment of truth: the butter. Remember, this butter is practically frozen, cut into little cubes. You need to cut it into the dry mix using a pastry blender, or honestly, just your fingertips work best! Keep rubbing it in until you get coarse crumbs, and you can still see some pieces about the size of little peas. That visible butter is non-negotiable for flaky layers! Don’t let it get greasy; work quickly. Seriously, the colder the butter stays, the better your tender scones will be! You can see how this method is key even in my fruitier recipes, like my take on blueberry scones.
Bringing the Dough Together and Shaping Your Scones
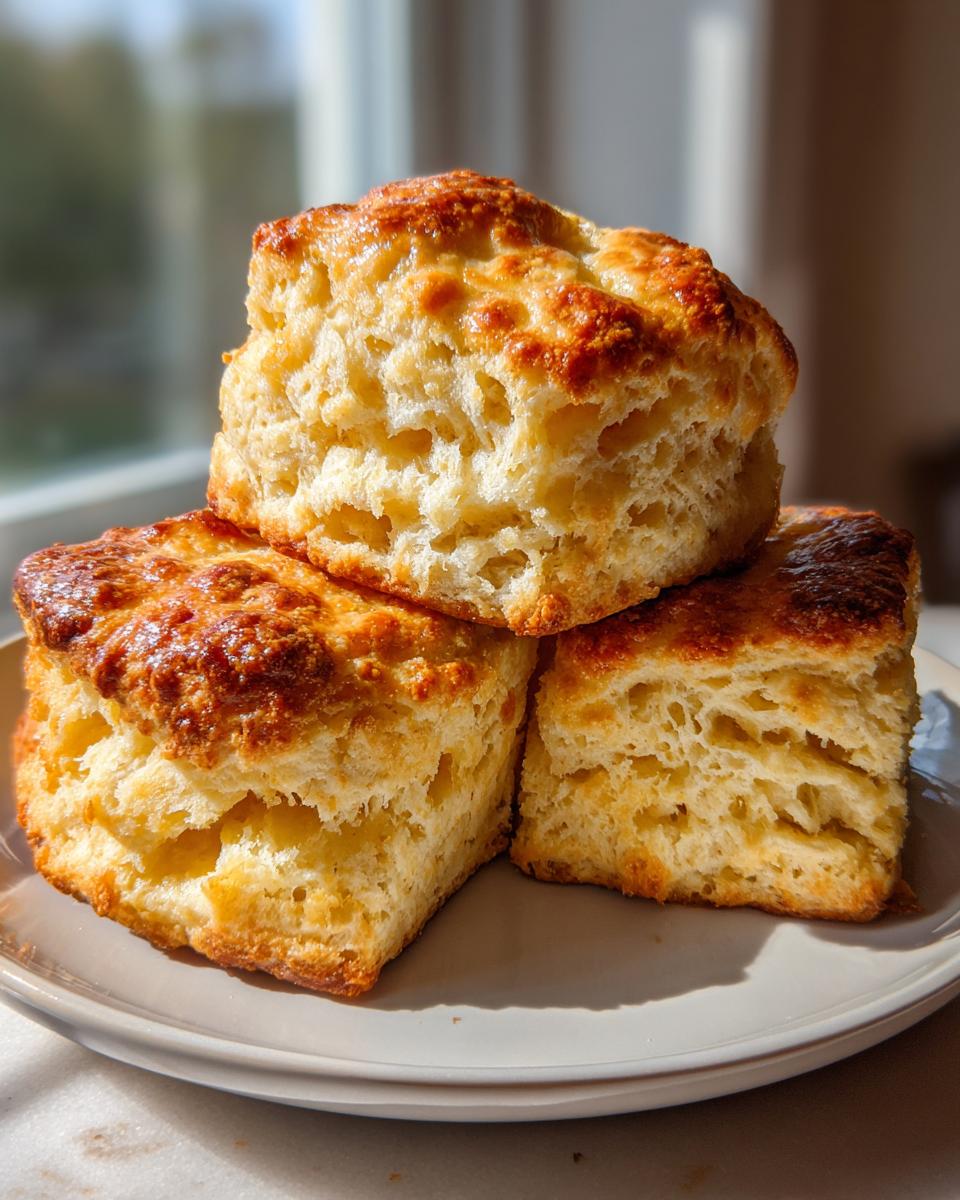
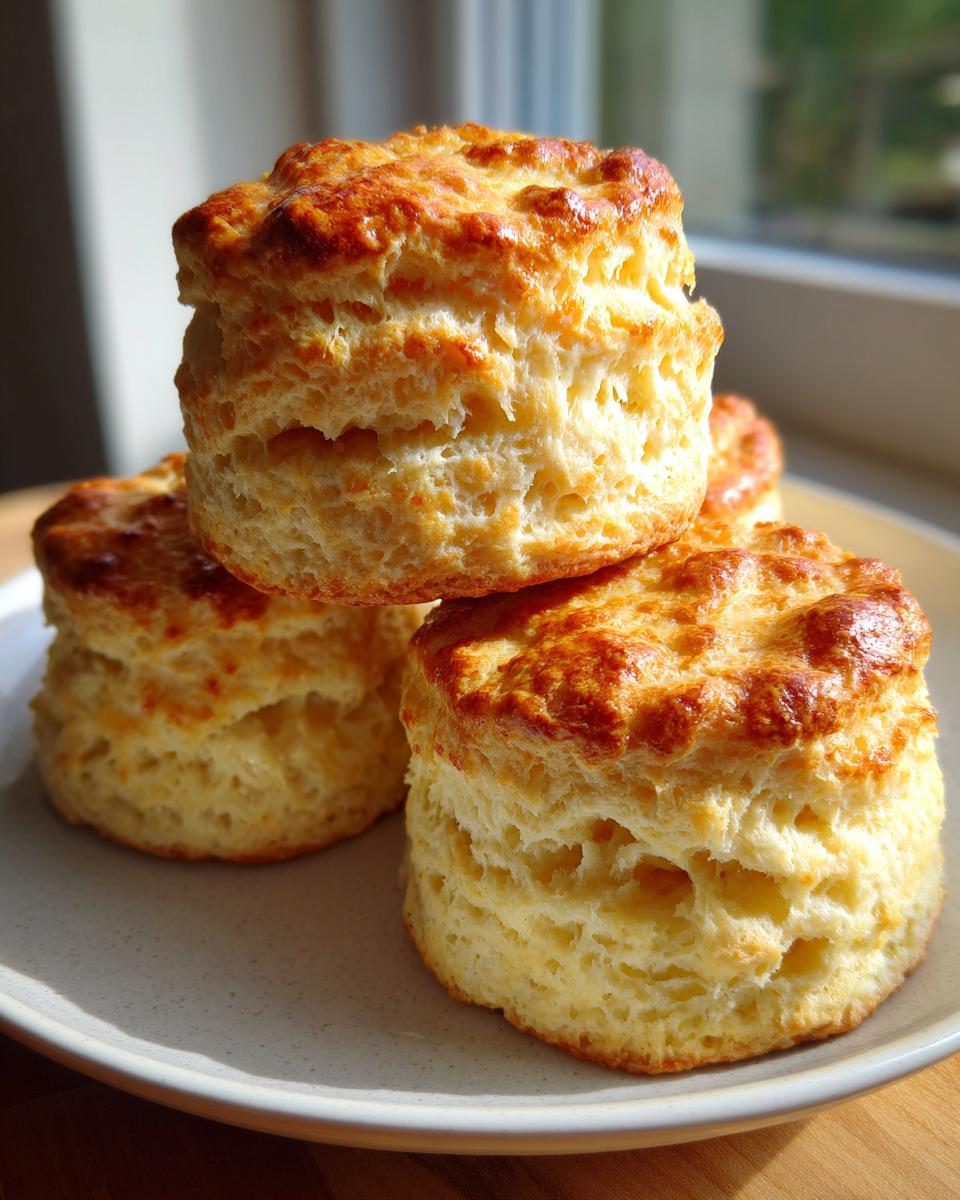
Next up, pour in your ice-cold heavy cream—and please, don’t stir it like you’re whipping meringue! Just use a fork until everything is *barely* combined. It’s supposed to look messy and a little shaggy; that’s perfect! Turn that shaggy mess out onto a lightly floured counter. Gently pat it into a 3/4-inch thick disk. Now, for my trick to get those lofty, bakery style scones: fold that dough over onto itself like you’re folding a letter, maybe once or twice. Pat it back into a circle about an inch thick. When you cut them with your round cutter, press straight down without any twisting—twisting seals the edges and stops that beautiful rise we worked so hard for. Pop those rounds onto your lined sheet.
Baking and Achieving Golden Brown Scones
Once they’re all lined up, give the tops a slick brush of that egg wash we mixed up. This gives you that gorgeous golden hue. Now, slide them into that hot 400°F oven and bake them for about 14 to 18 minutes. You’re looking for golden tops and they should sound solid if you tap the bottom. Don’t hesitate to check out posts on folding techniques like those found over at The First Year Blog if you want extra visual guidance!
Tips for Perfect Flaky Scones Every Time
Honestly, these scones are foolproof, but only if you respect the cold! If you want that flaky, bakery-quality texture, these three rules are the foundation of a successful quick scone recipe. If you follow these, you’ll avoid dense dough forever.
Firstly, your butter and cream must be absolutely freezing. I mean, if your kitchen is warm, stick that butter in the freezer for ten minutes right before you start cutting it in! Keeping that temperature down is the secret to those puffy layers. Secondly, once the cream goes in, stop fussing! Mix only until the flour disappears. Lumps are good; smooth, even dough means tough scones.
And finally, when you cut the rounds, you *must* press down hard and straight. Don’t twist that cutter! Twisting seals the edges, and that seals in the moisture you need for a beautiful, tall rise. If you need a visual on the structure, check out the great advice on this topic over at Handle the Heat.

Customizable Scone Recipe: Flavor Variations
This is the really fun part, isn’t it? Once you’ve mastered the technique for those perfect, flaky bases, you realize this isn’t just one recipe—it’s a jumping-off point for almost anything! That’s the beauty of a truly great, customizable scone recipe. We’ve established the structure needed for those lofty, bakery style scones; now we just mix in the magic!
If you want to see how this base works with fruit, I have a fantastic guide for easy blueberry scones, but honestly, tweaking the main recipe is so simple.
Creating Bright Lemon Blueberry Scones
For that bright, zesty punch, you’ll want to use the zest of one whole lemon right along with your dry ingredients. Then, gently fold in one cup of fresh blueberries just before you add the cream. They are amazing on their own, but if you want to elevate them even more, whip up a quick glaze using powdered sugar and fresh lemon juice instead of milk. That sweet-tart icing contrasts perfectly with the buttery crumb!
Making Cozy Cinnamon Scones
If you’re leaning towards something warmer, skip the fruit! For cinnamon scones that taste like bliss, add about 2 teaspoons of ground cinnamon right into your flour mix. It smells heavenly while baking, I swear. Also, swap out the granulated sugar in the base recipe for 1/4 cup of brown sugar. That little bit of molasses adds such a deep, cozy note that pairs perfectly with the spice. You can check out other variations on flavor combinations over at Black Rags if you need more inspiration!
Serving Suggestions for Your Classic Plain Scones
Now that you’ve pulled these beautiful, tall scones out of the oven, what do we do? Well, they are fantastic all by themselves while they are still warm, but they truly shine when they become the star of a lovely spread! These are meant to be incredible brunch pastries or the centerpiece of your next afternoon tea treats session.
For the purists among us, a dollop of good quality butter or homemade jam is all you need. If you want to go full English style, you absolutely must serve them with clotted cream—it’s life-changing! If you are looking for a little extra sweetness, a simple dusting of powdered sugar or a thin vanilla glaze works wonders. You can find some great ways to serve up classic plain scones over on Pinch Me, I’m Eating!
Storage and Reheating Instructions for Scones
I know you won’t want them to last, because these scones disappear fast, but sometimes we need a little patience! If you happen to have any left over from your quick breakfast baking session, storing them correctly is key to keeping that tenderness we worked so hard for. If you plan to eat them within a day, just leave them out on the counter in an airtight container. I usually don’t like to keep them past 48 hours because that beautiful flaky texture starts to get a little softer.
Now, if you need to keep them longer, the freezer is your best friend! Once they have completely cooled—and I mean completely cooled, this is important—wrap those individual scones tightly in plastic wrap, and then pop them into a freezer-safe bag. They should be great in the freezer for about a month.
The best way to bring them back to life, though, is the reheat! Don’t be tempted to microwave them unless you enjoy hard little hockey pucks. Instead, just pop them into a 350°F oven for about 5 to 7 minutes. That little blast of dry heat reactivates the butter, brings back the structure, and makes them taste like they just came out of the oven. That’s the secret to enjoying homemade scones all week long!
Frequently Asked Questions About Making Scones
I know you might have questions bubbling up—that’s the sign of a good cook wanting to get it just right! If you’ve ever wondered why your scones turned out dense or if you can swap ingredients, don’t worry, I’ve got you covered. Getting these tender scones right is all about mastering the technique, and I’m here to help you troubleshoot.
Why are my scones dense instead of flaky?
Oh, that is the saddest thing! Nine times out of ten, dense scones mean one of two things: you either overworked the dough after adding the liquid, or your butter wasn’t cold enough to create those separation pockets. Remember, we want the dough to look shaggy! If you mix until it’s perfectly smooth, you’re developing too much gluten, which leads to a tough, dense result instead of those beautiful flaky scones. Keep the handling to an absolute minimum!
Can I use regular milk instead of heavy cream or buttermilk?
You certainly can, and many people do when they’re looking for a quick scone recipe with what they already have! I strongly recommend heavy cream or buttermilk, though, because the higher fat content in the cream and the acidity in the buttermilk really contribute to that wonderfully rich, buttery tender scones texture. If you only have regular milk, it will work, but the texture might be slightly less luxurious. If you use regular milk, try chilling it in the freezer for 10 minutes first so it’s almost slushy when you add it. For advice on using buttermilk specifically, I dive into it a bit more over on my buttermilk scone recipe post.
During shaping, how thick should my dough be?
For these tall, bakery style scones, aim for about 1 to 1.5 inches thick before you cut them. If the dough is too thin—say, less than 3/4 inch—they just won’t have the height we are looking for. That thickness gives the little pockets of butter enough room to expand when they hit the heat. And don’t forget that crucial step: press your biscuit cutter straight down firmly without twisting! That clean cut edge helps them rise right up, making them perfect for your next brunch pastries spread.
Share Your Homemade Scones Creations
Oh, I truly hope you got to experience the joy of pulling these perfect, tall scones out of your oven! Seriously, don’t be shy! I want to hear all about it. Did you stick with the classic plain version, or did you go wild with the chocolate chips or maybe some sweet blueberries? Drop a comment down below and let me know what mix-ins you chose—I’m always looking for new ideas for my next batch!
If you snapped a picture of your flaky masterpiece, please share it with me on social media and tag me! Seeing your success stories is genuinely the highlight of my day here at DeliceRecipe. It proves that even the dreamiest bakery style scones are totally achievable in a regular home kitchen.
Thank you so much for baking with me today! If you loved how simple and reliable this recipe was, please consider rating it above. And while you’re here, why not check out some of my other favorite easy recipes? Happy baking, friends, and come back soon!
PrintThe Ultimate Bakery-Style Scones: Easy, Flaky & Infinitely Customizable Recipe

Make tall, buttery, flaky scones that rival your local bakery. This easy scone recipe requires only 10 minutes of active prep time and yields moist, flavorful results perfect for brunch or afternoon tea.
- Prep Time: 15 min
- Cook Time: 18 min
- Total Time: 33 min
- Yield: 8 scones 1x
- Category: Breakfast
- Method: Baking
- Cuisine: American
- Diet: Vegetarian
Ingredients
- 2 cups all-purpose flour
- 1/4 cup granulated sugar
- 1 tablespoon baking powder
- 1/2 teaspoon salt
- 1/2 cup (1 stick) cold unsalted butter, cut into small pieces
- 3/4 cup cold heavy cream or buttermilk
- 1 teaspoon vanilla extract (optional)
- 1 cup mix-ins (e.g., blueberries, chocolate chips, or dried cranberries)
- 1 large egg, beaten with 1 teaspoon water (for egg wash)
Instructions
- Preheat your oven to 400°F (200°C). Line a baking sheet with parchment paper.
- In a large bowl, whisk together the flour, sugar, baking powder, and salt.
- Cut the cold butter into the dry ingredients using a pastry blender or your fingertips until the mixture resembles coarse crumbs with some pea-sized pieces of butter remaining. This step is key for flaky scones.
- Gently stir in your chosen mix-ins, like blueberries or chocolate chips.
- Pour in the cold heavy cream (or buttermilk) and vanilla extract, if using. Mix with a fork until just combined. Do not overmix; the dough will look shaggy.
- Turn the dough out onto a lightly floured surface. Gently bring the dough together into a rough disk, about 3/4-inch thick. If adding flavorings like cinnamon or zest, sprinkle them over the dough before folding.
- For tall scones, fold the dough over itself in thirds (like a letter) once or twice. Pat the dough back into a circle about 1 inch thick.
- Use a sharp, round biscuit cutter (about 2.5 inches) to cut out the scones. Press straight down without twisting the cutter to maintain sharp edges, which helps them rise tall.
- Place the cut scones onto the prepared baking sheet, ensuring they touch slightly if you prefer softer sides.
- Brush the tops lightly with the egg wash.
- Bake for 14 to 18 minutes, or until the tops are golden brown.
- Let the scones cool slightly on a wire rack before serving warm.
Notes
- For the flakiest scones, keep your butter and cream as cold as possible. You can even freeze the butter for 15 minutes before cutting it in.
- If you want a glaze, mix 1 cup powdered sugar with 2-3 tablespoons of milk or lemon juice and drizzle over the cooled scones.
- To make Cinnamon Scones, add 2 teaspoons of ground cinnamon to the dry ingredients and use 1/4 cup brown sugar instead of granulated sugar in the base recipe.
- For Lemon Blueberry Scones, add the zest of one lemon to the dry ingredients and use 1 cup of fresh blueberries. Use lemon juice for the glaze.
Nutrition
- Serving Size: 1 scone
- Calories: 300
- Sugar: 8g
- Sodium: 250mg
- Fat: 18g
- Saturated Fat: 11g
- Unsaturated Fat: 7g
- Trans Fat: 0g
- Carbohydrates: 30g
- Fiber: 1g
- Protein: 5g
- Cholesterol: 55mg