
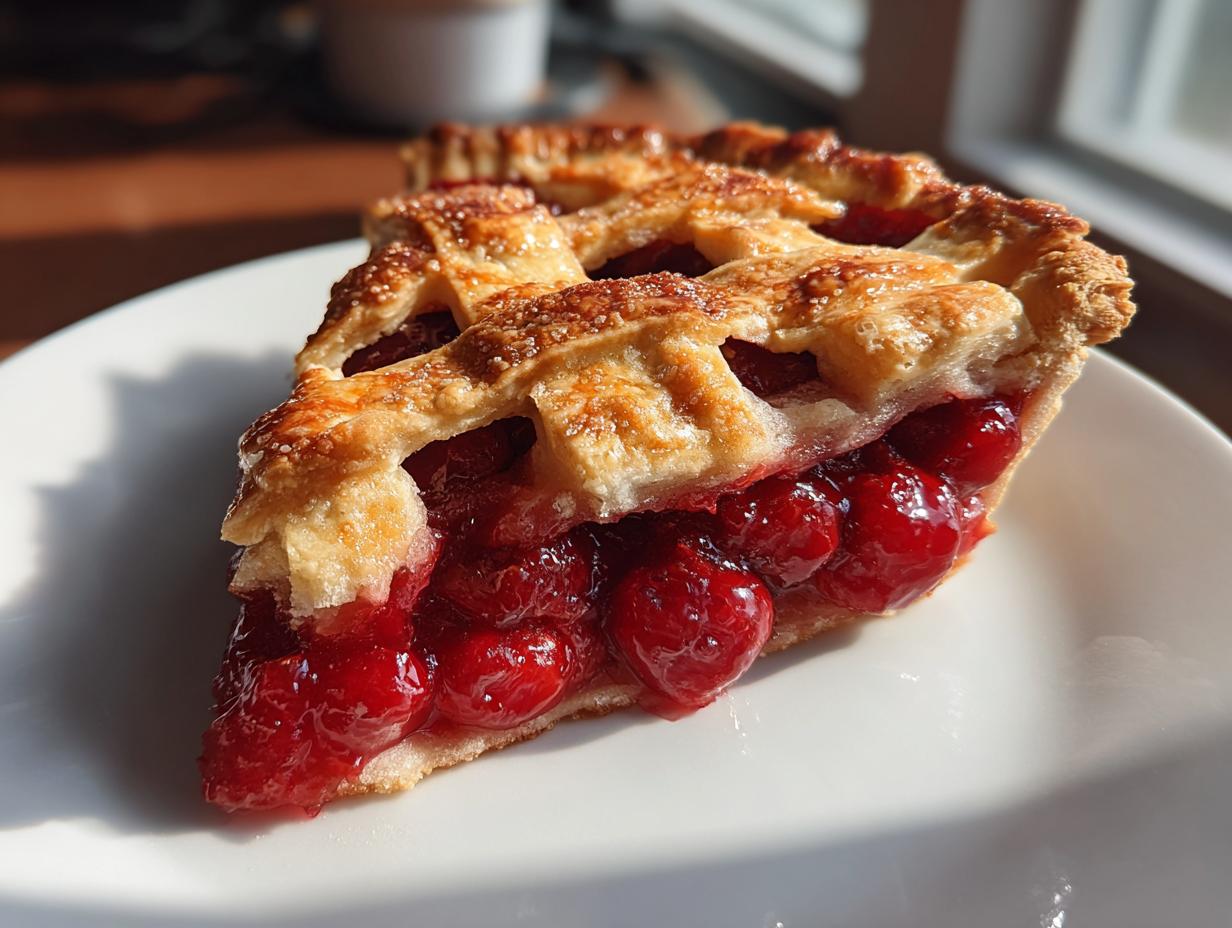
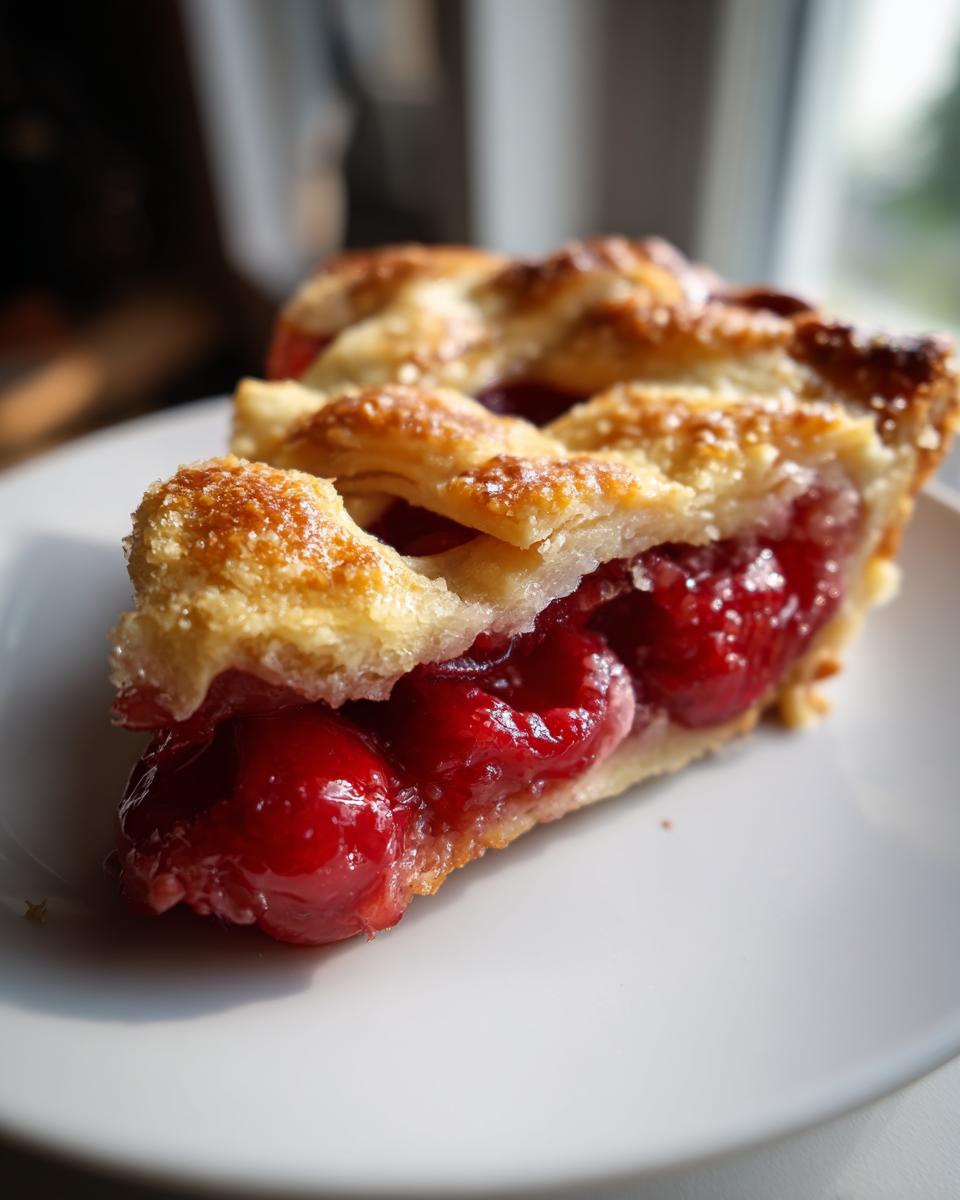
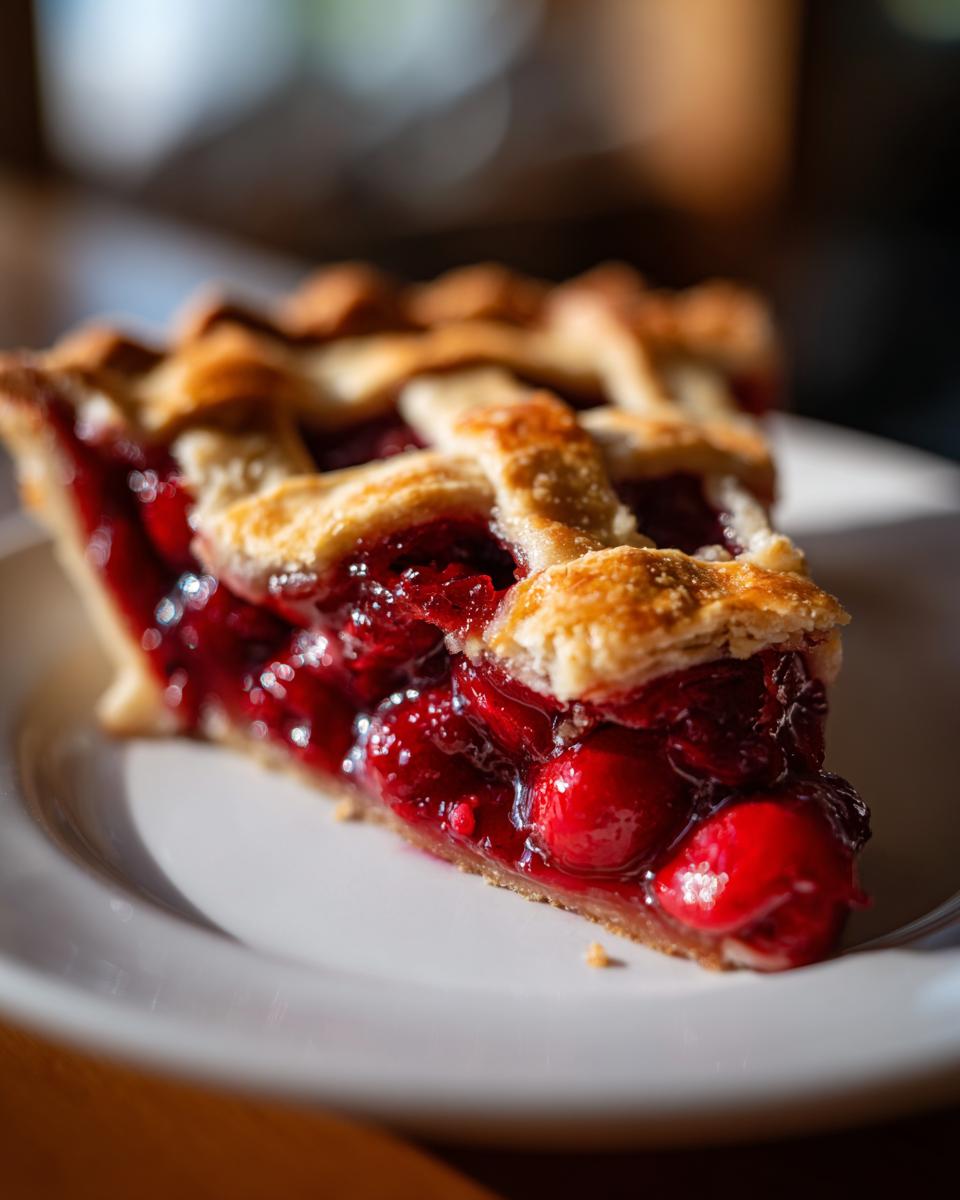
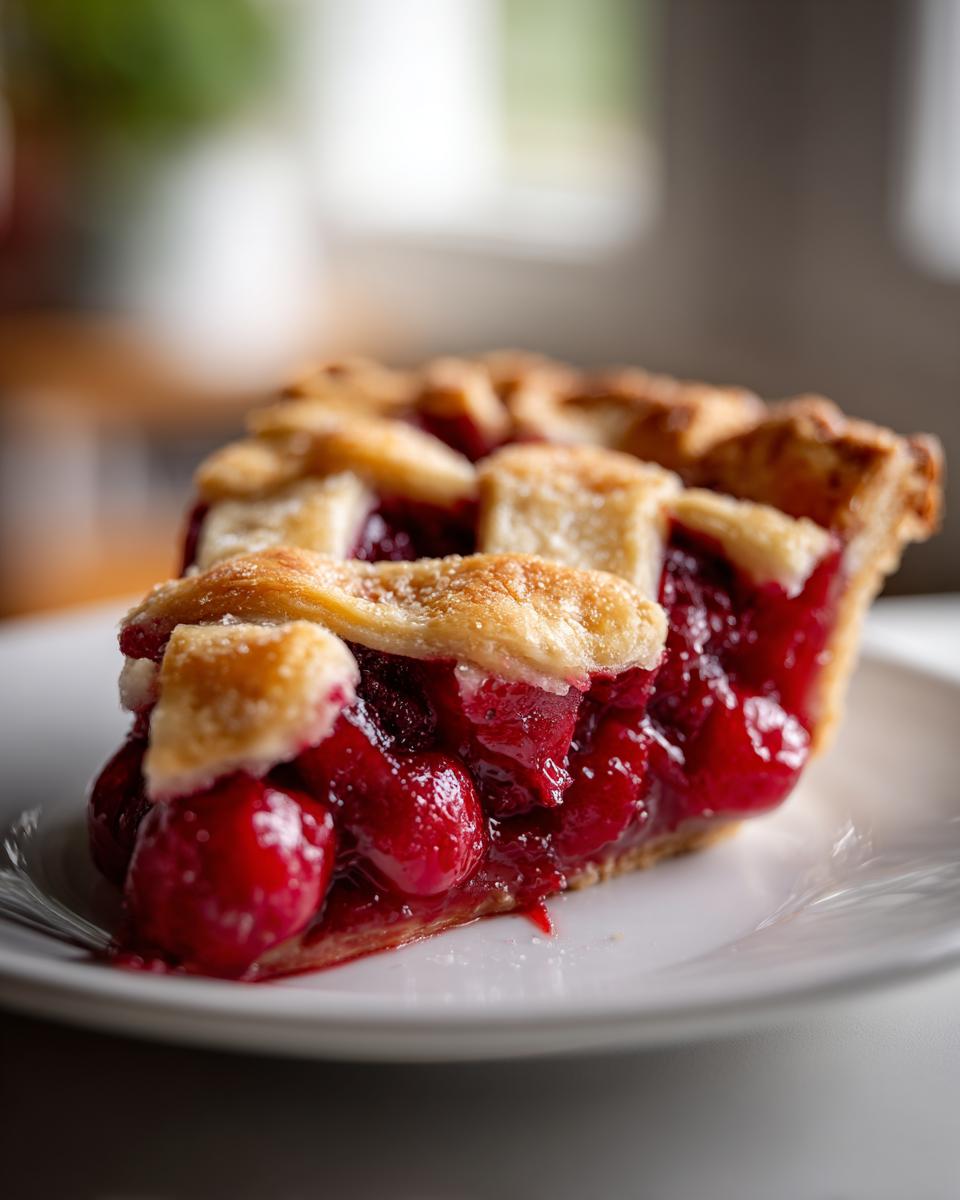
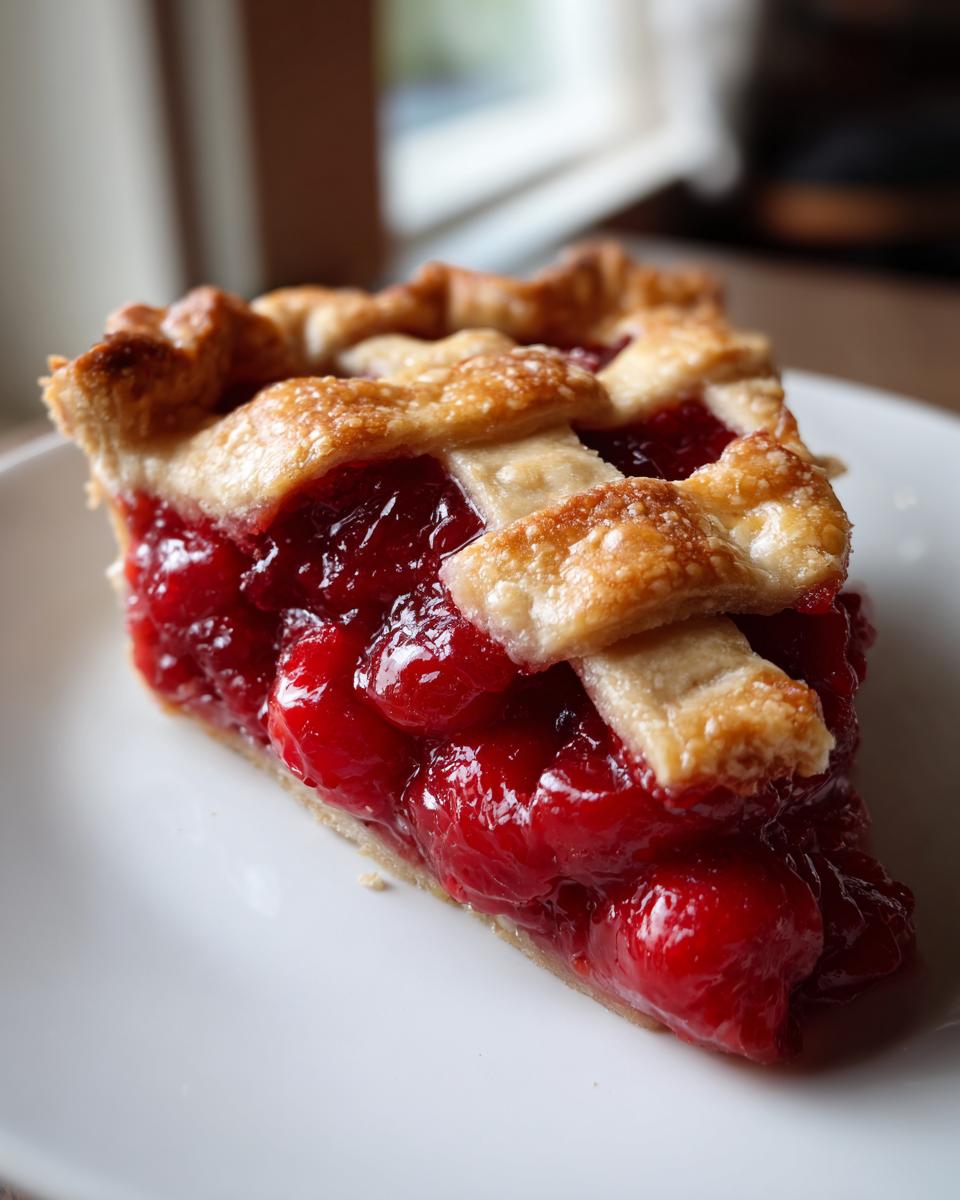
Oh, the absolute joy of a perfect slice of homemade cherry pie! It’s one of those classic desserts that just screams comfort and celebration, right? You know, the kind you see in those charming little cafes or picture on your holiday table – where the crust is golden and flaky, the filling is gloriously thick and doesn’t run everywhere, and there’s that beautiful, delicate lattice on top. That’s exactly what we’re capturing here! I’m Ellie, and this cherry pie recipe is a treasure passed down through my family. It’s all about bringing that simple, delicious, made-with-love feeling right into your own kitchen. Trust me, making a classic cherry pie from scratch is incredibly rewarding, and this recipe makes it totally doable!
- Why You'll Love This Classic Cherry Pie Recipe
- Homemade Cherry Pie: Ingredients You'll Need
- Crafting the Perfect Lattice Cherry Pie Crust
- Achieving a Thick Cherry Filling for Your Cherry Pie
- Assembling and Baking Your Homemade Cherry Pie
- Holiday Cherry Pie: Make-Ahead and Storage
- Frequently Asked Questions about Cherry Pie
- Estimated Nutritional Information for Cherry Pie
- Share Your Homemade Cherry Pie Experience
Why You’ll Love This Classic Cherry Pie Recipe
Okay, so why is THIS cherry pie recipe going to be your new go-to? Let me tell you!
- It gives you that gorgeous, sliceable, café-style look just like the fancy bakeries.
- We’ve nailed the filling – it’s thick, jammy, and won’t make a goopy mess when you cut into it.
- The crust? Oh my gosh, it’s perfectly buttery and flaky, just begging for that beautiful lattice top.
- It’s easier than you think to make, promise!
- And that little hint of almond extract? It just takes the cherry flavor to a whole new level of deliciousness.
Homemade Cherry Pie: Ingredients You’ll Need
Alright, let’s get our mise en place ready for this amazing homemade cherry pie! What you’ll need might seem like a lot, but it all comes together beautifully, I promise. Think of it like building the perfect flavor foundation.
For the Crust:
- 2 1/2 cups all-purpose flour (just your regular stuff works great!)
- 1 teaspoon salt (for flavor balance, don’t skip it!)
- 1 cup (that’s two sticks!) of super cold unsalted butter, cut into little cubes. Cold is KEY here, seriously!
- About 1/2 cup of ice water. We’ll add this little by little.
For the Filling:
This is where the magic happens! You’ll need:
- 6 cups of cherries, all pitted! You can totally use fresh ones, which my Grandma Ellie always did. But if fresh aren’t around, frozen ones work like a charm too – just make sure you *don’t thaw them* before you mix them in. It really helps keep the filling nice and thick.
- 3/4 cup of granulated sugar. We want it sweet but not *too* sweet, you know?
- 1/4 cup of cornstarch. This is our secret weapon for that thick, luscious filling! If you want it even thicker, the recipe notes say you can bump this up to 5 tablespoons, which is what I usually do.
- 1 tablespoon of lemon juice. It just brightens up all those cherry flavors.
- 1 teaspoon of almond extract. Oh, this is Ellie’s special touch! It gives the cherries this amazing, almost sophisticated flavor that’s just lovely.
- Just a tiny pinch of salt, 1/4 teaspoon to be exact, to make everything pop.
- And for dotting on top, 1 tablespoon of unsalted butter, cut into tiny little pieces.
For the Wash:
Just one last bit for that gorgeous golden crust:
- 1 large egg, whisked up with about 1 tablespoon of water. Easy peasy!
Gather all this up, and you’re over halfway there!
Crafting the Perfect Lattice Cherry Pie Crust
Alright, let’s talk about the foundation of any truly great cherry pie: the crust! This is where we get that wonderful, buttery flavor and that flaky texture that just melts in your mouth. My Grandma Ellie always said the secret is keeping everything super cold. Seriously, think arctic-level cold for your ingredients!
Start by grabbing a big bowl. We’ll whisk together our flour and that salt – it just makes everything else taste better, you know? Then comes the butter. You want it really cold, like you just took it out of the freezer for a minute. Cut it into small cubes, and then get your hands in there (or a pastry blender if you prefer!) to cut it into the flour. You’re looking for a texture that’s like coarse crumbs with some little pea-sized bits of butter still showing. Those little butter chunks are what create the flaky layers, so don’t overwork it!
Now for the ice water. Add it in, just a tablespoon at a time, and gently mix until the dough *just* starts to come together. It shouldn’t be sticky or super wet. When you can bunch it up in your hand, you’re golden. Divide that beautiful dough into two equal pieces. Flatten each one into a disk – this makes it easier to roll out later – wrap ’em up tight in some plastic wrap, and pop them in the fridge for at least an hour. Trust me, that chill time is crucial for a perfect, manageable crust.
Tips for a Buttery Pie Crust
Okay, so you’ve got your dough chilling, but let’s talk about making it *extra* special. The biggest thing is to resist the urge to overwork the dough! Once you start mixing or kneading too much, that gluten gets tough, and you end up with a chewy crust instead of a tender, flaky one. Keep your hands moving quickly when you’re cutting in the butter and mixing in the water. If the dough starts to feel warm, just pop it back in the fridge for 10-15 minutes. And that chilling step we talked about? It’s not just for making it easier to roll; it lets the flour absorb the water and relaxes the gluten, leading to a much more tender result. So patience here really pays off!
Achieving a Thick Cherry Filling for Your Cherry Pie
Alright, now for the heart of our beautiful cherry pie – that thick, glorious, non-runny filling that makes you feel like you’re eating something straight out of a fancy bakery! This is where we really get to create pure cherry magic. We’re going to combine those lovely cherries with sugar, cornstarch (our thickening superhero!), a little bit of lemon juice to brighten things up, and my personal favorite, that hint of almond extract which just makes the cherry flavor sing.
When you mix it all together, be gentle! Just a gentle toss is all it needs to coat everything. Remember the tip about using frozen cherries? If you use them, make sure they’re still frozen when you mix them in – this is a super important trick for keeping the filling from getting watery. Grandma Ellie always said if you want it *extra* thick, lean into that cornstarch. You can totally bump it up to 5 tablespoons, especially if your cherries seem extra juicy. It’s the secret to that perfect, sliceable filling!
Fresh vs. Canned Cherries for Cherry Pie
Now, let’s talk cherries! While you *can* use canned cherries in a pinch, honestly, for that true café-style, homemade cherry pie experience, fresh is the way to go. Fresh cherries just have this vibrant flavor and a firmer texture that holds up so beautifully in the pie. They contribute to that lovely, thick filling we’re aiming for. Canned cherries can sometimes be a bit softer and can release more liquid, which might make your filling a little runnier. So, if you can get your hands on fresh ones, I really encourage you to use them! It makes all the difference in getting that perfect bite.
Assembling and Baking Your Homemade Cherry Pie
Okay, pie assembly time! This is where all your hard work starts to look like a real showstopper! First things first, take one of those chilled dough disks you made earlier. On a lightly floured surface (a little flour keeps it from sticking!), roll it out into a circle that’s about 12 inches across. Don’t worry if it’s not a perfect circle; it’s homemade, after all! Carefully drape that dough into your 9-inch pie plate. Gently press it into the bottom and up the sides, leaving about an inch of overhang. This extra bit will help seal everything up.
Now for that glorious, thick cherry filling we worked so hard on! Pour it right into that pie shell. Then, take those little butter pieces and dot them all over the top of the cherries. It just adds this little richness that’s so good. Next, grab your second disk of dough. Roll it out, just like the first one, and then cut it into strips. I usually go for about 1/2 to 3/4 inch wide strips. This is where you get to be creative – lay them over the filling in a classic lattice pattern. Weave them over and under each other to make that beautiful crisscross look. Trim the ends of the strips, and press them down firmly onto the bottom crust edges to seal them all together. You can get fancy with the crimping if you like, or just press with a fork!
Before it goes in the oven, we need that perfect golden halo. Lightly brush the lattice top with your egg wash (remember, that’s the egg beaten with a splash of water?). It makes the crust bake up so beautifully shiny and golden brown.
Baking Tips for a Perfect Cherry Pie
Now for the moment of truth – baking! Preheat your oven to a nice hot 400°F (200°C). Pop that beautiful pie onto a baking sheet. This is a lifesaver for catching any bubbly filling that might escape. Bake it at that higher temp for about 20 minutes. Then, drop the oven temperature down to 375°F (190°C) and let it bake for another 30 to 40 minutes. How do you know it’s done? Look for a gloriously golden-brown crust and, importantly, see those juices bubbling up through the lattice! If you notice the edges of the crust are getting too dark before the center is done, just loosely tent a piece of aluminum foil over the edges. And this next part is SO important: let the pie cool completely on a wire rack for at least 3 to 4 hours. I know, it’s torture when it smells this good, but this cooling time is crucial for that thick, sliceable filling to set up properly. Resist the urge, and you’ll be rewarded!
Holiday Cherry Pie: Make-Ahead and Storage
Okay, so you want to get a jump start on your holiday baking, or maybe you just like to be prepared? I totally get it! This homemade cherry pie is fantastic for making ahead. You can easily make your pie dough up to two days in advance. Just keep it wrapped up tight in the fridge. If you want to go even further, you can roll out and cut the lattice strips, place them back on a piece of parchment paper on a tray, and freeze them separately. Then, when you’re ready to assemble, just pop those frozen lattice strips onto your chilled pie filling and bake!
Once your beautiful cherry pie is baked and cooled completely, it’ll keep well on the counter for about a day, thanks to the sugar and starch in the filling – kind of like those best meal delivery services that keep their food fresh! But for longer storage, especially around the holidays, pop it in the fridge. It’ll stay delicious for about 3-4 days. When you’re ready to serve a slice again, you can gently reheat it in a low oven (around 300°F or 150°C) for about 10-15 minutes to get that crust nice and warm again. So good!
Frequently Asked Questions about Cherry Pie
Got questions about making this classic cherry pie? I’ve got answers!
How do I prevent my cherry pie filling from being runny?
Oh, the dreaded runny filling! It’s usually from too much liquid or not enough thickening agent. Make sure you’re using enough cornstarch – the recipe calls for 1/4 cup, but bumping it to 5 tablespoons is my secret for a super thick, sliceable filling, especially if your cherries are really juicy. Also, remember *not* to thaw frozen cherries before mixing them in. And the biggest tip? Let your baked pie cool completely! That 3-4 hour cooling period is essential for the filling to finish setting up properly. Patience is key for that perfect thick cherry filling.
Can I use frozen cherries for my cherry pie?
Absolutely! Frozen cherries work wonderfully in this homemade cherry pie recipe. Just make sure you don’t thaw them first. Toss them in frozen! This helps prevent a watery mess and contributes to that lovely thick consistency we’re going for. They’re a great option when fresh cherries aren’t in season.
What is the best way to store cherry pie?
Once your beautiful cherry pie has cooled completely, you can store it covered at room temperature for about a day. For longer storage, or just to be safe, pop it in the refrigerator. It should stay yummy for about 3 to 4 days. If you want to reheat a slice, just pop it into a warm oven for a bit to bring back that fresh-baked goodness!
Why is my homemade cherry pie crust soggy?
A soggy bottom crust is nobody’s friend! Usually, it happens when the bottom crust gets too much moisture from the filling. Using cold ingredients for the dough and not overworking it helps create a barrier. Baking the pie on a preheated baking sheet and at a higher initial temperature can also help set the bottom crust quickly. Ensuring your filling is nice and thick, as we discussed, also prevents excess liquid from soaking through.
Estimated Nutritional Information for Cherry Pie
Just a little heads-up – these nutrition numbers are estimates, okay? So every time you make this classic cherry pie recipe, the exact amounts might change a bit depending on the specific ingredients you use and how you slice it. But for a standard serving:
- Serving Size: 1 slice
- Calories: about 450
- Sugar: around 35g
- Sodium: about 200mg
- Fat: roughly 25g (with about 15g of that being saturated)
It’s a treat, for sure, but a delicious one!
Share Your Homemade Cherry Pie Experience
Okay, now it’s YOUR turn to shine! I would absolutely LOVE to hear all about your cherry pie adventures. Did you try the almond extract? How did your lattice turn out? Please, please leave a comment below and tell me everything! If you’ve got a picture of your gorgeous creation, feel free to tag us on social media – seeing your beautiful homemade cherry pies makes my day. Sharing our kitchen triumphs is what it’s all about, right? Let’s connect! You can also reach out to me directly through my contact page.
PrintClassic Cherry Pie with Lattice Crust

A classic cherry pie recipe featuring a buttery lattice crust and a thick, flavorful cherry filling. Perfect for holidays or any occasion.
- Prep Time: 45 min
- Cook Time: 50 min
- Total Time: 100 min
- Yield: 8 servings
- Category: Dessert
- Method: Baking
- Cuisine: American
- Diet: Vegetarian
Ingredients
- For the Crust: 2 1/2 cups all-purpose flour, 1 teaspoon salt, 1 cup (2 sticks) cold unsalted butter, cut into cubes, 1/2 cup ice water
- For the Filling: 6 cups fresh or frozen pitted cherries (if frozen, do not thaw), 3/4 cup granulated sugar, 1/4 cup cornstarch, 1 tablespoon lemon juice, 1 teaspoon almond extract, 1/4 teaspoon salt, 1 tablespoon unsalted butter, cut into small pieces
- For the Wash: 1 large egg, beaten with 1 tablespoon water
Instructions
- Prepare the crust: In a large bowl, whisk together flour and salt. Cut in cold butter using a pastry blender or your fingertips until the mixture resembles coarse crumbs with some pea-sized pieces of butter remaining. Gradually add ice water, 1 tablespoon at a time, mixing until the dough just comes together. Divide the dough in half, flatten each half into a disk, wrap in plastic wrap, and refrigerate for at least 1 hour.
- Prepare the filling: In a large bowl, combine cherries, sugar, cornstarch, lemon juice, almond extract, and salt. Toss gently to coat.
- Assemble the pie: On a lightly floured surface, roll out one disk of dough into a 12-inch circle. Carefully transfer it to a 9-inch pie plate. Trim the edges, leaving about a 1-inch overhang.
- Pour the cherry filling into the pie crust. Dot the top of the filling with the small pieces of butter.
- Roll out the second disk of dough. Cut it into strips for a lattice top. Arrange the strips over the filling, weaving them to create a lattice pattern. Trim the ends of the strips and press them onto the bottom crust to seal. Crimp the edges as desired.
- Brush the lattice top with the egg wash.
- Bake the pie: Preheat your oven to 400°F (200°C). Place the pie on a baking sheet to catch any drips. Bake for 20 minutes.
- Reduce the oven temperature to 375°F (190°C) and continue baking for another 30-40 minutes, or until the crust is golden brown and the filling is bubbly. If the crust starts to brown too quickly, loosely tent the pie with aluminum foil.
- Cool the pie: Let the pie cool completely on a wire rack for at least 3-4 hours before slicing to allow the filling to set.
Notes
- For a thicker filling, you can increase the cornstarch to 5 tablespoons.
- If using frozen cherries, do not thaw them before mixing with the filling ingredients. This helps prevent a watery filling.
- You can make the pie dough up to 2 days in advance and store it in the refrigerator.
- The lattice top can be made ahead and frozen separately, then placed on the pie before baking.
- For a café-style finish, you can sprinkle the lattice with coarse sugar before baking.
Nutrition
- Serving Size: 1 slice
- Calories: 450
- Sugar: 35g
- Sodium: 200mg
- Fat: 25g
- Saturated Fat: 15g
- Unsaturated Fat: 10g
- Trans Fat: 0g
- Carbohydrates: 55g
- Fiber: 4g
- Protein: 5g
- Cholesterol: 60mg