
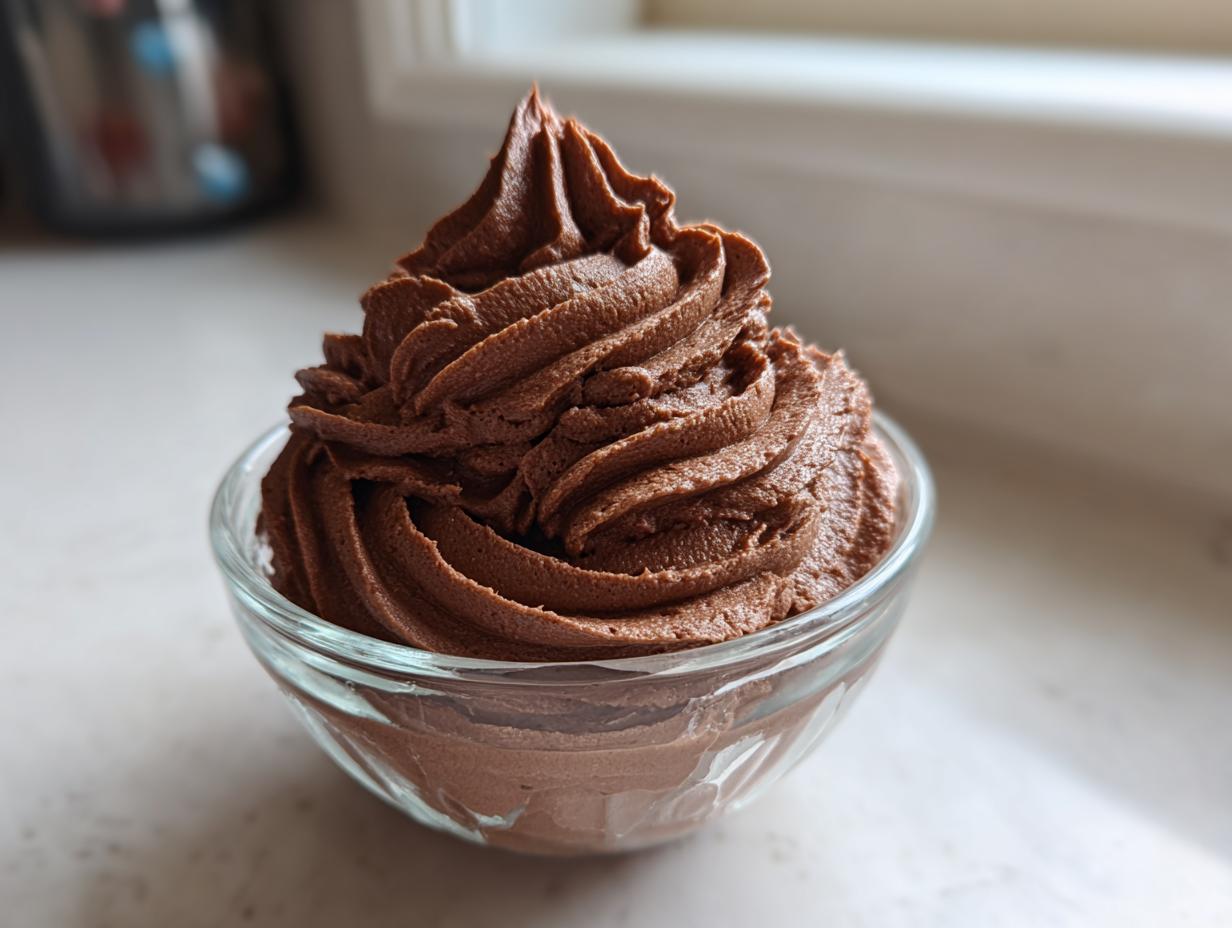
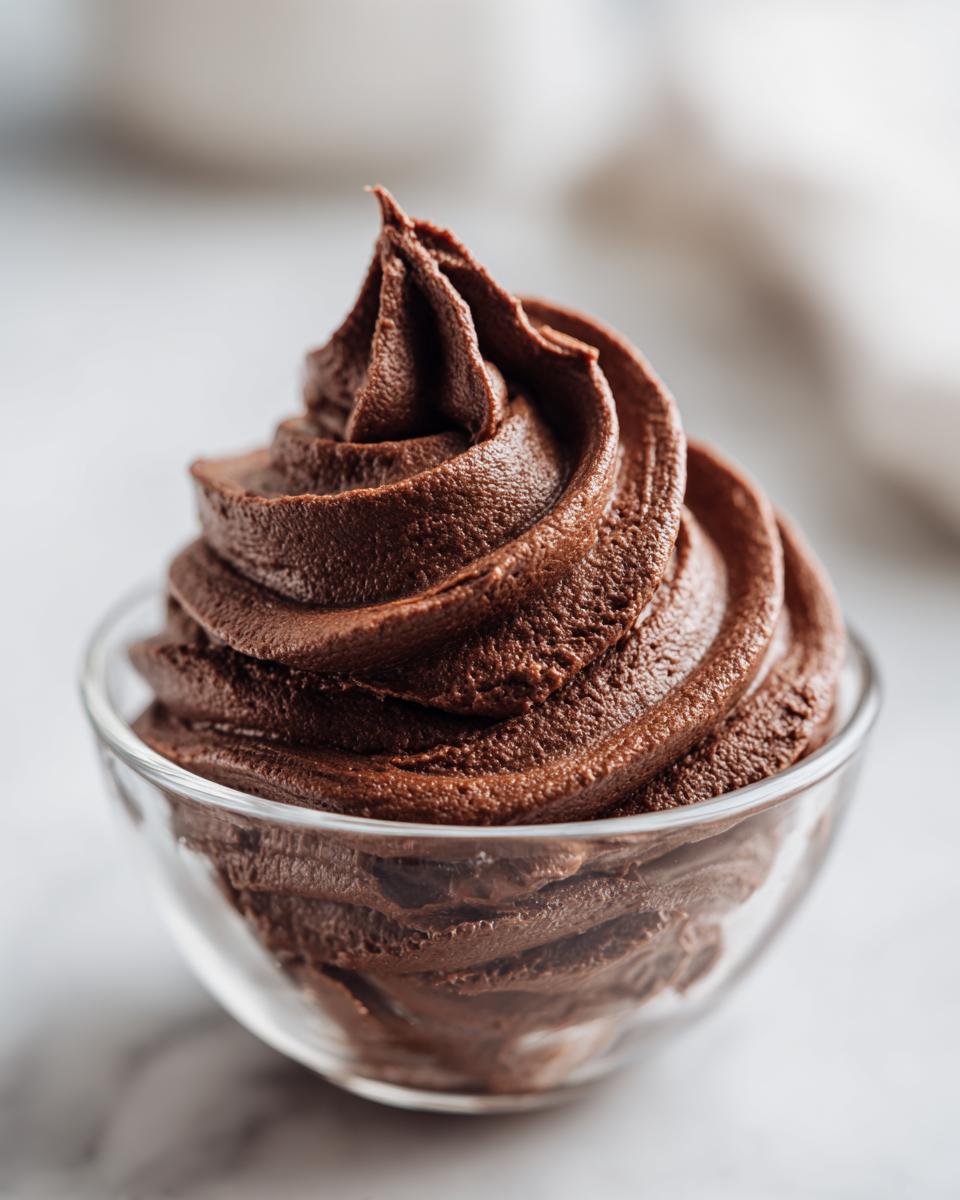
Oh, have you ever gotten your hopes up for a beautiful, decadent chocolate cake, only to slather it with frosting that turns out grainy, too sweet, or just… sad? I’ve been there more times than I care to admit! That’s precisely why I’m sharing what I believe is the **Ultimate Smooth & Creamy chocolate buttercream frosting** recipe. After years of testing, I promise this one delivers that rich, melt-in-your-mouth, bakery-quality texture we all dream about. Seriously, once you try this homemade version, you won’t look at the stuff in the tub ever again. We’re making something truly special today that tastes divine on everything, even straight off the paddle attachment! If you’re looking for the perfect companion cake for this amazing frosting, you absolutely must check out my recipe for the moist and rich chocolate cake.
- Why This is the Best Chocolate Buttercream Frosting You Will Ever Make
- Ingredients for Ultimate Smooth & Creamy Chocolate Buttercream Frosting
- Quick Chocolate Buttercream Frosting Preparation Instructions
- Tips for Perfect Chocolate Buttercream Frosting Every Time
- Versatile Uses for Your Rich Chocolate Icing Homemade
- Storage and Making Ahead with Chocolate Buttercream Frosting
- Frequently Asked Questions About Chocolate Buttercream Frosting
- Nutritional Estimates for Chocolate Buttercream Frosting
- Share Your Decadent Chocolate Icing Homemade Creations
Why This is the Best Chocolate Buttercream Frosting You Will Ever Make
I’m telling you, friends, this is the best chocolate buttercream out there. What sets it apart from the dozens of recipes you see online? It’s all about patience during the mixing phase, which guarantees that beautifully rich chocolate icing homemade flavor without that gritty texture. We are aiming for pure silkiness here, not sugar paste! If you want to elevate your desserts instantly, you need this frosting. It’s stable enough for elaborate piping work but so creamy you’ll be sneaking spoonfuls while you work. Trust me, it’s worth the five extra minutes of whipping! For the most incredible base cake to pair this with, don’t miss my recipe for the ultimate moist and rich chocolate cake.
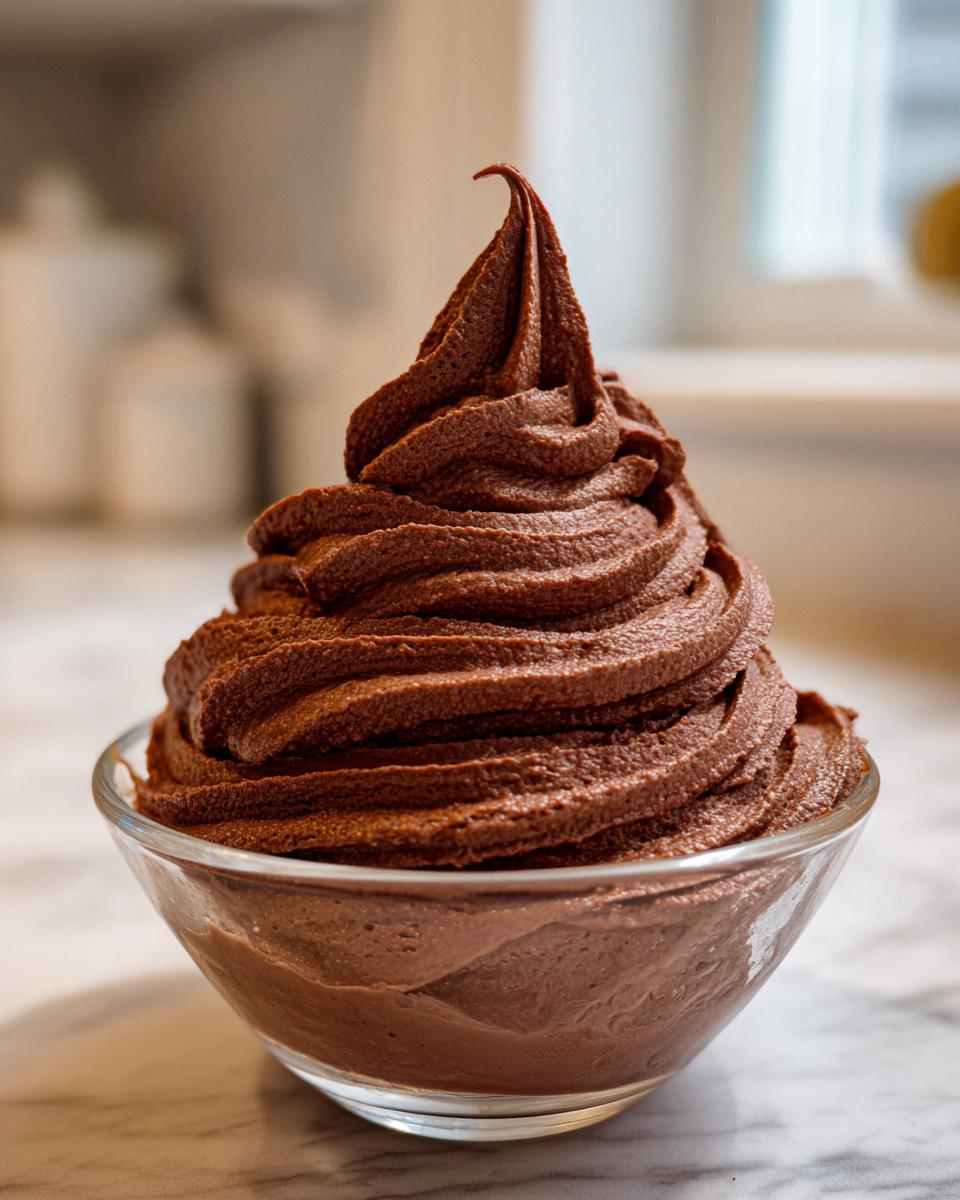
Achieving Bakery Style Chocolate Frosting Texture
The trick to non-grainy goodness hinges on two things: the butter temperature and the time you let it whip. If your butter is too cold, you get lumps; too warm, and it turns soupy. You need that soft-but-cool stage for a genuinely smooth chocolate buttercream. Then, you have to beat it—really beat it—after adding the liquid! That final fluffing stage is what incorporates the gorgeous air that makes it look like it came straight from a professional bakery.
Ingredients for Ultimate Smooth & Creamy Chocolate Buttercream Frosting
When we gather the ingredients for incredible chocolate buttercream frosting, it isn’t just about tossing things in a bowl. Every single component needs a little preparation love to make sure we hit that perfect, creamy texture. If you’ve tried making frosting before and it ended up messy or too stiff, often the culprit is forgetting these small steps! Keep your measuring cups and mixer bowl ready, because precision here is what guarantees success. This batch yields about 3 cups, which is just right for coating a nice two-layer cake or topping a generous dozen cupcakes.
Here is what you’ll need for this knockout batch. Remember, I always recommend sifting the dry items—it seems like an extra step, but it prevents those annoying little pockets of dry sugar or cocoa in your finished product. For the full breakdown of how much of everything you need, just check over here.
First up, the star of the show: 1 cup total (that’s two sticks!) of plain old unsalted butter. It must be softened beautifully to room temperature; hard butter makes lumps, and melted butter makes soup. Then, grab 3 1/2 cups of powdered sugar and 3/4 cup of unsweetened cocoa powder—and please, sift both of those before they even think about meeting the mixer! For flavor balance, grab 1 teaspoon of vanilla extract and just 1/4 teaspoon of salt to cut the sweetness. Finally, you’ll need 3 to 5 tablespoons of heavy cream or fresh milk, depending on how thick or soft you plan on making this delicious topping. If you’re interested in seeing how I use similar techniques for a different kind of topping, check out my recipe for easy cookie icing which hardens perfectly!
Quick Chocolate Buttercream Frosting Preparation Instructions
Now for the fun part—mixing! This process is fast, clocking in at only about 15 minutes total, making it a perfect go-to when you need something fast. You absolutely must use a stand mixer for this; trying to do this by hand is just asking for tired arms and a slightly less fluffy result. Remember how we talked about patience in the previous section? That patience really kicks in during the first step. We’re building the fluffy base for our fluffy buttercream for cakes right here. If you ever need an easy, no-bake treat to test out frosting on, you have to look at my easy tiramisu recipe!
The Importance of Creaming Butter for Fluffy Buttercream for Cakes
This is step one, and you can’t rush it! Drop that room-temperature butter right into your mixing bowl. You want to beat it on medium speed until it’s genuinely light. I mean *light*—think pale yellow and noticeably aerated—which usually takes about three full minutes. Scrape the sides down really well after this time. This essential step builds those initial air pockets needed for the final light texture we are aiming for in our chocolate buttercream frosting.
Adjusting Consistency for Pipeable Chocolate Frosting
Once you’ve added the sugar and cocoa, the mixture will look stiff, almost crumbly. That’s normal! This is where we introduce the heavy cream slowly. Start with just three tablespoons. Increase the speed and let that mixer run for a good five minutes! Yes, five minutes! This whipping incorporates air and dissolves any lingering sugar grains, which gives you that gorgeous, totally pipeable chocolate frosting. If it seems a little too thick for your spreader tool, add that last tablespoon of cream, just a tiny splash at a time, until it feels perfect for spreading or piping.
Tips for Perfect Chocolate Buttercream Frosting Every Time
Look, even when we follow the directions for this chocolate buttercream frosting to the letter, sometimes something throws us off, right? That’s what makes it a “no-fail chocolate frosting” recipe—because I’ve included all the little fixes and secrets I learned over the years. If you want that genuinely rich chocolate icing homemade result without any worry, pay attention to these pointers. They are little nuggets of wisdom I gathered from testing batch after batch!
First things first: the cocoa powder! For the deepest, most luxurious chocolate flavor, don’t just grab any old stuff. I always talk about using high-quality, Dutch-processed cocoa powder. It makes a massive difference in how dark and intense your frosting tastes. If you want an extra-decadent drizzle later on, you can pour a little of my chocolate sauce recipe right on top!
Temperature control is your new best friend when making this creamy chocolate frosting recipe. I can’t stress this enough: the butter needs to be just right. If it’s too soft—oily, even—your frosting will look soupy and flat, no matter how long you whip it. On the flip side, if it’s too cold, those sugar grains get stuck in the cold butter, and you end up with those annoying little lumps we are trying to avoid. Room temperature, soft but not greasy—that’s the sweet spot!
And speaking of avoiding lumps, pay attention to the warm-weather trick! If you happen to be making this on a super hot day, or maybe you need a pipeable chocolate frosting that won’t droop during transport, try swapping out one tablespoon of that heavy cream for melted semi-sweet chocolate that has cooled down just a touch. That extra bit of solidified chocolate helps brace the structure beautifully.
Finally, if you do over-mix or it gets a little soft while you are working, don’t panic! Just pop the whole bowl (if you can fit it!) into the fridge for about ten minutes. A quick chill tightens everything up beautifully, and then you can whip it again for one last fluffy boost before you frost.
Versatile Uses for Your Rich Chocolate Icing Homemade
The absolute best part about making this amazing chocolate buttercream frosting from scratch is how fantastically versatile it is! You don’t just make this decadent icing for one type of dessert, oh no. It’s the perfect American buttercream chocolate blend for frosting a tall layer cake, but it’s just as dreamy dolloped generously on my ultimate fudgy Oreo brownies. Need chocolate frosting for cupcakes? This pipes like a dream! I’ve used it on everything from sugar cookies to my favorite vanilla cupcakes, and it holds up beautifully.
But honestly? My favorite secret use is having a small bowl hidden away just for emergency tasting—or maybe a full spoon! There’s nothing quite like scooping up a bit of this rich chocolate icing homemade when nobody’s looking. It never lasts long enough to see the leftovers, usually!
Storage and Making Ahead with Chocolate Buttercream Frosting
I know you plan on eating most of this incredible chocolate buttercream frosting right away, but just in case you manage to save some for later—or if you like to get your baking prep done ahead of time—we need to talk storage. Making things ahead is a huge sanity saver, especially if you’re tackling a big baking project! This homemade frosting is much better than anything store-bought, but it does need a little tender care when you put it away.
If you have leftovers, you’ll want to seal that buttercream up tight in an airtight container. If you’re just keeping it on the counter for a day or two, that’s usually fine, provided your kitchen isn’t scorching hot. If you need to keep it longer, the fridge is the place to go. Just make sure the container is really well-sealed so it doesn’t absorb any other weird smells from the back of the fridge. Cold weather baking means you can store perfectly frosted treats like my easy, super moist pumpkin bread beautifully!
Now, here’s the key part if you refrigerate it: don’t even think about spreading rock-hard frosting onto a delicate cake! When you pull that container out of the fridge, it will be stiff as a brick. Let it sit on the counter for at least an hour, sometimes longer depending on how cold your kitchen is, until it softens up. Once it’s soft, transfer it back to your mixer bowl and whip it again on medium speed for about 60 seconds. That quick re-whipping brings all the luscious air back in, transforming that hard block into the smooth, spreadable texture you remember from making it fresh!
Frequently Asked Questions About Chocolate Buttercream Frosting
I always get a ton of questions after people try this recipe for the first time—which is wonderful! It means you’re getting serious about ditching the tub icing. Here are a few things folks usually ask when first making this creamy chocolate frosting recipe from scratch.
Can I make this chocolate buttercream frosting without cocoa powder?
That’s a fair question! You absolutely *can* use melted chocolate instead, but I really encourage you to stick with the cocoa powder for this version. When you use melted chocolate, you are adding extra fat and often sugar, which completely changes the science of the recipe. If you try to swap it directly, you’ll likely end up with frosting that is too soft or greasy unless you start adjusting things like the butter content and the amount of powdered sugar, which messes with the lovely smooth chocolate buttercream structure we worked so hard to achieve here. Stick to the sifted cocoa for this guaranteed result!
How do I get my chocolate frosting from scratch to look glossy?
Oh, the gloss! That’s what gives it that beautiful, high-end look. It really comes down to two things we covered: the whipping time and the fat-to-liquid ratio. When you beat the mixture on medium-high speed for those full five minutes (yes, seriously, five minutes!), you are incorporating tons of tiny air bubbles, and those are what catch the light and make it look shiny. However, be careful not to over-whip past the recommended time, especially if your kitchen is warm. Sometimes too much whipping can actually deflate the texture and make it look a little dull or grainy again, so stop when it’s light and fluffy!
If you are looking for other amazing recipes for your baking projects—from savory to sweet—you might want to take a peek at my recipe for the easy chicken pot pie casserole for a lovely dinner contrast!
Nutritional Estimates for Chocolate Buttercream Frosting
Now, I know we aren’t making this chocolate buttercream frosting because we are counting calories—we’re making it because it tastes like pure joy! But I always believe in giving you all the information, just so you know what you’re working with. These numbers are based on using unsalted butter and standard store-bought ingredients, so yours might vary slightly depending on the brands you choose, especially the cocoa powder and cream!
For a standard serving size of about 1/4 cup, here is what we are generally looking at:
- Calories: Roughly 350
- Sugar: About 45 grams (It is frosting, after all!)
- Fat: Around 19 grams
- Sodium: Just shy of 70 mg
- Protein: About 2 grams
Remember, these are just estimates to give you a general idea. If you use a lower-fat cream or a different type of sugar substitute, all those numbers change, of course! But when you are deciding between this homemade goodness and that tub of stuff from the store, knowing that you control the quality of the ingredients—that’s what really matters to me. It solidifies why this is the best chocolate buttercream!
Share Your Decadent Chocolate Icing Homemade Creations
Well, that’s it, my friends! You are now equipped to make what I truly believe is the best chocolate buttercream frosting out there. It’s rich, it’s easy, and it’s definitely better than anything you pull off a grocery store shelf. Now that you’ve whipped up this luscious, decadent chocolate icing, I really want to hear all about it!
Did you use it on simple cupcakes? Did you swirl it high on a layer cake? Or did you, like me sometimes, just eat a big spoonful straight from the bowl while cleaning up? Every single time you make something special in your kitchen, it creates a memory, and I want to be part of that! Please take a moment to leave a rating right below this section—it helps so much and lets me know what you thought of the texture and flavor.
And if you took a gorgeous photo of your finished dessert using this chocolate frosting from scratch, please tag me on social media! I absolutely adore swooning over your creations. It truly fills my heart seeing my recipes bring joy to tables across the country. If you need something savory to balance out all that sweetness, you must try out my recipe for the easy steak fajitas next time you’re in the kitchen!
PrintUltimate Smooth & Creamy Chocolate Buttercream Frosting
This recipe delivers the best chocolate buttercream frosting you will ever make. It is rich, creamy, and fluffy, perfect for piping bakery-style decorations on cakes and cupcakes, or enjoying straight from the bowl.
- Prep Time: 15 min
- Cook Time: 0 min
- Total Time: 15 min
- Yield: About 3 cups 1x
- Category: Dessert Topping
- Method: Mixing
- Cuisine: American
- Diet: Vegetarian
Ingredients
- 1 cup (2 sticks) unsalted butter, softened to room temperature
- 3 1/2 cups powdered sugar, sifted
- 3/4 cup unsweetened cocoa powder, sifted
- 1 teaspoon vanilla extract
- 1/4 teaspoon salt
- 3 to 5 tablespoons heavy cream or milk
Instructions
- Place the softened butter in the bowl of a stand mixer fitted with the paddle attachment. Beat the butter on medium speed until it is very light and creamy, about 3 minutes. Scrape down the sides of the bowl.
- Gradually add the sifted powdered sugar, one cup at a time, mixing on low speed until just combined after each addition. Scrape down the bowl frequently.
- Add the sifted cocoa powder, vanilla extract, and salt. Mix on low speed until the dry ingredients are incorporated.
- Increase the mixer speed to medium-high. Add 3 tablespoons of heavy cream. Beat for 3 to 5 minutes until the frosting is light, fluffy, and smooth. This whipping time is key for a non-grainy texture.
- If the frosting seems too stiff for spreading or piping, add the remaining cream, one tablespoon at a time, until you reach your desired consistency.
- Use immediately to frost layer cakes, cupcakes, brownies, or cookies.
Notes
- For the richest chocolate flavor, use high-quality, Dutch-processed cocoa powder.
- If your butter is too warm, the frosting will be soupy. If it is too cold, the frosting will be lumpy. Aim for soft, but not greasy, butter.
- If you need a very stable, pipeable chocolate frosting for warm weather, substitute 1 tablespoon of the heavy cream with 1 tablespoon of melted and slightly cooled semi-sweet chocolate.
- If the frosting becomes too soft while working, chill the bowl for 10 minutes before continuing to whip.
Nutrition
- Serving Size: 1/4 cup
- Calories: 350
- Sugar: 45
- Sodium: 65
- Fat: 19
- Saturated Fat: 11
- Unsaturated Fat: 8
- Trans Fat: 0
- Carbohydrates: 48
- Fiber: 1
- Protein: 2
- Cholesterol: 55