
The air is getting crisp, twinkly lights are popping up everywhere, and that means it’s officially cheesecake bar season! Seriously, is there anything more fitting for a holiday get-together than a plate piled high with delicious Christmas cheesecake bars? I know for me, baking is all about creating those warm, fuzzy memories in the kitchen, just like Ellie and her grandmother used to do. That’s why I absolutely adore how simple these festive beauties are – they deliver all the wow factor without keeping you chained to the oven when you should be sipping on something warm and festive. These Christmas cheesecake bars are my go-to for making holiday magic happen, easy-peasy!
- Why You'll Love These Christmas Cheesecake Bars
- Ingredients for Your Festive Christmas Cheesecake Bars
- Crafting the Perfect Christmas Cheesecake Bars: Step-by-Step
- Tips for Perfect Christmas Cheesecake Bars Every Time
- Make-Ahead and Storage for Your Holiday Dessert Bars
- Ingredient Notes and Substitutions for Festive Cheesecake Squares
- Serving Suggestions for Your Christmas Cheesecake Bars
- Frequently Asked Questions About Christmas Cheesecake Bars
- Estimated Nutritional Information
- Share Your Festive Creations!
Why You’ll Love These Christmas Cheesecake Bars
Honestly, these bars are a total holiday lifesaver! Here’s why they’ll become your new favorite:
- Super Easy to Make: No fuss, no complicated steps. Perfect for when you’re short on time!
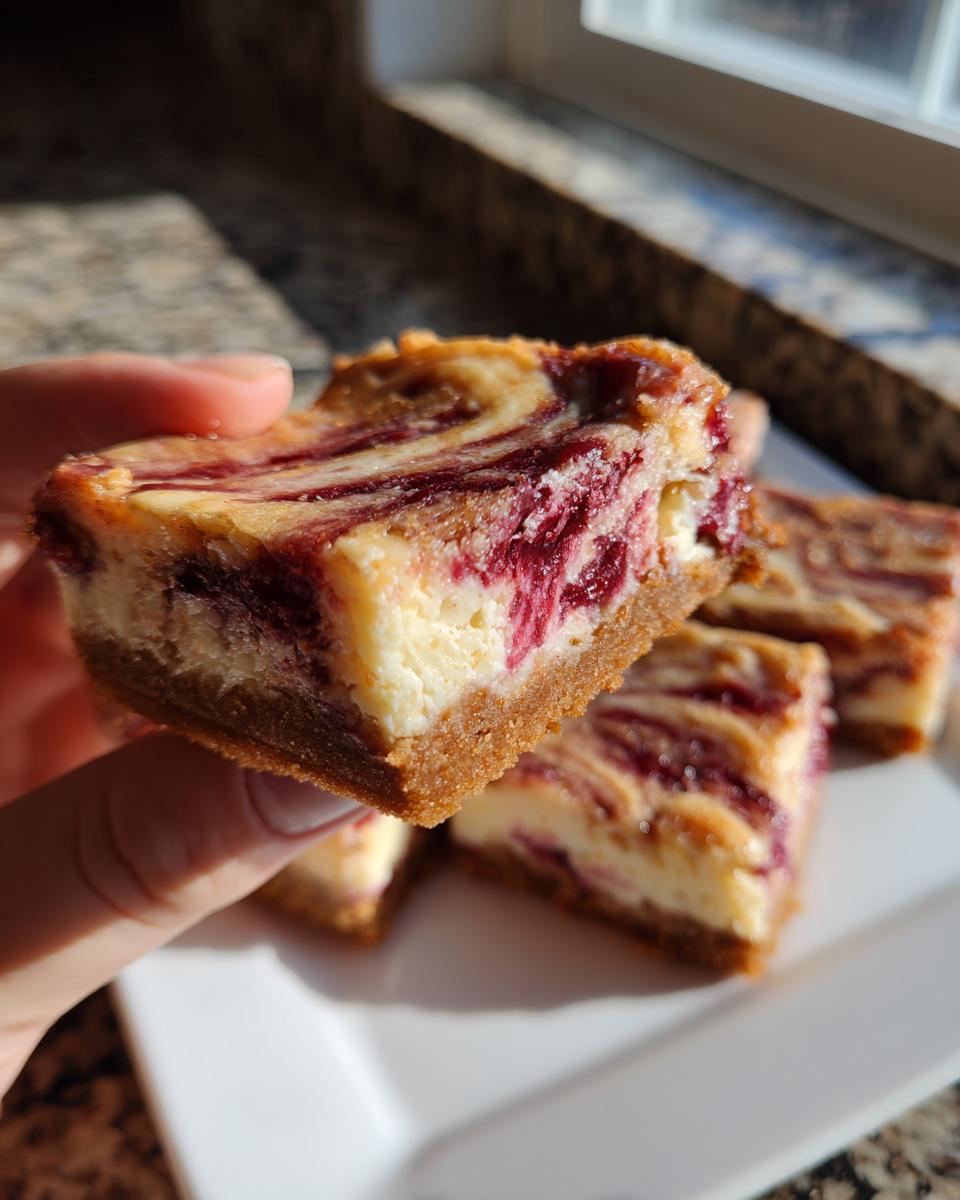
- Festive & Pretty: That gingersnap crust and cherry swirl just scream holiday cheer.
- Crowd Pleaser: Everyone loves cheesecake, right? These are always a hit!
- Make Ahead Magic: Whip them up a day or two before so you can actually relax during the party.
- Perfectly Portioned: Easy to grab and go, making them ideal for potlucks.
Ingredients for Your Festive Christmas Cheesecake Bars
Alright, let’s talk about what makes these Christmas cheesecake bars so special! It all comes down to getting the right ingredients. Trust your baker friend here, I’ve tried all sorts of shortcuts, but using these particular items truly makes a difference in getting that perfect festive flavor and texture. You’ll find them at most grocery stores, so happy baking!
For the Gingersnap Crust:
- 1 1/2 cups gingersnap cookie crumbs (I like to crush my own for the best flavor!)
- 1/4 cup granulated sugar
- 6 tablespoons unsalted butter, melted (make sure it’s truly melted, not hot!)
For the Creamy Cheesecake Filling:
- 3 (8 ounce) packages cream cheese, softened (this is SO important – leave them out for at least an hour!)
- 1 cup granulated sugar
- 3 large eggs (room temperature is best here too!)
- 1 teaspoon vanilla extract (use the good stuff!)
And for that Festive Swirl:
- 1/2 cup cherry pie filling (or your favorite berry filling, yum!)
Crafting the Perfect Christmas Cheesecake Bars: Step-by-Step
Alright, let’s dive into the fun part! Making these Christmas cheesecake bars is actually really straightforward. Think of it like building a yummy little dessert brick by brick. Ellie’s whole philosophy is about making things accessible and foolproof, and that’s exactly what we’re doing here. Don’t worry if you’re not a professional baker; these steps are designed to make you feel like one! If you loved our sopapilla cheesecake bars, you’re going to adore these festive squares.
Preparing the Gingersnap Crust
First things first, let’s get that crust going! You’re just going to mix up your gingersnap crumbs, that little bit of sugar, and the melted butter. Give it a good stir until it all looks nice and moist, like wet sand. Then, press it *really* firmly into the bottom of your baking pan. I like to use the flat bottom of a glass or a measuring cup to get it nice and even. Once that’s done, pop it into your preheated oven for just 10 minutes. This helps it get a little crispy and hold together. Let it cool a bit while we whip up the yummy part!
Creating the Creamy Cheesecake Filling
Now for the creamy goodness! Make sure your cream cheese is really soft – seriously, this makes all the difference. You’ll beat it with the other cup of sugar until it’s super smooth. No lumps allowed! Then, add your eggs, but do it one at a time, mixing after each one. This helps keep the filling nice and smooth. Pop in that vanilla extract and give it one last quick mix. Easy peasy, right? This is where the magic really starts to happen, kind of like building that delicious base for our no-bake cheesecake.
Swirling in the Festive Cherry Topping
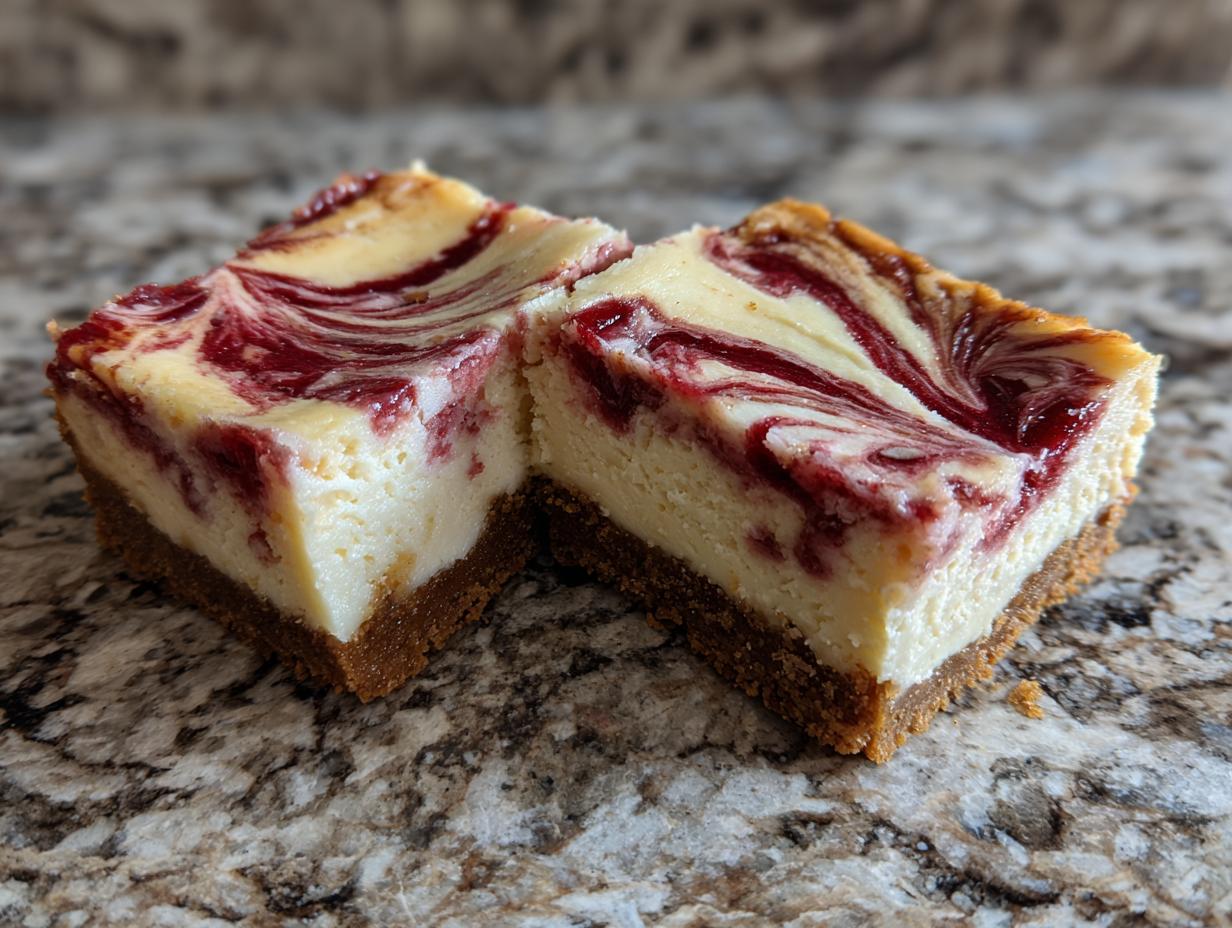
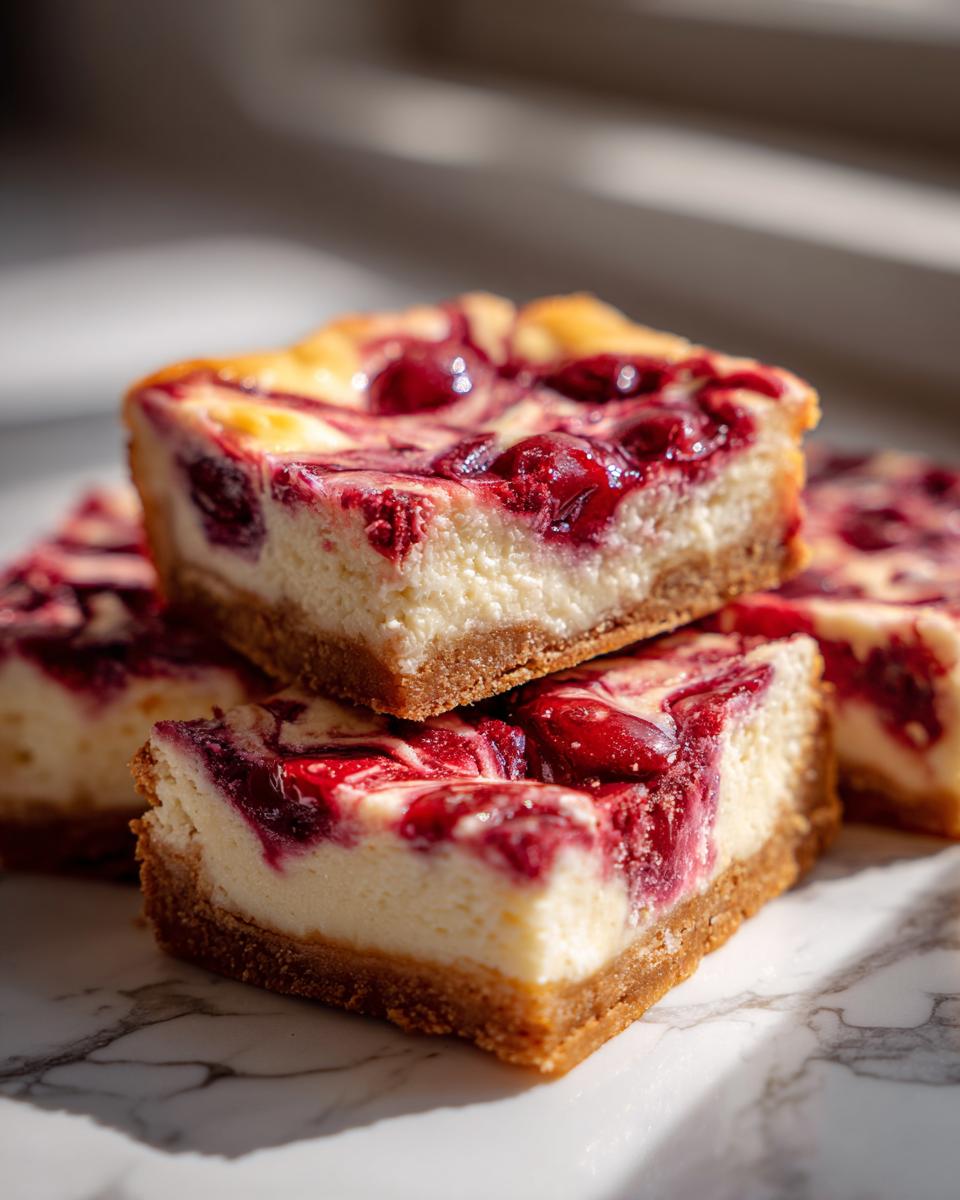
Okay, now for the super festive part that makes them look so special! Pour that gorgeous cream cheese filling right over your slightly cooled gingersnap crust. Don’t worry about making it perfectly smooth on top, because we’re about to add the cherry! Just spoon dollops of the cherry pie filling all over the surface. Then, grab a knife or a skewer and gently swirl it around. You don’t want to mix it in completely – just a few little swirls to create that pretty marbled effect. It makes them look so festive, perfect for any holiday table!
Baking and Cooling Your Christmas Cheesecake Bars
Time to bake! Pop those bars back into the oven for about 30 to 35 minutes. You’ll know they’re ready when the edges look set, but the center might still be a *little* jiggly. That’s exactly what you want! Now, this part is super important: let them cool completely in the pan on a wire rack. Patience, my friends! Once they’re totally cool, then it’s time to chill them in the fridge for at least a couple of hours. This makes them firm up perfectly, giving you those clean cuts you want for your holiday bar. Trust me, it’s worth the wait!
Tips for Perfect Christmas Cheesecake Bars Every Time
Okay, so you’ve made these gorgeous Christmas cheesecake bars, and you want them to look as amazing as they taste. I get it! A few little tricks can make all the difference. First off, for those super clean, crisp cuts you see in pictures, chilling is your best friend. Pop them in the fridge for at least a couple of hours after they’ve completely cooled. Use a long, sharp knife – wipe it clean between cuts, trust me on this one! If you ever worry about cheesecake cracking (though it’s less common in bar form!), try not to overmix the filling once the eggs are in, and definitely let them cool gradually. The biggest thing is just to be patient with the cooling and chilling – it makes for a much happier cheesecake bar experience!
Make-Ahead and Storage for Your Holiday Dessert Bars
Okay, the best part about these Christmas cheesecake bars is that they are totally a game-changer for busy holiday prep! You can absolutely make them a day or two ahead of your party. Honestly, I think they taste even better the next day! Just let them cool completely, then cover the pan tightly with plastic wrap. They’ll stay nice and fresh in the fridge. If you want to freeze them, that’s a great idea too! Make sure they’re fully cooled and chilled, then cut them into bars and freeze them in a single layer on a baking sheet. Once they’re firm, you can transfer them to a freezer bag or container for up to about a month. Thaw them overnight in the fridge before serving—easy peasy! Think of them like our apple brownies, perfect for making ahead!
Ingredient Notes and Substitutions for Festive Cheesecake Squares
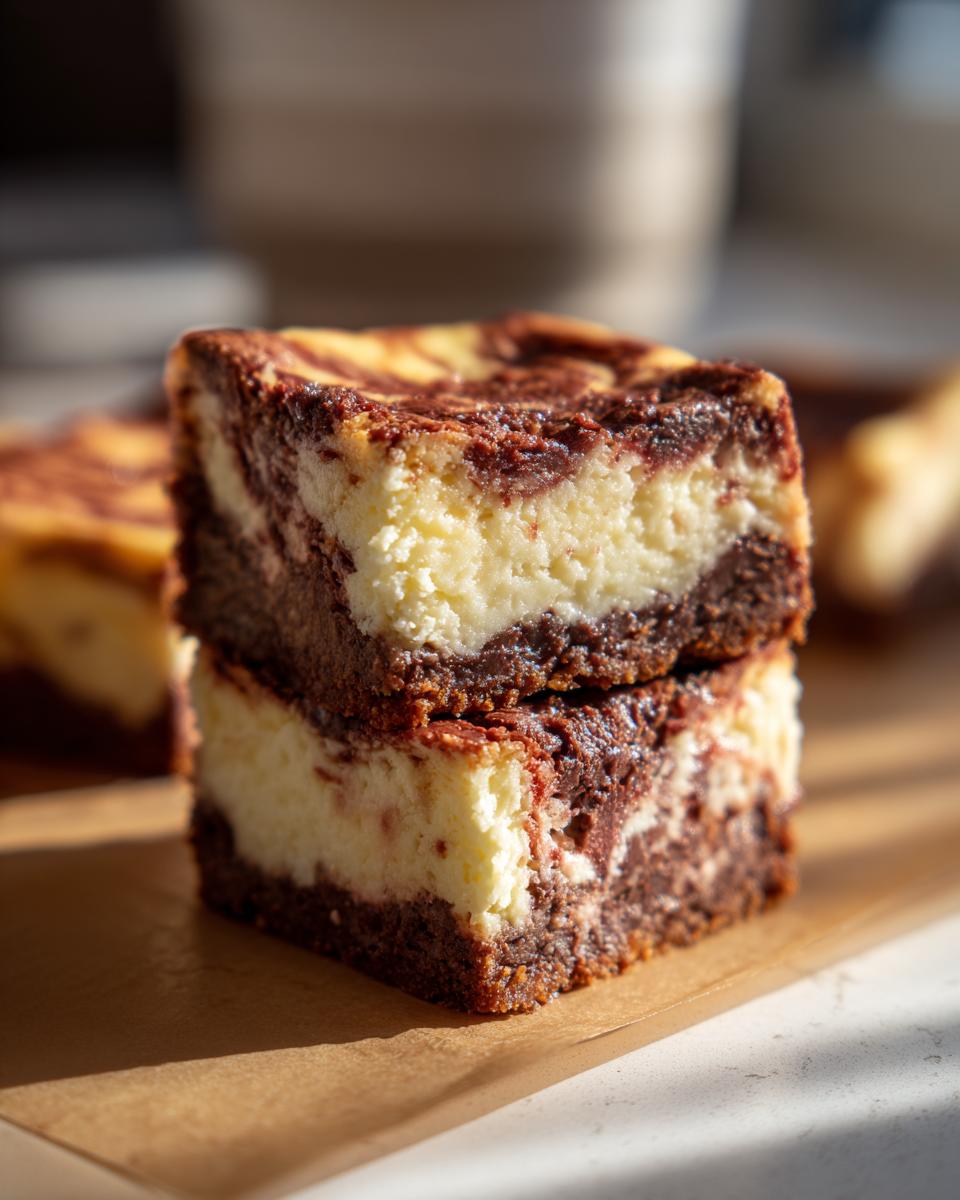
Let’s chat a little more about these ingredients because, honestly, they make all the difference! Those gingersnap cookies? They give the crust this amazing spiced flavor that just screams holidays. But if you’re not a huge gingersnap fan, no worries! You could totally use graham crackers or even vanilla wafers for the crust. Just about 1 1/2 cups of crumbs will do. And the cherry pie filling? It’s the classic choice, but imagine a raspberry swirl, or maybe blueberry! It adds that pop of color and fruity sweetness that just brightens everything up. It’s all about making these Christmas cheesecake bars YOUR perfect treat, just like how we love adapting things for our pumpkin bars!
Serving Suggestions for Your Christmas Cheesecake Bars
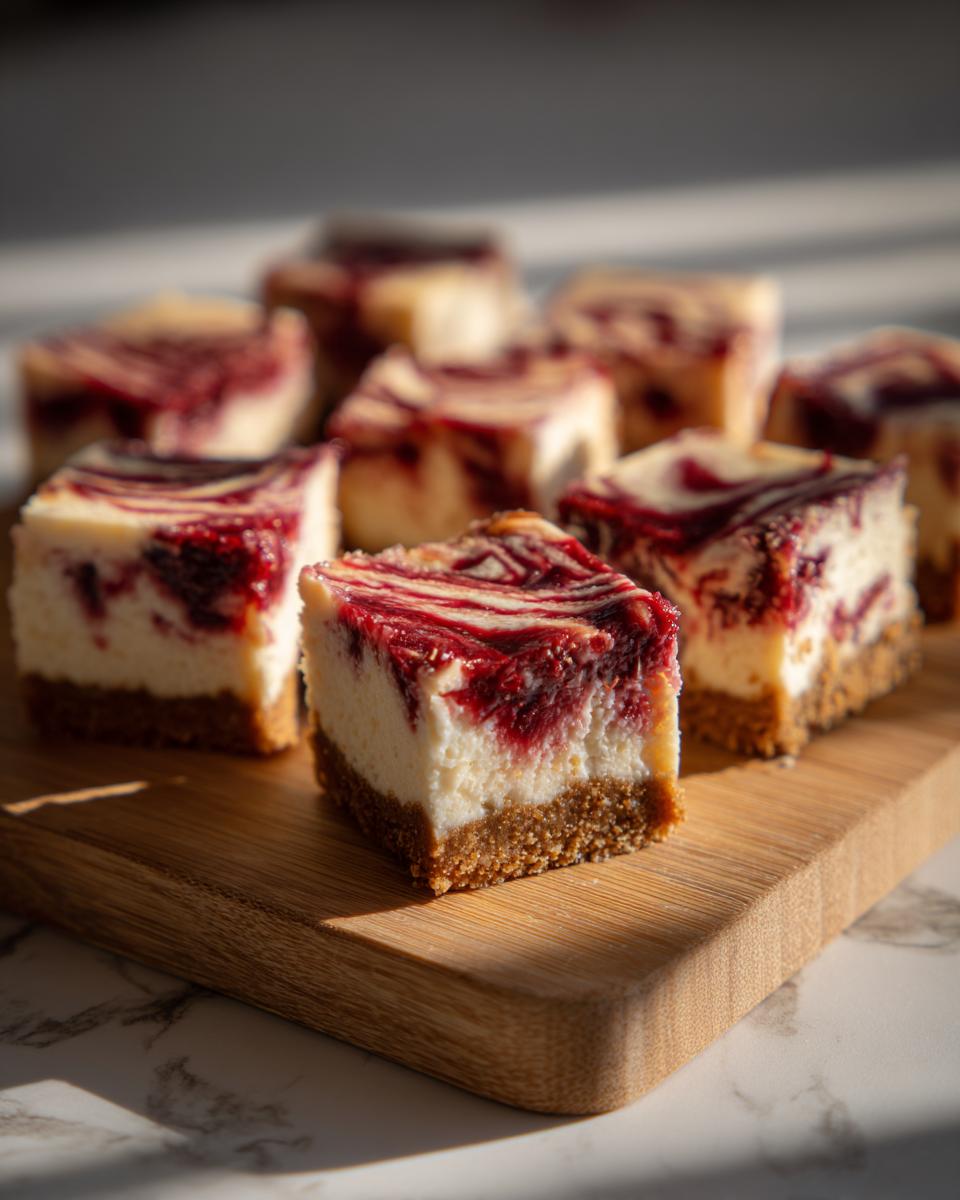
These Christmas cheesecake bars are absolute gems for any holiday gathering! They’re super portable, which makes them fantastic for potlucks or taking to a friend’s house. I love serving them alongside a hot cup of coffee or some festive tea. And if you want to take it up a notch? A little dollop of whipped cream or even some extra cherry pie filling on the side is just divine. They stand so beautifully on their own, but a little something extra can make them feel extra special. They’re like those apple pie cupcakes – easy to share and always a crowd-pleaser!
Frequently Asked Questions About Christmas Cheesecake Bars
Can I make these Christmas cheesecake bars ahead of time?
Oh, absolutely! These festive cheesecake squares are totally make-ahead friendly. I like to bake them a day or two before my event. Just let them cool completely, then cover them well with plastic wrap and pop them in the fridge. They stay wonderfully fresh and even taste better the next day!
How do I get really clean cuts for my holiday dessert bars?
That’s a great question! For those super sharp cuts, the secret is chilling. After your bars have cooled completely, let them chill in the refrigerator for at least 2-3 hours. Then, use a long, sharp knife. Dip it in hot water and wipe it dry with a clean towel between each cut. It makes a world of difference!
What if I don’t have gingersnap cookies for the crust?
No worries at all! If gingersnaps aren’t your thing or you can’t find them, you have options. Graham cracker crumbs are a classic substitute and work beautifully. You could also try vanilla wafers or even shortbread cookies for a slightly different, but still delicious, crust for your Christmas cheesecake bars. Just make sure you have about 1 1/2 cups of crumbs!
My cheesecake filling cracked a little. Is it ruined?
Oh no, don’t worry about a little crack! It happens sometimes, even with the best intentions. Since these are bars, a tiny crack is barely noticeable, especially once you add the cherry swirl and cut them up. Overmixing the eggs or baking at too high a temperature can sometimes cause cracks. But honestly, for these festive cheesecake squares, taste is king, and a small crack doesn’t affect that one bit! They’ll still disappear fast, just like my pecan pie muffins.
Estimated Nutritional Information
Alright, let’s talk numbers for these delicious Christmas cheesecake bars! Keep in mind these are just estimates, because what you use (like specific brands or how much swirl you add!) can change things a little. But generally, one of these festive squares will give you around 250 calories, about 15g of fat, and 4g of protein. They’ve got roughly 25g of carbohydrates and about 20g of sugar. Enjoy them as a wonderful holiday treat!
Share Your Festive Creations!
I just LOVE seeing what you all create in your kitchens! If you whip up these Christmas cheesecake bars, I’d be absolutely thrilled if you could leave a comment below telling me how they turned out. Did you try a fun variation? Did your family devour them? And if you snap a pic, please share it on social media and tag me! Seeing your festive holiday desserts brings me so much joy. You can learn more about how we handle shares and privacy on our privacy policy page. Happy Baking!
PrintChristmas Cheesecake Bars
Festive and easy cheesecake bars with a gingersnap crust and cherry topping, perfect for holiday gatherings and potlucks.
- Prep Time: 20 min
- Cook Time: 35 min
- Total Time: 55 min
- Yield: 16 servings 1x
- Category: Dessert
- Method: Baking
- Cuisine: American
- Diet: Vegetarian
Ingredients
- 1 1/2 cups gingersnap cookie crumbs
- 1/4 cup granulated sugar
- 6 tablespoons unsalted butter, melted
- 3 (8 ounce) packages cream cheese, softened
- 1 cup granulated sugar
- 3 large eggs
- 1 teaspoon vanilla extract
- 1/2 cup cherry pie filling
Instructions
- Preheat your oven to 350°F (175°C). Line an 8×8 inch baking pan with parchment paper, leaving an overhang on the sides.
- In a medium bowl, combine the gingersnap cookie crumbs and 1/4 cup granulated sugar. Pour in the melted butter and stir until the crumbs are evenly moistened. Press the mixture firmly into the bottom of the prepared baking pan to form the crust.
- Bake the crust for 10 minutes. Remove from the oven and let it cool slightly while you prepare the filling.
- In a large bowl, beat the softened cream cheese and 1 cup granulated sugar with an electric mixer until smooth and creamy.
- Beat in the eggs one at a time, mixing well after each addition. Stir in the vanilla extract.
- Pour the cream cheese filling over the prepared crust.
- Spoon dollops of the cherry pie filling over the cream cheese mixture. Use a knife or skewer to gently swirl the cherry filling into the cheesecake batter for a marbled effect.
- Bake for 30-35 minutes, or until the edges are set and the center is almost set.
- Let the cheesecake bars cool completely in the pan on a wire rack.
- Once cooled, use the parchment paper overhang to lift the cheesecake out of the pan. Cut into bars.
Notes
- For clean cuts, chill the cheesecake bars in the refrigerator for at least 2 hours before slicing.
- These bars can be made up to 2 days in advance and stored in an airtight container in the refrigerator.
- You can substitute other fruit pie fillings, like raspberry or blueberry, for the cherry filling.
Nutrition
- Serving Size: 1 bar
- Calories: 250
- Sugar: 20g
- Sodium: 150mg
- Fat: 15g
- Saturated Fat: 9g
- Unsaturated Fat: 6g
- Trans Fat: 0g
- Carbohydrates: 25g
- Fiber: 1g
- Protein: 4g
- Cholesterol: 50mg