
“Oh, summer! The season of sun-drenched fruit and easy, breezy desserts. And when those glorious sour cherries start showing up, I know exactly what I’m making: this incredible sour cherry crisp! Honestly, it’s my go-to because it’s practically no-fuss. We’re talking under 10 minutes of prep and it’s perfect for making ahead if you have guests coming. I remember making this for the first time after finding a basket of tart cherries at a local farm stand, and it was an instant hit. No crust to worry about, just pure, delicious fruity goodness with a sweet, crunchy topping. It always reminds me of those long, warm evenings. You can read more about where our recipes come from on our about page!”
- Why You'll Love This Easy Sour Cherry Crisp
- Ingredients for the Best Sour Cherry Crisp
- How to Make Sour Cherry Crisp: Step-by-Step
- Tips for a Perfect Old Fashioned Sour Cherry Crisp
- Serving Suggestions for Tart Cherry Crisp
- Frequently Asked Questions about Sour Cherry Crisp
- Nutritional Information for Easy Sour Cherry Crisp
- Share Your Sour Cherry Crisp Creations!
Why You’ll Love This Easy Sour Cherry Crisp
Okay, so why is this sour cherry crisp my absolute favorite summer bake? Let me break it down for you:
- It’s ridiculously easy – we’re talking 10 minutes of prep, tops! Seriously, you can whip this up before the oven even finishes preheating.
- No crust to worry about! Just pure, fruity goodness topped with the most amazing crunchy, crumbly oat topping.
- It’s the perfect way to use up those glorious, tart sour cherries. Sweet enough to be a treat, but that tartness really sings!
- Plus, it’s a fantastic make-ahead situation. Bake it, let it cool, cover it up, and reheat if needed. So handy!
Ingredients for the Best Sour Cherry Crisp
Alright, let’s talk about what goes into making this sour cherry crisp absolutely amazing. It’s really simple, you probably have most of this stuff in your pantry already!
For the filling, you’ll need:
- 4 cups sour cherries – Use them fresh or frozen, totally your call! If using frozen, no need to thaw them first. They’ll just release a little more juice while baking.
- 1/2 cup granulated sugar – This helps balance out that lovely tartness.
- 2 tablespoons cornstarch – This is our little helper to thicken up the cherry juices so it’s not too runny.
- 1 teaspoon lemon zest – Just a tiny bit to brighten everything up!
- 1 teaspoon vanilla extract – Because, well, vanilla makes everything better, right?
And for that glorious crumb topping:
- 1 1/2 cups rolled oats – Old-fashioned are best here, they give it that perfect chewy texture.
- 1 cup all-purpose flour – Or if you’re going gluten-free, grab some gluten-free all-purpose flour!
- 1 cup packed brown sugar – This is key for that caramel-y, comforting flavor.
- 1/2 teaspoon ground cinnamon
- 1/4 teaspoon salt – Just to make all those sweet flavors pop!
- 3/4 cup cold unsalted butter, cut into cubes – Make sure it’s cold! We’ll talk about why in a bit. You can also use your favorite dairy-free butter substitute if you like.
- 1/2 cup chopped pecans or walnuts – Nuts add such a lovely crunch and flavor! I’m partial to pecans, but walnuts are fantastic too.
How to Make Sour Cherry Crisp: Step-by-Step
Okay, so making this sour cherry crisp is honestly a breeze! You start by getting your oven all nice and toasty. Then, we’re going to mix up the juicy filling and whip out that amazing crumbly topping. It all comes together pretty quick, so you can be digging into this bubbly, delicious dessert in no time! You can find more details about our recipe standards on our terms of use page!
Preparing the Cherry Filling for Your Sour Cherry Crisp
First things first, grab a big bowl. If you’re using fresh cherries, give them a quick rinse. Toss your sour cherries (fresh or not!) with the granulated sugar, that cornstarch magic to thicken up the juices, the bright lemon zest, and the sweet vanilla. Give it all a gentle stir, just enough so those cherries are coated in that lovely mixture. It’s not rocket science, just coated cherries ready for the oven!
Crafting the Perfect Sour Cherry Crisp Topping
Now for the best part – that crumbly, crunchy topping! In a separate bowl, whisk together your rolled oats, flour, brown sugar, cinnamon, and salt. Make sure they’re all good and mixed. Then, add those cold butter cubes. This is where the magic happens! You want to use your fingers or a pastry blender to cut that butter into the dry stuff. Keep working it until it looks like coarse crumbs, with some pea-sized pieces of butter still hanging around. Don’t overdo it; those little butter bits create pockets of deliciousness! Finally, stir in your chopped nuts for extra crunch. Trust me, getting that texture right is key!
Assembling and Baking Your Sour Cherry Crisp
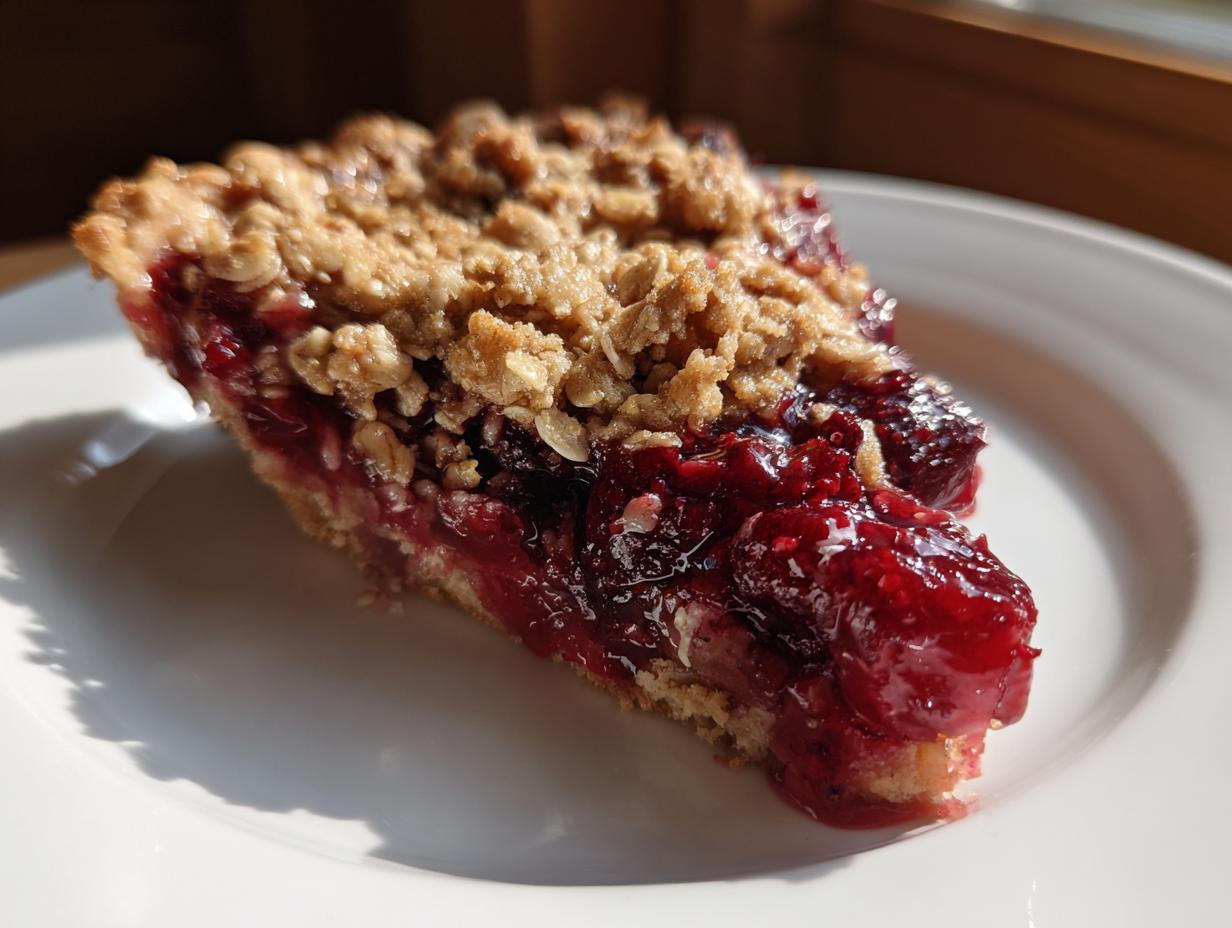
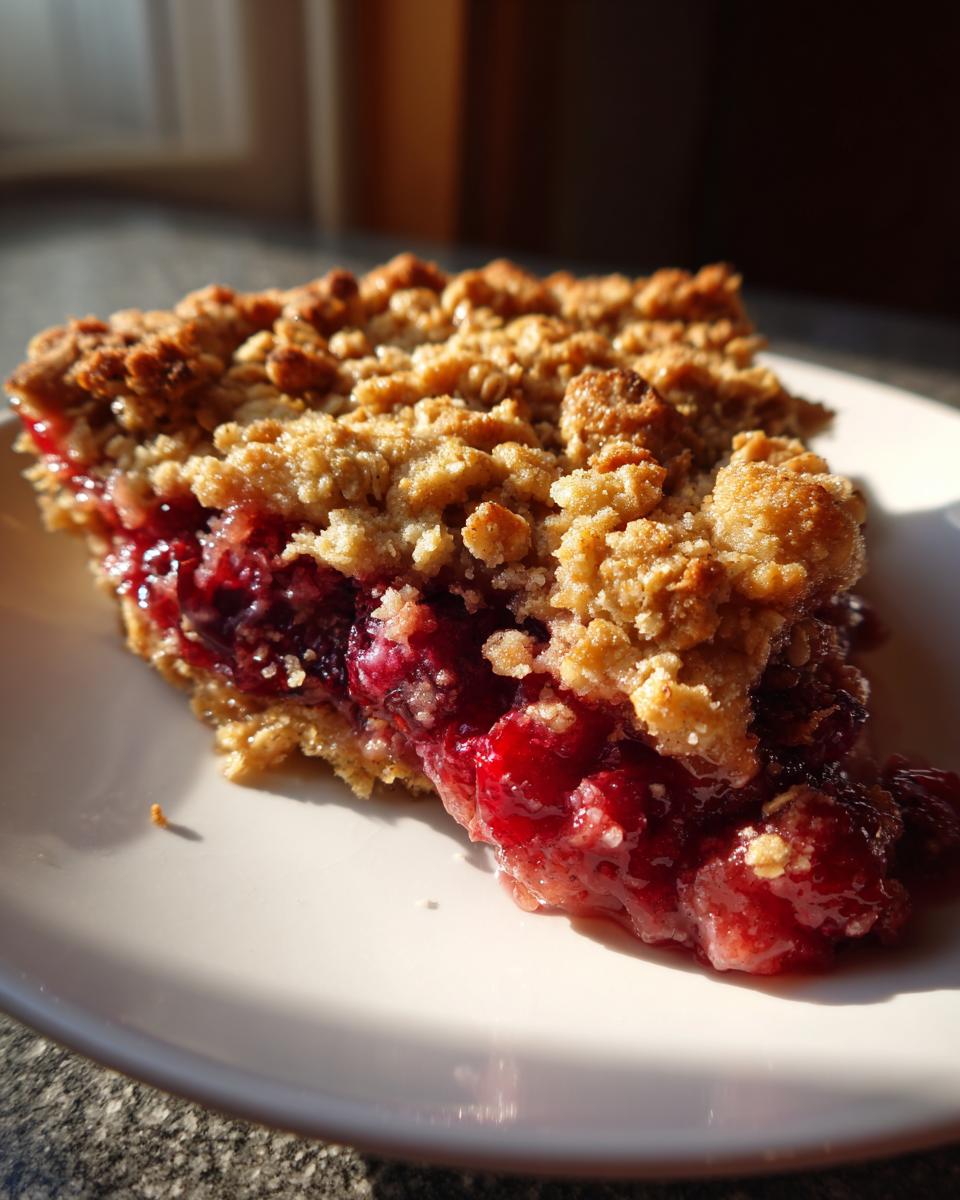
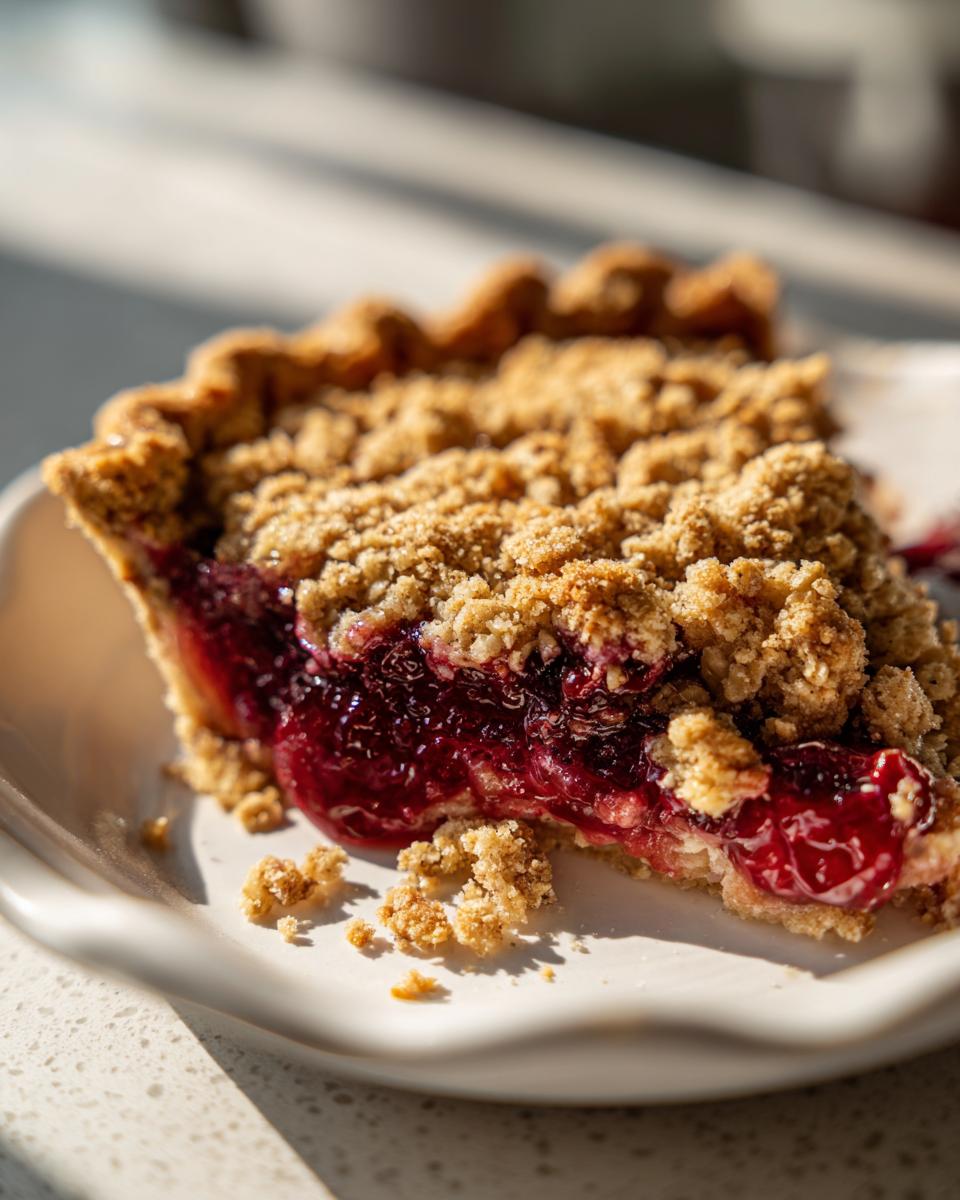
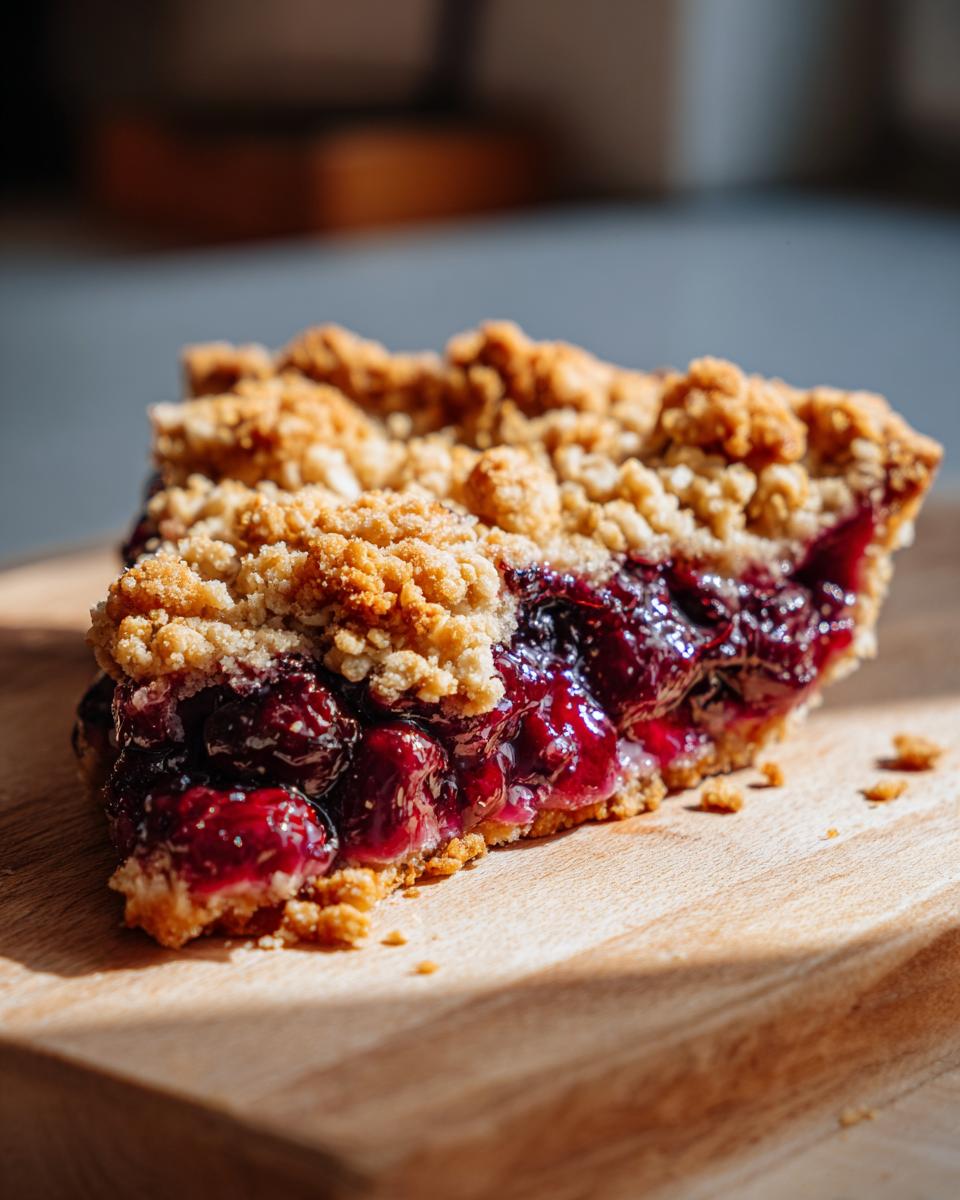
Time to put it all together! Pour that beautiful cherry filling into your baking dish. Then, evenly sprinkle that glorious crumble topping all over the cherries. Get it right to the edges! Pop it into your preheated oven at 375°F (190°C). You’re looking for the topping to turn a gorgeous golden brown and for those cherries underneath to get all bubbly and excited. That usually takes about 35 to 45 minutes. Once it’s out, let it cool for at least 10-15 minutes before you even think about digging in. It’s worth the wait, I promise!
Tips for a Perfect Old Fashioned Sour Cherry Crisp
Okay, so you’ve made the crisp and it’s delish, but how do we make sure it’s *perfect* every single time? It’s all about a few little tricks and paying attention to the details. Seriously, these tips will take your sour cherry crisp from great to absolutely unforgettable. We’re talking about getting that beautifully crisp topping and that wonderfully gooey, tart filling. It’s not complicated, just little things that make a big difference!
Ingredient Notes and Substitutions for Sour Cherry Crisp
Let’s dive a little deeper into the ingredients, because they really do matter for the *best* sour cherry crisp. Fresh cherries are wonderful when they’re in season, but don’t shy away from frozen ones! Just toss them in straight from the freezer – they’ll release their juices as they bake and thicken up perfectly with the cornstarch. For the topping, rolled oats are my jam; they give it a great chew. If you’re going gluten-free, make sure your oats are certified gluten-free! And for the nuts? Pecans or walnuts are both fantastic, but honestly, any nut you love will work. Almonds are great too! And if you don’t have all-purpose flour, almond flour can give it a lovely, slightly denser texture if you’re feeling adventurous.
Make-Ahead and Storage for Your Homemade Sour Cherry Crisp
One of my favorite things about this sour cherry crisp is that you can totally get a head start. You can mix up the cherry filling and the crumble topping separately, cover them tightly, and keep them in the fridge for about a day. When you’re ready to bake, just assemble and pop it in the oven! If you have any leftovers (which is rare in my house, but hey, it happens!), just cover that cooled crisp tightly with plastic wrap or foil. It’ll keep nicely in the fridge for about 3-4 days. To reheat, just pop it in a moderate oven for about 10-15 minutes until warm and bubbly again. It’s still amazing the next day!
Serving Suggestions for Tart Cherry Crisp
This tart cherry crisp is just begging for something creamy and cool to go alongside it. My absolute favorite way to serve it is warm with a big scoop of vanilla bean ice cream. The contrast between the warm, bubbly fruit and the cold, creamy ice cream is just heavenly! If ice cream isn’t your jam, a dollop of fluffy whipped cream or a spoonful of tangy crème fraîche is also divine. They both cut through the sweetness and highlight that wonderful tartness of the cherries perfectly. It really makes the whole dessert sing!

Frequently Asked Questions about Sour Cherry Crisp
Got questions about this amazing sour cherry crisp? I totally get it! Sometimes you need a little extra info to make sure your bake turns out just right. From cherry talk to crisp topping secrets, I’ve got you covered. We want every bite of this tart cherry crisp to be pure perfection, right? For more on our recipe guidelines, check out our privacy policy!
Can I use fresh or frozen cherries for this sour cherry crisp?
Absolutely! Whether you have gorgeous fresh cherries or convenient frozen ones, this easy sour cherry crisp works beautifully with both. If you’re using frozen cherries, there’s no need to thaw them first. Just toss them straight into the bowl with the other filling ingredients. They might release a little more juice as they bake, but that’s what our cornstarch is there for!
What are good substitutes for all-purpose flour in the crisp topping?
For lovers of a gluten-free cherry crisp, reach for certified gluten-free all-purpose flour! It works just like the regular stuff. If you want to switch things up even more, almond flour or even oat flour can be really tasty in the topping too, though they might change the texture a tiny bit. Experiment and find your fave!
How do I prevent the bottom of my fruit crisp from being soggy?
Oh, the dreaded soggy bottom! To prevent that, make sure your oven is fully preheated before your crisp goes in. Sometimes, if the filling is super juicy, I’ll pop the cherries in the baking dish for about 10 minutes before adding the topping. This gives them a head start on releasing some liquid, which then bakes off. Also, letting the crisp sit for a bit after baking helps it set up and keeps things from getting mushy!
Nutritional Information for Easy Sour Cherry Crisp
Just a friendly heads-up, this nutritional info is an estimate and can totally vary depending on exactly what you use. But for our sour cherry crisp, a serving usually clocks in around 450 calories, with about 22g of fat, 5g of protein, 60g of carbs, 5g of fiber, and 40g of sugar. It’s a tasty treat, after all!
Share Your Sour Cherry Crisp Creations!
I just ADORE seeing what you all create in your kitchens! When you whip up this sour cherry crisp, I’d be tickled pink if you’d share your photos on social media, or even better, rate the recipe right here. It helps other bakers know what to expect, and honestly, I just love seeing your beautiful bakes! Don’t forget to tag us or use our contact page at DeliceRecipe so I can see your masterpieces!
PrintEasy Sour Cherry Crisp

A simple, no-crust summer dessert featuring tart cherries and a sweet oat-nut crumble topping. Perfect for home bakers looking for a make-ahead fruit crisp.
- Prep Time: 10 min
- Cook Time: 40 min
- Total Time: 50 min
- Yield: 6 servings 1x
- Category: Dessert
- Method: Baking
- Cuisine: American
- Diet: Vegetarian
Ingredients
- 4 cups sour cherries, fresh or frozen
- 1/2 cup granulated sugar
- 2 tablespoons cornstarch
- 1 teaspoon lemon zest
- 1 teaspoon vanilla extract
- 1 1/2 cups rolled oats
- 1 cup all-purpose flour (or gluten-free all-purpose flour)
- 1 cup packed brown sugar
- 1/2 teaspoon ground cinnamon
- 1/4 teaspoon salt
- 3/4 cup cold unsalted butter, cut into cubes (or dairy-free butter substitute)
- 1/2 cup chopped pecans or walnuts
Instructions
- Preheat your oven to 375°F (190°C).
- In a large bowl, combine the sour cherries, granulated sugar, cornstarch, lemon zest, and vanilla extract. Toss gently to coat the cherries.
- Pour the cherry mixture into an 8×8 inch baking dish.
- In a separate medium bowl, combine the rolled oats, flour, brown sugar, cinnamon, and salt.
- Add the cold butter cubes to the oat mixture. Use a pastry blender or your fingertips to cut the butter into the dry ingredients until the mixture resembles coarse crumbs.
- Stir in the chopped nuts.
- Evenly sprinkle the crumble topping over the cherry mixture in the baking dish.
- Bake for 35-45 minutes, or until the topping is golden brown and the cherry filling is bubbly.
- Let the crisp cool for at least 10-15 minutes before serving.
Notes
- For a gluten-free version, use gluten-free all-purpose flour and ensure your oats are certified gluten-free.
- You can prepare the cherry filling and the crumble topping separately up to a day in advance. Store them covered in the refrigerator. Assemble and bake when ready to serve.
- Serve warm with vanilla ice cream or whipped cream.
Nutrition
- Serving Size: 1 serving
- Calories: 450
- Sugar: 40g
- Sodium: 150mg
- Fat: 22g
- Saturated Fat: 12g
- Unsaturated Fat: 10g
- Trans Fat: 0g
- Carbohydrates: 60g
- Fiber: 5g
- Protein: 5g
- Cholesterol: 50mg