
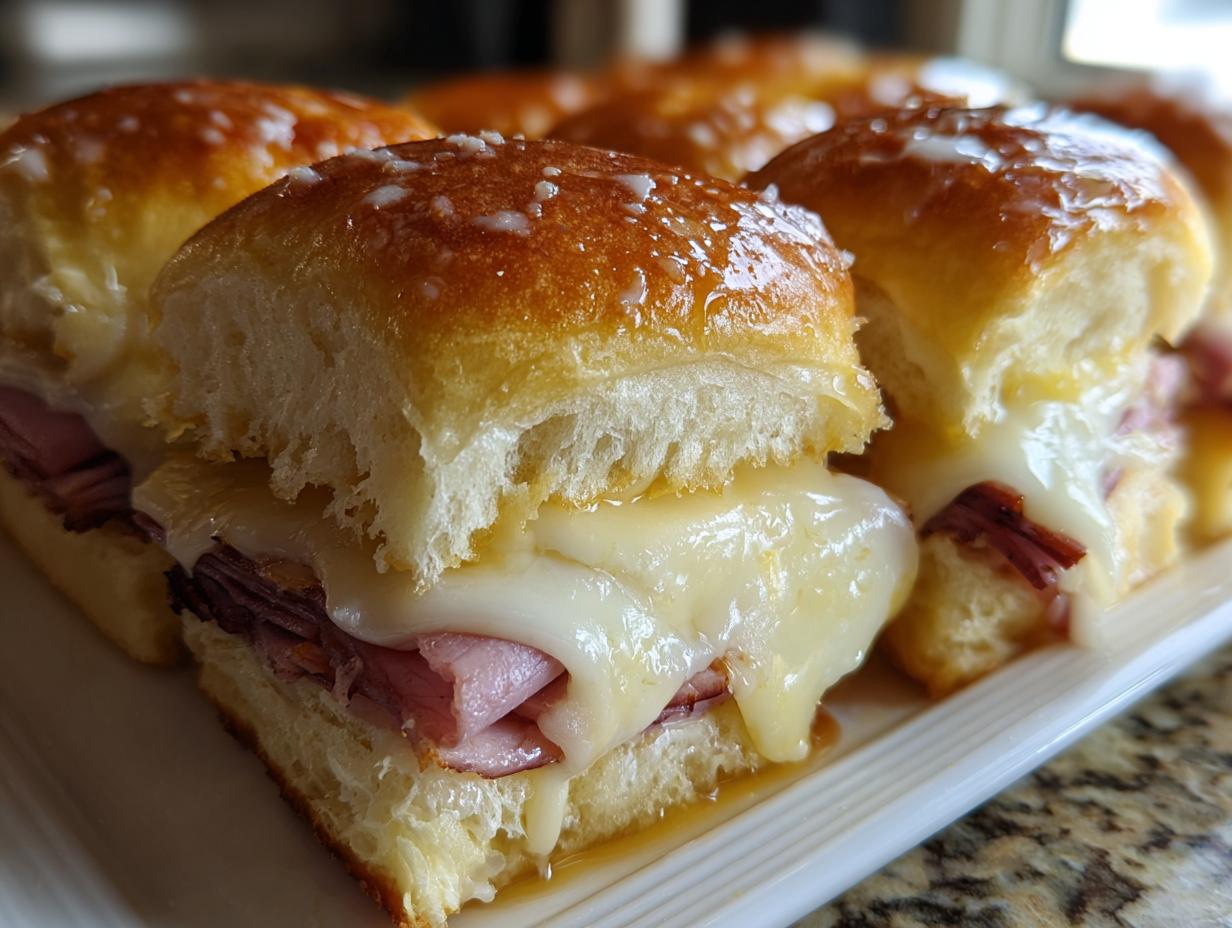
Okay, so you need a go-to recipe for your next get-together, right? Something that’s almost criminally easy but tastes like you slaved over it for hours? That’s where these amazing Ham and Cheese Sliders come in! Seriously, these little sandwiches are my secret weapon for everything from busy weeknights to big holiday parties. I remember making a batch for my cousin’s baby shower, and they were GONE in minutes – people kept asking me for the recipe! They’re just perfectly golden, gooey with Swiss cheese, and that buttery, slightly tangy glaze? Oh my goodness. The best part is you can totally make them ahead and just pop them in the oven when you’re ready. Pure magic!
- Mastering the Art of Making Ham and Cheese Sliders
- Gather Your Ingredients for Perfect Ham and Cheese Sliders
- Mastering the Art of Making Ham and Cheese Sliders
- Tips for Success with Your Ham and Cheese Sliders
- Make-Ahead Magic: Planning Your Hawaiian Roll Sliders
- Variations on Classic Ham and Cheese Sliders
- Serving Suggestions for Game Day Sliders
- Frequently Asked Questions About Ham and Cheese Sliders
- Nutritional Estimate for Ham and Cheese Sliders
- Share Your Slider Creations!
Mastering the Art of Making Ham and Cheese Sliders
Alright, let’s get down to business and make these incredible Ham and Cheese Sliders! Honestly, it’s so simple, you’ll wonder why you haven’t made them a million times before. We’re going to go step-by-step, and trust me, the payoff is SO worth it. When that buttery mustard glaze hits the hot oven, your whole house is going to smell like heaven.
Preparing Your Hawaiian Roll Sliders Base
First things first, grab your package of Hawaiian rolls. They’re the perfect little fluffy pillows for this sandwich. Using a long serrated knife, carefully slice the whole package in half lengthwise. It’s like slicing a giant single roll! Then, lay the bottom halves of your rolls out on a good-sized baking sheet. I like to use one with a slight lip so nothing slides off.
Building the Flavor: Ham and Cheese Layering
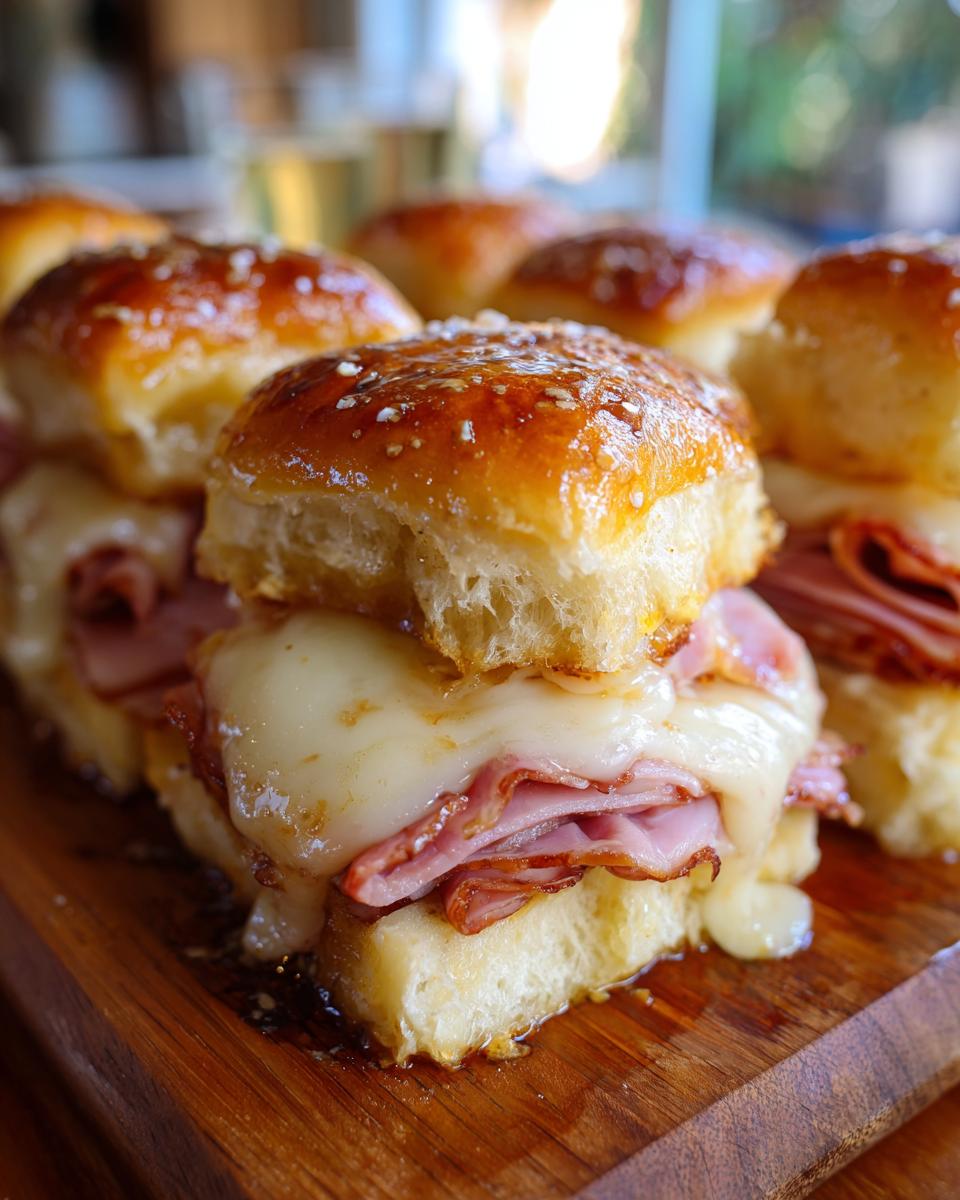
Now for the good stuff! Take your deli ham — I like to use thinly sliced — and arrange it evenly over the bottom halves of those rolls. Try to get it right to the edges so every bite is stuffed full. Then, lay your Swiss cheese slices right over the ham. Again, aim for full coverage. Seeing that cheese peek out is just the best!

Crafting the Signature Glaze for Your Baked Sliders
This glaze is where the magic really happens! In a small bowl, whisk together your melted butter, a good dollop of Dijon mustard (it gives it that perfect tang!), a splash of Worcestershire sauce for depth, garlic powder, and a little onion powder. Just give it a good whisk until it’s all combined and looks wonderfully glossy. This liquid gold is going to soak into those tops and make them irresistibly tender and flavorful.
The Baking Process for Perfect Party Sandwiches
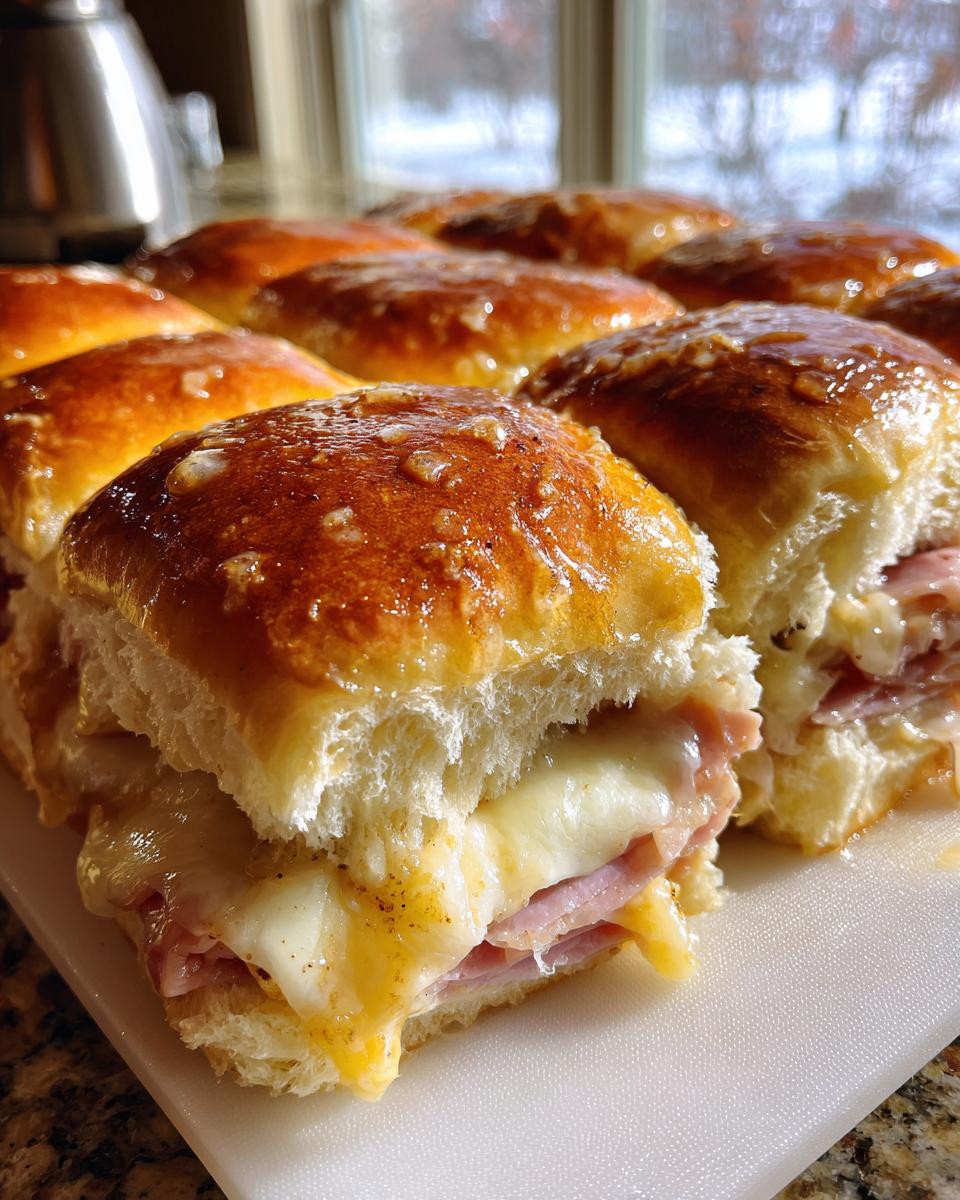
Once everything is layered, gently place the top halves of the Hawaiian rolls back on. Now, take that amazing butter mixture and pour it evenly all over the very tops of the rolls. Get it in all the nooks and crannies! If you’re feeling fancy, sprinkle on some poppy seeds for a little crunch and visual appeal. Cover the whole baking sheet snugly with foil. This traps the steam and helps melt that cheese and warm everything through perfectly. Pop it into your preheated oven at 350°F (175°C) for about 15 to 20 minutes. You’ll know they’re ready when the cheese is all melty and gooey, and the tops of the rolls are just starting to get golden brown.
Gather Your Ingredients for Perfect Ham and Cheese Sliders
Okay, so to whip up these amazing Ham and Cheese Sliders, you don’t need a ton of fancy stuff. It’s all about grabbing the right players for the job! Here’s what you’ll want to have on hand:
- 12 Hawaiian rolls: These are key! Their sweet, soft texture is what makes these sliders so special.
- 12 slices deli ham: Go for good quality, thinly sliced ham. It distributes so much better!
- 12 slices Swiss cheese: Swiss and ham are a classic pairing for a reason. It melts beautifully and has that perfect nutty flavor.
- 1/2 cup butter, melted: This is the base for our glorious glaze. Real butter, please!
- 1 tablespoon Dijon mustard: This gives the glaze a little zing and depth, cutting through the richness.
- 1 teaspoon Worcestershire sauce: Just a splash adds so much umami flavor.
- 1/2 teaspoon garlic powder
- 1/4 teaspoon onion powder
- Poppy seeds, optional: If you like that little extra texture and look, sprinkle ’em on top!
See? Super simple. Just these few things are going to transform into something truly irresistible.
- Mastering the Art of Making Ham and Cheese Sliders
- Gather Your Ingredients for Perfect Ham and Cheese Sliders
- Mastering the Art of Making Ham and Cheese Sliders
- Tips for Success with Your Ham and Cheese Sliders
- Make-Ahead Magic: Planning Your Hawaiian Roll Sliders
- Variations on Classic Ham and Cheese Sliders
- Serving Suggestions for Game Day Sliders
- Frequently Asked Questions About Ham and Cheese Sliders
- Nutritional Estimate for Ham and Cheese Sliders
- Share Your Slider Creations!
Mastering the Art of Making Ham and Cheese Sliders
Alright, let’s get down to business and make these incredible Ham and Cheese Sliders! Honestly, it’s so simple, you’ll wonder why you haven’t made them a million times before. We’re going to go step-by-step, and trust me, the payoff is SO worth it. When that buttery mustard glaze hits the hot oven, your whole house is going to smell like heaven.
Preparing Your Hawaiian Roll Sliders Base
First things first, grab your package of Hawaiian rolls. They’re the perfect little fluffy pillows for this sandwich. Using a long serrated knife, carefully slice the whole package in half lengthwise. It’s like slicing a giant single roll! Then, lay the bottom halves of your rolls out on a good-sized baking sheet. I like to use one with a slight lip so nothing slides off.
Building the Flavor: Ham and Cheese Layering
Now for the good stuff! Take your deli ham — I like to use thinly sliced — and arrange it evenly over the bottom halves of those rolls. Try to get it right to the edges so every bite is stuffed full. Then, lay your Swiss cheese slices right over the ham. Again, aim for full coverage. Seeing that cheese peek out is just the best!
Crafting the Signature Glaze for Your Baked Sliders
This glaze is where the magic really happens! In a small bowl, whisk together your melted butter, a good dollop of Dijon mustard (it gives it that perfect tang!), a splash of Worcestershire sauce for depth, garlic powder, and a little onion powder. Just give it a good whisk until it’s all combined and looks wonderfully glossy. This liquid gold is going to soak into those tops and make them irresistibly tender and flavorful.
The Baking Process for Perfect Party Sandwiches
Once everything is layered, gently place the top halves of the Hawaiian rolls back on. Now, take that amazing butter mixture and pour it evenly all over the very tops of the rolls. Get it in all the nooks and crannies! If you’re feeling fancy, sprinkle on some poppy seeds for a little crunch and visual appeal. Cover the whole baking sheet snugly with foil. This traps the steam and helps melt that cheese and warm everything through perfectly. Pop it into your preheated oven at 350°F (175°C) for about 15 to 20 minutes. You’ll know they’re ready when the cheese is all melty and gooey, and the tops of the rolls are just starting to get golden brown.

Tips for Success with Your Ham and Cheese Sliders
Okay, so you’ve got the recipe, you’ve got the rolls – but let’s talk about making them absolutely *perfect* every single time. A few little tricks can take these from ‘good’ to ‘OMG, I need another one *right now*!’ First off, don’t skimp on the quality of your ham and cheese; it really makes a difference in the final flavor. When you’re pouring on that buttery glaze, try to get it pretty evenly distributed on top of each roll. This ensures that lovely golden-brown, slightly crispy top that’s still moist inside. And for that perfect texture – make sure you watch them closely towards the end of baking. You want that cheese gooey and bubbly, and the rolls toasted just right, not burnt!
Make-Ahead Magic: Planning Your Hawaiian Roll Sliders
Seriously, the best part about these Ham and Cheese Sliders is how incredibly forgiving they are when it comes to planning! You can totally assemble them up to 24 hours ahead of time. Just follow all the steps for slicing the rolls, piling on the ham and cheese, and even pouring on that dreamy glaze. Then, instead of baking, cover the whole pan really, really well with plastic wrap and pop it right into the fridge. When it’s almost party time, just pop it into the oven (might need a couple extra minutes of baking time since it’s coming from cold) and voila! You’ve got hot, gooey goodness ready to go. Easy peasy!
And if you happen to have any leftovers (which is rare, trust me!), just wrap them up tight or pop them in an airtight container. They’re still pretty darn good the next day, maybe heated up gently in a toaster oven or even just at room temperature. For more about our philosophy on making life easier in the kitchen, you can check out our story!
Variations on Classic Ham and Cheese Sliders
Now, I love these classic Ham and Cheese Sliders just the way they are, but sometimes mixing things up is half the fun, right? You can totally jazz them up! Try swapping the Swiss for provolone or cheddar cheese, or maybe even a mix! A few pickle slices or some pickled jalapeños tucked in there add a fantastic tangy or spicy kick. And don’t be afraid to experiment with the glaze – a little bit of honey mixed in with the mustard glaze is delicious, or try a different mustard like stone-ground!
Serving Suggestions for Game Day Sliders
These little sliders are total rockstars on their own, but imagine them as part of a bigger spread! They’re amazing with a big bowl of creamy coleslaw, some spicy potato salad, or even a simple green salad with a bright vinaigrette. A side of tortilla chips with your favorite salsa or a cool ranch dip is always a winner too!
Frequently Asked Questions About Ham and Cheese Sliders
Got questions about these yummy Ham and Cheese Sliders? You’ve come to the right place! I’ve heard a few things when people try them out, and I’m happy to clear things up so yours turn out absolutely perfect.
Can I use a different type of bread instead of Hawaiian rolls?
Of course! While Hawaiian rolls are my absolute favorite because they’re so soft and slightly sweet, they’re not the only game in town. You could definitely use slider buns, dinner rolls, or even a soft focaccia cut into squares. Just make sure whatever you choose is soft enough to soak up that glorious glaze!
How do I prevent the bottoms of the sliders from getting soggy?
This is a super common worry, but honestly, it’s pretty easy to avoid! The key is in the glaze. Make sure your butter mixture isn’t too watery. Also, try to pour the glaze evenly over the tops and let it soak in a bit before baking. Covering them with foil for the first part of baking helps steam everything together beautifully without making the bottoms like a soggy mess. Baking them on a baking sheet that’s not too thin can also help distribute heat evenly.
Can I freeze these sliders?
You know, I haven’t personally frozen the *baked* sliders because they’re best eaten fresh. However, you can totally assemble the unbaked sliders (ham, cheese, and glaze on!) and freeze them. Just be sure to wrap them super well so they don’t get freezer burn. When you’re ready to cook, pull them out of the freezer and bake them straight from frozen – they’ll just need a bit of extra baking time, maybe an extra 10-15 minutes. They’re also amazing assembled up to a day ahead and kept in the fridge!
Nutritional Estimate for Ham and Cheese Sliders
Alright, let’s talk numbers! While every kitchen is a little different and ingredient brands can vary, here’s a general idea of what you’re looking at for each of these delicious Ham and Cheese Sliders. Remember, this is just an estimate, but it gives you a good ballpark!
Per slider (approximate):
- Calories: 350
- Fat: 18g
- Saturated Fat: 8g
- Carbohydrates: 30g
- Sugar: 8g
- Protein: 15g
- Sodium: 800mg
These numbers can totally shift depending on the specific ham and cheese you use, but this gives you a good starting point!
Share Your Slider Creations!
Alright, I’ve shared all my secrets for these amazing Ham and Cheese Sliders, but now it’s YOUR turn! Have you made them? Did you try a fun variation? I’d absolutely love to hear all about it! Please drop a comment below and tell me how they turned out, or even better, share a pic with me on social media. You can also reach out through my contact page – I always love hearing from you!
PrintHam and Cheese Sliders

Easy ham and cheese sliders baked on Hawaiian rolls with a buttery mustard glaze, perfect for parties or make-ahead meals.
- Prep Time: 15 min
- Cook Time: 20 min
- Total Time: 35 min
- Yield: 12 sliders 1x
- Category: Appetizer
- Method: Baking
- Cuisine: American
- Diet: Vegetarian
Ingredients
- 12 Hawaiian rolls
- 12 slices deli ham
- 12 slices Swiss cheese
- 1/2 cup butter, melted
- 1 tablespoon Dijon mustard
- 1 teaspoon Worcestershire sauce
- 1/2 teaspoon garlic powder
- 1/4 teaspoon onion powder
- Poppy seeds, optional
Instructions
- Preheat your oven to 350°F (175°C).
- Slice the Hawaiian rolls in half horizontally.
- Place the bottom halves of the rolls on a baking sheet.
- Layer 12 slices of ham evenly over the bottom halves of the rolls.
- Top the ham with 12 slices of Swiss cheese.
- Place the top halves of the rolls over the cheese.
- In a small bowl, whisk together the melted butter, Dijon mustard, Worcestershire sauce, garlic powder, and onion powder.
- Pour the butter mixture evenly over the tops of the sliders.
- Sprinkle with poppy seeds, if desired.
- Cover the baking sheet tightly with foil.
- Bake for 15-20 minutes, or until the cheese is melted and the rolls are lightly toasted.
- For easy slicing, use a serrated knife to cut through the sliders.
Notes
- These sliders can be assembled up to 24 hours in advance and refrigerated before baking.
- For a spicier kick, add a pinch of cayenne pepper to the butter mixture.
- Serve immediately for the best texture.
Nutrition
- Serving Size: 1 slider
- Calories: 350
- Sugar: 8g
- Sodium: 800mg
- Fat: 18g
- Saturated Fat: 8g
- Unsaturated Fat: 10g
- Trans Fat: 0g
- Carbohydrates: 30g
- Fiber: 1g
- Protein: 15g
- Cholesterol: 50mg