

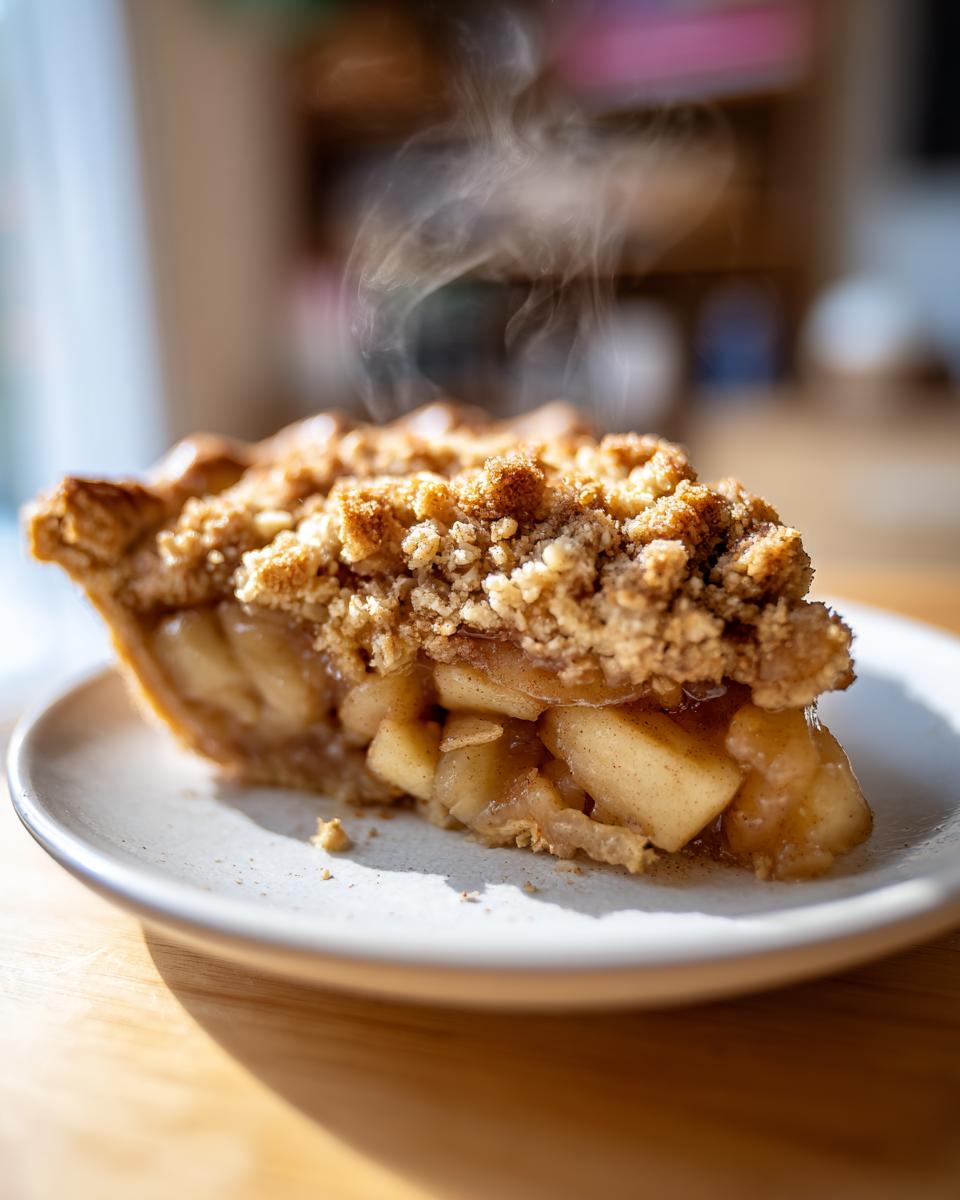
Oh, when that first chill hits the air and the leaves start turning those gorgeous shades of red and gold, my kitchen just *demands* to be filled with the comforting scent of baking apples. And you know what hits the spot perfectly? It’s this incredible apple crisp pie! It’s like the best of both worlds, right? You get that tender, cinnamon-spiced apple filling from a classic pie, but then you top it with the most glorious crunchy, buttery oat mixture you’d find on a killer apple crisp. Seriously, it’s my go-to for a reason – that contrast of textures and flavors is just pure fall magic to me. I first started tinkering with this idea years ago when I couldn’t decide between making pie or crisp for a family get-together, and well, necessity really is the mother of invention!
- Why You'll Love This Apple Crisp Pie
- Choosing the Best Apples for Your Apple Crisp Pie
- Ingredients for Your Perfect Apple Crisp Pie
- How to Make Apple Crisp Pie: Step-by-Step
- Tips for the Best Apple Crisp Pie
- Serving and Storing Your Apple Crisp Pie
- Frequently Asked Questions about Apple Crisp Pie
- Nutritional Estimate for Apple Crisp Pie
- Share Your Apple Crisp Pie Creations!
Why You’ll Love This Apple Crisp Pie
Trust me, this recipe is a keeper! Here’s why you’re going to be obsessed:
- It’s SO easy! You get all the cozy fall vibes without any fussy pie crust drama. The crumb topping is a breeze.
- Flavor bomb alert! Tender, perfectly spiced apples meet that irresistible crunchy oat topping. It’s a match made in dessert heaven.
- Crowd-pleaser guaranteed. Seriously, who doesn’t love a good apple dessert? This one is perfect for holidays, potlucks, or just a Tuesday night treat.
- The ultimate fall comfort. It just *tastes* like autumn – warm spices, sweet apples, and that buttery goodness. Pure comfort in every bite!
Choosing the Best Apples for Your Apple Crisp Pie
Okay, so you want to make the *best* apple crisp pie, right? Well, the secret weapon is definitely the apples you pick! It’s not just about grabbing any old apple; you really want ones that hold up their shape when they bake and have that perfect sweet-tart balance. I’ve experimented a *lot* over the years, like that time I tried to use Ambrosias and they just turned to mush – not what we want in a good apple crisp pie! That’s why I always reach for baking apples. They’re bred to be sturdy and flavorful, which is exactly what this dessert needs to shine.
My absolute favorite trick is to use a mix! It sounds a little fancy, but honestly, it just gives you the most amazing depth of flavor and texture. Some apples are super sweet, others are a bit tart, and some stay firmer while others soften up nicely. When you combine them, you get a filling that’s just… chef’s kiss! It’s like a little flavor party happening in your pie. Don’t forget to check out this apple butter recipe too, it uses similar apples and is delish!
Top Apple Varieties for Baking
When I’m making my apple crisp pie, I usually grab a combo of these reliable bakers:
- Honeycrisp: Oh my gosh, these are a dream! They’re super crisp (surprise, surprise!), wonderfully sweet with just a hint of tartness, and they keep their shape beautifully when baked.
- Gala: These are reliably sweet and a bit milder, perfect for balancing out any tarter apples. Plus, they’re usually easy to find!
- Fuji: Similar to Gala, they’re sweet and crisp, a great all-around baking apple that adds a nice firmness.
- Granny Smith: If you like a bit of tang, you gotta have some Granny Smiths in the mix! They hold their structure like a champ and provide that classic tartness that makes the whole pie sing.
Using a couple of these together really makes a difference. You get sweetness, a little tartness, and that perfect tender-but-not-mushy apple filling that makes this apple crisp pie truly special.
Ingredients for Your Perfect Apple Crisp Pie
Okay, let’s talk about what you’ll need to get this amazing apple crisp pie going! It’s really pretty straightforward, mostly pantry staples you probably already have on hand. We’ve got two main stars here: the luscious apple filling and that irresistible crumb topping. Don’t worry about fancy stuff; we’re keeping it simple and delicious!
For the Apple Filling:
- 1 recipe for double pie crust – you can totally use store-bought if you’re in a rush, no judgment here!
- About 6 medium baking apples (like Honeycrisp, Gala, or Fuji), peeled, cored, and sliced nice and even.
- 1/4 cup granulated sugar
- 1/4 cup packed light brown sugar – this adds that lovely caramel depth!
- 2 tablespoons all-purpose flour – just to thicken things up a bit.
- 1 teaspoon ground cinnamon – can’t have apple pie without it!
- 1/4 teaspoon ground nutmeg – a little whisper of warmth.
- 1 tablespoon fresh lemon juice – brightens everything up.
For the Crumb Topping:
- 1/2 cup all-purpose flour
- 1/2 cup rolled oats – regular, not instant, for the best texture!
- 1/2 cup packed light brown sugar – more of that good stuff!
- 1/4 teaspoon salt – to balance all that sweetness.
- 1/2 cup (which is one stick!) unsalted butter, nice and cold, then cut into little cubes.
How to Make Apple Crisp Pie: Step-by-Step
Alright, ready to bring this amazing apple crisp pie to life? It’s really not complicated at all, just follow along and you’ll have a masterpiece!
First things first, let’s get that oven preheated. You want it nice and hot at 375°F (190°C) so everything bakes up perfectly. While it’s heating, I like to get my pie plate ready by lining it with one of those pie crusts. You know, the bottom one! Just gently press it into the plate. Easy peasy!
Preparing the Apple Filling
Now for the yummy apples! In a big bowl, I toss my sliced apples with both sugars, that little bit of flour (which helps thicken everything up so it’s not too watery), all that warm cinnamon and nutmeg goodness, and a splash of lemon juice. Make sure every apple slice gets coated! Uniform slices are key here so they all cook evenly. I’ve learned that lesson the hard way with some giant chunks turning out raw and others getting a bit too mushy!
Creating the Crumb Topping
This is my favorite part! In a separate bowl, whisk together the flour, oats, brown sugar, and salt. Now, grab your cold butter and cut it in. You can use a pastry blender if you have one, but honestly, my fingers work just fine! Just rub the butter into the dry stuff until it looks like coarse crumbs. Think little pebbles. Don’t overmix it, you want those nice crumbly bits!
Assembling and Baking Your Apple Crisp Pie
Okay, here we go – putting it all together! Pour those beautifully spiced apples into your crust-lined pie plate. Spread them out evenly. Then, sprinkle that glorious crumb topping all over the apples. Make sure it’s covered nicely. Before it goes in the oven, I always pop the whole thing onto a baking sheet. This is a lifesaver for catching any bubbly apple filling that might try to escape and make a mess in your oven. Bake for about 45 to 55 minutes. You’ll know it’s ready when the crust is a beautiful golden brown and you can see the filling bubbling away happily. If the crust starts looking a little too dark before the apples are done, don’t panic! Just loosely tent the edges with some foil. And please, for the love of pie, let it cool for at least 2-3 hours before slicing. I know, it’s torture, but it lets everything set up so you get those gorgeous slices, not a juicy mess. You might also want to check out my apple pie cookies or this apple crumble recipe while you’re waiting!
Tips for the Best Apple Crisp Pie
Alright, let’s talk about making this apple crisp pie absolutely perfect every single time. It’s not hard, but there are a few little tricks I’ve picked up over the years that really make a difference. You know, the kind of things you learn when you bake something a gazillion times and finally nail it! We want that bottom crust to be golden and crisp, not soggy, and that crumb topping to be perfectly crunchy.
First off, if you’re worried about a soggy bottom (and who isn’t?!), here’s what I do: make sure your apples aren’t swimming in juice. Tossing them with that bit of flour and sugar helps, but sometimes I like to drain off any excess liquid after they’ve sat for a few minutes. Also, making sure your oven is fully preheated is *so* important. A hot oven helps set the bottom crust quickly. Sometimes, I’ll even put a pizza stone or a baking sheet on the rack below the pie to give it extra direct heat. It’s a game changer!

For the topping, remember those cold butter cubes? Keep ’em cold! That’s what makes for those lovely, distinct crumbly bits instead of a greasy paste. Oh, and don’t stress about making the topping *too* uniform. A little variation is good and means you’ll get different textures in every bite. If you’ve got extra topping, you can just bake it on a little parchment paper and sprinkle it over ice cream later – yum! And hey, if you’re ever looking for other moist baked goods, my zucchini bread recipe is a crowd-pleaser too!
Serving and Storing Your Apple Crisp Pie
Okay, the hardest part is over – your incredible apple crisp pie is baked and smells divine! Now, how to enjoy it? My absolute favorite way is warm, with a generous scoop of vanilla ice cream melting into the spiced apples and that crunchy topping. Whipped cream is also lovely if you want something a little lighter. Honestly, this pie is such a star, it doesn’t need much! It’s truly the perfect fall apple dessert.
If you happen to have any leftovers (which I highly doubt!), storing it is easy. Once it’s cooled down quite a bit, you can cover it loosely with plastic wrap or foil and keep it at room temperature for a day, or pop it in the fridge for up to 3-4 days. I find it reheats beautifully in a low oven (around 300°F or 150°C for about 10-15 minutes) to get that topping nice and crisp again. It’s almost as good as fresh! If you love pumpkin pie, you should totally check out this pumpkin pie recipe too!
Frequently Asked Questions about Apple Crisp Pie
Got questions about making this amazing apple crisp pie? I totally get it! Baking is part science, part art, and sometimes you just need a little reassurance. Here are a few things I get asked a lot:
Can I make the crumb topping ahead of time?
Oh yeah, absolutely! This is one of my favorite make-ahead tricks. Just whip up the crumb topping mixture according to the recipe, then pop it into an airtight container or a zip-top bag and store it in the fridge for up to 2-3 days. It’s a huge time-saver, especially if you’re planning a big meal or baking for a crowd. Just pull it out when you’re ready to assemble the pie!
What if my pie crust browns too quickly?
This is a common one, especially with fruit pies! If you notice the edges of your crust getting too dark before the filling is bubbly and cooked through, don’t panic. Just grab a piece of aluminum foil, loosely create a ring around the edge of the pie, and continue baking. This will protect the crust from getting too brown while the rest of the pie finishes baking. It’s a simple fix that works wonders!
How long does the apple crisp pie need to cool?
This is super important, trust me! You *really* want to let your crumb topping pie cool for at least 2 to 3 hours before you slice into it. I know, I know, the smell is torture, but this is crucial for the filling to set up properly. If you cut into it too soon, all those delicious spiced apples might ooze out, and you won’t get those beautiful, clean slices. Patience is a virtue, especially when it comes to pie!
Nutritional Estimate for Apple Crisp Pie
Just a heads-up, this is a rough estimate! Because everyone’s ingredients and portion sizes can vary a bit, the exact nutritional info for your apple crisp pie might differ. But generally, you’re looking at about:
- Calories: Around 450 per slice
- Fat: About 22g
- Carbohydrates: Roughly 65g
- Sugar: Around 35g
- Protein: About 4g
It’s definitely a treat, so enjoy a slice (or two!) – you’ve earned it!
Share Your Apple Crisp Pie Creations!
I absolutely LOVE seeing your creations! If you make this apple crisp pie, please share your photos on Instagram and tag me, or leave a comment below telling me how it turned out. Did you try any fun variations? I’d also be thrilled if you took a moment to rate the recipe – it truly helps other bakers find it! You can learn more about my kitchen adventures and how DeliceRecipe got started here!
PrintApple Crisp Pie

A comforting dessert combining tender baked apples with a sweet, crumbly oat topping.
- Prep Time: 30 min
- Cook Time: 55 min
- Total Time: 85 min
- Yield: 8 servings 1x
- Category: Dessert
- Method: Baking
- Cuisine: American
- Diet: Vegetarian
Ingredients
- 1 recipe for double pie crust
- 6 medium baking apples (like Honeycrisp, Gala, or Fuji), peeled, cored, and sliced
- 1/4 cup granulated sugar
- 1/4 cup packed light brown sugar
- 2 tablespoons all-purpose flour
- 1 teaspoon ground cinnamon
- 1/4 teaspoon ground nutmeg
- 1 tablespoon lemon juice
- 1/2 cup all-purpose flour
- 1/2 cup rolled oats
- 1/2 cup packed light brown sugar
- 1/4 teaspoon salt
- 1/2 cup (1 stick) unsalted butter, cold and cut into cubes
Instructions
- Preheat your oven to 375°F (190°C).
- Line a 9-inch pie plate with one pie crust.
- In a large bowl, toss the sliced apples with granulated sugar, 1/4 cup brown sugar, 2 tablespoons flour, cinnamon, nutmeg, and lemon juice. Pour the apple mixture into the prepared pie crust.
- In a separate medium bowl, combine 1/2 cup flour, oats, 1/2 cup brown sugar, and salt. Cut in the cold butter using a pastry blender or your fingers until the mixture resembles coarse crumbs.
- Sprinkle the oat topping evenly over the apples.
- Place the pie on a baking sheet to catch any drips.
- Bake for 45-55 minutes, or until the crust is golden brown and the filling is bubbly. If the crust starts to brown too quickly, you can loosely tent it with foil.
- Let the pie cool for at least 2-3 hours before slicing and serving.
Notes
- For best results, use a mix of apple varieties for balanced flavor and texture.
- You can prepare the crumb topping ahead of time and store it in the refrigerator.
- Serve warm with vanilla ice cream or whipped cream.
Nutrition
- Serving Size: 1 slice
- Calories: 450
- Sugar: 35g
- Sodium: 200mg
- Fat: 22g
- Saturated Fat: 13g
- Unsaturated Fat: 9g
- Trans Fat: 0g
- Carbohydrates: 65g
- Fiber: 4g
- Protein: 4g
- Cholesterol: 55mg