
Oh, I just LOVE a good apple crumble! There’s something about that warm, sweet apple filling bubbling under a toasty, golden topping that just screams comfort, you know? This old-fashioned apple crumble recipe is my absolute go-to when I want a dessert that feels like a hug. It’s so simple to whip up, ready in less time than you think, and it always brings back memories of cozy autumn evenings. I remember making this for a neighborhood potluck last year, and people were raving about it all night! It’s the kind of dessert that just makes everyone happy, no fuss, no fancy techniques, just pure homey goodness. You can read more about our baking philosophy here!
- Why You'll Love This Old Fashioned Apple Crumble
- Choosing the Best Apples for Your Apple Crumble
- The Perfect Crumble Topping Ratio: Apple Crumble with Oats
- How to Make This Quick Apple Dessert From Scratch
- Serving and Storing Your Fall Apple Crumble
- Frequently Asked Questions About Apple Crumble
- Tips for Success with Your Apple Crumble
- Estimated Nutritional Information
- Share Your Apple Crumble Creations!
Why You’ll Love This Old Fashioned Apple Crumble
Seriously, what’s not to love about this apple crumble? It’s pure comfort in a dish!
- So easy to make: You can totally whip this up even if you’re new to baking!
- Ready in a flash: The whole thing, from prep to oven, takes less than an hour! Perfect for a quick weeknight treat.
- Warm, cozy flavors: That classic combo of sweet apples and cinnamon is just unbeatable, especially for a fall apple crumble.
- Perfectly crumbly topping: Whether you love oats in yours or not, the topping on this best apple crumble recipe is *chef’s kiss*.
- Super versatile: Serve it warm with ice cream, or just enjoy it on its own!
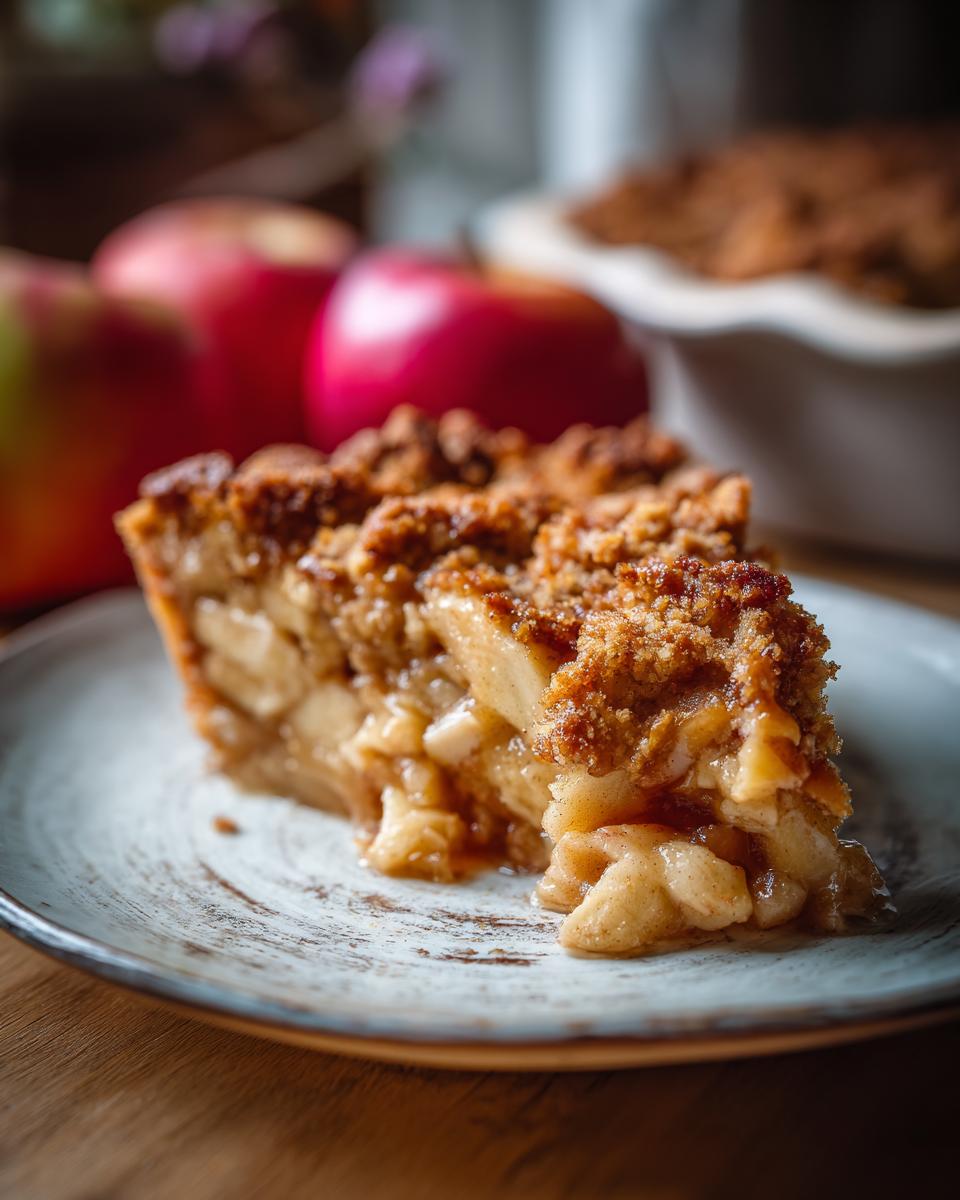
Choosing the Best Apples for Your Apple Crumble
Okay, so for the absolute best apple crumble, the type of apple you choose makes a HUGE difference! My recipe calls for Honeycrisp, Gala, or Fuji, and trust me, they’re stars for a reason. Honeycrisp apples are amazing because they keep a little bit of their crispness even after baking, and they have that perfect sweet-tart balance. Gala apples are a bit softer and super sweet, which is lovely in a crumble, and Fuji apples are just reliably sweet and firm. You want apples that won’t totally turn to mush in the oven, but will get nice and tender. When you’re picking them out, look for ones that feel firm to the touch and have a nice aroma – no soft spots or bruises! That’s how you know they’ll be perfect for this old fashioned apple crumble.
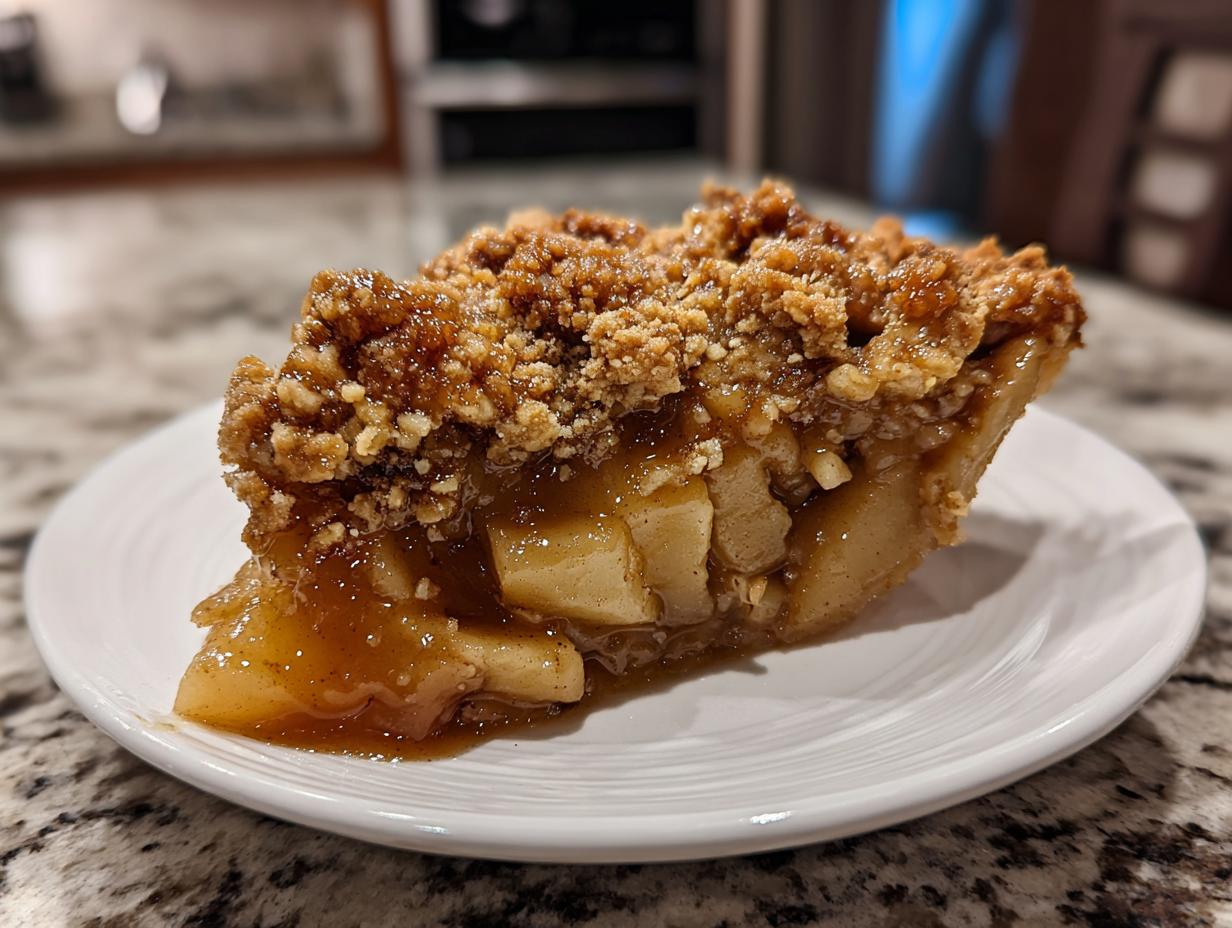
The Perfect Crumble Topping Ratio: Apple Crumble with Oats
Alright, let’s talk about the star of the show – that glorious crumble topping! This is where you really get to play with texture, and my favorite way to do it is with just a touch of oats. The ratio here is key to getting that perfect crumbly, buttery bite that contrasts so beautifully with the soft apples. You want a mix that holds together just enough to create chunks, but still feels light and airy when you sprinkle it on.
For this recipe, we’re keeping it nice and simple, but oh-so-effective. The base is a blend of flour, brown sugar for that lovely molasses flavor, and a pinch of cinnamon and salt to wake everything up. And the butter? It *has* to be cold, guys! Cold butter is your best friend for a crumbly topping because as it melts in the oven, it creates those amazing pockets of deliciousness. Just cut it into small cubes, and then use your fingers or a pastry blender to get it all incorporated. If you’re adding oats, like I love to do for extra texture, just toss them in at the very end. Not too many, just enough to give it a little chew!

Ingredient Clarity for the Best Apple Crumble Recipe
So, you’ve got your apples picked out? Awesome! Now let’s get everything else ready. Here’s exactly what you’ll need to make the magic happen:
- 6 medium apples (like Honeycrisp, Gala, or Fuji), all peeled, cored, and sliced up nice and thin.
- 2 tablespoons of all-purpose flour – this helps thicken the apple juices a bit.
- 1/4 cup of granulated sugar – for a touch of sweetness with the apples.
- 1 teaspoon of ground cinnamon – because, well, apples and cinnamon are soulmates!
- 1/4 teaspoon of ground nutmeg – just a whisper to add warmth.
- Now for that amazing topping: 1 cup of all-purpose flour.
- 1/2 cup of packed light brown sugar – it gives the topping such a rich, caramel-y flavor.
- 1/2 teaspoon of ground cinnamon – to match the filling!
- 1/4 teaspoon of salt – to balance out all that sweetness.
- 1/2 cup (that’s one stick!) of cold unsalted butter, cut into little cubes. Make sure it’s cold!
- And of course, 1/2 cup of rolled oats. These are optional but highly recommended for that extra bit of texture!
How to Make This Quick Apple Dessert From Scratch
Alright, let’s get this delicious apple crumble in the oven! Honestly, this is the easy part, and it smells *amazing* as it bakes. First things first, preheat your oven to 375°F (that’s 190°C). While that’s heating up, grab your sliced apples. In a big bowl, give them a gentle toss with those 2 tablespoons of flour, the 1/4 cup of granulated sugar, 1 teaspoon of cinnamon, and that little pinch of nutmeg. This just helps to sweeten them up and make sure the juices thicken nicely. Once they’re all coated, pour that beautiful apple mixture into your baking dish. I usually use an 8×8 inch square one, but any similar size works!
Now, for that irresistible crumble topping! In a separate bowl, whisk together the 1 cup of flour, your packed brown sugar, the other 1/2 teaspoon of cinnamon, and that salt. This is where the magic happens: cut in your cold butter. I love using my fingertips for this; it feels more connected to the dough, you know? Just rub the butter cubes into the dry ingredients until it looks like coarse crumbs, about the size of little peas. If you’re using oats, give them a quick stir in there too! Then, you just sprinkle this glorious topping evenly all over those apples. Try to get it into all the nooks and crannies. Pop it into the preheated oven and let it bake for about 35 to 45 minutes. You’ll know it’s ready when the topping is a lovely golden brown and you can see the apple filling bubbling up around the edges. Just be patient for those 10-15 minutes it needs to cool before digging in – it’s worth it!

Step-by-Step Guide to Your Old Fashioned Apple Crumble
Once your apple crumble comes out of the oven, golden and bubbly, let it sit and cool for at least 10 minutes. This is super important because those apples are molten lava! It gives the filling a chance to set up just a bit, so it’s not too soupy when you serve it. I usually just let mine rest on the counter while I get my spoons or ice cream ready. It should still be warm enough to melt a scoop of vanilla ice cream into a delightful puddle. Trust me, resisting the urge to dive right in is the hardest part, but it makes for a much better eating experience!
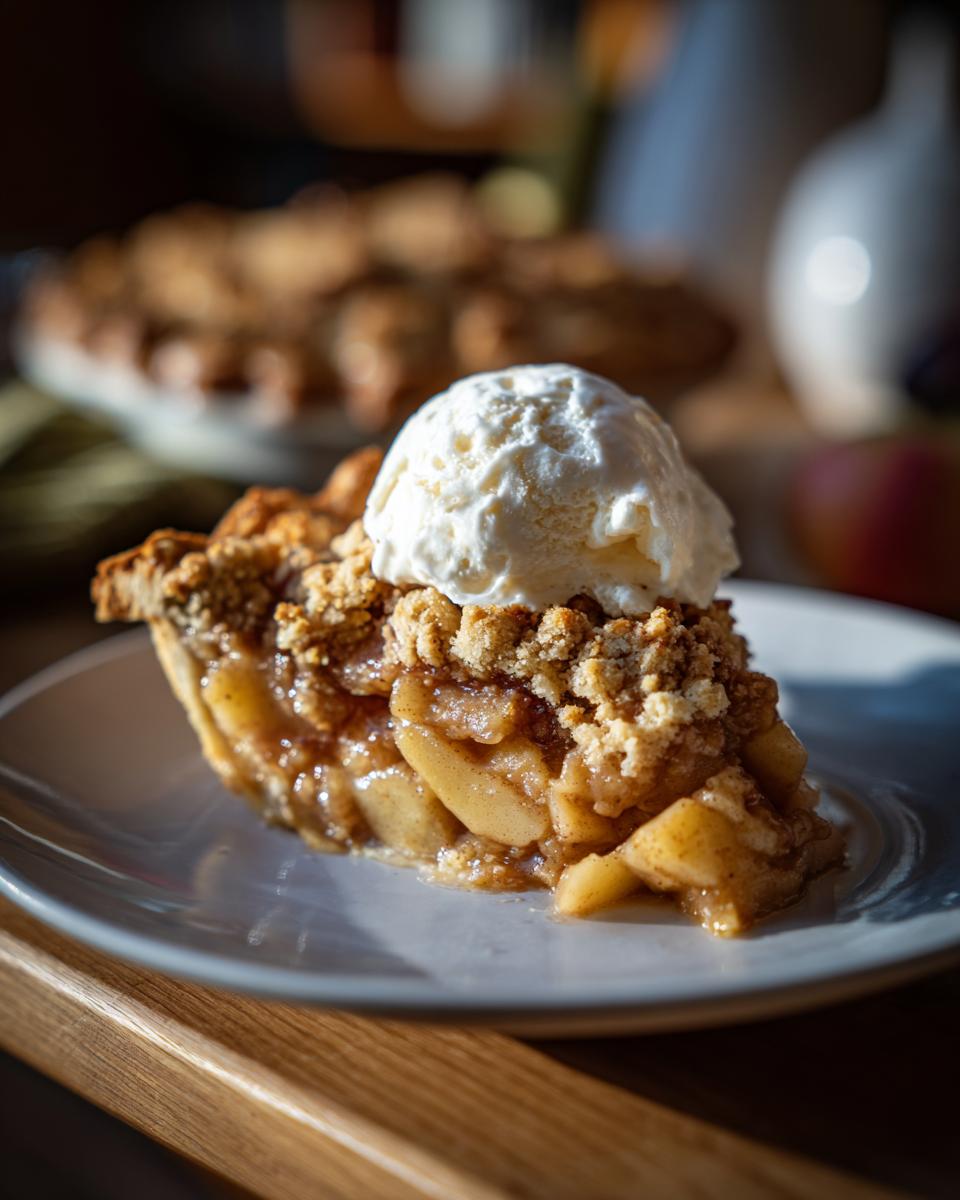
Serving and Storing Your Fall Apple Crumble
Okay, so your amazing apple crumble is fresh out of the oven, smelling like a cozy dream. The absolute best way to enjoy this fall apple crumble is warm, of course! I firmly believe a scoop of good quality vanilla ice cream is the perfect partner – it gets all melty and delicious. Whipped cream is also fantastic if that’s more your style. Honestly, even a tiny drizzle of heavy cream works wonders. Whatever you choose, serve it up while it’s still toasty!
Now, what if you have leftovers? Because sometimes, even my family can’t finish the whole dish in one go! Just let it cool completely, then cover it tightly with plastic wrap or pop it into an airtight container. It’ll keep nicely in the fridge for about 3-4 days. When you’re ready for more (and you will be!), reheating is super easy. My favorite way is to pop a slice in a toaster oven at 300°F for about 5-10 minutes. It gets that topping nice and crisp again! You can also zap it in the microwave for 20-30 seconds, but be careful, it gets hot fast!
Frequently Asked Questions About Apple Crumble
Got questions swirling around your head about this easy apple crumble? I totally get it! Baking should be fun, not frustrating, so let’s clear things up. You can check out our terms of use if you have any other general questions!
Can I make this apple crumble ahead of time?
You absolutely can! If you want to get a head start, you can assemble the whole apple crumble, topping and all, and wrap it tightly in plastic wrap. Just pop it in the fridge for up to a day before you plan to bake it. You might need to add a few extra minutes to the baking time since it’ll be going into the oven cold, but it’s totally doable. Some folks even freeze the unbaked crumble for longer storage!
What can I substitute for oats in my apple crumble?
No oats? No problem! If you don’t have rolled oats or just prefer not to use them in your apple crumble topping, you can easily swap them out. Try adding an extra 1/4 cup of flour or, my personal favorite, about 1/4 cup of chopped nuts like pecans or walnuts. They give the topping a lovely crunch and a little extra flavor, making it just as delicious. You could even use a mix of both if you’re feeling adventurous!
How do I prevent my apple crumble from getting soggy?
Oh, the dreaded soggy bottom! It happens to the best of us. For this best apple crumble recipe, the trick is making sure those apples aren’t too watery to begin with. Tossing them with that bit of flour and sugar helps soak up excess moisture. Also, make sure your oven is fully preheated to the right temperature. A hot oven helps the bottom crust set up quickly. Serving it right after a short cooling period, rather than letting it sit for ages, also helps keep that delicious topping nice and crisp.
What are the best apples for baking an apple crumble?
Like I mentioned before, I really love using firmer apples like Honeycrisp, Gala, or Fuji for my old fashioned apple crumble. They hold their shape beautifully when baked, giving you those lovely tender chunks of apple without turning into complete mush. If you can’t find those, Braeburn or Granny Smith (if you like a little tartness!) are also great choices. Just avoid super soft apples like Red Delicious, as they tend to break down too much.
Tips for Success with Your Apple Crumble
You know, even with a super simple recipe like this old fashioned apple crumble, there are just a few little tricks that can take it from good to absolutely phenomenal! It’s all about those little details that make a big difference, trust me. If you want your apple crumble to be the star of the show every single time, pay attention!
First off, when you’re prepping your apples, make sure they’re sliced fairly uniformly. It sounds simple, but if some slices are super thin and others are really thick, they won’t all cook at the same rate. We want tender, soft apples, not some mushy and some still crunchy! And remember how I said to toss them with that flour, sugar, and spices? Don’t skip that. That little bit of flour really helps thicken up the juices so you don’t end up with a watery mess at the bottom of your dish. For the topping, make sure your butter is truly cold – I can’t stress this enough! Cold butter is what gives you that lovely, crumbly texture instead of a greasy paste.
And if you’re feeling a bit adventurous, don’t be afraid to play around with the spices! A pinch of cardamom or a tiny bit of ground ginger can add an extra layer of warmth that’s just divine with apples. You can even add a tablespoon or two of lemon juice to the apples if you like a bit more of a tart kick. It’s your kitchen, your crumble! For more ways to connect with us, feel free to get in touch!
Estimated Nutritional Information
Just a heads-up, like all home cooking, these numbers are estimates! They can totally change based on the exact apples you use, how much butter you swirl in, and whether you add those yummy oats. But as a general guide, one serving of this delightful apple crumble clocks in at around 350 calories, with about 18g of fat, 50g of carbs, and 3g of protein. You’ll also get about 30g of sugar, which is pretty standard for a lovely sweet treat like this. Enjoy every bite!
Share Your Apple Crumble Creations!
I just LOVE seeing what you all whip up in your kitchens! Once you’ve made this easy apple crumble, I’d be thrilled if you popped back here to leave a comment and let me know how it turned out for you. Did you try it with a scoop of vanilla ice cream? Did you add nuts to the topping? I’m always curious! And if you snap a picture (because I know you will!), please tag us on social media. It always makes my day to see your apple crumble masterpieces! You can also check out our privacy policy here.
PrintOld Fashioned Apple Crumble
A comforting and easy apple crumble recipe, perfect for a weeknight treat or holiday gathering. This classic dessert features tender baked apples with a sweet, crumbly topping.
- Prep Time: 15 min
- Cook Time: 40 min
- Total Time: 55 min
- Yield: 6 servings 1x
- Category: Dessert
- Method: Baking
- Cuisine: American
- Diet: Vegetarian
Ingredients
- 6 medium apples (such as Honeycrisp, Gala, or Fuji), peeled, cored, and sliced
- 2 tablespoons all-purpose flour
- 1/4 cup granulated sugar
- 1 teaspoon ground cinnamon
- 1/4 teaspoon ground nutmeg
- 1 cup all-purpose flour
- 1/2 cup packed light brown sugar
- 1/2 teaspoon ground cinnamon
- 1/4 teaspoon salt
- 1/2 cup (1 stick) cold unsalted butter, cut into cubes
- 1/2 cup rolled oats (optional)
Instructions
- Preheat your oven to 375°F (190°C).
- In a large bowl, toss the sliced apples with 2 tablespoons of flour, granulated sugar, 1 teaspoon cinnamon, and nutmeg. Pour the apple mixture into an 8×8 inch baking dish.
- In a separate medium bowl, whisk together 1 cup flour, brown sugar, 1/2 teaspoon cinnamon, and salt.
- Cut in the cold butter using a pastry blender or your fingertips until the mixture resembles coarse crumbs. Stir in the rolled oats, if using.
- Sprinkle the crumble topping evenly over the apples.
- Bake for 35-45 minutes, or until the topping is golden brown and the apples are tender and bubbly.
- Let cool for at least 10 minutes before serving.
Notes
- For a richer topping, use 1/4 cup of chopped pecans or walnuts.
- Serve warm with vanilla ice cream or whipped cream.
- To reheat, place a slice in the microwave for 20-30 seconds or in a 300°F (150°C) oven for 5-10 minutes.
Nutrition
- Serving Size: 1 serving
- Calories: 350
- Sugar: 30g
- Sodium: 150mg
- Fat: 18g
- Saturated Fat: 11g
- Unsaturated Fat: 7g
- Trans Fat: 0g
- Carbohydrates: 50g
- Fiber: 4g
- Protein: 3g
- Cholesterol: 45mg