
Oh, friends, let’s talk about that smell—the one that immediately transports you back to Grandma’s porch on a hot summer evening. That, my dears, is the smell of a true, unapologetic, homemade blackberry pie. I know you’ve tried recipes before, but my promise to you—coming straight from the heart of the DeliceRecipe home kitchen—is that this is the ultimate, foolproof blackberry pie recipe you’ve been searching for. We are locking down that flaky, buttery crust and guaranteeing you a filling that’s juicy but perfectly set. Trust me, when Ellie Vance puts her stamp on something, it means it’s reliable, tested, and meant for real family tables. You can always read more about our philosophy of simple, delicious cooking over on our About Us page!
- Why This is the Best Blackberry Pie Recipe for Your Table
- Gathering Ingredients for Your Classic Homemade Blackberry Pie
- Step-by-Step Instructions for the Perfect Blackberry Pie
- Tips for Success When Making Your Blackberry Pie
- Variations for Your Old Fashioned Blackberry Dessert
- Blackberry Pie Serving Ideas
- Storing and Reheating Your Homemade Berry Pie
- Frequently Asked Questions About Blackberry Pie
- Nutritional Estimates for This Classic American Desserts Recipe
Why This is the Best Blackberry Pie Recipe for Your Table
I know you want a showstopper pie, and honestly, you deserve one! We’ve focused on the two things that make or break a berry pie: that shatteringly flaky crust and a filling that stays put when you slice into it. Forget the weeping, watery mess you might have dealt with before. This recipe is designed by a real home cook, for you.
- This **blackberry pie** gives you that classic, old-fashioned vibe we all crave.
- We guarantee the **buttery pie pastry** will be flaky—seriously, no shortcuts taken here!
- The filling is balanced—sweet enough, wonderfully tart, and it sets up beautifully.
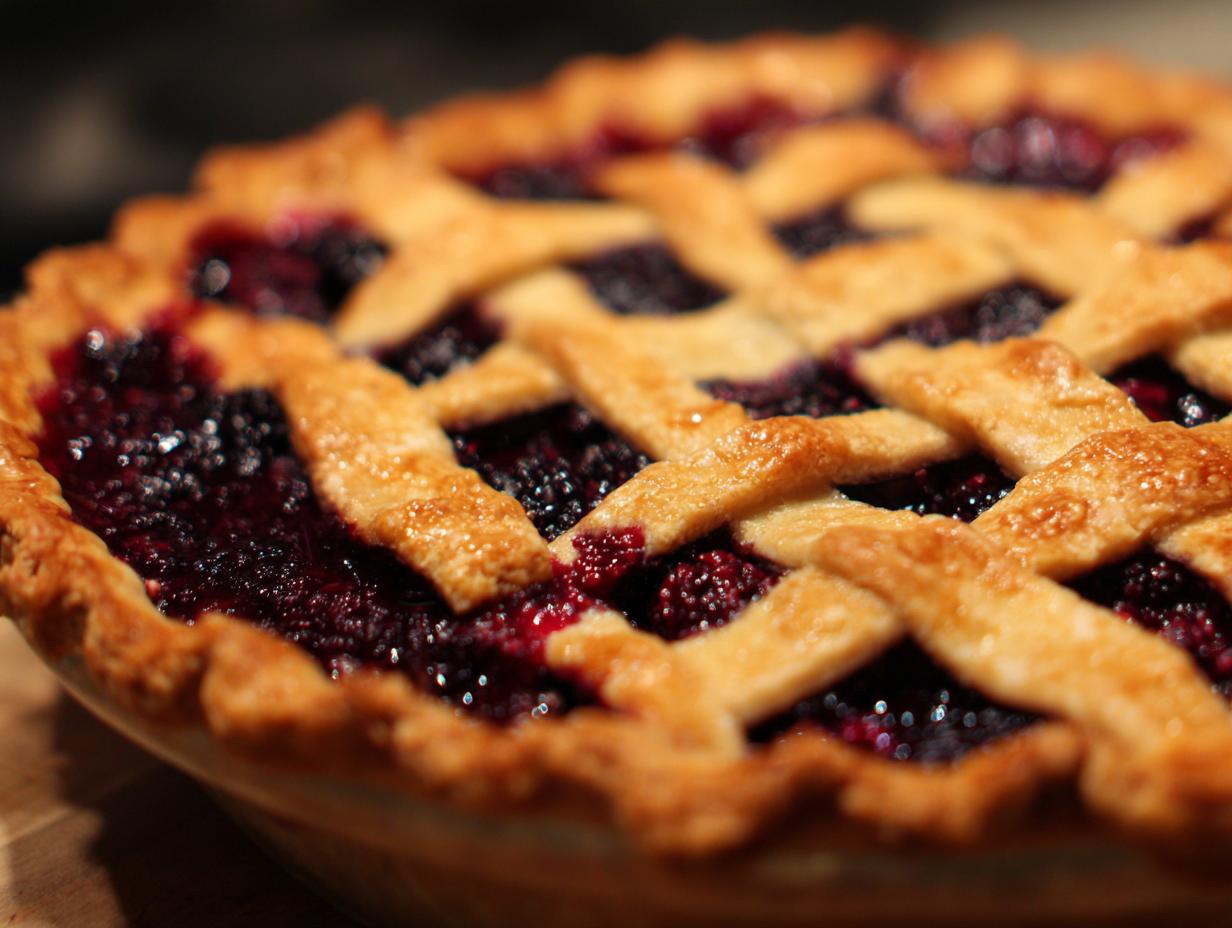
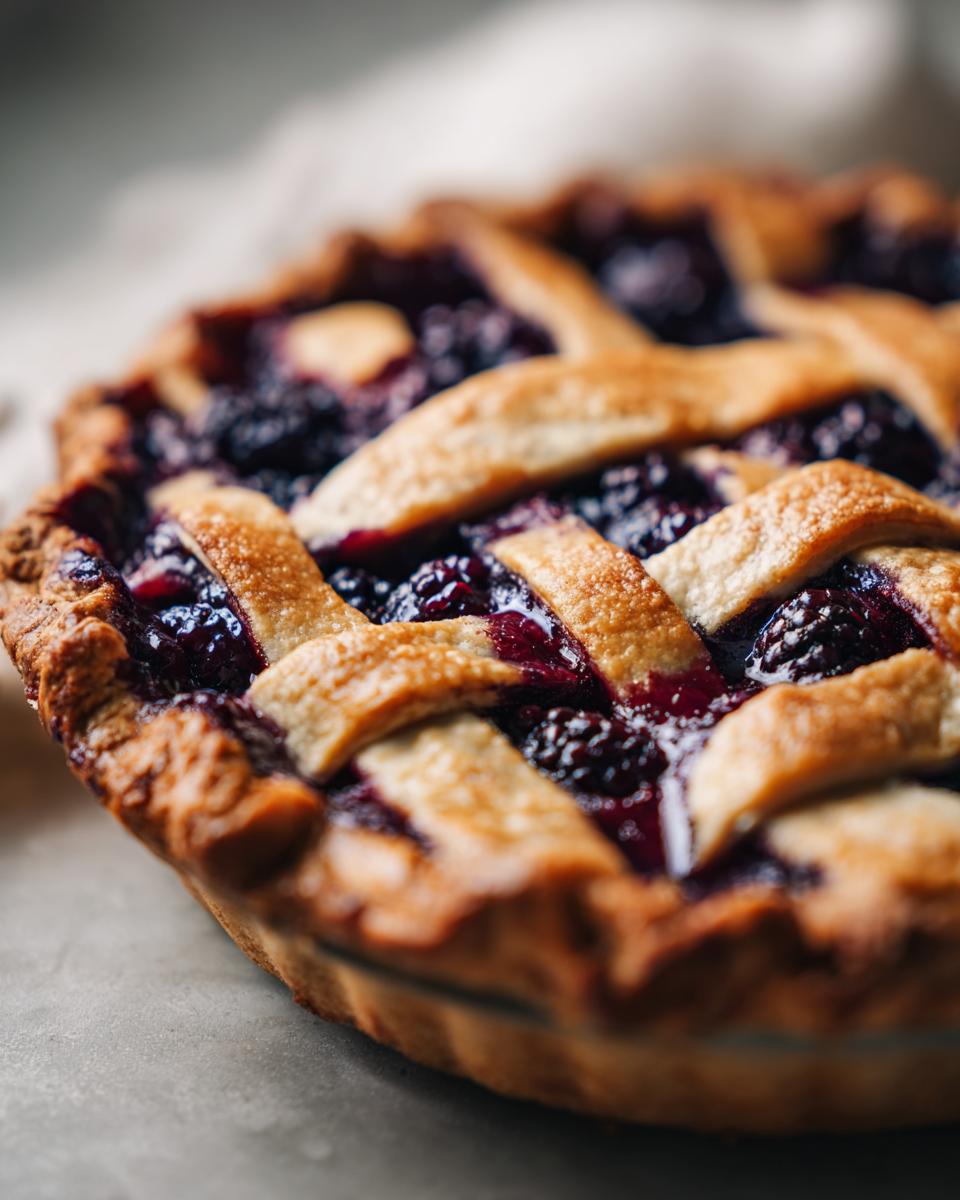
- You get the gorgeous presentation of a classic lattice top, which lets that beautiful purple peek through.
Achieving the Perfect Flaky Pie Crust Tutorial
If you’ve ever felt defeated by tough or soggy pastry, this is where we change things! The secret to a proper Flaky Pie Crust Tutorial is temperature. You absolutely must keep your butter and water ice cold. We aren’t looking for smooth dough when we mix; we want those jagged, pea-sized chunks of butter intact! When those cold pieces hit the hot oven, they steam and create all those amazing layers that make the crust puff up wonderfully around your delicious berry filling.
Sweet Tart Fruit Pies: Mastering the Blackberry Filling from Scratch
Making a **Blackberry Filling from Scratch** that tastes like summer is easy, but making one that actually *sets* requires just a little starch hug. We use cornstarch along with the sugar and lemon juice. This combination thickens the juices as they cook down, meaning your sweet tart fruit pies won’t collapse into a puddle on the plate. It’s the perfect way to balance the deep flavor of the blackberries without making them taste heavy or dull. Trust me on the cornstarch; it’s the hero ingredient for structure!
Gathering Ingredients for Your Classic Homemade Blackberry Pie
Okay, now that we know this is going to be the best **blackberry pie** ever constructed, let’s talk about what you need to pull this off. Remember what I said about home cooking? It’s all about celebrating what’s fresh! If you can get your hands on local, in-season blackberries, do it! That vibrant fruit makes all the difference in a true baking taste experience. We need two separate groups of items: one for that gorgeous, flaky dough and one for the bursting berry filling. Don’t cheat and use melted butter or warm water—we need everything frigid for the pastry magic to happen!
Ingredients for the Buttery Pie Pastry
This is where your **Buttery Pie Pastry** comes to life. Remember, keep your measuring cups ready in the freezer while you gather these bits. For the dough, you’ll need:
- 2 1/2 cups all-purpose flour
- 1 teaspoon salt
- 1 cup (that’s two full sticks!) of cold unsalted butter, cut into small cubes
- About 1/2 cup of ice water—and yes, you might need a splash more, but keep it icy!
Ingredients for the Blackberry Filling from Scratch
This part is super simple, but pay attention if your berries are sweeter or tarter than mine were that day! For the **Blackberry Filling from Scratch**, gather up:
- 6 cups of blackberries—fresh or straight from the freezer, no thawing needed!
- 1 1/2 cups of granulated sugar. Taste your berries first, you can always dial this up or down.
- 1/4 cup of cornstarch (our non-soggy, setting agent!).
- 1 tablespoon of fresh lemon juice—it brightens everything up.
- 1/2 teaspoon ground cinnamon (just a whisper!)
- A tiny pinch of salt to make the fruit flavor pop!
And don’t forget the finishing touches for the top: one beaten egg mixed with a spoonful of milk for the wash, and a tablespoon of coarse sugar for that sparkle!
Step-by-Step Instructions for the Perfect Blackberry Pie
Alright, this is the fun part! We’ve gathered our beautiful ingredients; now we put them together. Remember, baking a truly spectacular homemade berry pie is all about patience, especially with the dough. Don’t rush the chilling! If you have a handy apple strudel recipe you love, the crust concepts right here are similar—keep everything cold to maximize those flaky layers. Read carefully, follow the temperatures, and by the time this smells heavenly, you’ll have mastered baking a berry pie that never disappoints.
Making the Dough and Chilling for the Flaky Pie Crust Tutorial
First things first: the crust! Take your flour and salt mixture. Now, dump in that icy cold, cubed butter. You need to use your fingertips (or a pastry blender if you’re feeling fancy) to work the butter into the flour. Stop when it looks like coarse sand with some lovely, pea-sized butter chunks still visible. Those chunks are what give you that amazing, flaky crust! Next, drizzle in your ice water, just a tablespoon at a time, using your fork to bring it together. Once it forms a shaggy mass, stop mixing immediately. Divide it in two, squash each piece into a flat disk, wrap them up tight, and stick them in the fridge for at least one whole hour. Seriously, don’t touch them until that hour is up—they need that rest!
Assembling and Topping Your Blackberry Lattice Pie Ideas
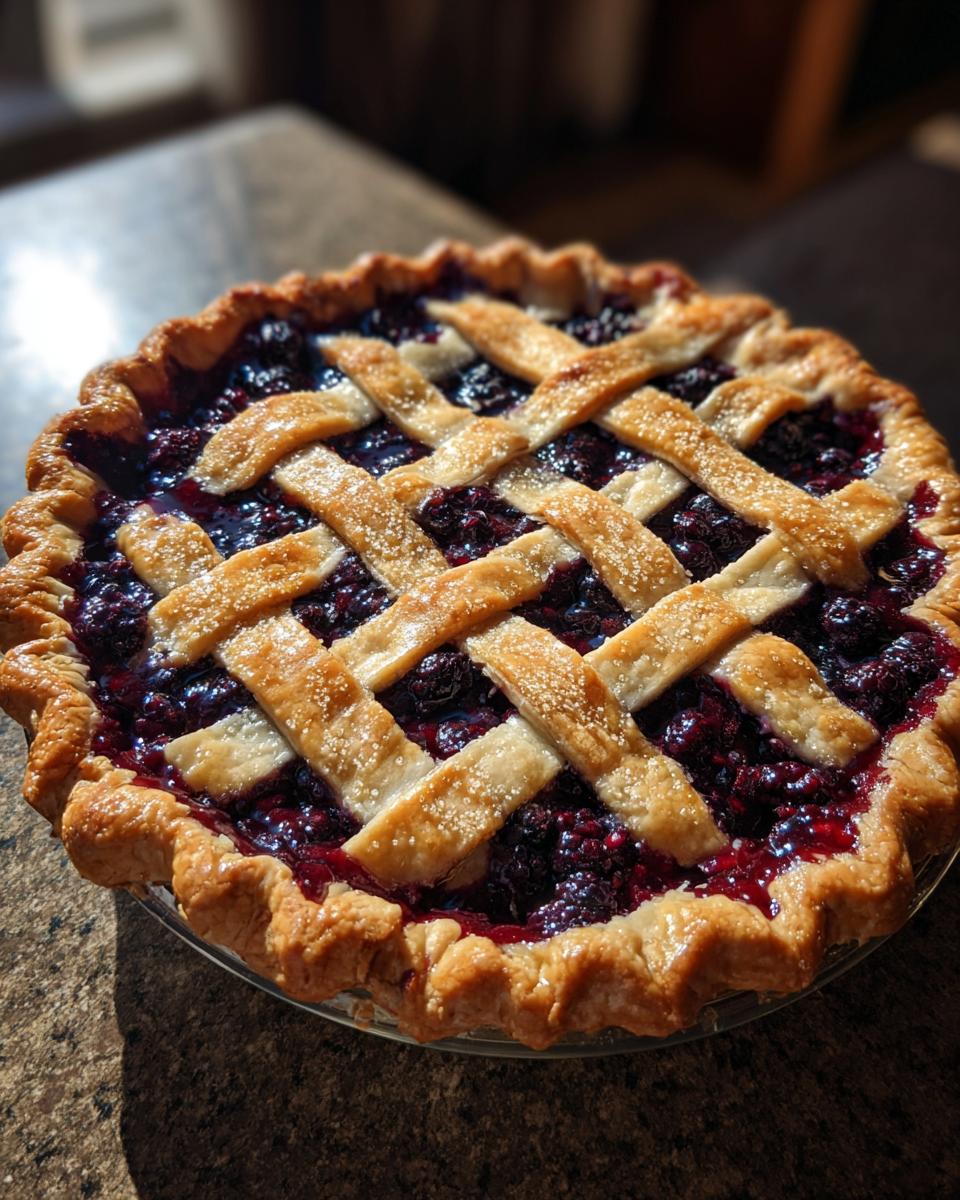
Once your dough is cold, take one disk out and roll it on a lightly floured surface until it’s a nice big circle, probably about 12 inches across. Gently lay it into your 9-inch pie plate. Trim the extra dough, leaving about an inch hanging over the edge. Now, gently pour in your prepared blackberry filling—make sure it’s all mixed well first! For the top, this is where you can get creative with your Blackberry Lattice Pie Ideas, or just slap the other disk right on top for a full covering. If you go for the full top, make sure you cut a few vents so that steam can escape, or it’ll try to explode! Then, pinch those top and bottom edges together firmly to seal everything up tight.
Baking and Cooling: How to Make Pie Without a Soggy Bottom
Oven time! We start high to set that crust quickly. Preheat your oven to 400°F (200°C) and put your pie on a baking sheet—trust me, drips happen! Bake it for 20 glorious minutes at that higher heat. Then, and this is vital for **how to make pie without a soggy bottom**, you reduce the heat down to 375°F (190°C) and bake for another 35 to 45 minutes long. If the edges look too dark, just wrap a ring of foil around them. After you pull that golden beauty out, resist the temptation! You must, must, must let it cool on a wire rack for at least four hours. This cooling time is the absolute secret weapon; it lets that cornstarch finish thickening all those wonderful berry juices so you get that perfect, thick filling!
Tips for Success When Making Your Blackberry Pie
Baking a perfect pie involves a few little secrets, and honestly, these tips are what separate a good pie from the absolute best blackberry pie you’ve ever made. I’ve learned these the hard way through many failed attempts, so you get the benefit of my messes! Don’t worry about seeming fussy; when it comes to pastry, fussy equals flaky!
First, let’s talk about that chill factor again. Even if you think your kitchen isn’t warm, handle that dough as little as humanly possible. If you find yourself needing to roll it out and it’s getting soft or sticky, nope! Stop immediately, wrap it back up, and stick your entire workspace assembly into the fridge for ten minutes. Cold butter is your best friend for ensuring those layers form.
Also, if you’re baking during the summer and your house feels like an oven, consider using your food processor for cutting in the butter, but pulse it *very* carefully—just three or four quick zaps before adding the liquid back in is enough to keep the butter pieces chunky and prevent everything from getting warm from the motor’s heat.
Don’t forget the baking sheet underneath! I cannot stress this enough when making these kinds of juicy summer pies. A foil-lined baking sheet underneath the pie plate is crucial. If your filling bubbles over (and it will!), you save massive cleanup in the oven, and the bottom crust gets better circulation, helping us fight that soggy bottom monster one last time!
And remember that frozen berry note? If you use them, they release a ton of extra liquid. I sometimes increase the cornstarch by an extra tablespoon just to be safe when I’m working with frozen fruit. It never hurts to give that filling a little extra insurance against running everywhere!
Variations for Your Old Fashioned Blackberry Dessert
While this classic **blackberry pie** recipe stands perfectly on its own—a true tribute to an old fashioned blackberry dessert—I always encourage a little creative flair! After all, Ellie Vance believes cooking should be fun, not rigid. When you’re baking something traditional, sometimes the simplest additions make it feel like *yours* and give it a lovely little seasonal twist. You don’t have to veer far from the ingredients list to make a big impact either; think of these as whispers of extra flavor added to the filling.
I love experimenting with warm spices, just like in my favorite spice cake—you can find my recipe for that yummy moist spice cake recipe from scratch if you’re feeling that warm flavor profile!
Boosting the Spice
If you find cinnamon a bit too common, try leaning into something a little more complex. A tiny pinch—and I mean tinier than a pinch!—of ground cardamom added to your filling mixture gives the berries an amazing floral, slightly mysterious backdrop. It pairs unbelievably well with the tartness.
Alternatively, if you are leaning into the dessert for a fall gathering, a hint of ground cloves (but seriously, use restraint!) can give it that cozy, robust flavor reminiscent of old kitchen recipes that needed to last all winter.
Adding Zest or Citrus Notes
We already use lemon juice, but using citrus zest takes it up a notch. Before you juice your lemon, make sure to zest about half of the peel right into your berry bowl before you add the sugar. That aromatic oil in the zest adds so much brightness that cuts through the richness of the crust!
For a truly stunning variation, skip the lemon juice entirely and use the zest and juice from one small orange instead. Orange and blackberry are just divine together, offering a slightly sweeter, more fragrant lift to what is otherwise a very deep, dark fruit flavor. It makes this **old fashioned dessert** feel much more elegant!
A Crumb Topping Alternative
If you are short on time or decide last minute you don’t want to fiddle with a lattice top, ditching the top crust for a streusel is a fantastic option. It changes the structure a bit—it won’t be a double-crust pie, obviously—but it’s delicious! Just mix up a quick simple crumble using equal parts flour, brown sugar, and cold butter until crumbly, and sprinkle that generously over your filled pie before baking. It gives you a nice crunchy contrast to the soft blueberries underneath. Just remember, a crumb topping might brown a tiny bit faster than the pastry, so keep an eye on it!
Blackberry Pie Serving Ideas
Okay, the hardest part is over! You baked the perfect **blackberry pie**—it’s golden, it smells like heaven, and you’ve managed to wait the agonizing four hours for that filling to set. Now comes the truly fun part: serving it! A wedge of this glorious, fresh, homemade berry pie deserves the right accompaniment, and really, this sweet tart fruit pie stands up beautifully on its own.
But why stop at perfect when you can aim for legendary? In my house, we rarely serve a slice without something cool and creamy next to it. My mom always insisted that the contrast between the warm, spiced fruit and something cold is essential for the best bite. Check out some of our favorite **Blackberry Pie Serving Ideas** below—I even linked to my favorite recipe for old-fashioned pancakes because, hey, sometimes you just want carbs!
This pie is fantastic on day one, but honestly, it tastes even better the next day when the spices have really settled into the jammy filling. If you’re taking this incredible dessert to a gathering, make sure you bring along one of these pairings!
- Classic Vanilla Bean Ice Cream: This is the absolute standard for a reason. The cold, creamy, sweet vanilla melts just slightly over that warm berry filling, creating a simple, perfect sauce. You can see how much others love this pairing over on one of my favorite lifestyle blogs, too here!
- Homemade Whipped Cream: If you want something lighter than ice cream, whip up some fresh heavy cream with a tiny bit of powdered sugar and a splash of vanilla. Fold in some fresh lemon zest if you want that citrus note to shine through—it helps cut the richness of our incredible buttery pie pastry.
- Sharp Cheddar Cheese (?): Wait, cheese? Yes! This is an old-school pie trick that works wonders with deeply flavored fruit pies like apple or blackberry. A thin slice of sharp cheddar melted slightly on top of the warm pie adds a salty, savory element that really balances that intense tartness. Don’t knock it till you’ve tried it!
- Crème Fraîche or Sour Cream: For a slight tang that’s less sweet than whipped cream, use crème fraîche. It’s thick, rich, and has lovely acidity. It’s perfect if you tend to bake your filling side on the tarter end of the spectrum.
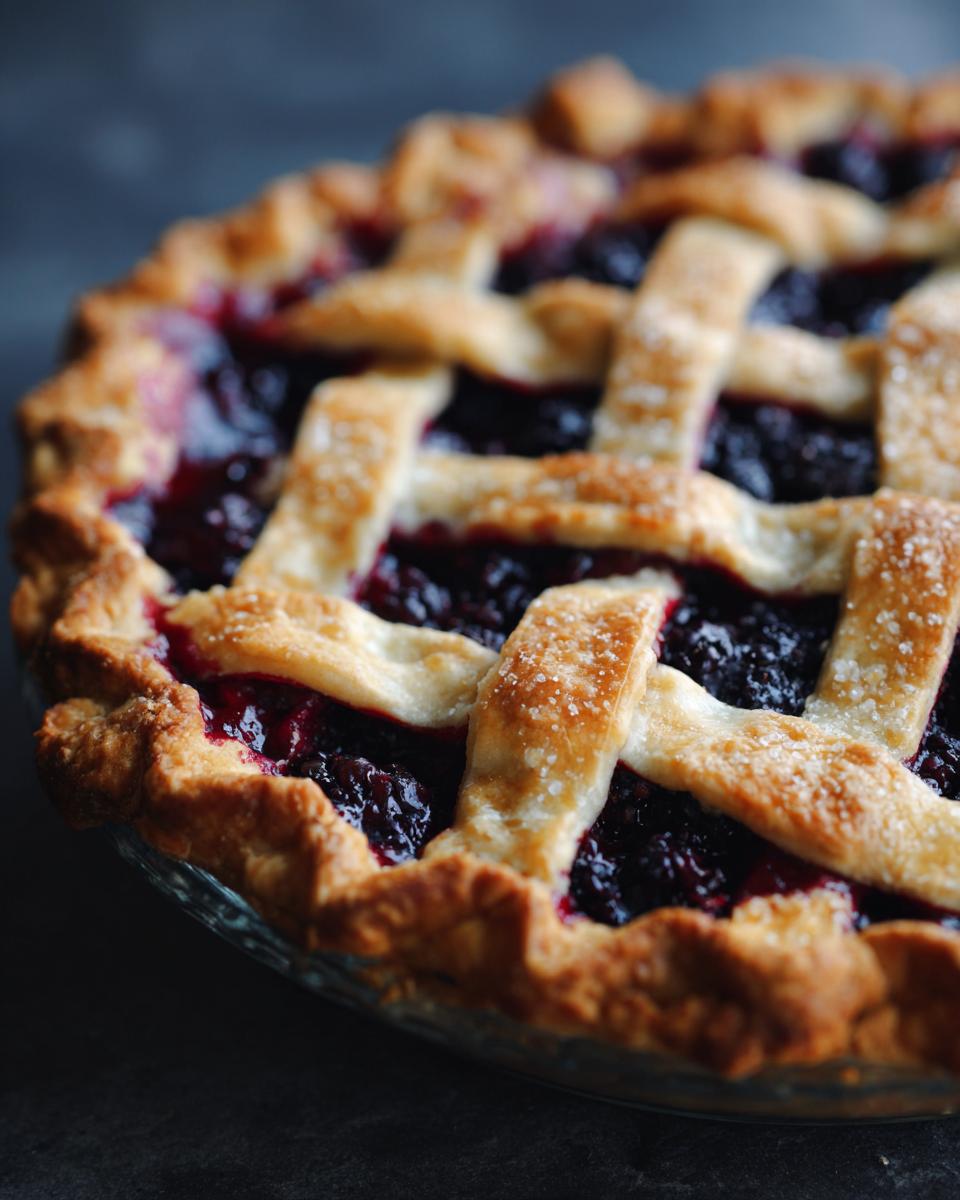
Whatever you choose, just make sure you cut a generous slice. You earned it after mastering this lattice top!
Storing and Reheating Your Homemade Berry Pie
I know you’re going to want to save some of this gorgeous **blackberry pie** for later, but how you store it really matters—especially since we worked so hard on that amazing, flaky crust! It’s a bit of a balancing act between maintaining the crust’s crispness and keeping the berry filling safe. Here is my advice for making sure those leftovers taste almost as good as the first slice.
First off, no matter how tempting it is, do not try to put this pie away warm. If you seal it up while it’s still hot, that trapped steam is going to instantly turn your perfect bottom crust into a sad, gummy mess. You have to let it cool completely on the counter first—and I mean completely, maybe 4 or 5 hours after it comes out of the oven.
Storage Temps: Counter vs. Fridge
This depends on how fast you plan on eating it! If you think you’ll devour the rest of this **homemade berry pie** within 24 hours, keeping it on the counter, loosely covered with a cake dome or a large bowl, is actually the best bet for the crust. The cold air in the fridge pulls moisture out of the crust faster, and we don’t want that hard, dry shell.
However, if you need it to last longer than a day, into the fridge it goes. Just try to use a container that isn’t airtight, or place a paper towel over the filling before you cover it loosely. The fridge is better for preserving the fruit filling over several days, but we have to be careful about reheating!
Reheating Slices Gently
You want warm pie, not a steaming hot, soggy one! When you are ready for that second helping, please skip the microwave entirely. The microwave is the enemy of flaky pastry; it heats the water inside the dough and makes it tough and chewy. Yuck!
Instead, preheat your oven, or even a toaster oven, to a low temperature—around 300°F (150°C) is perfect. Place the single slice of **blackberry pie** directly onto a baking sheet or a small piece of foil. Heat it gently for about 10 to 15 minutes. This warms up the fruit filling just enough to be luscious and soft again while lightly crisping up that buttery pastry. Pull it out before it gets too hot, and it will taste practically fresh-baked again!
Can You Freeze Leftover Pie?
Yes, absolutely! If you have a half-pie left over after a big gathering and know you won’t get to it in five days, freezing is a wonderful option for preserving your **classic American dessert**. Wrap the entire, completely cooled pie tightly first in plastic wrap, and then wrap it again in aluminum foil. Freeze it flat for up to three months.
When you want to eat it, just transfer the frozen pie (still wrapped!) to the fridge for a good 12 hours to thaw slowly. Once thawed, you can then reheat individual slices using that low-and-slow oven method I just mentioned to bring that crust back to life!
Frequently Asked Questions About Blackberry Pie
I know when you spend this much love on making a beautiful fruit pie, you want to know every little thing beforehand! These are the questions I always get asked about making the perfect **Simple Summer Pie Recipe**. Don’t worry about tricky techniques; these answers are straightforward and designed to help you succeed. If you’re looking for other quick, reliable recipes for busy days, maybe check out my list of easy weeknight dinners!
Can I use frozen blackberries in this blackberry pie recipe?
Oh, yes, you absolutely can! This recipe is built tough enough for that. If you are using frozen berries, please do not thaw them first. Dump them straight into your pie shell, filling and all. Because they are frozen, they release their juice much slower, so you might just need to add about 5 to 10 minutes to that final bake time to ensure everything is bubbling beautifully in the center.
What is the secret to avoiding a soggy bottom on my pie?
This is the million-dollar question for any **Homemade Berry Pie**! It comes down to three things: First, make sure that bottom crust is chilled right up until it hits the oven. Second, don’t skimp on the cornstarch! It’s there to work hard. Third, and this is non-negotiable: you must let the pie cool for a solid four hours before you ever try to slice it. That cooling time is when the filling actually sets up.
Can I use a different sweetener or thickener in the filling?
I really, really encourage you to stick with the sugar and cornstarch measurement for your first try. These were dialed in specifically for this berry volume. If you absolutely must substitute the sugar, you’ll need to taste the berries first and start low. If you change the sweetener, you might need to slightly adjust the amount of cornstarch used, as different sugars can affect moisture release. Good **meal planning** helps ensure you buy enough of the right ingredients ahead of time so you don’t have to panic-substitute!
Nutritional Estimates for This Classic American Desserts Recipe
Now listen, I’m a baker, not a nutritionist! I focus on flavor and family traditions, not counting every single calorie when we’re making a showstopper like this **blackberry pie**. But I know some of you are curious about what’s sneaking into that beautiful lattice top, so I pulled the estimated figures from my recipe analysis tool. We’ve been working on making our whole site more helpful, including linking over to some of our quick healthy lunch recipes for those non-pie days!
Please take these numbers with a grain of salt—a very large, sugary grain of salt! These figures (based on 8 slices) change so much depending on how sweet your actual fresh berries are, the exact brand of butter you use, and if you skipped that coarse sugar sprinkle on top. They are just a guide, not a strict rulebook!
- Serving Size: 1 slice
- Calories: About 450
- Sugar: Roughly 35g (Yes, it’s fruit pie, you deserve it!)
- Fat: Around 25g (That’s the cost of that incredible flaky pie crust!)
- Carbohydrates: About 58g
- Protein: Around 5g
The bottom line? This is a truly indulgent dessert, and that’s okay! We bake these wonderful **dessert recipes with fresh berries** to celebrate, not to worry about the details. Enjoy every single bite!
PrintClassic Homemade Blackberry Pie with Flaky Lattice Crust

Make an old-fashioned blackberry pie featuring a sweet-tart, juicy filling that sets perfectly, wrapped in a buttery, flaky double crust. This recipe guarantees a showstopper dessert without a soggy bottom.
- Prep Time: 45 min
- Cook Time: 65 min
- Total Time: 110 min
- Yield: 8 servings 1x
- Category: Dessert
- Method: Baking
- Cuisine: American
- Diet: Vegetarian
Ingredients
- 2 1/2 cups all-purpose flour
- 1 teaspoon salt
- 1 cup (2 sticks) cold unsalted butter, cut into cubes
- 1/2 cup ice water (plus more if needed)
- 6 cups fresh or frozen blackberries
- 1 1/2 cups granulated sugar (adjust based on berry tartness)
- 1/4 cup cornstarch
- 1 tablespoon lemon juice
- 1/2 teaspoon ground cinnamon
- Pinch of salt
- 1 large egg, beaten with 1 tablespoon milk (for egg wash)
- 1 tablespoon coarse sugar (for sprinkling)
Instructions
- Prepare the Pie Dough: In a large bowl, whisk together the flour and salt. Cut in the cold butter using a pastry blender or your fingers until the mixture resembles coarse crumbs with some pea-sized pieces of butter remaining. Gradually add the ice water, mixing until the dough just comes together. Divide the dough in half, form each half into a disk, wrap in plastic, and chill for at least 1 hour.
- Prepare the Filling: In a separate bowl, gently combine the blackberries, granulated sugar, cornstarch, lemon juice, cinnamon, and a pinch of salt. Toss until the berries are evenly coated. Set aside while you roll out the bottom crust.
- Assemble the Bottom Crust: On a lightly floured surface, roll out one disk of dough into a 12-inch circle. Carefully transfer the dough to a 9-inch pie plate. Trim the edges, leaving a 1-inch overhang. Chill the pie plate.
- Fill and Top the Pie: Pour the blackberry filling into the chilled bottom crust. Roll out the second disk of dough. Cut strips to create a lattice top, or place the whole sheet over the filling. Crimp the edges of the top and bottom crusts together to seal. Trim excess dough.
- Create the Finish: Brush the top crust with the egg wash mixture and sprinkle evenly with coarse sugar. Cut several slits in the top crust if you did not make a lattice to allow steam to escape.
- Bake the Pie: Preheat your oven to 400°F (200°C). Place the pie on a baking sheet to catch drips. Bake for 20 minutes at 400°F. Reduce the oven temperature to 375°F (190°C) and continue baking for another 35 to 45 minutes, or until the crust is golden brown and the filling is bubbling thickly. If the edges brown too quickly, cover them loosely with foil.
- Cool Completely: Remove the pie from the oven and let it cool on a wire rack for at least 4 hours before slicing. This cooling time is crucial for the filling to set and avoid a runny slice.
Notes
- Serve this classic American dessert warm with a scoop of vanilla ice cream or fresh whipped cream for the perfect finish.
- If you use frozen berries, do not thaw them first; use them straight from the freezer, but you may need to add 5-10 minutes to the total bake time.
- For the flakiest crust, keep all butter and water extremely cold during the dough preparation.
Nutrition
- Serving Size: 1 slice
- Calories: 450
- Sugar: 35g
- Sodium: 250mg
- Fat: 25g
- Saturated Fat: 15g
- Unsaturated Fat: 10g
- Trans Fat: 0g
- Carbohydrates: 58g
- Fiber: 4g
- Protein: 5g
- Cholesterol: 60mg