
There’s just something about Italian desserts, isn’t there? They feel instantly elegant but still totally comforting. If you’ve been hunting high and low for the perfect homemade espresso dessert, stop right there. I’m here to tell you that making an authentic, show-stopping Tiramisu doesn’t require a culinary degree or a night spent hovering over a stove! This is my absolute favorite tiramisu recipe because it fits right into Ellie Vance’s philosophy here at DeliceRecipe: big flavor built on simple, reliable steps. We’re bypassing the oven entirely and focusing purely on creamy mascarpone goodness and that incredible coffee soak. Trust me, this Easy No-Bake Classic Tiramisu Recipe is going to become your go-to special occasion treat.
- Why This is the Best Tiramisu Recipe for Home Cooks
- Gathering Ingredients for Your Classic Tiramisu Recipe
- Simple Tiramisu Instructions: Assembling Your No Bake Italian Dessert
- Tips for a Restaurant Style Tiramisu Every Time
- Make Ahead Tiramisu: Perfecting Your Layered Coffee Dessert
- Serving Suggestions for Your Creamy Italian Dessert
- Frequently Asked Questions About This Tiramisu Recipe
- Estimated Nutrition for Your Homemade Espresso Dessert
- Share Your Experience Making This Tiramisu Recipe
Why This is the Best Tiramisu Recipe for Home Cooks
Listen, I get it—sometimes the idea of homemade desserts feels overwhelming, especially layered ones like Tiramisu. But that’s why I’m so proud of this specific Easy Tiramisu Dessert.
We’ve stripped away anything fussy. Since there’s no baking involved, cleanup is a dream, and honestly, the flavors actually *improve* as they sit. That rich coffee mingling with that impossibly light mascarpone cream? That’s the magic only time and patience—not complex technique—can create. This recipe proves you can achieve a creamy Italian dessert worthy of a fancy restaurant right in your standard 8×8 dish.
Key Benefits of Our Easy Tiramisu Recipe
- No oven time required whatsoever—it’s completely no-bake!
- Perfect for company since it *must* be made ahead.
- Uses simple layering you can’t really mess up.
- Achieves that classic, deeply satisfying coffee flavor.
Gathering Ingredients for Your Classic Tiramisu Recipe
Okay, let’s talk about what you need. Since this is a no-bake situation, the quality of your ingredients really sings! If you want that truly authentic flavor for your Authentic Tiramisu with Mascarpone, you need two things to be top-notch: your mascarpone cheese and your coffee. Don’t skimp on the coffee! Brew it strong—we need that robust espresso punch to cut through the richness later on.
You’ll notice this recipe calls for a few simple items, but the way we handle them is what separates a good dessert from a great one. Make sure your heavy cream is ice cold before you start whipping it; that’s non-negotiable for getting stiff peaks!
Ingredient Notes and Substitutions for Authentic Tiramisu with Mascarpone
Let’s get the raw egg thing out of the way first, because I know that worries many beginner bakers. In the official recipe list above, I included the egg yolk because it does add incredible richness, but I always recommend using pasteurized eggs if you’re nervous. Or, you can totally skip it! If you cut the yolk, just add two tablespoons of extra cream cheese along with the sugar when mixing in the mascarpone; you won’t even notice the difference in flavor, trust me.
The most crucial technique tip happens when we dip the coffee soaked ladyfingers dessert. You are *not* bathing the cookies! We are talking a super quick dunk—one second per side—because they soak up liquid like crazy. If they get mushy here, your final dessert will be soupy, and nobody wants a soupy Tiramisu!
Simple Tiramisu Instructions: Assembling Your No Bake Italian Dessert
This is where the fun really begins! You’ve got your rich coffee mixture waiting, your impossibly smooth mascarpone cream chilling nearby, and your dish ready to go. Remember what I always say about building layers? It needs to be steady and even. We are building a sturdy, elegant structure here, totally deserving of the title Elegant Party Dessert.
First order of business: whipping that cream solo! Get your cold heavy cream and powdered sugar in a clean bowl and beat it until it holds those stiff, gorgeous peaks. This is what gives us the airy lift, so don’t stop too soon! Next, gently—and I mean *gently*—fold that whipped cream into your mascarpone base. If you attack it with the mixer, you deflate all that hard work. We want fluffy, not flat, okay? This folding step takes patience, but it’s the secret to that light texture that melts in your mouth.
Step-by-Step Guide to Coffee Soaked Ladyfingers Dessert
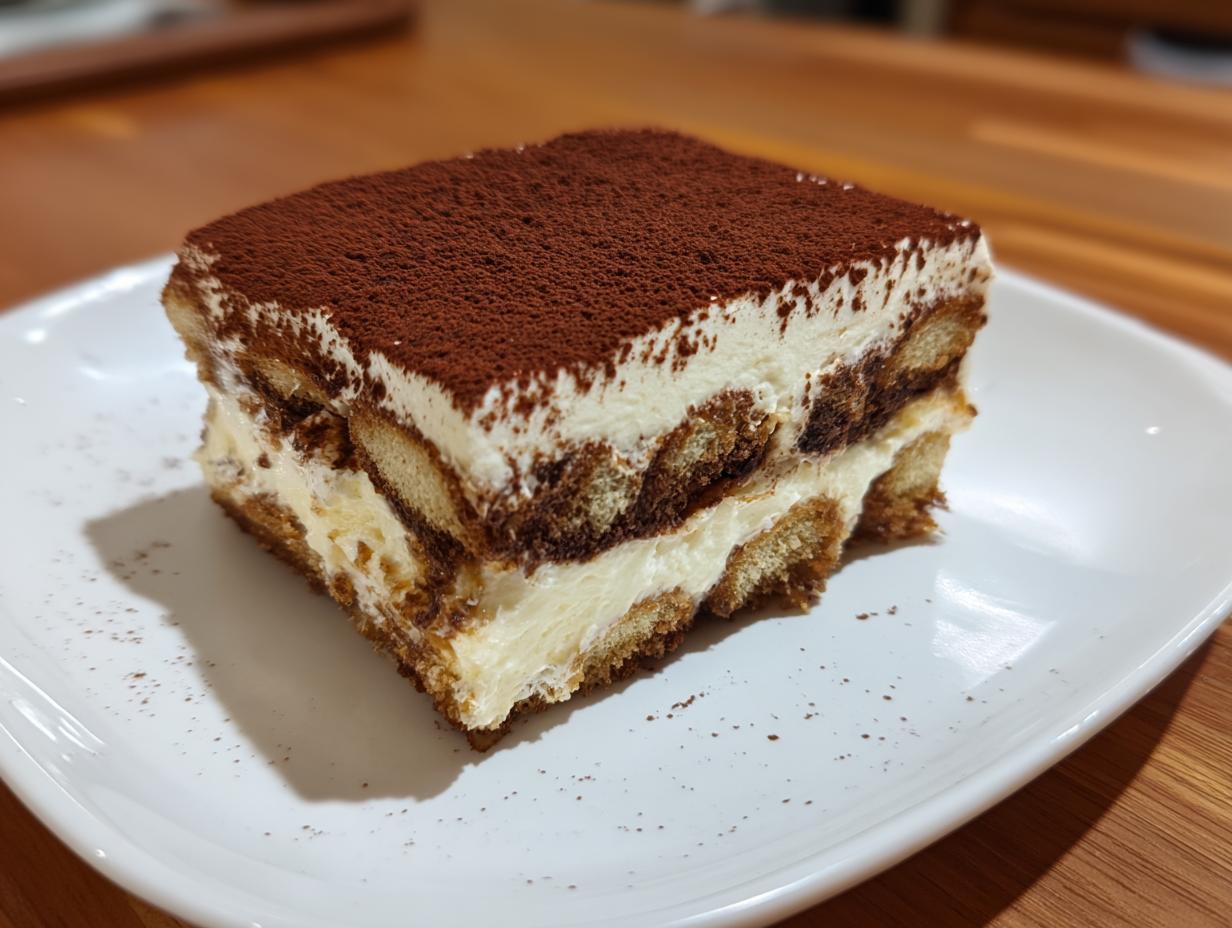
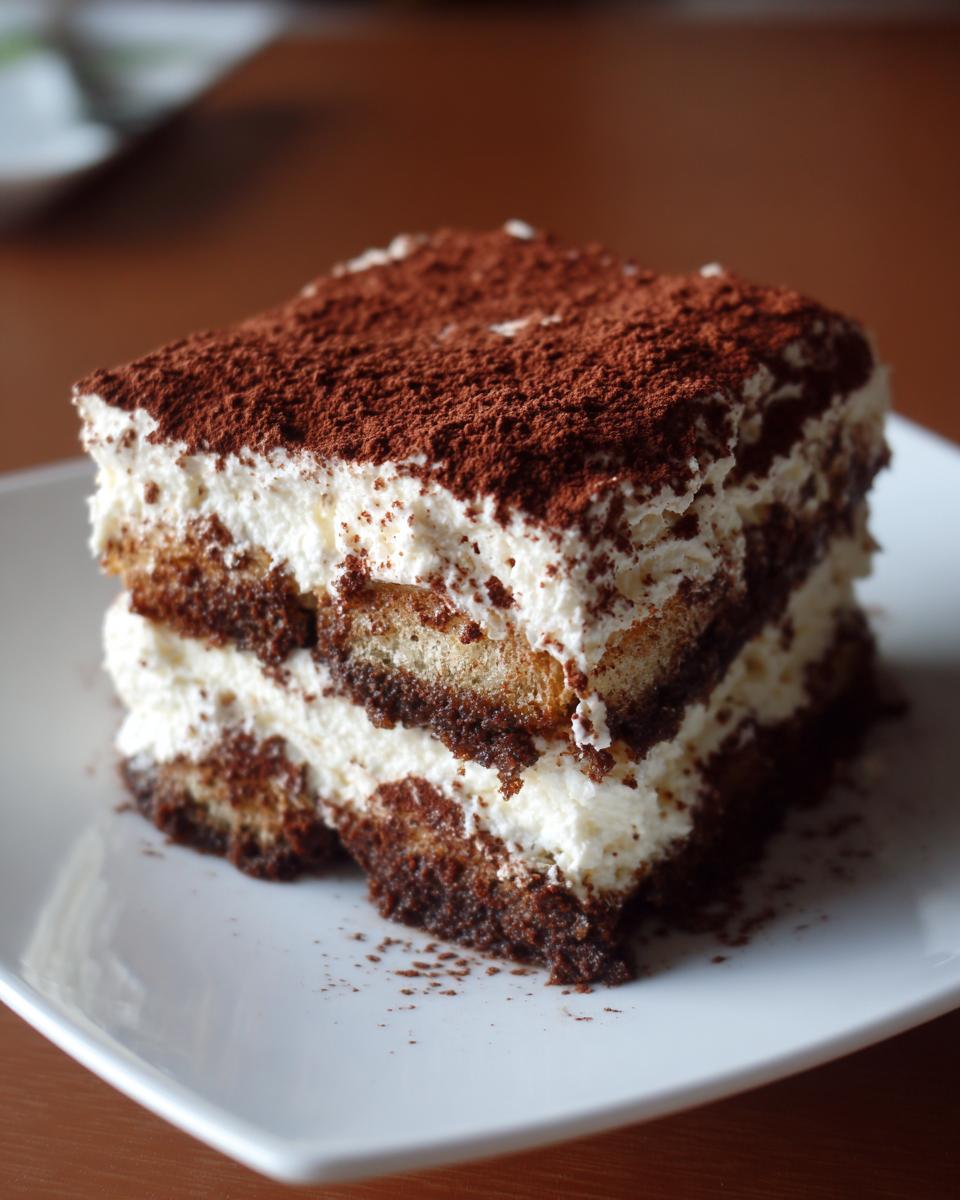
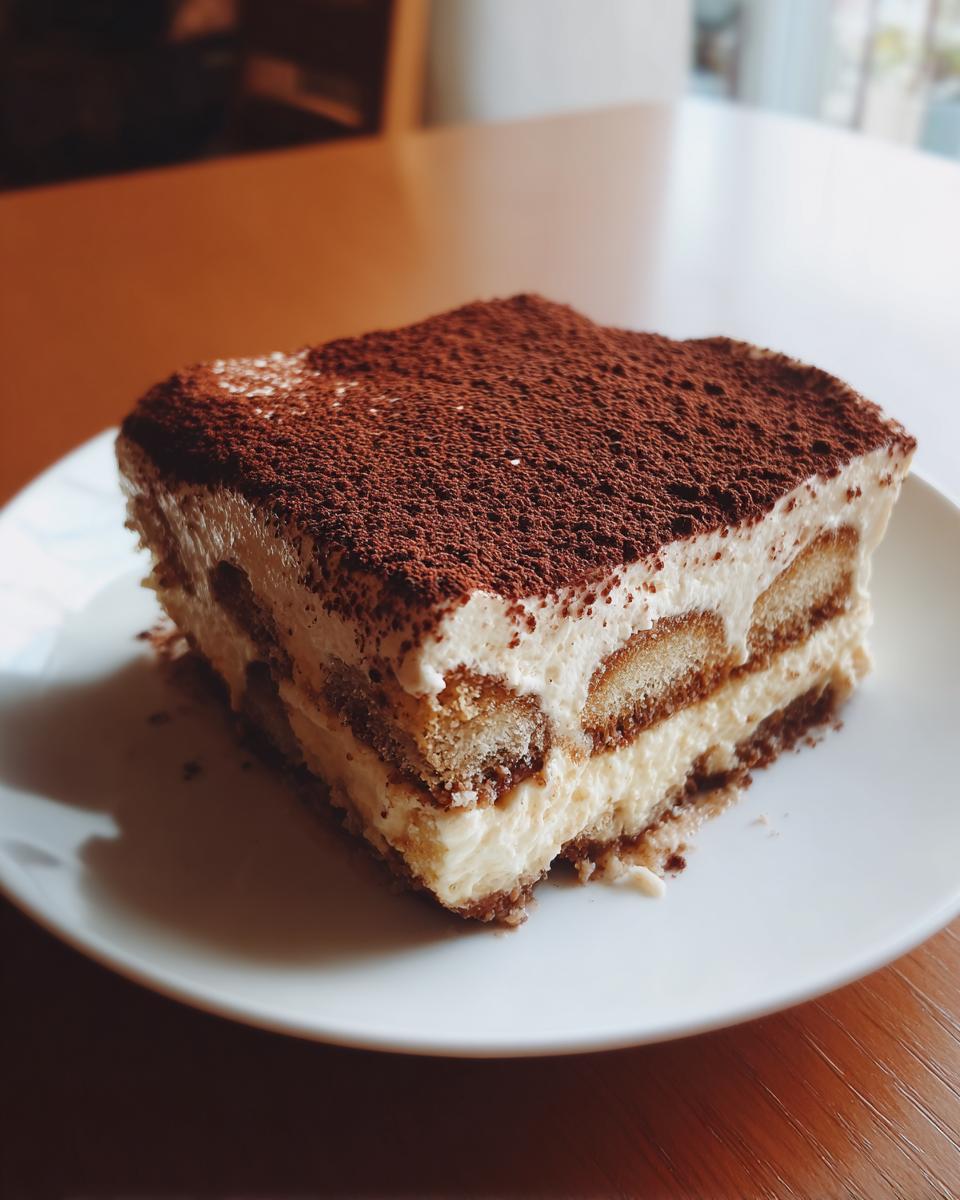
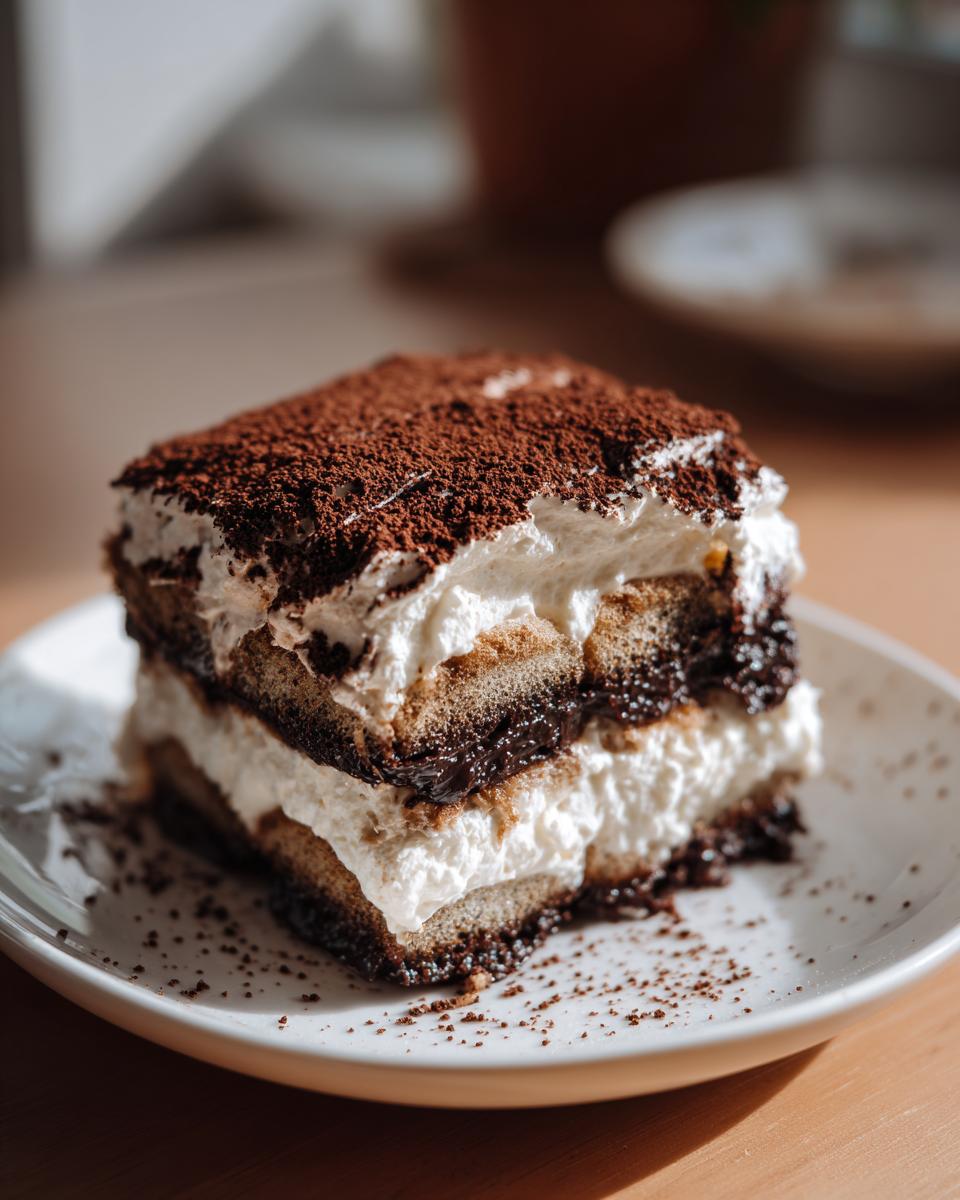
Now for the assembly! Grab your shallow dish—I use an 8×8 inch square for the perfect ratio of cream to cookie—and get your coffee soak ready. You’re treating those ladyfingers like they’re delicate little sponges that can only handle a momentary dip. Seriously, grab a ladyfinger, dip the bottom side quickly into the espresso, flip immediately, and pull it out. They should still feel a bit firm; they will soften up beautifully during chilling.
Lay down your first layer of these coffee-kissed cookies snuggly against each other. Now, spread exactly half of your glorious mascarpone cream right over the top. Make sure you get the cream right up to the edges—we don’t want any lonely cookie corners sticking out!
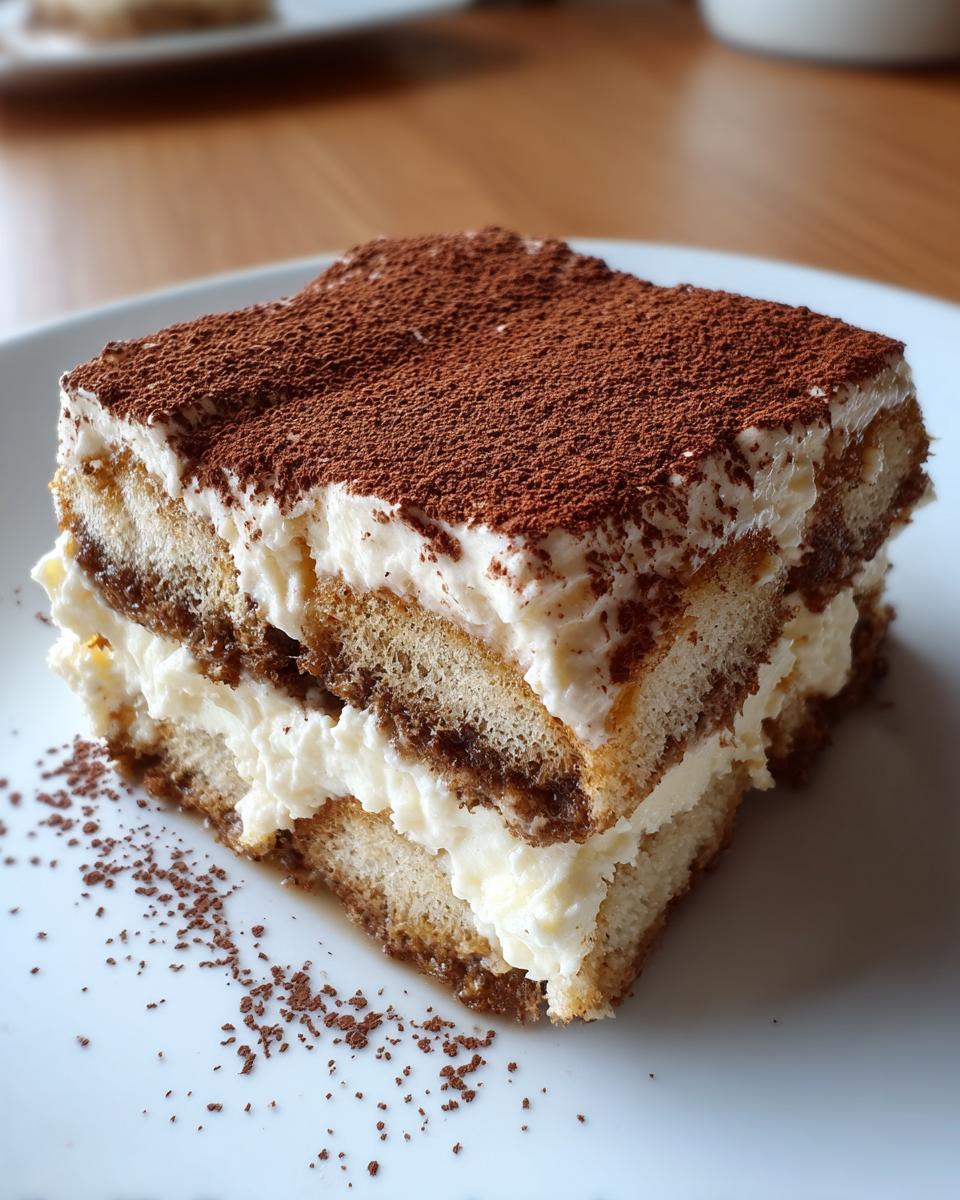
Repeat the whole process: quick coffee dip, lay the second layer of ladyfingers flat, and then top it all with the final layer of cream. Spread it smooth as glass. Now, and this is the hardest part of making this Layered Coffee Dessert, cover it tight and stick it in the fridge. You absolutely must chill this for at least six hours, but honestly, if you can wait until the next day, the flavors meld together so much better. Once it’s set, dust it heavily with cocoa powder right before you bring it to the table!
Tips for a Restaurant Style Tiramisu Every Time
So, you’ve layered everything neatly, and now you’re waiting for the magic to happen? That chilling time isn’t just for show, believe me. For a Tiramisu that tastes like you ordered it straight from a gorgeous little spot in Rome, you need patience! The flavor settling during that long rest period is where the sharp punch of the coffee softens and the sweetness integrates into that rich cream.
When it’s time to dust it with cocoa powder—oh, the dusting! This is the final flourish that makes it look professional, like a gorgeous cream cheese pound cake topped with something elegant. Don’t just toss it on! Use a very fine-mesh sieve. Sift a generous, even layer over the top while the Tiramisu is still super cold from the fridge. If you dust it too early, the moisture from the cream will absorb the cocoa and make it look damp and patchy. Do this *right* before serving, and you’ll wow everyone!
And promise me you won’t peek at it too much before the minimum chilling time is up. That structure needs time to set up so you get clean slices. That’s the secret to that clean, beautiful cross-section when you cut into this Tiramisu recipe.
Make Ahead Tiramisu: Perfecting Your Layered Coffee Dessert
Here’s probably my favorite part about this Simple Tiramisu Instructions: it actively punishes you if you try to rush it! You *have* to make it ahead for company, and frankly, I think that’s just perfect for home cooks. When you prepare this tiramisu recipe the day before you need it, something amazing happens in the fridge.
That long rest isn’t just about setting the cream so your layers don’t slide apart, though that’s important. Overnight, the dense, slightly bitter espresso soak slowly marries itself with the creamy mascarpone. It stops tasting like “coffee-dipped cookies layered with cream” and starts tasting like one cohesive, luxurious dessert. It’s totally richer the next day! If you have time, aim for 12 to 18 hours.
When it comes time to store it, you need a good seal. I always cover my dish tightly with a layer of plastic wrap pressed directly onto the surface of the cream before I put the main lid on, or just use one of those snap-on lids if you have them. This keeps everything fresh and stops the coffee aroma from taking over your fridge! For more great make-ahead ideas, check out this recipe linked below. It’s all about planning ahead, right?
Serving Suggestions for Your Creamy Italian Dessert
Since this Creamy Italian Dessert is already so rich and decadent, you really don’t need a ton of fuss on the side. When I serve this after a big dinner party, I like anything that cuts through that richness a little bit.
Honestly, a small, bright side salad is perfect. Something citrus-forward, like a simple mandarin orange salad, cleanses the palate beautifully before you dive into that creamy, luxurious Tiramisu. If you prefer something to sip alongside it, rich, dark roast coffee or a small glass of Vin Santo or even a lovely, slightly sweet Moscato works wonders. Keep it simple; the Tiramisu is the star!
Frequently Asked Questions About This Tiramisu Recipe
You’ve probably read through everything and maybe a few little questions popped up—that’s totally normal! We want you to feel 100% confident tackling this tiramisu recipe, especially if you’re making an Easy Tiramisu Dessert for the first time. Here are the few things people always ask me!
Can I skip the alcohol in the coffee soak for this tiramisu recipe?
Oh, absolutely, you can! If you’re avoiding alcohol, or just serving this to kids, the coffee soak still works beautifully on its own. But if you miss that little zip, try adding a splash of vanilla extract or maybe a teaspoon of almond extract to your cooled espresso instead. That will give the ladyfingers a nice little background flavor that complements the whole dish.
What if my mascarpone cream is too thin in this Easy Tiramisu Dessert?
If your cream feels a little too runny after you fold everything together, don’t panic! Usually, this means two things: either your mascarpone was too warm when you started, or you didn’t whip your heavy cream stiff enough. The best immediate fix is to cover the bowl and put the whole mixture back in the fridge for about 30 minutes. That chill will firm up the fat in the mascarpone and the cream, making it much easier to handle when you go to assemble the dessert.
Is this truly a Tiramisu recipe for Beginners?
Yes, I promise it is! This whole recipe is built around the fact that it’s a No Bake Italian Dessert. There is no fussy cooking timeline or complicated folding techniques here—it’s just mixing the cream components and then layering. If you can dip a cookie and spread cream, you can absolutely nail this classic dessert!
Estimated Nutrition for Your Homemade Espresso Dessert
Now, look, since this is all home-baked goodness and those ingredients—mascarpone, heavy cream, sugar—they aren’t exactly diet food, I don’t focus too much on the numbers. But for those of you who like to plan, here’s a rough idea of what you’re looking at per generous slice of this Tiramisu recipe.
Keep in mind these are estimates based on standard measurements, but they should give you a good idea of how rich and satisfying this homemade espresso dessert truly is. Enjoy it! You’ve certainly earned it!
- Calories: 450
- Fat: 32g (19g saturated)
- Carbohydrates: 35g
- Protein: 8g
Share Your Experience Making This Tiramisu Recipe
I truly hope you loved making this easy, stunning tiramisu recipe! For me, food is all about connection—sharing something you made with love around the table—and when you nail a classic like this, it feels like you’ve unlocked a little piece of culinary magic.
When you finish dusting that top with cocoa and slide your tray into the fridge, I want to know how it went! Did you use the rum or go straight for vanilla in the coffee? Did you manage to wait until the next day to slice into it? Please pop down to the comments below and leave me a rating so I know how well this classic came together for you.
If you snapped a picture of your finished creation, tag me on social media! Seeing your beautiful, creamy, homemade espresso desserts running around the internet is truly the best part of my job here. If you want another foolproof, delicious Italian treat next, don’t forget to check out the recipe linked here: Easy Tiramisu. Happy baking, and I can’t wait to hear all about your successes!
PrintEasy No-Bake Classic Tiramisu Recipe

Make this classic Italian tiramisu dessert easily at home. This no-bake recipe features creamy mascarpone and espresso-soaked ladyfingers, perfect for making ahead for parties.
- Prep Time: 25 min
- Cook Time: 0 min
- Total Time: 25 hours 25 min
- Yield: 8 servings 1x
- Category: Dessert
- Method: No-Bake
- Cuisine: Italian
- Diet: Vegetarian
Ingredients
- 1 cup strong brewed espresso or coffee, cooled
- 1/4 cup coffee liqueur or dark rum (optional)
- 1 large egg yolk (or use pasteurized eggs for safety)
- 1/4 cup granulated sugar
- 1 teaspoon vanilla extract
- 16 ounces mascarpone cheese, softened
- 1 cup heavy whipping cream, cold
- 1/4 cup powdered sugar
- 1 package (7 ounces) ladyfingers (about 24–30 cookies)
- Unsweetened cocoa powder, for dusting
Instructions
- Prepare the coffee soak: In a shallow bowl, combine the cooled espresso and coffee liqueur, if using. Set aside.
- Make the cream base: In a medium bowl, whisk the egg yolk and granulated sugar until the mixture is pale yellow and slightly thickened. This takes about 2 minutes.
- Add the vanilla extract and the softened mascarpone cheese to the egg mixture. Beat with an electric mixer on medium speed until just combined and smooth. Do not overmix.
- In a separate, clean bowl, whip the cold heavy cream and powdered sugar until stiff peaks form.
- Gently fold the whipped cream into the mascarpone mixture in two additions until fully incorporated. You now have your creamy filling.
- Assemble the dessert: Quickly dip one side of a ladyfinger into the coffee mixture for just 1-2 seconds. Do not soak them completely, or the dessert will be soggy.
- Arrange a single layer of the dipped ladyfingers in the bottom of an 8×8 inch baking dish or similar serving dish.
- Spread half of the mascarpone cream mixture evenly over the layer of ladyfingers.
- Repeat the process: Dip and layer the remaining ladyfingers over the cream.
- Top with the remaining mascarpone cream, spreading it smoothly across the top layer.
- Cover the dish tightly with plastic wrap. Chill in the refrigerator for at least 6 hours, or preferably overnight, to allow the flavors to meld and the dessert to set. This chilling time is crucial for texture.
- Before serving, dust the top generously with unsweetened cocoa powder using a fine-mesh sieve. Slice and serve cold.
Notes
- For a recipe without raw eggs, you can substitute the egg yolk with 2 tablespoons of full-fat cream cheese mixed with the sugar, or omit the yolk entirely and rely on the stability of the whipped cream and mascarpone.
- If you are preparing this for a large group, consider using a 9×13 inch dish and doubling the recipe.
- This dessert is excellent for meal planning as it tastes better the next day.
Nutrition
- Serving Size: 1 slice
- Calories: 450
- Sugar: 30
- Sodium: 120
- Fat: 32
- Saturated Fat: 19
- Unsaturated Fat: 13
- Trans Fat: 1
- Carbohydrates: 35
- Fiber: 1
- Protein: 8
- Cholesterol: 150