
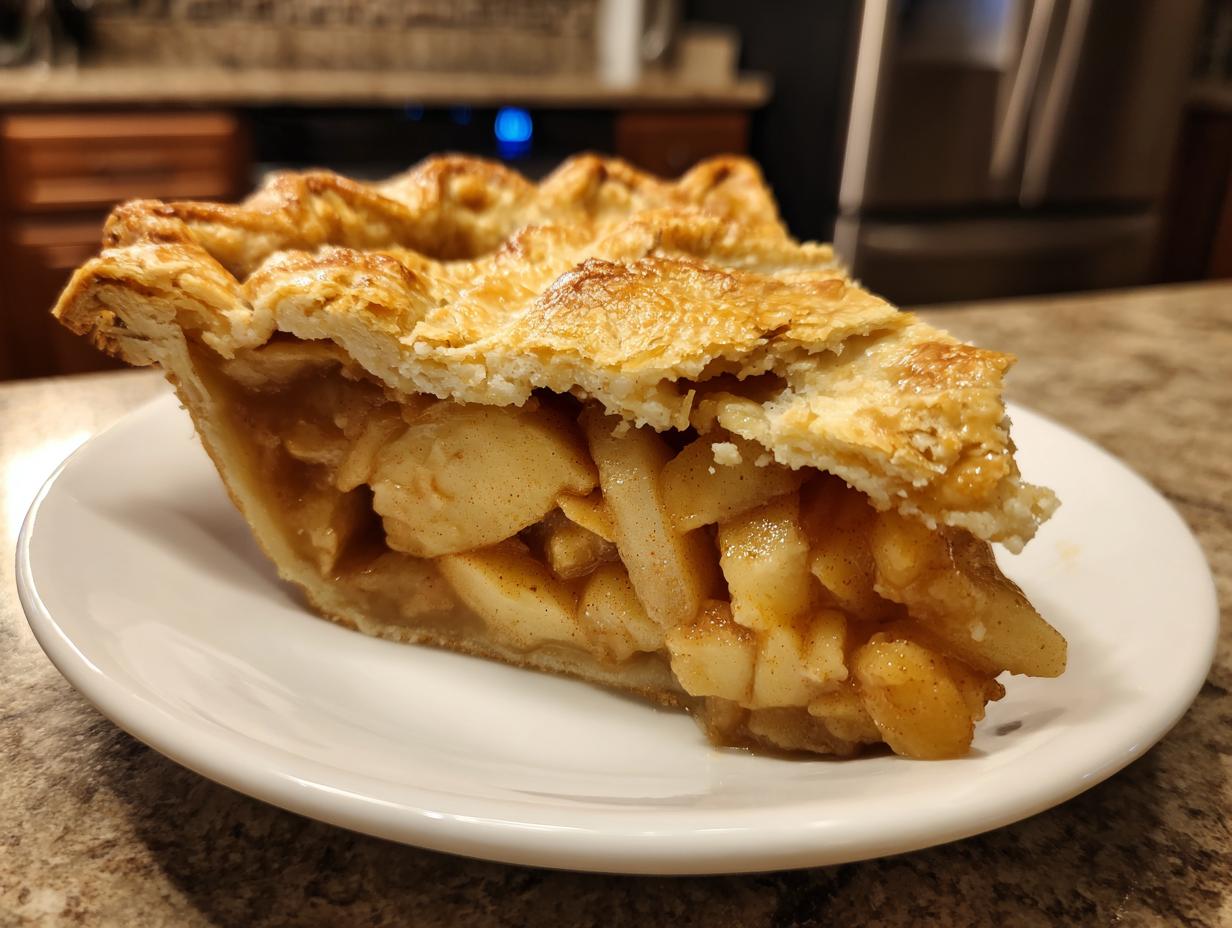
There’s just something about biting into a perfect slice of apple pie that settles the soul, isn’t there? It instantly takes me back to my childhood kitchen in upstate New York. When I think of comfort food, I think of this dessert first. I’ve tried hundreds of recipes over the years, but I always come back to this one because it delivers exactly what you want: the absolute best homemade classic apple pie from scratch, boasting a flaky, buttery crust that shatters just right, surrounding a filling that’s warm, spiced, and never mushy. This isn’t just about following steps; it’s about honoring those tried-and-true traditions that make a simple apple pie feel like a masterpiece on your holiday table.
We use this recipe for everything—big holidays, small victories, or just those chilly October evenings when you need a hug in a pie dish. I promise you, once you master this technique, you’ll never look at another pie recipe again. And hey, if you’re looking for another classic fall bake to add to your repertoire, you should definitely check out my tips for making easy, super-moist pumpkin bread, too!
- Why This Classic Apple Pie Recipe Works So Well
- Gathering Ingredients for Your Homemade Apple Pie
- How to Make Apple Pie From Scratch: Step-by-Step
- Tips for the Best Apple Pie Success
- Storing Your Homemade Apple Dessert
- Frequently Asked Questions About Apple Pie
- Nutritional Estimates for This Classic Apple Pie Recipe
- Share Your Thoughts on This Apple Pie
Why This Classic Apple Pie Recipe Works So Well
I know your struggle! Most apple pies end up either with a crust that’s tough as leather or a filling that’s swimming in liquid. Believe me, I spent years trying to get it right before settling on this classic apple pie recipe. The magic really comes down to technique, which prevents those dreaded failures.
We focus on two main areas that always get results, giving you that desired tender apple filling instead of applesauce. If you want to deep-dive into the crust alone, you can check out my standalone buttery pie crust tutorial right here.
Achieving the Perfect Flaky Pie Crust Tutorial
The secret to the flakiness, which you’ll see detailed in the dough steps, is keeping everything frigid. I mean icy cold water and butter straight from the freezer. When that cold butter hits the hot oven, it creates little pockets of steam, which is what gives you those glorious, distinct layers in your crust. Never use warm butter here; if you follow this flaky pie crust tutorial, you’ll get lightness every time.
Balancing Flavors in the Apple Pie Filling Recipe
Using a blend of apples—that tart Granny Smith paired with the softer Macintosh—is key for texture and flavor. I also dial back the sugar just a touch. It ensures the final apple pie filling recipe highlights the natural sweetness of the fruit and the warm notes of the spices, rather than tasting like a sugar bomb. That perfect blend of cinnamon spiced apples really shines through!
Gathering Ingredients for Your Homemade Apple Pie
Okay, the foundation of any great dessert is, of course, the ingredients! I didn’t want you messing around with fancy, hard-to-find items here. This is about making a beautiful, true homemade apple pie using things you likely already have or can easily grab at the store. Precision matters, especially with the butter, so read those prep notes carefully.
For the Buttery Pie Crust Dough
You need cold, cold, cold ingredients for that beautiful flaky texture we are aiming for:
- 2 1/2 cups all-purpose flour
- 1 teaspoon salt
- 1 cup (2 sticks) cold unsalted butter, cut into cubes
- 1/2 cup ice water, plus more if needed
For the Cinnamon Spiced Apples Filling
This is where the flavor explosion happens! Make sure you get both kinds of apples for the best results:
- 6 large Granny Smith apples, peeled, cored, and sliced 1/4 inch thick
- 2 large Macintosh apples, peeled, cored, and sliced 1/4 inch thick
- 3/4 cup granulated sugar
- 1/4 cup packed light brown sugar
- 1/4 cup all-purpose flour
- 1 teaspoon ground cinnamon
- 1/4 teaspoon ground nutmeg
- 1/8 teaspoon ground allspice
- 1 tablespoon lemon juice
- 2 tablespoons unsalted butter, cut into small pieces
- 1 large egg, beaten with 1 teaspoon water (for egg wash)
- 1 tablespoon coarse sugar for sprinkling
How to Make Apple Pie From Scratch: Step-by-Step
Alright, here is the moment of truth! Learning how to make apple pie from scratch is so rewarding, and it all starts with the foundation: the crust. Don’t worry, we aren’t skipping the chilling time—that’s non-negotiable for success here. Once you get this timing down, you’re halfway to the best dessert on the block. This method is so solid, you won’t need to search for another one—though if you enjoy reading about others’ approaches, check out this great guide on the classic best homemade apple pie!
Mixing and Chilling the Double Crust Apple Pie Dough
We’re starting by smashing the cold butter into the flour until it looks like coarse crumbs with some visible chunks—those chunks are your future flaky layers, so don’t blend it until it’s sand-like! Add the ice water slowly until it just barely holds together. Seriously, stop mixing the second it comes together above all else! Divide that shaggy mess in two, wrap those disks tightly, and let them chill in the fridge for at least an hour. That rest time lets the gluten relax so you get that perfect double crust apple pie.
Preparing the Tender Apple Filling
While the dough is getting nice and cold, toss all your sliced apples with the sugars, spices, and flour. Give it a good, gentle coating—we want flavor everywhere! Then, let it sit on the counter for about 15 minutes. This little break is my trick; those apples start to weep a little juice, which is exactly what we want to happen *before* the oven, not after. This pre-soak is huge for getting that tender apple filling.
Assembling and Baking the Apple Pie
Roll out your first disk big enough for your pie plate, carefully lay it in, and mound those apples high in the middle! Dot those spices apples with those little bits of cold butter—they melt down beautifully—then top it with the second crust. Crimp those edges tight, cut a few vents for steam, brush with that egg wash, and sprinkle with coarse sugar. Pop it into a 425-degree oven for 15 minutes. After that initial blast, drop the heat down to 375 degrees for 40 to 50 minutes until bubbly. If those edges start getting too dark, just cover them loosely with a strip of foil! If you want more tips on making easy, delicious bar versions, take a peek at my easy apple pie bars recipe for a shortcut!
Tips for the Best Apple Pie Success
We’ve baked it, it smells incredible, but resisting the urge to cut into it is the final hurdle in making the best apple pie recipe! I’ve learned a few tricks over the years to ensure that beautiful bake translates into perfect slices on the plate. You want that cozy, comforting experience without the disappointment of a slump-and-runny filling, right? Trust me, these final steps are just as important as mixing the dough.
Crucial Cooling Time for Perfect Apple Pie Slices
I know, I know, the smell is torture! But you absolutely must let this apple pie sit for a minimum of three hours on a wire rack after it leaves the oven. If you cut into it while it’s piping hot, all that gorgeous, thickened filling runs right out onto your cutting board—it’s a tragedy. Those three hours let the juices settle and solidify just enough so you get a clean, beautiful wedge with every dish. It’s worth the wait, I promise!
Variations: Making a Dutch Apple Pie
Now, if you happen to be making this for someone who just loves a crunchy topping instead of a double crust, switching to a Dutch apple pie couldn’t be simpler. Just skip rolling out that second disk of dough! Instead, take the ingredients listed in my notes—flour, brown sugar, cold butter, and cinnamon—and mix them until they form a crumbly topping. Scatter that mixture generously over your apples before baking. It’s a fantastic way to change things up for next time!
If you’re looking for something simpler to serve warm right now, try making my easy stovetop cinnamon applesauce recipe!
Storing Your Homemade Apple Dessert
The best part about making a whole pie is having leftovers! This homemade apple dessert keeps really well, which is fantastic for those busy weeks ahead. If you have any slices left, just cover them loosely with plastic wrap or foil—don’t seal them airtight right away, as that can make the crust soggy. Keeping it at room temperature is usually fine for the first day if your house isn’t too warm.
If you need to keep it longer than that, slide it snugly into the fridge. When you want to enjoy a slice later, I always recommend reheating it slightly! Pop a slice on a plate, wrap it loosely in foil, and warm it in a 350-degree oven for about 10 to 15 minutes. That gets the crust nice and crisp again, and the filling warm and gooey. Perfect!
Frequently Asked Questions About Apple Pie
I always get questions about substitutions or what to do when things don’t look quite right, especially with temperature. It’s completely normal when tackling a classic apple pie recipe for the first time! Here are a few things I hear all the time. If you have other questions floating around about pie making—maybe savory ones for dinner first—you can look at my guide for easy chicken pot pie casserole recipe.
What is the best type of apple for apple pie?
Oh, this is my favorite topic! You absolutely need a blend, trust me on this one. Granny Smith apples are non-negotiable because they hold their shape beautifully and give you that necessary tartness to cut through the sugar. But I mix in softer, tastier apples like Macintosh for overall flavor depth. A mix means you don’t get purely mushy apples, and you get that perfect bite in your filling.
Can I make this an easy apple pie using store-bought crust?
Look, I get it—sometimes you are short on time, and that’s okay! You can absolutely use store-bought pastry if you need an easy apple pie fix. Just know that the flaky, buttery layers you’re going to spend time perfecting here really make this specific recipe shine. If you use store-bought, just make sure you still line the bottom well and be very gentle when crimping those edges together!
How do I prevent my apple pie from being too sweet?
The balance in this apple pie filling recipe is intentional! The key here is primarily using tart apples—that acidity needs to balance the sugar. We also use a combination of white and brown sugar, which adds depth instead of just pure sweetness. If you find your apples naturally super sweet, just reduce the granulated sugar by two tablespoons to start, and you’ll still get that beautiful, warm cinnamon spiced apple flavor without it being cloying.
Nutritional Estimates for This Classic Apple Pie Recipe
Now, let’s talk numbers for our beautiful classic apple pie recipe. I always tell everyone that food made with love shouldn’t be stressed over for macros, but I know some of you need the breakdown! Please remember these figures are just friendly estimates based on the ingredients listed here. They change wildly depending on the exact brand of butter or amount of sugar you end up using. Seriously, treat this like a fun overview, not gospel for your diet plan!
For one substantial slice of this deeply satisfying crust and tender apple goodness, you are looking at approximate values:
- Calories: 450
- Fat: 25g
- Carbohydrates: 58g
- Protein: 4g
It’s definitely a rich dessert because we use that gorgeous, cold butter, but every calorie is worth it when that crust shatters perfectly!
Share Your Thoughts on This Apple Pie
Now that you’ve baked your very own beautiful, flaky **apple pie**, I truly want to hear what you think! Did you love the blend of spices? Did your double crust turn out perfectly flaky? Please come back and leave those stars and comments below—it means the world to me to watch our little cooking community grow and try these recipes.
If you took a picture of your golden-brown masterpiece, tag me on social media! Seeing your **homemade apple pie** successes is the absolute highlight of my day. Thank you so much for baking with me today. Happy eating! Feeling inspired for more sweet bakes? Browse all my delicious dessert recipes for your next adventure!
PrintThe Best Homemade Classic Apple Pie from Scratch

You will make the best homemade apple pie with this classic recipe. It features a flaky, buttery double crust and a perfectly spiced, tender apple filling that is not overly sweet.
- Prep Time: 45 min
- Cook Time: 65 min
- Total Time: 110 min
- Yield: 8 servings 1x
- Category: Dessert
- Method: Baking
- Cuisine: American
- Diet: Vegetarian
Ingredients
- 2 1/2 cups all-purpose flour
- 1 teaspoon salt
- 1 cup (2 sticks) cold unsalted butter, cut into cubes
- 1/2 cup ice water, plus more if needed
- 6 large Granny Smith apples, peeled, cored, and sliced 1/4 inch thick
- 2 large Macintosh apples, peeled, cored, and sliced 1/4 inch thick
- 3/4 cup granulated sugar
- 1/4 cup packed light brown sugar
- 1/4 cup all-purpose flour
- 1 teaspoon ground cinnamon
- 1/4 teaspoon ground nutmeg
- 1/8 teaspoon ground allspice
- 1 tablespoon lemon juice
- 2 tablespoons unsalted butter, cut into small pieces
- 1 large egg, beaten with 1 teaspoon water (for egg wash)
- 1 tablespoon coarse sugar for sprinkling
Instructions
- Prepare the Pie Crust: In a large bowl, whisk together the 2 1/2 cups flour and 1 teaspoon salt. Cut in the cold butter cubes using a pastry blender or your fingers until the mixture resembles coarse crumbs with some pea-sized pieces of butter remaining. Gradually add the ice water, one tablespoon at a time, mixing until the dough just comes together. Do not overmix. Divide the dough in half, form each half into a disk, wrap in plastic, and chill for at least 1 hour.
- Prepare the Apple Filling: In a large bowl, combine the sliced apples, granulated sugar, brown sugar, 1/4 cup flour, cinnamon, nutmeg, allspice, and lemon juice. Toss gently until the apples are evenly coated. Let the mixture sit for 15 minutes while you roll out the bottom crust.
- Assemble the Pie: Preheat your oven to 425 degrees F (220 degrees C). On a lightly floured surface, roll out one disk of dough into a 12-inch circle. Carefully transfer the dough to a 9-inch pie plate. Trim the edges, leaving a 1-inch overhang.
- Fill the Crust: Pour the apple mixture into the bottom crust, mounding the apples slightly in the center. Dot the top of the apples with the 2 tablespoons of small butter pieces.
- Top the Pie: Roll out the second disk of dough. Place it over the filling. Trim the top crust, leaving a 1-inch overhang. Crimp the edges of the top and bottom crusts together to seal. Cut several slits in the top crust to allow steam to escape.
- Bake: Brush the top crust with the egg wash and sprinkle with coarse sugar. Place the pie on a baking sheet to catch any drips. Bake at 425 degrees F for 15 minutes. Then, reduce the oven temperature to 375 degrees F (190 degrees C) and continue baking for 40 to 50 minutes more, or until the crust is golden brown and the filling is bubbly. If the edges brown too quickly, cover them loosely with foil.
- Cool: Let the apple pie cool on a wire rack for at least 3 hours before slicing. This allows the filling to set properly.
Notes
- For the flakiest pie crust, make sure your butter and water are very cold when mixing the dough.
- If you prefer a Dutch Apple Pie, substitute the top crust with a streusel topping made from 1 cup flour, 1/2 cup brown sugar, 1/2 cup cold butter, and 1/2 teaspoon cinnamon, mixed until crumbly.
- Using a mix of apple varieties, like Granny Smith for tartness and Macintosh for texture, gives you the best flavor profile.
Nutrition
- Serving Size: 1 slice
- Calories: 450
- Sugar: 35g
- Sodium: 250mg
- Fat: 25g
- Saturated Fat: 15g
- Unsaturated Fat: 10g
- Trans Fat: 0g
- Carbohydrates: 58g
- Fiber: 3g
- Protein: 4g
- Cholesterol: 60mg