

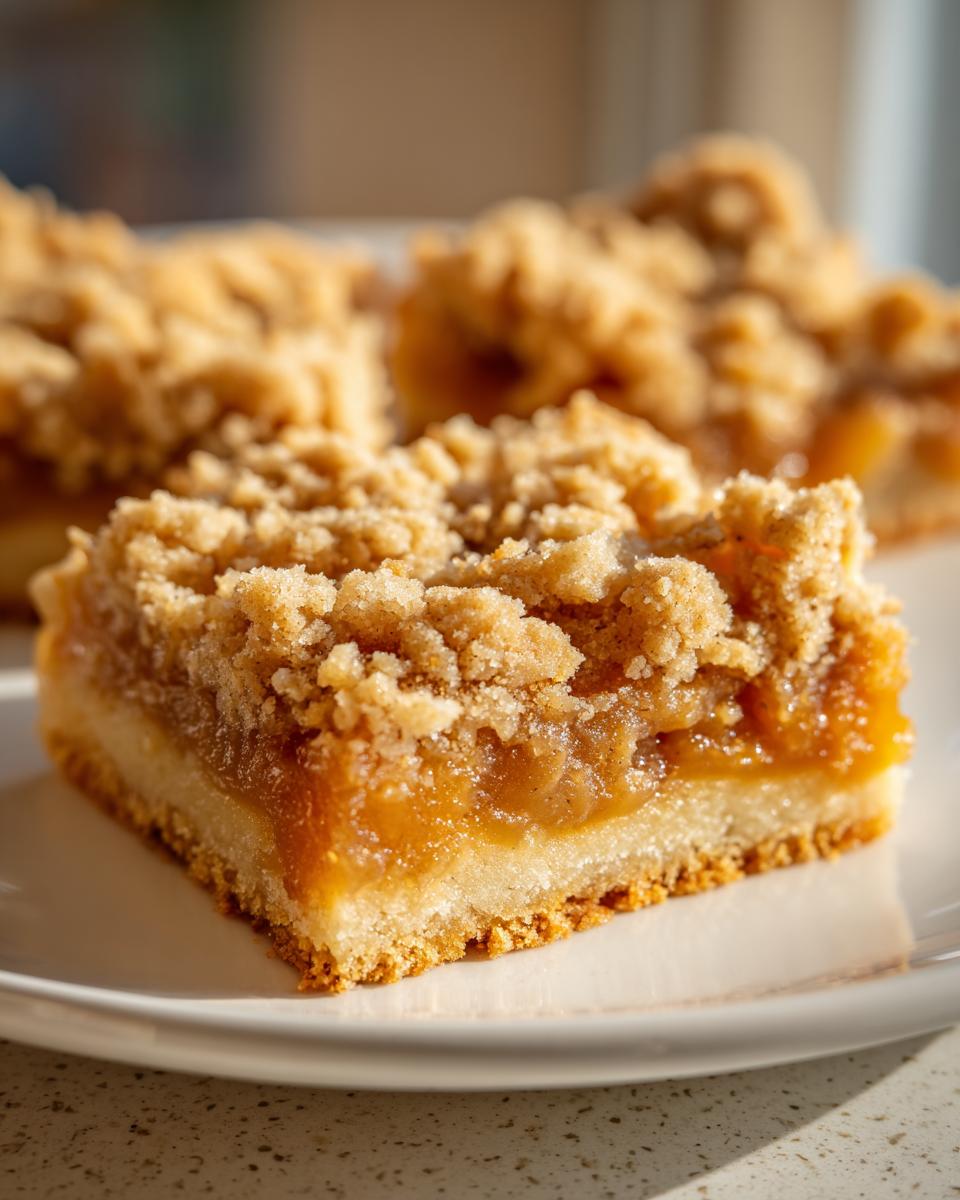
Oh, let’s be real for a second. Cutting and serving a traditional pie? It’s always a little bit stressful, right? You spend all that time making those beautiful lattice edges only for half the slice to fall apart when you put it on the plate. That’s where these amazing apple pie bars come in to save the day! They give you all that perfect, cozy apple pie flavor but in a wonderfully sturdy, easy-to-manage square. I’m thrilled to share what I call ‘The Ultimate Easy Apple Pie Bars,’ which nails that perfect combo: a rich, buttery shortbread crust, a warm, cinnamon-spiced apple filling, and a glorious crumbly streusel topping. If you want to read more about our commitment to reliable home cooking, you can check out our mission over on the About Page. Ellie Vance founded our site on the idea that home cooking should be reliable and joyful, and trust me, these bars embody that spirit. They’re foolproof, and they disappear fast at every single gathering!
- Why This Easy Apple Pie Bars Recipe is Your New Favorite Fall Baking Recipe
- Gathering Ingredients for Your Homemade Apple Dessert
- Step-by-Step Instructions for Perfect Apple Pie Crumb Bars
- Tips for Success Making Apple Streusel Bars
- Storage and Reheating Instructions for Apple Pie Bars
- Serving Suggestions for These Cinnamon Apple Bars
- Frequently Asked Questions About Apple Pie Bars
- Estimated Nutritional Data for Apple Pie Bars
- Create More Comfort Food Desserts
Why This Easy Apple Pie Bars Recipe is Your New Favorite Fall Baking Recipe
I truly believe that once you try this Easy Apple Pie Bars Recipe, you won’t look back at traditional deep-dish pie for casual events. Seriously, these just make life simpler! The best thing about them is the portability—you slice, you serve, and everyone can easily carry one around. This is why they have become my go-to among all my Fall Baking Recipes. We’re talking about only about 25 minutes of prep work here, and then you let the oven do the rest of the magic.
These aren’t just convenient; they are pure, unadulterated Comfort Food Desserts. They are reliable, and as my friend Ellie always says, reliable food makes for joyful moments. You get all that classic, warm apple spice we crave in the cooler months, wrapped up in a perfect, handheld square.
The Perfect Balance: Buttery Apple Pie Bars Texture
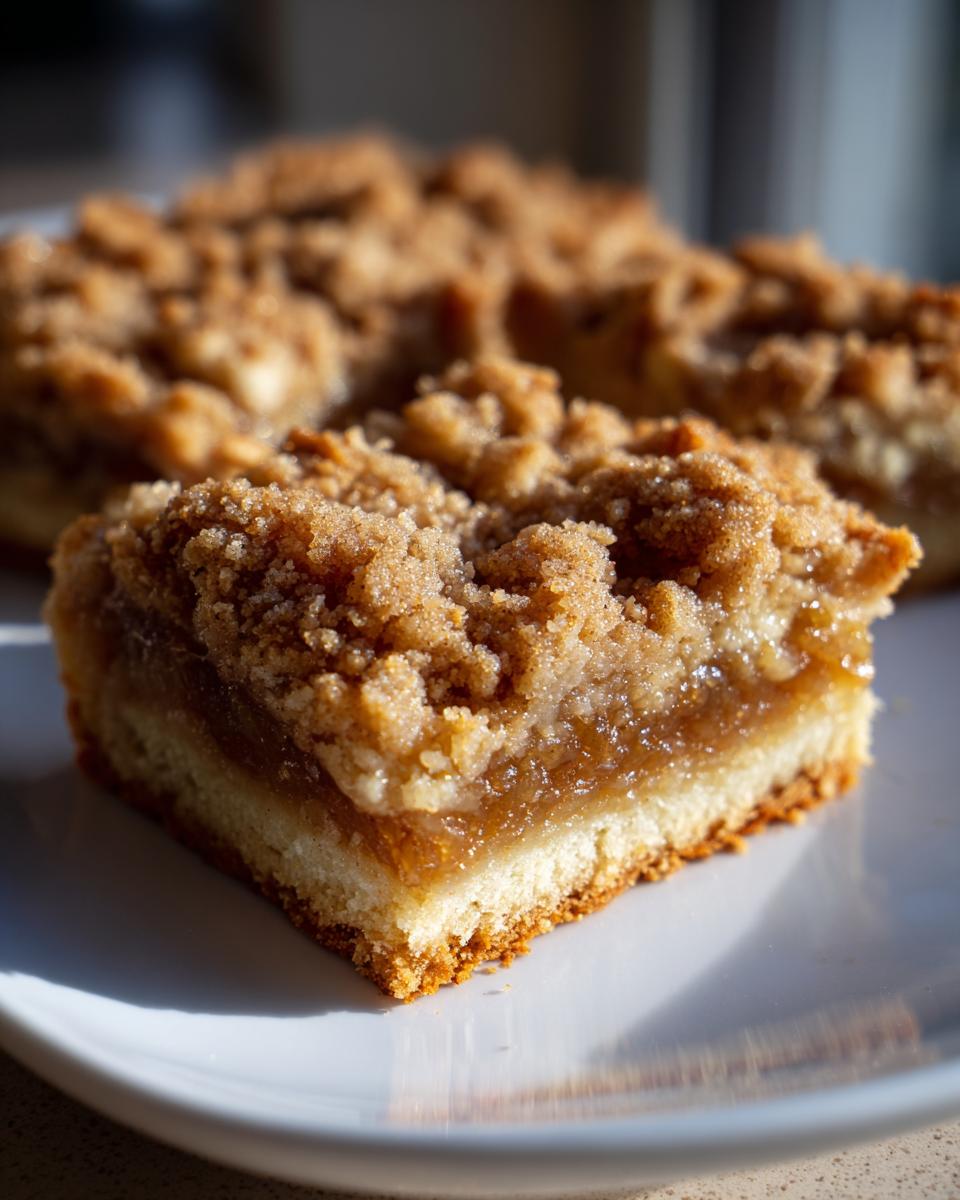
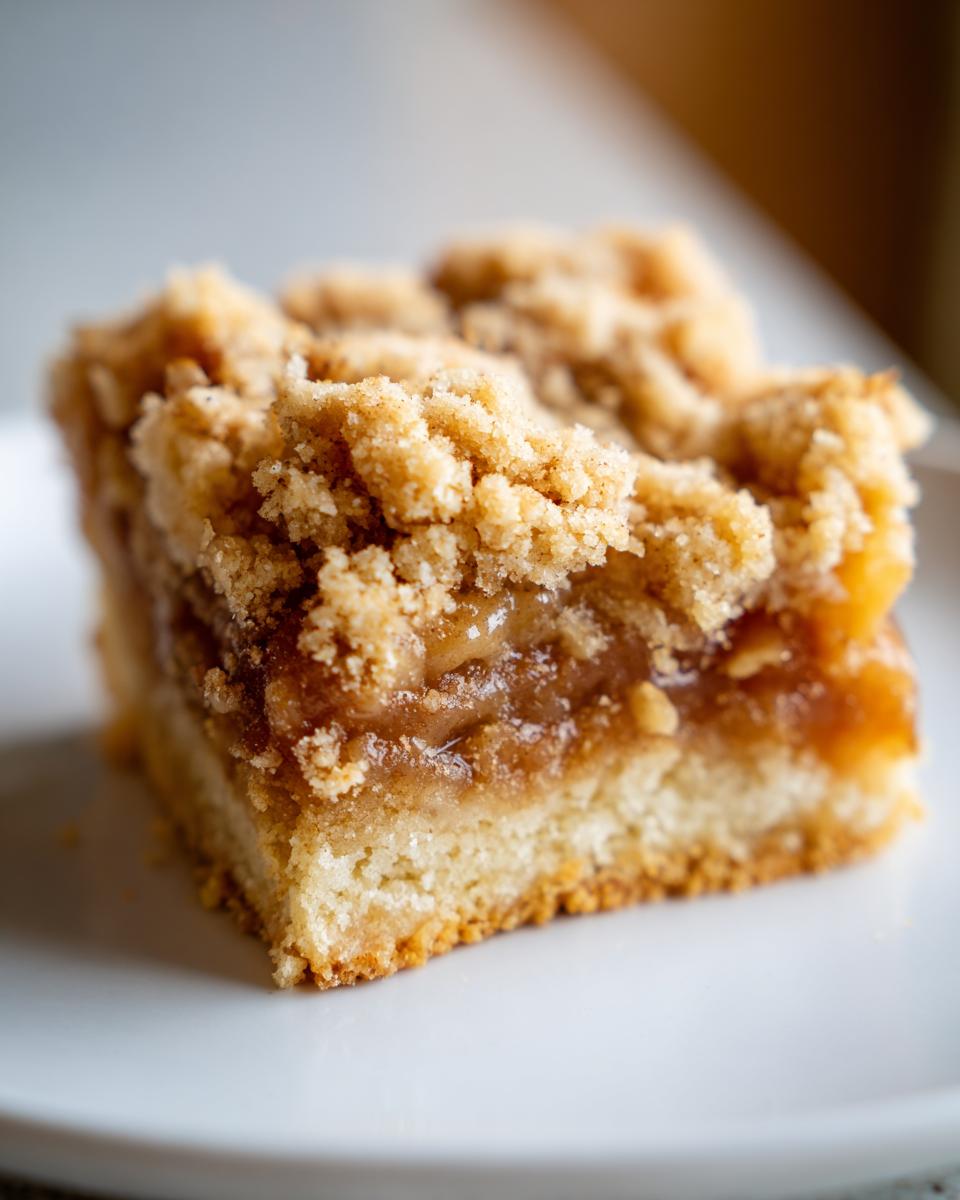
Okay, let’s talk texture, because that’s truly where these shine. You get three distinct layers working together beautifully. First, you have that incredible shortbread base—it melts in your mouth, folks. Then those tender, cinnamon-hugged apples get all gooey while baking. And finally, that streusel topping provides the perfect little crumble!
If you want to know what it feels like to have the absolute Best Apple Pie Dessert flavor without the hassle of crimping and venting a full pie crust, this is it. I love seeing the cinnamon and butter mingling together in that topping as it bakes. I often make a big batch because they’re great for sharing, but honestly, I end up keeping a few aside just for me!
If you love cinnamon and streusel combinations, you absolutely have to check out my recipe for Apple Coffee Cake too. It hits a lot of the same cozy flavor notes!
Gathering Ingredients for Your Homemade Apple Dessert
Alright, grabbing our ingredients next! Since these apple pie bars are made up of three distinct parts—the sandy crust, the sweet apple layer, and the crumbly top—we need to keep our piles organized. The secret to that amazing shortbread base and topping is temperature, so make sure your butter is truly cold and cut into those little pieces we described. Don’t try to rush softening it in the microwave, or you’ll end up with mush instead of that lovely coarse crumb texture!
For the crust, you’ll need 1 1/2 cups of flour, 1/2 cup of white sugar, just a pinch of salt, and a full cup of that cold butter. The filling is where the magic happens: about three cups of peeled and diced apples, tossed with 1/2 cup of brown sugar, two tablespoons of flour, cinnamon, nutmeg, and that hint of lemon juice for brightness. Don’t forget the 1/4 cup of cold water needed to bind things just right!
Ingredient Notes and Substitutions for Apple Pie Bars
Speaking of apples, please, please for the love of crunch, use Granny Smith apples if you can find them! They hold their shape beautifully and that tartness fights perfectly against all the sugar we use. If you absolutely must cheat because you’re short on time, yes, you can use canned apple pie filling, but you’ll want to drain off most of that extra syrupy goo first so your base doesn’t get soggy. We want delicious, not damp!
For the streusel topping, we are just mixing the remaining 1/2 cup flour, 1/2 cup brown sugar, 1/4 cup white sugar, 1/2 teaspoon cinnamon, and that last 1/4 cup of cold butter. It’s so simple, which is why this is such a fantastic, no-fuss apple dessert idea!
Step-by-Step Instructions for Perfect Apple Pie Crumb Bars
Now for the fun part! Putting it all together. These apple pie bars are so satisfying because they are truly a one-pan wonder. I always start by getting my oven warmed up to 375°F (190°C). That preheating step is non-negotiable, folks, or your base won’t set right! Also, listen up—line that 9×13 inch pan with parchment paper, making sure you leave some overhang on the sides. This little trick is your best friend when it comes time to lift these babies out later. Trust me, sticky bars are the worst!
Since we made two portions of the buttery crumb mixture earlier—enough for the base and the top—we need to divide it up. Take about two-thirds of that crumbly mix and press it firmly into the bottom of your parchment-lined pan. This forms our foundational shortbread layer. Don’t be shy; press it down well so it forms a solid bottom for your apple shortbread bars.
Creating the Buttery Base and Layering the Apple Streusel Bars
Once the base is set, spread your apple filling evenly right on top. Make sure those spiced apples are sitting nicely across the whole crust. Now for the simple genius: take that reserved one-third of the crust mixture and sprinkle it right over the apples. That’s half your topping done!
Then, you just sprinkle the dedicated streusel topping mixture right over everything. See? No fuss at all. This layering technique is so much calmer than trying to roll out pie dough for lattice work. It’s foolproof, which makes this recipe perfect for when you are mapping out your week of baking and need reliable results for your meal planning later on!
Baking and Cooling Your Apple Pie Bars
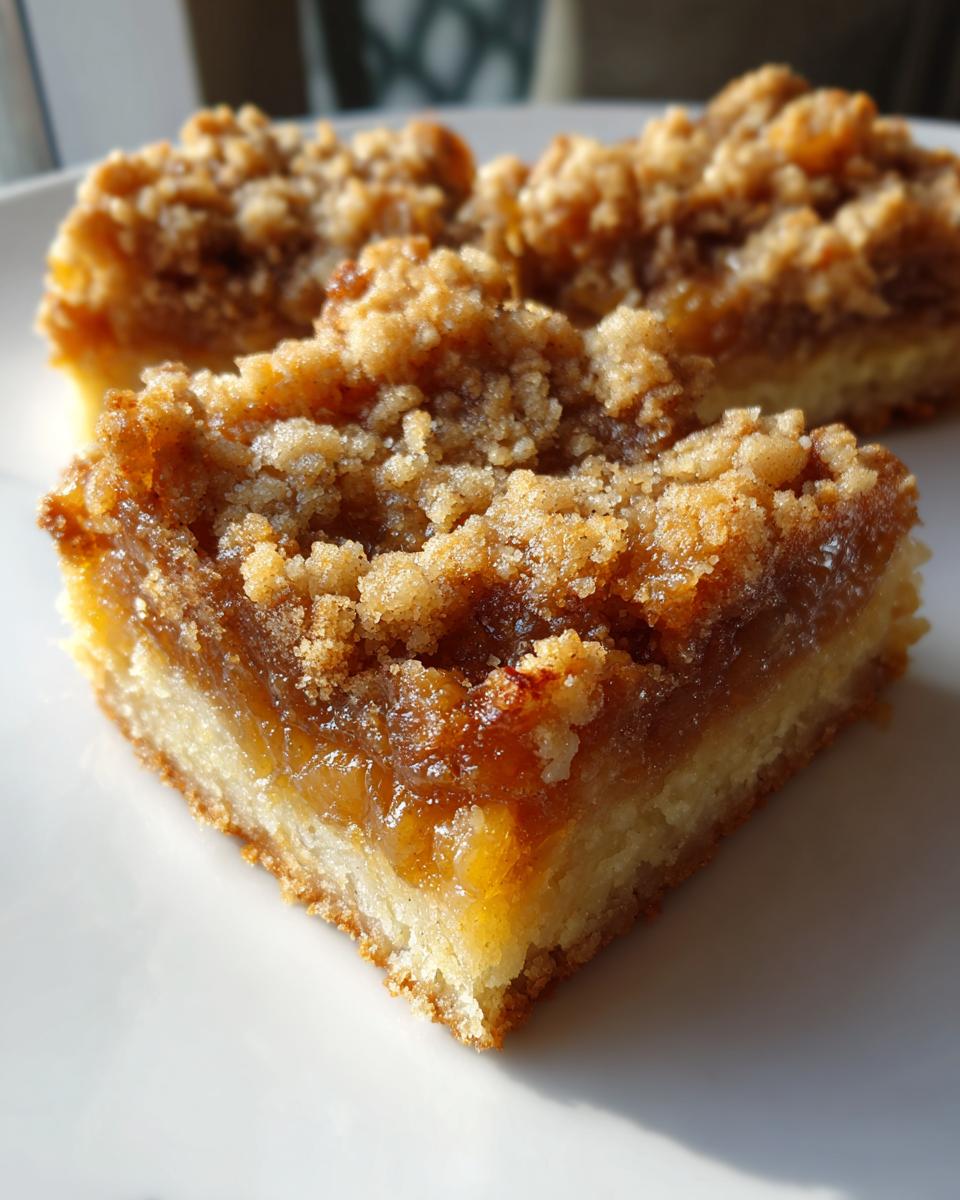
Into the oven they go for about 40 to 45 minutes. You are looking for two things here to know they are done: the topping needs to look beautifully golden brown, and if you gently poke an apple chunk along the edge with a fork, it should feel tender, not hard or resistant.
This next part is the hardest but most important step for clean squares: you MUST let these cool completely in that pan. I know, the smell will drive you crazy, but if you try to cut them warm, they will just fall apart into a gooey mess. Let them cool down until they are set underneath, then grab those parchment paper handles and lift them out for a perfect slice!
Tips for Success Making Apple Streusel Bars
I have probably made these apple pie bars so many times I could do it in my sleep! But even the classics have little secrets to making them go from good to absolutely unforgettable. If you follow just a couple of my non-negotiable rules, I promise your texture will be perfect every single time.
First up: that butter! Whether you are making the base or the streusel topping, the butter *must* be cold, truly cold. I always cut the butter into little cubes and then I stick it back in the freezer for about ten minutes right before I cut it into the flour mixture. If that butter melts even a little bit while you’re mixing, you lose the ability to create those beautiful, flaky pockets that make the crust and topping crumble just right. That cold butter is what keeps this recipe from sliding into “mushy cake” territory.
Second, when you are mixing your apples with the sugar and spices, really take the time to toss everything gently until every single apple piece is coated. You don’t want a dry patch, because that dry apple will turn hard and crunchy when it bakes against the crumb topping. We want uniform tenderness!
And finally, the removal step. I mentioned this before, but it bears repeating because it’s my top tip for ease: the parchment paper overhang is sacred! Pulling the entire slab out in one go—that is the key to keeping these perfect. Once they are completely cool (and I mean completely cool, maybe even chill them for 30 minutes), you can use a large, sharp knife to cut clean squares. If you try to hack at them while they are warm, you’re just going to smoosh the layers. Patience equals perfect squares every time!
If you’re interested in other recipes that rely on that phenomenal cinnamon streusel texture, you might want to take a look at my Moist Cinnamon Streusel Coffee Cake recipe as well. It uses similar crumb techniques!
Storage and Reheating Instructions for Apple Pie Bars
Look, these apple pie bars are so delicious that you’ll probably eat them all on day one, but since they make such a big batch (sixteen perfect servings!), you might have some leftovers. Don’t panic! They store beautifully, which is another reason they’re miles better than a regular pie for weekly snacks.
For longevity, you want to keep them airtight. Once they are totally cooled—and I mean rock solid cool—you can store them right on the counter in an airtight container. They hold up great at room temperature for about three to four days because that buttery crust and streusel topping provide a nice little seal. I usually put a piece of parchment paper between layers just to make sure that streusel doesn’t stick to the bars underneath it.
Now, if you want them to last longer, say up to a week, I’d tuck them into the fridge instead. They firm up a little more in the cold, which some people actually prefer! But you definitely don’t want to freeze pre-cut squares, they tend to get a little weird texture-wise when thawed, though I’ve seen people freeze the whole block and slice it after thawing slightly.
Warming Up Those Leftover Apple Streusel Bars
When you’re ready to enjoy one later, you have two paths, depending on what texture you’re craving. If you want that gooey, melt-in-your-mouth experience, pop a bar on a microwave-safe plate for about 15 to 20 seconds. That’s usually enough heat to soften the apples just a touch.
But if you want to recapture that fresh-from-the-oven crispness in the crust and topping? You absolutely need the oven. Just preheat your oven—or toaster oven, if you’re only eating one—to about 325°F. Pop your bar on a small baking sheet and heat it for about 5 to 7 minutes. That little bit of heat wakes up the butter in the crust and makes that cinnamon streusel topping so wonderfully crisp again. It tastes almost brand new, I swear!
Serving Suggestions for These Cinnamon Apple Bars
So, you’ve pulled off the perfect batch of these gorgeous, golden Cinnamon Apple Bars! Now comes the fun part: figuring out how to dress them up just right for serving. While they are absolutely perfect just sitting in their squares on a platter for a causal get-together—think easy Desserts for Potlucks—a little something extra can take them completely over the top.
My number one recommendation is serving them slightly warm. If you warm them up just a touch (like we talked about in the reheating section!), the buttery crust softens beautifully and the apple spice really blooms. It just smells like heaven when they’re warm!
The Ultimate Ice Cream Pairing
You can’t really go wrong with a classic, can you? A scoop of really good quality vanilla bean ice cream melting right over a warm square of these bars is peak comfort food. The cold creaminess against the spiced apples? Perfection. But vanilla is just the start!
If you have some coffee ice cream on hand, try that! The slight bitterness of the coffee pairs so excellently with the brown sugar and cinnamon in the streusel. Honestly, I think a scoop makes any bar feel instantly fancier, even if you made them while watching reality TV right before everyone arrived.
Drizzles and Dips: Taking It Next Level
If you want to get truly decadent, we have to talk drizzles. Since these are apple pie bars, anything that tastes delicious on an apple pie will work here! If you have a jar of caramel sauce lying around, a simple drizzle elevates these immediately. Imagine those beautiful ridges of crust catching little pools of thick caramel. It transforms them almost into a temporary Caramel Apple Pie Bars hybrid!
I actually have a super simple recipe for a rich homemade dark chocolate sauce, which might sound wild on apple pie, but trust me, it’s amazing. You can find the instructions for my easy drizzle over at my Chocolate Sauce Recipe page. Just a thin zig-zag pattern over the top elevates these bars from a simple snack to a spectacular dessert centerpiece. Remember, food should be fun, and these Pie Bar Recipes are begging for a little flair!
Frequently Asked Questions About Apple Pie Bars
I always get so many questions after people try these! Because we want everyone to have the same easy success I have when whipping up a batch of these apple pie bars, I gathered up the most common things folks ask. You’ll see how simple these Pie Bar Recipes really are!
Can I use other types of apples besides Granny Smith?
That’s a great question! While I sing the praises of Granny Smith because I love that tart bite to balance the sweetness of the crust and streusel, you can certainly mix it up. A lot of people love mixing Granny Smith with Honeycrisp or Gala for a sweeter overall flavor profile. Just try to avoid apples that get super soft or turn to mush quickly when baked, like Red Delicious. We want structure in our filling, right?
What is the main difference between these bars and an apple crisp?
Oh, I love a crisp, but they are totally different beasts! With an apple crisp, you usually have a tender layer of mostly just apples underneath a crumbly topping, and it’s often baked in a deeper dish. These, on the other hand, are special because they have that defined, buttery shortbread layer on the bottom—that’s what makes them true Shortbread Apple Bars. You can easily slice and serve these because of that compact bottom crust, which you just can’t do with a loose crisp topping!
Can these apple pie bars be frozen?
Yes, they freeze like a dream, provided you prepare them correctly! I actually recommend freezing them before you slice them. Bake the whole slab, let it cool completely, and then wrap the whole thing tightly in plastic wrap, followed by a layer of foil. You can pop that frozen slab directly into the oven for a quick warm-up (covered for the first 20 minutes or so) or thaw it on the counter and then slice. They stay wonderfully fresh this way!
Do I have to use butter in the crust, or can I use oil?
Please stick to the butter! I know oil seems easier, but the structure and texture of that buttery base are crucial here. Butter provides stability and flavor that oil just can’t replicate in a shortbread-style crust. The cold butter is what gives you those wonderful tender crumbs for both the base and the topping. It’s one of Ellie’s core beliefs: for baked goods like this, butter is necessary!
If you enjoyed these tips and want another fantastic baked good that uses that similar crumbly topping technique, you should definitely check out my recipe for Moist Cinnamon Streusel Coffee Cake. It proves that crumb toppings are good for more than just apples!
Estimated Nutritional Data for Apple Pie Bars
Okay, let’s talk numbers for a minute! I know most of us aren’t baking these delicious apple pie bars with macros in mind—they are pure comfort food, after all—but I always like to give you an idea of what you’re enjoying. The Nutrition Facts table below is based on 16 servings, as the recipe yields. It tries to account for all that buttery crust and the sweet spiced apples.
But here is the big disclaimer, friends: I am not a registered dietitian, and my kitchen calculator probably isn’t as fancy as you think! The exact amounts of fat, sugar, and carbs can change based on the exact variety of apples you use, how much sugar soaks into certain apples, or if you add a drizzle of caramel on top (wink, wink). So, please treat these numbers as a good, general estimate for your own meal planning purposes!
- Serving Size: 1 bar
- Calories: 280
- Total Fat: 15g
- Saturated Fat: 9g
- Carbohydrates: 36g
- Sugar: 22g
- Protein: 3g
- Cholesterol: 35mg
If you are tracking closely, remember that substituting some of that flour for oats, like I mentioned in the notes, might slightly increase the fiber content! Enjoying these amazing Buttery Apple Pie Bars is all about balance, after all!
Create More Comfort Food Desserts
Well, that’s it, friends! We made it through the ultimate batch of apple pie bars, and I hope your kitchen smells as absolutely heavenly as mine currently does. That warm cinnamon and buttery scent is the smell of success, in my book!
Now that you have this incredible, fuss-free recipe under your belt, I would absolutely love to hear from you. Did you try them with a drizzle of caramel? Did they disappear faster than you thought they would? Please take a moment and leave a comment below telling me your thoughts! It genuinely makes my day when I hear how much you enjoyed one of Ellie’s favorite home baking staples.
If you’re looking for another recipe to keep that comfort food streak going, especially if you loved the crumble topping on these bars, you simply must try my recipe for Moist Cinnamon Streusel Coffee Cake next. It uses that same philosophy: big flavor, simple steps, and maximum comfort!
And hey, if you snap a picture of your gorgeous golden batch of these apple pie crumb bars, please tag us on social media! Showing off your baking triumphs helps remind me why keeping these traditional, reliable recipes alive is so important. Happy baking, and I’ll see you in the next recipe!
PrintThe Ultimate Easy Apple Pie Bars: Buttery Crust and Cinnamon Streusel Topping
Make classic apple pie flavor in a simple bar format with this easy recipe featuring a buttery shortbread crust, spiced apple filling, and a crumbly cinnamon streusel topping. Perfect for potlucks or family desserts.
- Prep Time: 25 min
- Cook Time: 45 min
- Total Time: 70 min
- Yield: 16 servings 1x
- Category: Dessert
- Method: Baking
- Cuisine: American
- Diet: Vegetarian
Ingredients
- 1 1/2 cups all-purpose flour
- 1/2 cup granulated sugar
- 1/4 teaspoon salt
- 1 cup (2 sticks) cold unsalted butter, cut into pieces
- 3 cups peeled, cored, and diced apples (about 6 medium apples)
- 1/2 cup packed light brown sugar
- 2 tablespoons all-purpose flour
- 1 teaspoon ground cinnamon
- 1/4 teaspoon ground nutmeg
- 1 tablespoon lemon juice
- 1/4 cup cold water
- 1/2 cup all-purpose flour (for topping)
- 1/2 cup packed light brown sugar (for topping)
- 1/4 cup granulated sugar (for topping)
- 1/2 teaspoon ground cinnamon (for topping)
- 1/4 cup cold unsalted butter, cut into small pieces (for topping)
Instructions
- Preheat your oven to 375°F (190°C). Line a 9×13 inch baking pan with parchment paper, leaving an overhang on the sides for easy removal.
- Prepare the crust: In a large bowl, whisk together 1 1/2 cups flour, 1/2 cup granulated sugar, and salt. Cut in 1 cup of cold butter using a pastry blender or your fingers until the mixture resembles coarse crumbs.
- Press two-thirds of the crumb mixture evenly into the bottom of the prepared pan to form the crust. Reserve the remaining one-third of the crumbs for the topping.
- Prepare the apple filling: In a separate bowl, toss the diced apples with 1/2 cup brown sugar, 2 tablespoons flour, 1 teaspoon cinnamon, nutmeg, and lemon juice until coated.
- Spread the apple mixture evenly over the crust in the pan.
- Prepare the streusel topping: In a small bowl, combine the remaining 1/2 cup flour, 1/2 cup brown sugar, 1/4 cup granulated sugar, and 1/2 teaspoon cinnamon. Cut in the remaining 1/4 cup cold butter until crumbly.
- Sprinkle the reserved one-third of the crust mixture and the streusel topping mixture evenly over the apples.
- Bake for 40 to 45 minutes, or until the topping is golden brown and the apples are tender when pierced with a fork.
- Let the bars cool completely in the pan on a wire rack before lifting them out using the parchment paper overhang.
- Cut into squares. For extra flavor, consider these bars as part of your weekly meal planning for satisfying comfort food.
Notes
- For a richer flavor, substitute half of the all-purpose flour in the crust and topping with finely ground oats.
- If you prefer a softer topping, you can skip the final streusel step and instead mix the remaining crust mixture with 1/4 cup cold water to form a dough, then crumble it over the apples.
- These bars pair well with a scoop of vanilla ice cream or a drizzle of caramel sauce.
Nutrition
- Serving Size: 1 bar
- Calories: 280
- Sugar: 22
- Sodium: 95
- Fat: 15
- Saturated Fat: 9
- Unsaturated Fat: 6
- Trans Fat: 0
- Carbohydrates: 36
- Fiber: 2
- Protein: 3
- Cholesterol: 35