
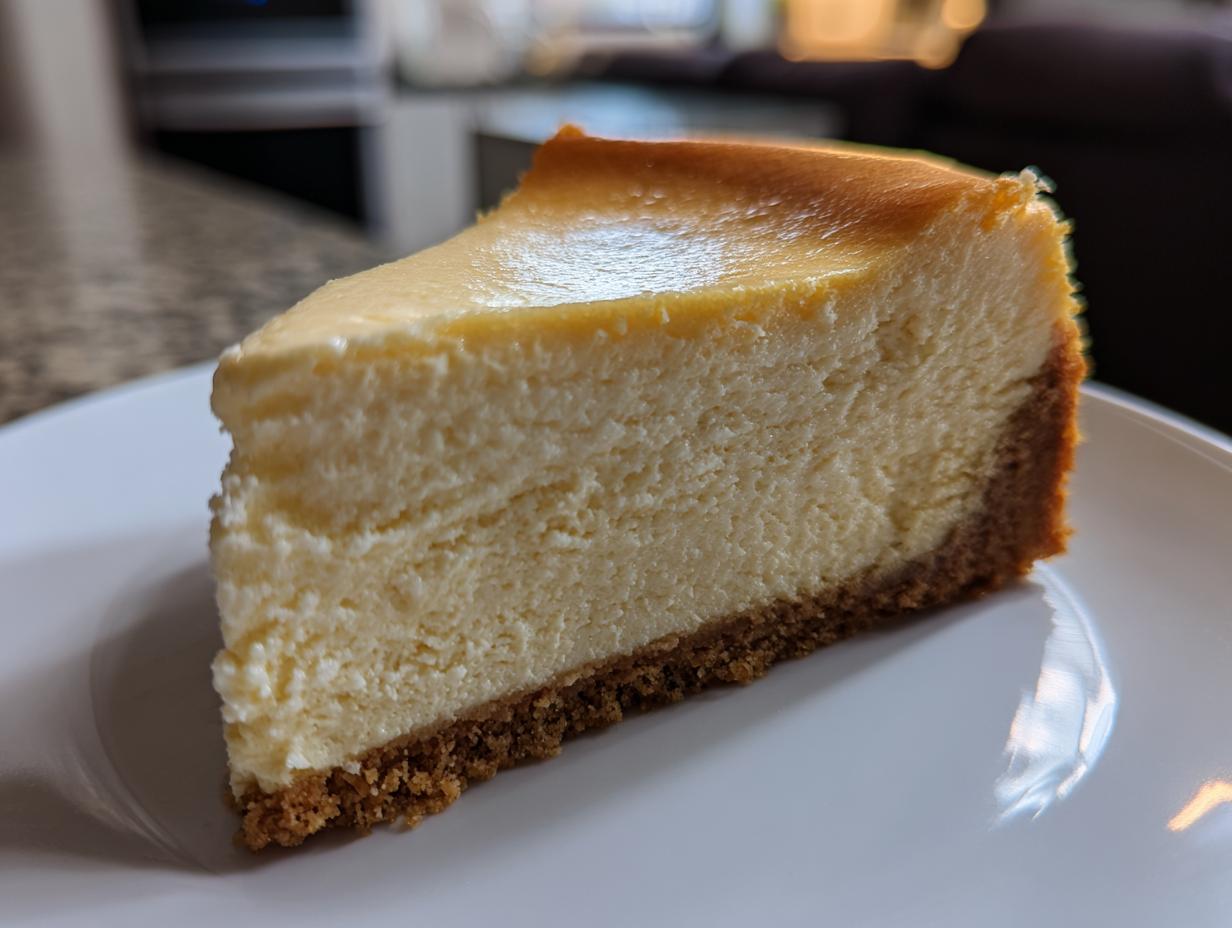
Listen, achieving that tall, impossibly creamy New York style texture without wrestling with a hot water bath has always felt like a myth, right? Well, I’m here to tell you that myth is busted! This is my go-to, ultimate cheesecake recipe, designed specifically for us home cooks. Our founder, Ellie Vance, built this entire site on giving you foolproof recipes, and this one is proof. We skip the messy water bath entirely and still get a dessert that’s rich, dense, and absolutely crack-free. Trust me, this is the one you’ve been searching for!
- Why This is the Best Easy Cheesecake Recipe for Beginners
- Ingredients for Your Foolproof Cheesecake Recipe
- Step-by-Step Instructions for the Ultimate Cheesecake Recipe
- Tips for a Perfect Homemade Cheesecake Every Time
- Serving Suggestions for Your Delicious Cheesecake
- Storage and Make Ahead Tips for Your Cheesecake Recipe
- Frequently Asked Questions About This Baked Cheesecake Recipe
- Estimated Nutritional Data for This Cheesecake Recipe
- Share Your Ultimate Cheesecake Creation
Why This is the Best Easy Cheesecake Recipe for Beginners
I know the thought of starting a baked cheesecake can be terrifying. Everyone warns you about cracking! But that’s why I love standing by this Easy Cheesecake Recipe. It knocks out all the major stress points before you even turn on the mixer. We’re talking no massive water bath that sloshes everywhere, no fighting with aluminum foil sticking to the crust, and best of all, a texture just as rich as those pricey bakery versions.
This recipe is my little secret weapon for making things look way more complicated than they actually are. It’s designed to be dependable. If you follow the simple prep, you get that tall, beautiful dessert without the drama. I promise this will be the first of many you make!
Achieving Creamy Cheesecake Texture Without Complications
The secret to that ‘Creamy Cheesecake’ mouthfeel isn’t some fancy ingredient, it’s just about being kind to your cream cheese! You absolutely must let everything warm up to room temperature—I mean, leave it out for a good couple of hours. Cold cheese equals lumps, and lumps mean over-mixing when you try to smooth them out.
Mixing speed is everything too. We’re using the mixer on low speed! You want to incorporate, not whip. Whipping adds air, and air expands, leading to sad cracks when it cools down. Over-mixing is genuinely the number one enemy, but if you keep it slow and use room temperature magic, you’ll be fine. You can even check out some other simple dessert ideas if you need a break from baking, but trust me, this one’s worth your time. If you want more pointers on making things simple, check out this great easy recipe guide too!
Ingredients for Your Foolproof Cheesecake Recipe
Okay, let’s talk supplies! Gathering everything before you start is half the battle when it comes to a rich dessert like this. I’ve broken them down so you can grab everything you need in one trip—or rifle through your pantry knowing exactly what’s missing. Remember, for the filling, everything needs to be relaxed and ready; warm ingredients mix smoothly, and cold ingredients fight you every step of the way. This is the foundation for that smooth dessert!
For the Graham Cracker Crust
This is quick, simple, and only needs a few things to create that sturdy base that can hold up all that creamy filling. No regrets using real butter here, folks!
- 1 1/2 cups graham cracker crumbs (I like using crumbs from about 12 full sheets, crushed finely)
- 1/4 cup granulated sugar (just the regular white stuff)
- 6 tablespoons unsalted butter, melted until completely liquid
When you press this mixture into your springform pan, press it firmly, almost like packing down sand on the beach. A solid crust means no crumbly edges when you serve!
For the Rich Cheesecake Filling
This is where we focus on room temperature magic. Seriously, take the cream cheese, eggs, and sour cream out early. I mean it! If you try to rush this by microwaving the cheese, you’ll end up with a bumpy mess. We don’t want bumpy!
- 3 (8 ounce) packages full-fat cream cheese, softened way, way down to room temperature
- 1 1/2 cups granulated sugar
- 1/4 cup all-purpose flour (yes, a little flour helps stabilize this no-water-bath version!)
- 1 teaspoon vanilla extract
- 1/4 teaspoon salt
- 4 large eggs, also at room temperature
- 1/2 cup sour cream, nice and soft, room temperature
Step-by-Step Instructions for the Ultimate Cheesecake Recipe
Alright, let’s get this show on the road! This can’t be rushed, but trust me, the payoff for paying attention during these steps makes this the cheesecake recipe everyone will rave about. Since we are skipping the water bath, timing is key for getting that perfect, tall structure. Stick with me here, and just like you would for my fudge topping, we’ll create something amazing.
Preparing the Crust and Initial Bake
First up, get that oven hot! Preheat to 350°F (175°C) and make sure your 9-inch springform pan is ready to go. Take your crust mixture—the crumbs, the sugar, and the melted butter—and combine it all until it looks like wet sand. Press that mixture firmly and evenly across the bottom of the pan. I use the bottom of a measuring cup to really tamp it down solid!
Pop that crust into the oven for just 10 minutes. When it comes out, let it sit and cool down while you start tackling the filling. Then, drop your oven temperature down to 325°F (160°C). Don’t forget that step!
Mixing the Creamy Cheesecake Batter (No Lumps Allowed)
This is where you show that cream cheese who’s boss! Use your mixer on medium speed to beat the softened cream cheese until it is absolutely, perfectly smooth. Scrape down the bowl—don’t skip that!
Now, add the 1 1/2 cups of sugar, flour, vanilla, and salt. Mix this on LOW just until it disappears. Then, the eggs go in one at a time. I mean it: add one egg, mix *only* until the yolk disappears, then stop and add the next one. Do not beat air into this batter! Seriously, keep your mixer speed low—this is vital for a crack-free result. Finally, gently fold in the sour cream until it’s just uniform. If you wanted to top this later with something rich, think how delicious it would be on top of holiday cheesecake bars! For more tips on this style of baking, check out Natasha’s great guide here too.
Baking and the Essential Slow Cooling Method for a No Water Bath Cheesecake
Pour that smooth filling over your cooled crust and give the pan a few gentle taps on the counter to pop any surface bubbles—remember, we hate air pockets!
Bake at 325°F (160°C) for about an hour to 75 minutes. You know it’s ready when the edges look set, but the center two inches still has a little jiggle—like firm Jell-O. This is the moment of truth for any No Water Bath Cheesecake!
Now, the most important part that prevents the fall: Turn the oven OFF. Prop the door open just a crack using a wooden spoon handle. Let that cheesecake chill in the cooling oven for a full hour. This gradual temperature drop is what stops the top from collapsing angrily. After that hour, take it out completely, let it cool on the counter, and then stick it in the fridge for six hours minimum. It’s rough, but your patience will reward you!
Tips for a Perfect Homemade Cheesecake Every Time
Even with the perfect cheesecake recipe on hand, sometimes one little step can throw the whole thing sideways—especially with something as temperamental as cream cheese. I’ve made these a million times, and I’ve learned a few hard-won lessons that transform a good cheesecake into a truly gorgeous, Homemade Cheesecake. These aren’t complicated additions; they are just small details that majorly impact the final texture and the look of that beautiful top.
Ellie Vance always says the best cooking comes from understanding *why* you’re doing something, not just following a list. These tips are all about that understanding!
Ingredient Temperature and Mixing Secrets for This Cheesecake Recipe
I can’t stress this enough: room temperature ingredients are non-negotiable for a smooth batter. When I first tried making cheesecake years ago, I was in a hurry and pulled the cream cheese straight from the fridge. What resulted? A lumpy mess! Even my powerful mixer couldn’t blend those cold chunks perfectly. You end up over-beating everything trying to smooth those lumps out, and that’s how you get air incorporated.
Remember, air is our enemy! Think of the mixing bowl like a delicate relationship—you want smooth incorporation, not a dramatic argument. When you mix the eggs in, you’re barely stirring. Just enough to combine. If you see streaks of egg white, stop! The oven is going to bake out the tiny imperfections, but if you’ve added a bunch of air pockets, they will turn into giant cracks when the cheesecake settles. Speaking of settling, if you’re looking for baking tips for softer items as a palate cleanser, you should check out my guide on a moist spice cake recipe while you wait for dessert to set up!
Chilling: The Final Step for Ultimate Cheesecake Structure
Okay, you’ve baked it, you’ve cooled it slowly in the turned-off oven (which you did, right?), and it finally looks perfect on the counter. Do *not* cut it yet! I repeat: Do not grab that knife!
The chilling isn’t just for flavor, although the chilling definitely lets those rich flavors meld beautifully. The primary reason we need at least six hours—and honestly, overnight is truly best—is for structure. This is a Delicious Cheesecake that’s dense and creamy. If you try to slice it, even slightly warm from cooling on the counter, the edges will slump, and the whole slice will mush. You need that full chilling time for the fats and proteins to firm up properly so you can get those clean, beautiful slices that look exactly like the restaurant versions. It’s honestly just a little patience standing between you and perfection!
Serving Suggestions for Your Delicious Cheesecake
That beautiful, smooth top of your baked cheesecake is just begging for a little something extra, isn’t it? Because this New York style base is so rich and tangy, you don’t want to overdo the toppings. A heavy chocolate sauce can totally crowd the flavor, and we want that luxurious creaminess to shine through! This is where the subtle additions really save the day.
For a truly Delicious Cheesecake experience, I always lean toward fresh fruit. The tartness cuts through the richness perfectly. Have you ever tried a whisper of lemon zest sprinkled right over the top just before serving? Wow! It brightens everything up immediately.
- Simple Berry Compote: Think fresh raspberries or blueberries simmered briefly with just a tiny splash of water and maybe half a teaspoon of sugar until they just start to release their juices. Let it cool slightly so it doesn’t melt the cheese.
- Caramel Drizzle: A light drizzle of homemade or store-bought salted caramel is classic perfection. Don’t drown it; just a thin web across the top looks elegant.
- Plain & Proud: Honestly, sometimes the very best topping is nothing at all! Once it’s perfectly chilled, it looks stunning just as it is against that buttery crust. If you want to try a different kind of impressive dessert later, maybe try my panna cotta recipe!
Whichever way you go, make sure the topping is cool or room temperature so you don’t risk disturbing that gorgeous surface we worked so hard to keep smooth!

Storage and Make Ahead Tips for Your Cheesecake Recipe
One of the things I genuinely adore about this specific cheesecake recipe is how perfectly it works for future planning. If you’re juggling your weekly routine or planning ahead for a big holiday get-together, this is a lifesaver. Seriously, this is one of the best make ahead desserts you can find!
The absolute BEST time to eat this is the day *after* you make it. Chilling overnight doesn’t just firm it up; it lets the flavor deepen into that perfect, intense New York style richness. It goes from being good to being legendary overnight, I swear.
Once it’s fully chilled and you’ve admired its perfection, keeping it fresh is easy. Leave the cheesecake—still in its springform pan, wrapped loosely but securely with plastic wrap—in the refrigerator. It holds up beautifully for four to five days. I actually think the flavor gets richer as the days go on, which is handy if you need a quick treat for spontaneous dessert cravings during the week!
Now, can you freeze it? Yes, you absolutely can, but there are a few things to watch out for. If you freeze it with any kind of topping (like fruit compote or sour cream swirl), that topping might get weeping or textural issues when it thaws. For the best results, freeze only the plain, chilled cheesecake. Wrap the whole thing tightly first in a layer of plastic wrap, then cover it tightly again with aluminum foil. This double layer keeps freezer burn away! It thaws best overnight in the fridge, and it’s still fantastic after about a month in the freezer.
Frequently Asked Questions About This Baked Cheesecake Recipe
It’s totally normal to have questions when diving into something as iconic as a New York style cheesecake! Even though I promise this is a simple baking recipe, cheesecake always seems to spark a few worries. Here are the things I get asked most often about ensuring this Baked Cheesecake Recipe turns out flawless for you.
What if I don’t have sour cream? Can I substitute it?
This is tricky, honestly. The sour cream plays a role beyond just flavor; it adds a necessary acidic element that helps keep the texture smooth and balances the sweetness for that classic tang. If you are in a pinch, you *can* substitute it with an equal amount of full-fat plain Greek yogurt. Make sure the yogurt is as thick as you can find! However, for the absolute creamiest results that rival a professional bakery, nothing beats the real thing. If you skip it, you might miss out on the signature tanginess of this Classic Cheesecake Recipe.
How can I be 100% sure my cheesecake is done when I test it?
The jiggle test is everything! This is the biggest tell for a Creamy Cheesecake. When you bake it for 60–75 minutes, you need to gently nudge the pan. The outer ring, maybe two inches in from the edge, should look completely set—no wobbling at all. But the very center, about the size of a silver dollar coin, should still move slightly. It honestly looks like soft gelatin moving when you nudge it. If it doesn’t move, it’s already overbaked, and the cooling-in-the-oven trick might not save it from a slight dip. Always trust the jiggle over the time on the clock!
Do I absolutely have to use a springform pan for this recipe?
For this specific recipe, yes, I really recommend sticking with a 9-inch springform pan. Why? Because once this Homemade Cheesecake sets up after chilling overnight, it becomes incredibly dense and heavy. Trying to invert it out of a regular cake pan would almost certainly cause it to break apart, and that would be a total tragedy after all your hard work!
The springform pan lets the sides release cleanly, giving you access to cut those perfect slices without disrupting the crust underneath. We put in all this effort to avoid cracks on top, we don’t want a crack on the bottom just because we tried to save three dollars on a specialized pan!
My cream cheese was slightly lumpy when I added the sugar. Will I still get a smooth dessert?
If you only have tiny lumps before you add the sugar and flour, don’t panic yet! You stand a chance. The sugar and flour actually help scour those little lumps smooth as they mix in, provided you’re mixing slowly. If you see chunks bigger than, say, a small pea, stop immediately and use a rubber spatula to work them out by hand against the side of the bowl before turning the mixer back on low. But that’s why we preach room temperature ingredients—it saves you this extra labor!
Estimated Nutritional Data for This Cheesecake Recipe
I always like to give folks a heads-up on what they’re digging into when they enjoy a slice of this decadent treat. Keep in mind that this is just the estimate based on the ingredients listed in this cheesecake recipe—if you use different brands of cream cheese or add loads of toppings, your numbers will change!
For this calculation, we’re looking at a standard slice (1/12th of the cake) serving size. It’s rich, yes, but trust me, a little goes a long way when the flavor is this luxurious!
| Nutrient | Amount Per Serving |
|---|---|
| Calories | 450 |
| Total Fat | 30g |
| Saturated Fat | 18g |
| Trans Fat | 0.5g |
| Cholesterol | 120mg |
| Sodium | 300mg |
| Total Carbohydrates | 40g |
| Dietary Fiber | 1g |
| Total Sugars | 35g |
| Protein | 8g |
Keep this in mind if you’re tracking things closely, but honestly, sometimes you just need a slice of pure, homemade happiness, and this cream cheese dream delivers!
Share Your Ultimate Cheesecake Creation
Well, that’s it! You’ve braved the mixing, you’ve managed the slow cool-down, and you have pulled off the most gorgeous, restaurant-quality New York style cheesecake that didn’t require a single drop of extra water in the oven. I can only imagine how incredible your kitchen smells right now!
I truly want to see what marvelous dessert you’ve created here. Did you stick to the simple, elegant topping, or did you decide to go wild with sauces? Every time I bake this, I feel like I’m putting a little bit of my heart into the oven, and I love knowing readers just like you are sharing that feeling across the country. It’s why we do what we do here at DeliceRecipe!
Please take a moment down in the comments below to let me know what you thought of the whole process. Rate this recipe for me—five stars if it earned it!—and tell me what you thought of skipping that scary water bath step. If you snapped a picture of your perfectly smooth, tall slices, I’d absolutely squeal with delight if you shared it!
And hey, if you’re already planning your next dessert adventure for when you’re recovering from cheesecake bliss, maybe take a look at my recipe for classic soft and chewy oatmeal cookies as a simpler post-cheesecake treat!
PrintThe Best Easy New York Cheesecake Recipe (No Water Bath Needed)
Follow this simple recipe to make a tall, creamy, and rich New York style cheesecake that resists cracking, even without using a water bath.
- Prep Time: 25 min
- Cook Time: 75 min
- Total Time: 8 hours 40 min
- Yield: 12 servings 1x
- Category: Dessert
- Method: Baking
- Cuisine: American
- Diet: Vegetarian
Ingredients
- 1 1/2 cups graham cracker crumbs
- 1/4 cup granulated sugar (for crust)
- 6 tablespoons unsalted butter, melted
- 3 (8 ounce) packages full-fat cream cheese, softened to room temperature
- 1 1/2 cups granulated sugar (for filling)
- 1/4 cup all-purpose flour
- 1 teaspoon vanilla extract
- 1/4 teaspoon salt
- 4 large eggs, room temperature
- 1/2 cup sour cream, room temperature
Instructions
- Preheat your oven to 350°F (175°C). Get a 9-inch springform pan ready.
- Prepare the crust: Mix graham cracker crumbs, 1/4 cup sugar, and melted butter until combined. Press the mixture firmly into the bottom of the springform pan.
- Bake the crust for 10 minutes. Remove from the oven and let it cool slightly while you prepare the filling. Reduce the oven temperature to 325°F (160°C).
- Prepare the filling: In a large bowl, beat the softened cream cheese with an electric mixer until completely smooth. Scrape down the sides of the bowl.
- Add the 1 1/2 cups sugar, flour, vanilla extract, and salt to the cream cheese mixture. Beat on low speed until just combined and smooth. Do not overmix.
- Add the eggs one at a time, mixing on low speed after each addition only until the yolk disappears. Do not beat air into the batter.
- Gently mix in the sour cream until the batter is uniform.
- Pour the filling over the cooled crust in the springform pan. Gently tap the pan on the counter a few times to release any large air bubbles.
- Bake at 325°F (160°C) for 60 to 75 minutes. The edges should look set, but the center 2 inches should still have a slight jiggle when gently nudged.
- Turn off the oven, but leave the cheesecake inside with the oven door propped open slightly (use a wooden spoon). Let it cool slowly in the oven for 1 hour. This slow cooling helps prevent cracks.
- Remove the cheesecake from the oven and let it cool completely on a wire rack.
- Once fully cooled, cover the pan loosely with plastic wrap and chill in the refrigerator for at least 6 hours, or preferably overnight, before serving.
Notes
- Use room temperature ingredients for the cream cheese, eggs, and sour cream; this prevents lumps and ensures a creamy texture.
- Do not substitute low-fat cream cheese; full-fat is necessary for the proper texture.
- If you are planning your week and looking at meal planning options, this dessert is excellent for making ahead of time.
Nutrition
- Serving Size: 1 slice
- Calories: 450
- Sugar: 35g
- Sodium: 300mg
- Fat: 30g
- Saturated Fat: 18g
- Unsaturated Fat: 12g
- Trans Fat: 0.5g
- Carbohydrates: 40g
- Fiber: 1g
- Protein: 8g
- Cholesterol: 120mg