

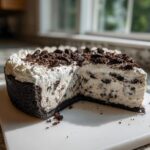
When the summer heat hits, who wants to stand over a hot oven? Honestly, nobody! That’s why I’m kicking things off with what I consider the reigning champion of chill-out desserts: the ice cream pie. Forget fussy baking, because this Ultimate No-Bake Cookies and Cream one is pure heaven with minimal effort. Here at DeliceRecipe, my promise is always simple, reliable home cooking that actually works, and this recipe embodies that perfectly. It’s rich, it’s creamy, and it gets rave reviews every single time you bring it out. Trust me, you’re always going to want this quick, crowd-pleasing treat in your back pocket for those impromptu summer gatherings!
- Why This Ultimate No-Bake ice cream pie is Your New Favorite Summer Dessert
- Gathering Ingredients for Your No Bake ice cream pie
- Step-by-Step Instructions for a Creamy frozen pie
- Tips for the Best homemade ice cream pie Success
- Make Ahead frozen desserts: Storing Your ice cream pie
- Serving Suggestions for a Party ice cream pie
- Frequently Asked Questions About This ice cream pie
- Nutritional Estimates for This Indulgent ice cream pie
- Share Your Ultimate No-Bake ice cream pie Creation
Why This Ultimate No-Bake ice cream pie is Your New Favorite Summer Dessert
Honestly, when it comes to surviving the heat, you need desserts that work with you, not against you. This ice cream pie absolutely delivers on easy, crowd-pleasing flavor, which is why I keep it bookmarked every summer. If you need to see my other go-to sweets, check out my collection of delicious dessert recipes!
Quick Prep Time for Easy ice cream pie Recipe
Seriously, 15 minutes! That’s all it takes for the active prep on this recipe. Since it’s totally no-bake, you don’t have to worry about anything heating up your kitchen. It’s the perfect solution when you realize you need a stellar dessert for unexpected guests—it cuts right down on stress!
Crowd-Pleasing Flavor Profile
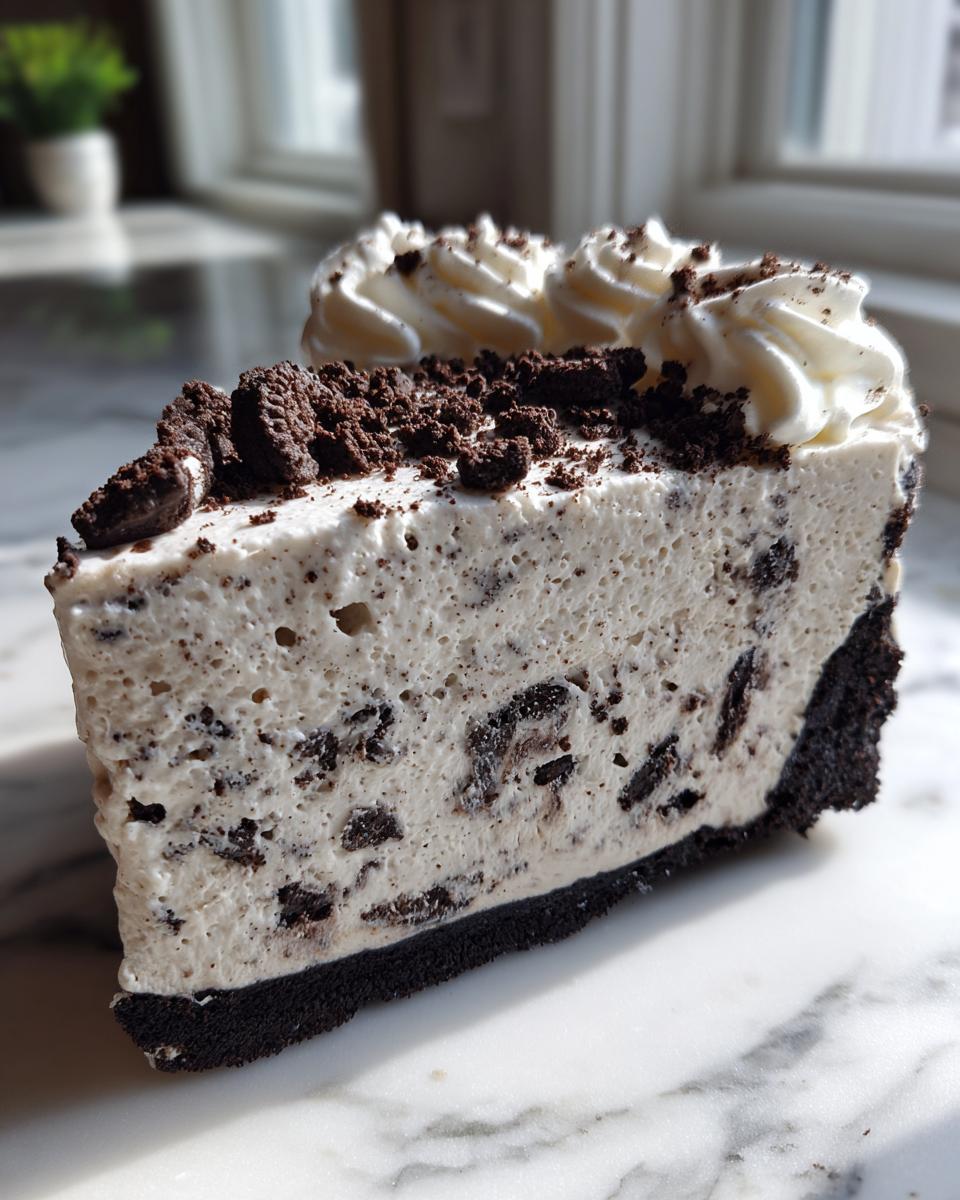
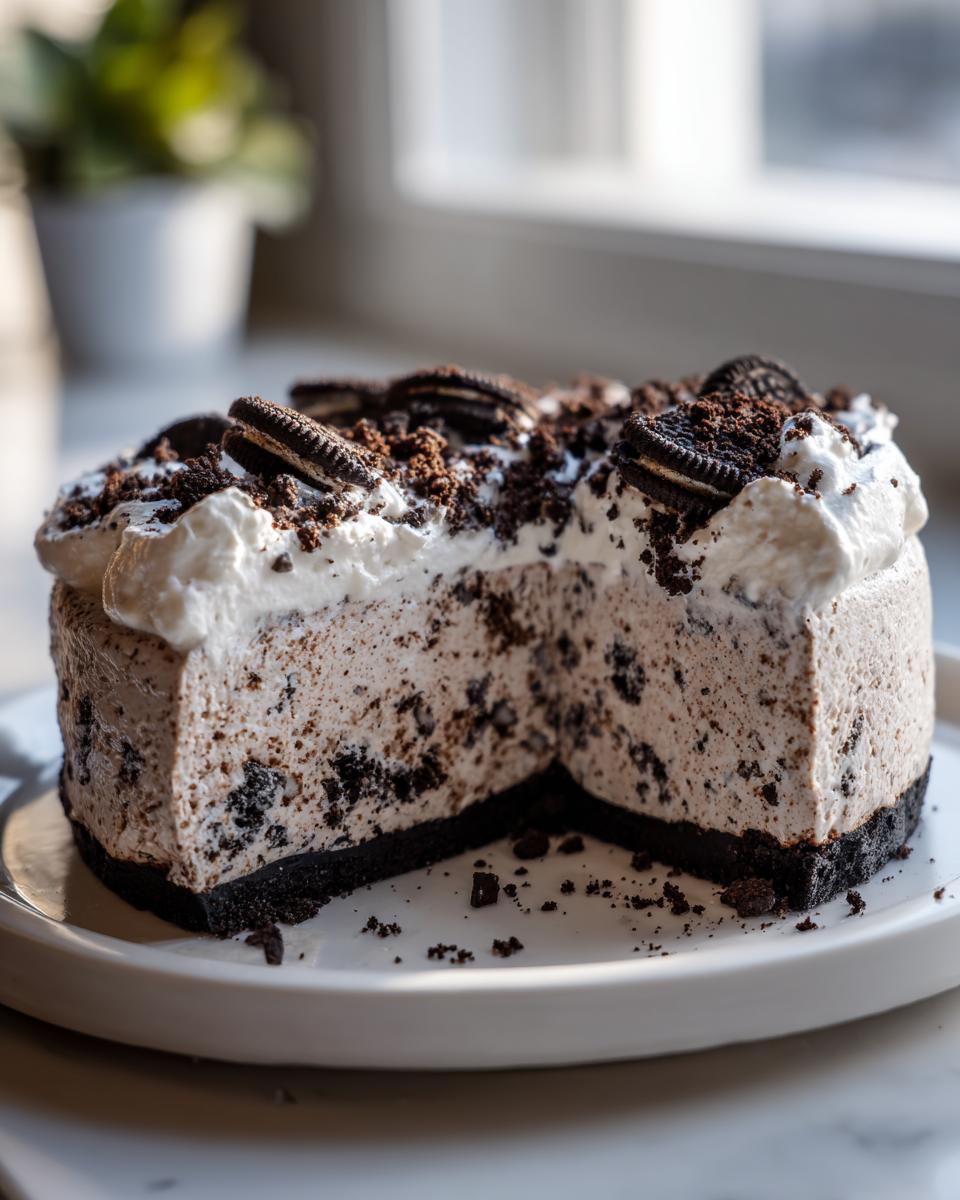
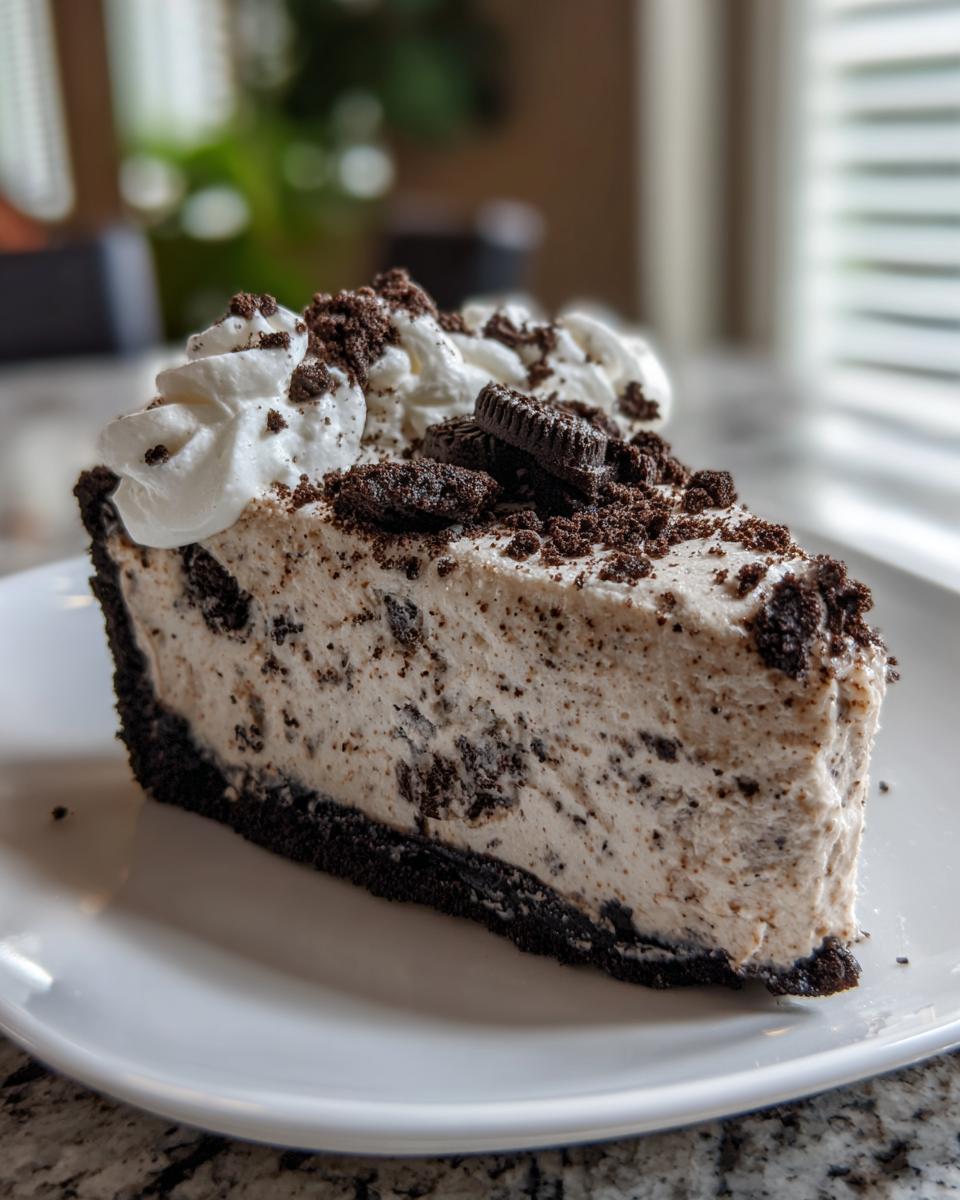
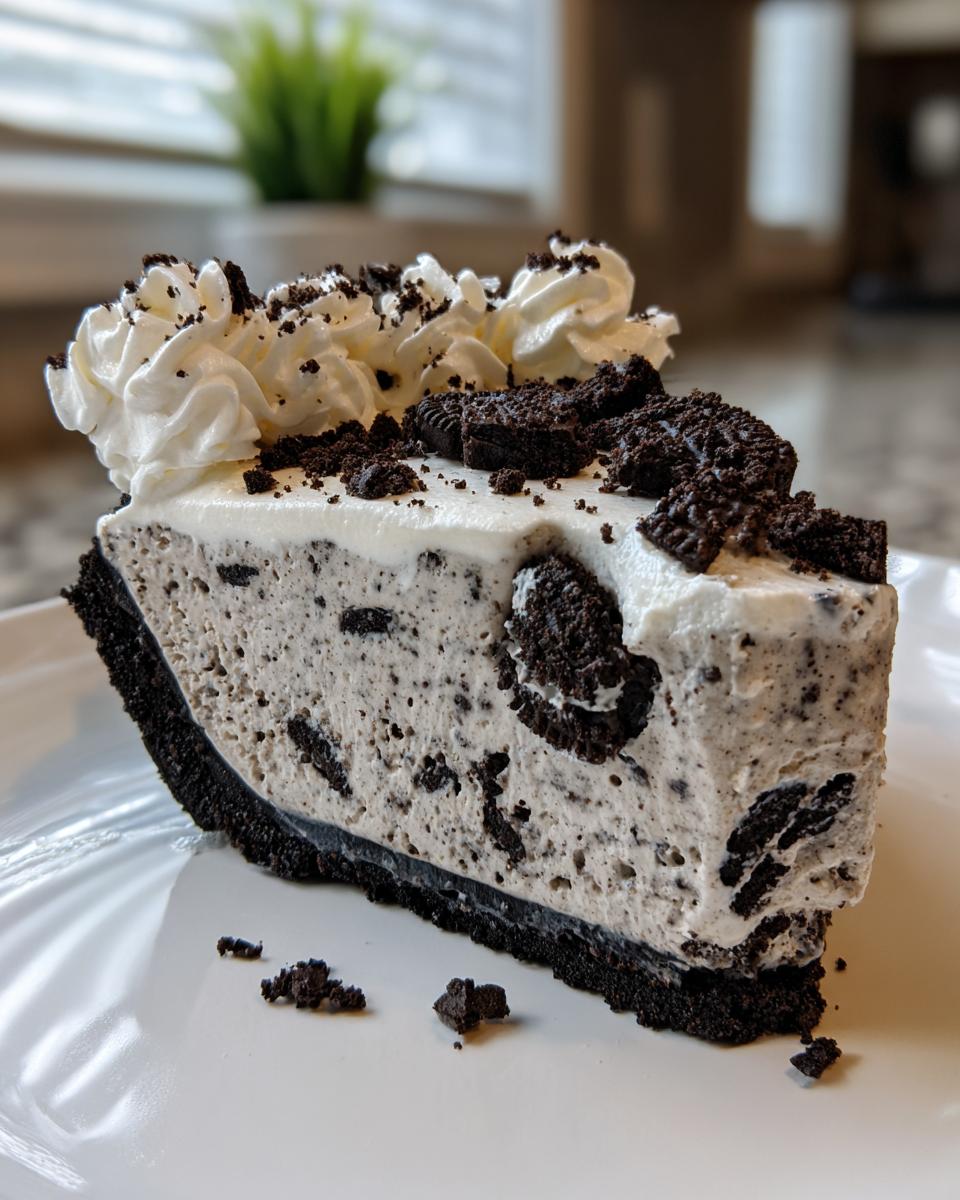
You just can’t beat Cookies and Cream when it comes to wide appeal. It’s familiar, decadent, and perfectly creamy over that sharp, crunchy Oreo crust ice cream pie base. It satisfies everyone, from the picky eaters to the dessert connoisseurs at the party.
Gathering Ingredients for Your No Bake ice cream pie
Okay, let’s talk supplies! The beauty of an oreo crust ice cream pie recipe is how simple the shopping list is. You don’t need a pantry full of strange items; everything here is easy to find. Remember to grab the ice cream when you are shopping for this, but make sure you let it sit out just long enough so it’s slightly softened—we want spreadable, not soup!
Here is exactly what you need to gather for this indulgent treat:
- 1 9-inch Oreo pie crust (I often use store-bought to save time, but you can totally make your own if you fancy a butter pie crust recipe adventure!).
- 1 quart (that’s about 4 cups!) of cookies and cream ice cream, softened slightly.
- 1 cup heavy whipping cream.
- 2 tablespoons powdered sugar.
- 1 teaspoon vanilla extract.
- 1/2 cup crushed Oreo cookies just for sprinkling on top at the very end.
That’s it! When you whip that cream later on, remember that goal is stiff peaks—it gives the topping the structure it needs to sit beautifully on the frozen pie.
Step-by-Step Instructions for a Creamy frozen pie
Alright, my trusted cook, let’s get this frozen beauty assembled! Making a fantastic creamy frozen pie is all about timing your layers so they meet perfectly in the middle—firm but not rock-solid. Follow these steps, and you’ll have the prettiest slice on the block. It’s just a few moves, but each one makes a big difference in how this incredible ice cream pie comes together.
Preparing the Base and Ice Cream Layer
First things first: you need a solid foundation. Set your 9-inch Oreo crust right onto a baking sheet or a sturdy plate that can easily slide into your freezer without tipping over. Trust me on the flat surface—we don’t want a tilted pie! (Step 1) Next, take that slightly softened ice cream. We aren’t waiting until it melts, just until it yields a little bit. Spread that glorious cookies and cream goodness evenly right into the crust. Use an offset spatula if you have one; it helps get a nice, smooth top surface. (Step 2) Now, pop it straight into the freezer for at least two hours. We need that layer locked in before we do anything else.
Whipping the Topping for Your ice cream pie
While the base is getting nice and firm, let’s make the cloud that goes on top! In a clean bowl, combine your heavy whipping cream, the powdered sugar, and that teaspoon of vanilla extract. (Step 4) You need to whip this until you get what bakers call stiff peaks. This is super important! Stiff peaks mean the whipped cream won’t deflate or melt into the ice cream when you spread it on. It holds up beautifully, giving your final ice cream pie that gorgeous, professional look!
Assembling and Final Freeze
Once your ice cream is rock solid (after those two initial hours), pull it out. Time to spread that glorious whipped cream right over the hardened layer. (Step 6) Then, give it a generous snow shower of crushed Oreos on top. (Step 7) Back into the freezer it goes! This final freeze needs at least one more hour to make sure that topping sets firmly. When you are ready to serve this masterpiece, try dipping your sharpest knife in hot water first, wiping it dry, and then slicing. You’ll get the cleanest slices ever!
Tips for the Best homemade ice cream pie Success
Even though this is a super simple ice cream pie, I always have a few tricks up my sleeve to make sure it tastes absolutely professional. Building that extra layer of flavor and texture is what turns a good dessert into a truly great, reliable homemade ice cream pie!
Crust Customization for Your ice cream pie
If you have an extra five minutes, skipping the store-bought crust is worth it. My note mentioned using melted butter when you make your own crust from crushed Oreos, right? That addition really helps bind everything together and gives the base a richer, more buttery crunch that just sings against the ice cream. If you’re thinking about taking that extra step, remember that a properly set crust is key, just like when you use a good hardening glaze on other treats. You can check out my guide on easy cookie icing recipes that harden perfectly for inspiration on getting that firm base!
Flavor Swaps for Different ice cream pie Variations
The recipe template is fantastic because it’s genuinely flexible. If you’re not feeling Cookies and Cream—maybe you’re feeling a bit more decadent or salty-sweet—just swap out that ice cream! I know people who have had huge success using rich chocolate ice cream, or even leaning into that salty-sweet vibe with a good peanut butter ice cream if they prepare a slightly different topping. You can really customize this base for any crowd or season.
Make Ahead frozen desserts: Storing Your ice cream pie
Oh, I absolutely love a dessert that lets me get ahead of the party schedule! That’s the joy of making this ice cream pie—it’s one of those perfect make ahead frozen desserts you can tuck away several days early. The recipe notes say you can safely keep this beauty stored for up to a week! Just make absolutely sure it’s wrapped tightly with plastic wrap and maybe a layer of foil over that.
Since it’s frozen, we don’t need to worry about reheating *at all*, which is the best part! For optimal enjoyment, though, pull your amazing creation out about 10 to 15 minutes before you plan to slice it. That tiny bit of ‘tempering’ time allows the layers to relax just enough so you get the cleanest cuts. It really helps the texture shine. Check out my guide on other make ahead frozen desserts if you need more freezer inspiration!
Serving Suggestions for a Party ice cream pie
Presenting this ice cream pie is almost as fun as eating it! Because the look is already so striking with that dark Oreo base, light whipped cream, and dark crumbs, you don’t need much fuss for a great presentation. For a real showstopper at your next gathering, drizzle some extra chocolate sauce right over the top just before you serve it. I have a recipe for the easiest, richest chocolate sauce recipe if you want to ditch the jarred stuff!
If you are aiming for a true party ice cream pie vibe, maybe serve a small scoop of plain vanilla ice cream on the side of each slice—the contrast is surprisingly wonderful. Or, keep it simple and just put out a bowl of fresh raspberries; that tartness cuts through the sweetness perfectly!
Frequently Asked Questions About This ice cream pie
It’s totally normal to have a few questions when you are whipping up a big, beautiful ice cream pie like this! I get asked about shortcuts and setup all the time. Because we’re dealing with frozen layers, people always want to know the little secrets to make sure everything sets up perfectly. Here are the common things I hear about making this no bake ice cream pie!
Can I make this ice cream pie without an Oreo crust?
Oh gosh, absolutely, yes! While the Oreo crust is amazing, it’s not the only option for a solid base. If you’re looking for something a little lighter, a classic graham cracker crust works beautifully. It gives you a more butter/honey flavor profile instead of that deep chocolate crunch. You can also use a simple shortbread cookie crumb crust if you have some on hand. Just remember the melted butter binder is key for any crust in these wonderful frozen dessert recipes!
What is the best way to get clean slices of ice cream pie?
This is the number one question I get about serving any frozen dessert! My secret weapon, which I mentioned earlier, is the hot water knife. Get a sharp knife, dip the blade completely into a tall glass of very hot—almost boiling—water for about ten seconds, wipe it dry quickly, and then slice. You might need to repeat that dip for every single slice, but it makes all the difference for getting clean edges on your ice cream pie. Also, pull it out of the freezer about 5 to 10 minutes before you want to cut it so it’s not a total rock.
How long does this no bake ice cream pie need to freeze?
Timing is everything here, right? You need enough chill time to lock in those layers so they don’t slide around. For the first layer—the ice cream spread into the crust—you need a minimum of two hours in the freezer until it’s firm enough to hold its shape. Then, after you top it with the stabilized whipped cream, you absolutely must put it back for at least one more full hour. That final hour ensures the topping sets and you can handle the pie without smooshing your beautiful work. The longer this no bake ice cream pie stays frozen after that, the better!
Nutritional Estimates for This Indulgent ice cream pie
Now, let’s talk numbers. I know some of you are watching closely, and others just want to know what kind of magic you are about to consume! When we are making something this delicious, like these indulgent ice cream treats, it’s important to remember that these figures are just estimates. They change depending on the exact brand of cookies or ice cream you use, so please take them as a helpful guide rather than a strict rule.
But for a standard serving of this glorious Cookies and Cream ice cream pie made to my usual specifications, here is what we are looking at:
- Serving Size: 1 slice
- Calories: 450
- Fat: 28g
- Carbohydrates: 45g
- Sugar: 35g
- Protein: 6g
We’ve also got 320mg of Sodium and 75mg of Cholesterol in there. I’m not going to tell you this is a health food—it’s dessert, and it’s meant to be enjoyed! But knowing the approximate values upfront means you can plan the rest of your day accordingly. Enjoy every single, creamy bite!
Share Your Ultimate No-Bake ice cream pie Creation
Now that you’ve got the blueprint for the best ice cream pie ever—rich, chilly, and totally hassle-free—the best part begins! Honestly, I live for hearing how you made this recipe your own. Did you try that peanut butter swap I mentioned, or did you keep it classic Cookies and Cream?
Please, don’t be shy! Come back here and leave a rating for this recipe and drop a comment below telling me about your experience. Seeing photos of your finished no bake ice cream pie is truly what makes this whole process worthwhile for me. You can always reach out through my contact page if you have specific questions, but mostly, I just love seeing our DeliceRecipe community sharing these amazing, easy summer desserts!
Happy chilling, and enjoy that slice!
PrintUltimate No-Bake Cookies and Cream Ice Cream Pie with Oreo Crust
Make this easy, no-bake ice cream pie using an Oreo crust and creamy cookies and cream filling. This frozen dessert is perfect for summer parties or family gatherings and requires minimal preparation.
- Prep Time: 15 min
- Cook Time: 0 min
- Total Time: 3 hours
- Yield: 8 servings 1x
- Category: Dessert
- Method: No-Bake
- Cuisine: American
- Diet: Vegetarian
Ingredients
- 1 9-inch Oreo pie crust (store-bought or homemade)
- 1 quart (about 4 cups) cookies and cream ice cream, softened slightly
- 1 cup heavy whipping cream
- 2 tablespoons powdered sugar
- 1 teaspoon vanilla extract
- 1/2 cup crushed Oreo cookies for topping
Instructions
- Place the Oreo pie crust on a baking sheet or plate that fits in your freezer.
- Spread the slightly softened cookies and cream ice cream evenly into the crust. Use an offset spatula to smooth the top surface.
- Place the pie in the freezer for at least 2 hours, or until the ice cream is firm.
- While the pie freezes, prepare the whipped cream topping. In a medium bowl, combine the heavy whipping cream, powdered sugar, and vanilla extract.
- Beat the mixture with an electric mixer on medium-high speed until stiff peaks form. This takes about 3 to 5 minutes.
- Remove the pie from the freezer. Spread the prepared whipped cream over the hardened ice cream layer.
- Sprinkle the crushed Oreo cookies evenly over the whipped cream topping.
- Return the pie to the freezer for at least 1 hour to set the topping before slicing and serving.
- When ready to serve, slice the ice cream pie with a sharp knife dipped in hot water.
Notes
- For a richer flavor, you can use a homemade Oreo crust made from crushed Oreos mixed with melted butter.
- If you prefer a different flavor, substitute the cookies and cream ice cream with your favorite store-bought ice cream, like chocolate or peanut butter ice cream.
- This homemade ice cream pie is a great make-ahead frozen dessert; it keeps well in the freezer for up to one week.
Nutrition
- Serving Size: 1 slice
- Calories: 450
- Sugar: 35g
- Sodium: 320mg
- Fat: 28g
- Saturated Fat: 16g
- Unsaturated Fat: 12g
- Trans Fat: 0.5g
- Carbohydrates: 45g
- Fiber: 2g
- Protein: 6g
- Cholesterol: 75mg