
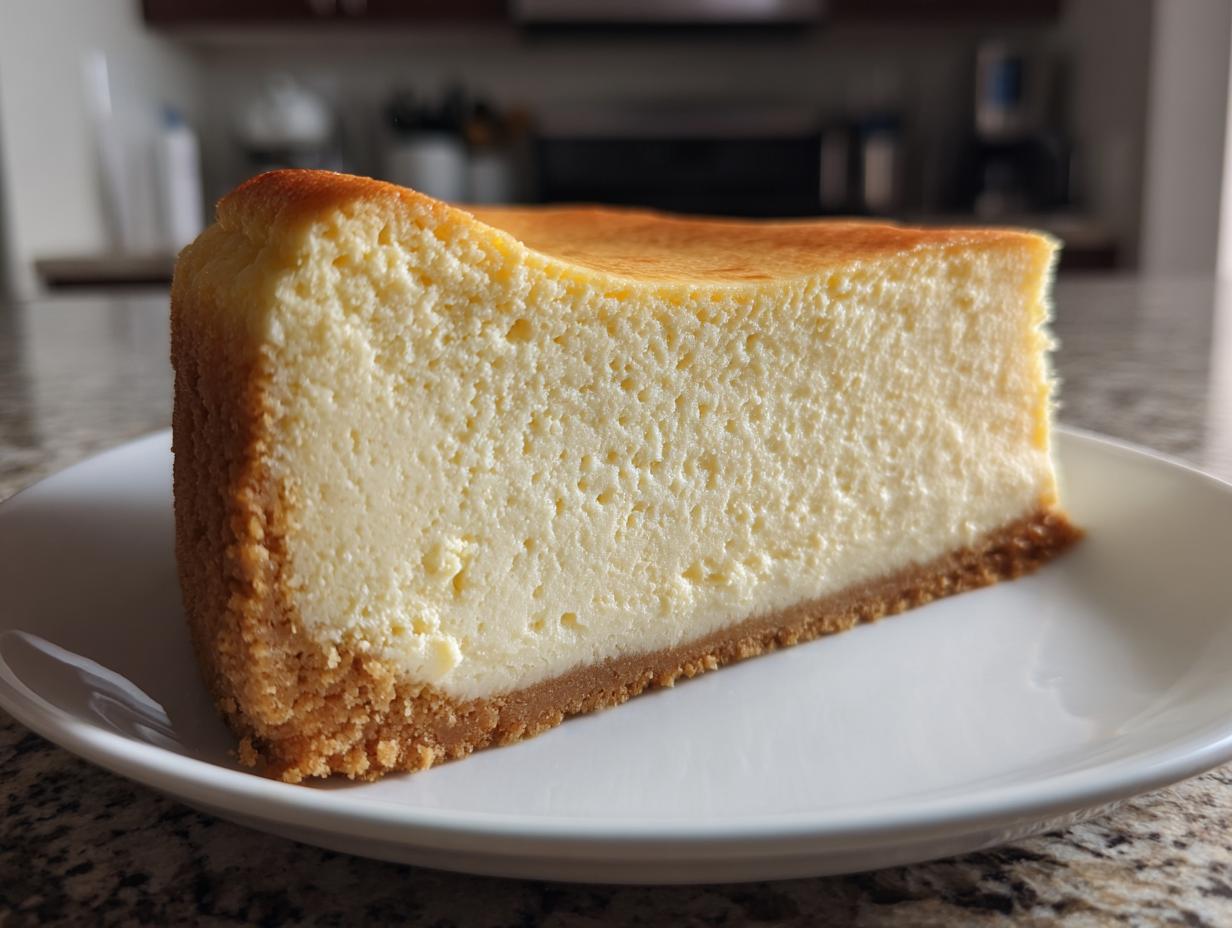
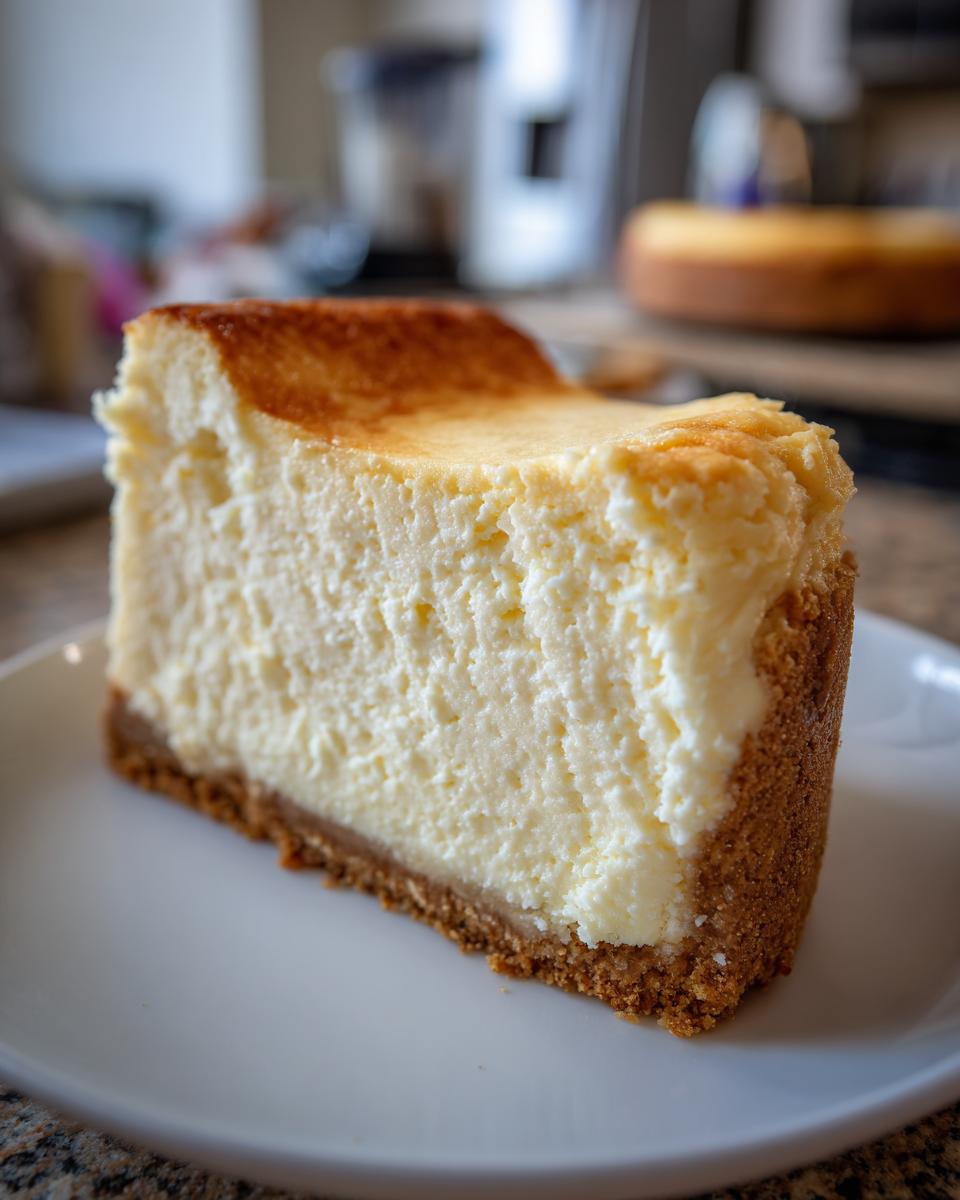
You know that moment when you bite into a slice of true, authentic New York cheesecake? That perfect contrast between the buttery crust and the incredibly dense, rich, and supremely creamy filling? I swear, achieving that bakery perfection at home used to feel like a pipe dream, especially with the constant fear of cracks appearing right when it cooled! Well, I’m here to tell you that it is totally possible. My goal with this recipe is simple: to deliver that signature texture of a top-tier New York Cheesecake without any of the usual baking drama or scary cracks.
This isn’t some fussy restaurant recipe, trust me. As Eleanor Vance, I built DeliceRecipe on the idea that classic American treats should be approachable. This recipe comes straight from the heart of that tradition, focusing on quality ingredients and foolproof methods that work, every single time, right in your own kitchen.
- Why This Is The Best Homemade Cheesecake Recipe
- Ingredients for Your Rich Cheesecake with Graham Cracker Crust
- How to Bake a Foolproof New York Cheesecake: Step-by-Step Instructions
- Tips for a Velvety Smooth Cheesecake Success
- Making Variations on the Classic New York Cheesecake
- Storage and Reheating Instructions for your new york cheesecake
- Frequently Asked Questions About Making new york cheesecake
- Estimated Nutritional Data for this Decadent Dessert Ideas
- Share Your Bakery Style Cheesecake at Home Success
Why This Is The Best Homemade Cheesecake Recipe
If you’re chasing that iconic New York slice, this recipe gives you exactly what you’re looking for. We aren’t messing around with anything light or airy here! This is designed to be:
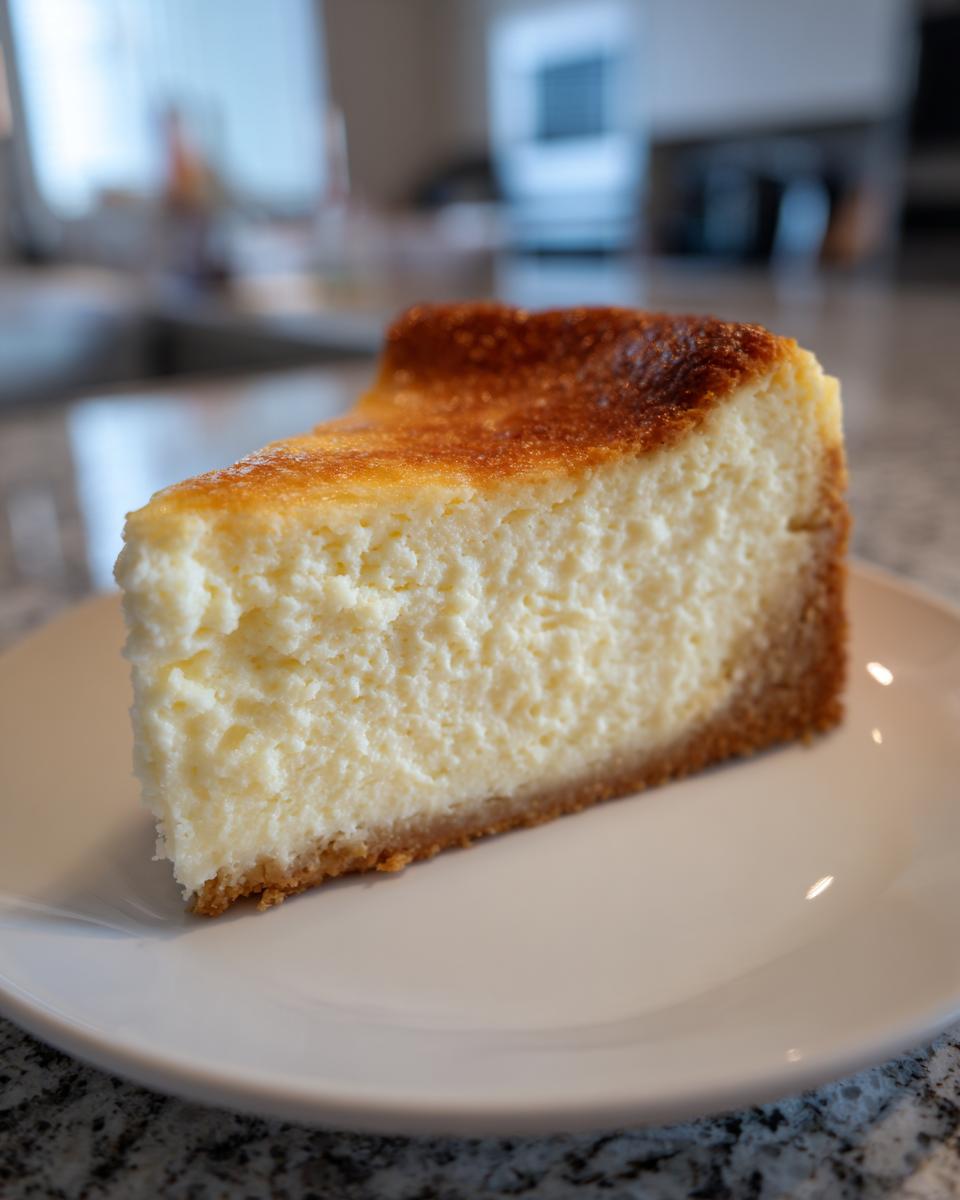
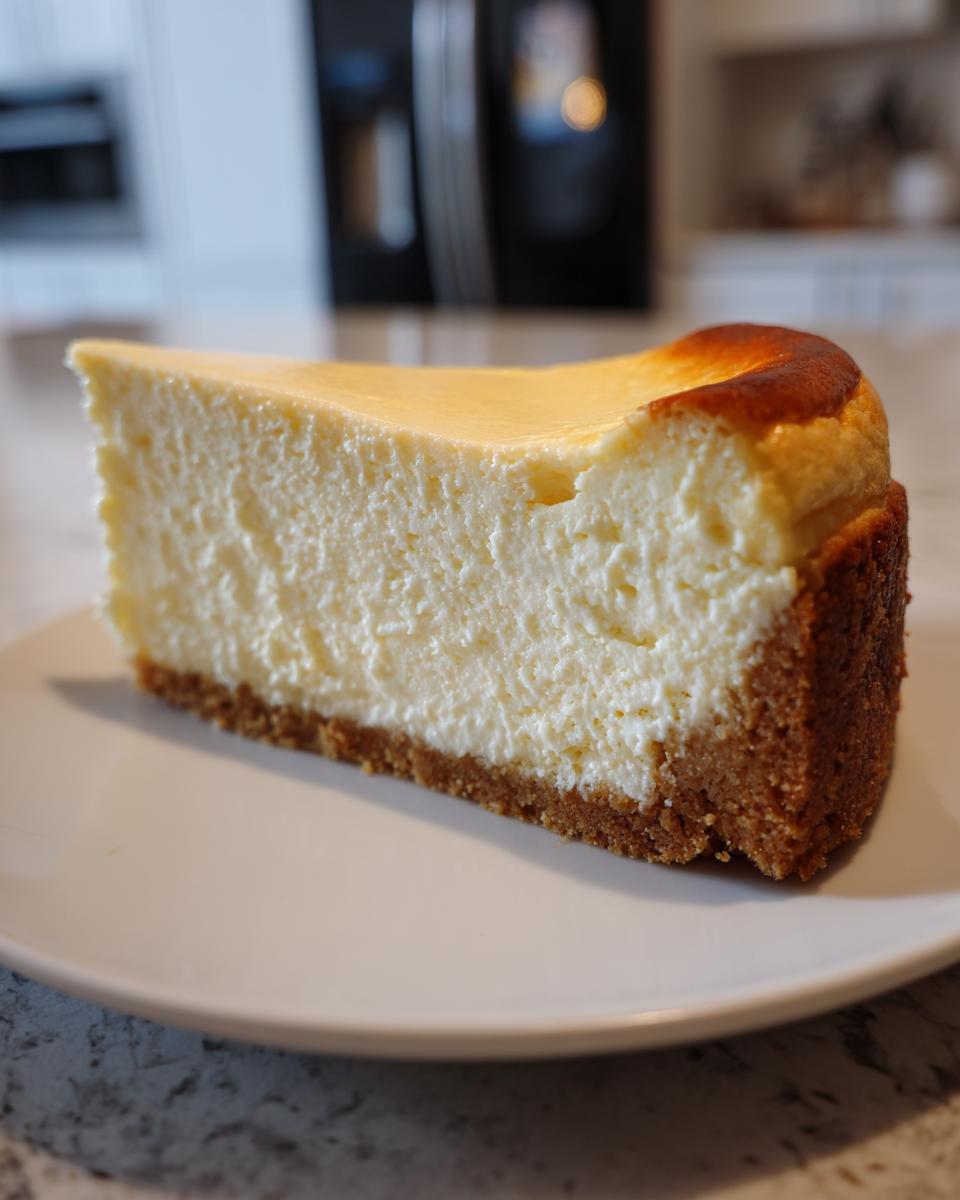
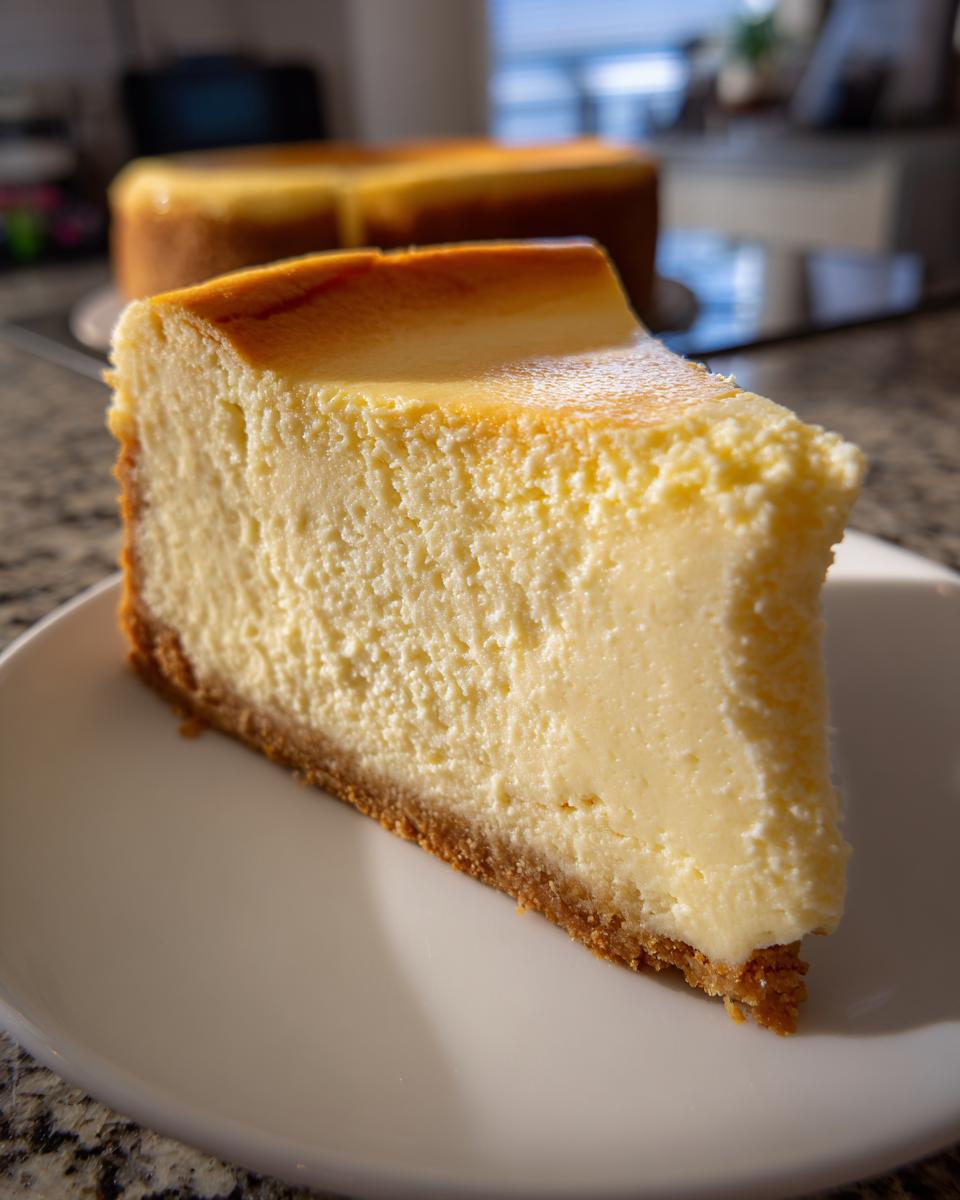
- Incredibly **Dense Creamy Cheesecake** that holds its shape beautifully.
- Perfectly tangy, thanks to that essential hit of sour cream.
- Guaranteed to have a flawless, smooth top—we’ve worked hard on that **no-crack** promise!
It truly is the Best Homemade Cheesecake you’ll ever pull out of your oven. It’s luxurious indulgence made simple.
Ingredients for Your Rich Cheesecake with Graham Cracker Crust
Okay, this is where we set the stage for that perfect texture we talked about. With a **new york cheesecake**, ingredient quality really matters, especially when it comes to the fat content. Do NOT try to use light cream cheese, okay? You won’t get that signature density. Also, please, please, make sure everything you are using for the filling has been sitting out for at least an hour or two until it’s beautifully room temperature. This is key to avoiding lumps that lead to cracks later!
You can find a great guide on working with butter in another post about butter pie crusts, but for this cheesecake, focus on the room temperature elements for the filling.
For the Buttery Graham Cracker Crust
We want a sturdy base that can support all that creamy filling. Press it down firmly—we need a solid foundation!
- 1 1/2 cups graham cracker crumbs (about 10 standard sheets)
- 1/4 cup granulated sugar (the small bit for the crust)
- 6 tablespoons unsalted butter, fully melted
For the Tangy New York Cheesecake Filling
Remember, room temp is your best friend here! Seriously, cold cream cheese and cold eggs are the enemy of a smooth batter. Giving those ingredients time to warm up ensures everything incorporates into that luscious, velvety smooth cheesecake we are aiming for.
- 4 (8-ounce) packages full-fat cream cheese, softened to room temperature (Use four blocks!)
- 1 1/2 cups granulated sugar (the main sugar for the filling)
- 1/4 cup all-purpose flour (just a little bit gives stability)
- 1 teaspoon vanilla extract
- 1/4 teaspoon salt
- 1 cup sour cream, room temperature (this is what adds the wonderful tang!)
- 4 large eggs, room temperature
How to Bake a Foolproof New York Cheesecake: Step-by-Step Instructions
Alright, here’s where we put all those perfectly tempered ingredients to work to create the signature **new york cheesecake** texture. Listen closely to these mixing and cooling steps—they are the *entire* secret sauce for that beautiful, tall, and crack-free finish! I know some folks try to get away without the water bath, like you can see for alternative methods here, but for the classic dense version, we need the steam!
This isn’t some fussy restaurant recipe, trust me. As Eleanor Vance, I built DeliceRecipe on the idea that classic American treats should be approachable. This recipe comes straight from the heart of that tradition, focusing on quality ingredients and foolproof methods that work, every single time, right in your own kitchen. If you’re looking for that classic New York Cheesecake experience, follow these steps exactly.
Preparing the Crust and Pan for the new york cheesecake
First up, let’s get that base right. After you press the crust mixture firmly into your 9-inch springform pan—make sure you pack it tight against the bottom and about an inch and a half up the sides—pop it in the fridge for a good 30 minutes. We want that **Rich Cheesecake with Graham Cracker Crust** to be cold and set before the wet filling hits it.
Now for the critical prep: Take heavy-duty aluminum foil—I mean *really* heavy duty—and wrap the outside bottom and sides of your springform pan at least twice. This is non-negotiable! It stops any rogue water from seeping in and ruining your gorgeous crust during the water bath.
Mixing the Dense Creamy Cheesecake Batter
Use your electric mixer on low speed—or a stand mixer if you have one—and beat that room-temperature cream cheese until it is absolutely dreamy smooth. Scrape those bowl sides down! It needs to look like silk before you add anything else. Next, slowly stream in the sugar and the flour, mixing just until it disappears. Then, add the sour cream, vanilla, and salt, scraping again.
Here’s the big rule for that **Dense Creamy Cheesecake**: Add the eggs one at a time, mixing on the absolute lowest speed only until the yellow yolk vanishes. I mean it—as soon as it’s incorporated, stop the mixer! Overbeating here whips in too much air, and that air expands when it bakes, leading straight to cracks. We are nurturing smoothness, not volatility!
The Cheesecake Water Bath Technique for a Tall Cheesecake Recipe
You need a larger roasting pan for this part—big enough to comfortably hold your foil-wrapped springform. Carefully pour your beautiful batter into the chilled crust. Now, place the cheesecake pan inside the roasting pan.
Start boiling your water *before* you assemble this. Carefully pour the hot water into the roasting pan until it comes about halfway up the sides of the foil-wrapped cheesecake pan. This steam bath is the key to the **Cheesecake Water Bath Technique**; it keeps the oven humid, helps the cheesecake bake evenly, and stops the edges from setting too fast—essential for that **Tall Cheesecake Recipe** height we want!
Baking and Slow Cooling for No Crack Cheesecake Tutorial
Bake at 350°F (175°C) for about 60 to 75 minutes. It’s done when the edges look set firm, but the center—maybe a two-inch circle right in the middle—still has a little wobble, like firm gelatin. This jiggle means it’s still moist inside!
This two-step cooling trick is what gives you that **No Crack Cheesecake Tutorial** success. First, turn the oven off. Prop the oven door open an inch or so—use a wooden spoon handle if you need to. Leave the cheesecake in there for a full hour. Don’t peek! Then, take it out of the water bath, carefully remove the foil, and let it cool completely on the counter before you even think about chilling it. Trust me on this slow goodbye!
Tips for a Velvety Smooth Cheesecake Success
Baking a show-stopping **new york cheesecake** is all about respecting the cream cheese. My absolute biggest piece of advice, which I learned the hard way with a few lumpy, cracked batches years ago, is ensuring every single dairy item—the cream cheese, the sour cream—is completely at room temperature. If they aren’t, you’re going to end up fighting the mixer trying to smooth out tiny cold lumps.
Also, I can’t stress this enough: after you add those eggs, mix like you’re trying not to wake a sleeping baby. Seriously, low speed, quick dips! Overmixing is the fast track to air bubbles, which equal cracks later, ruining that beautiful **Velvety Smooth Cheesecake** finish we worked so hard for. If you want more insight into what can go wrong, check out some great advice on creamy texture issues here. If you ever want to see how cream cheese works its magic in something savory, check out my cream cheese corn casserole!
Finally, when assembling the crust for this **Rich Cheesecake with Graham Cracker Crust**, really pack it down! A loose base causes sinking, which can stress the filling later. These little habits, like using room temperature ingredients and gentle mixing, separate a good cheesecake from a truly great one.
Making Variations on the Classic New York Cheesecake
Now, I know this recipe is spot-on for the most authentic, **tangy New York Cheesecake**, but sometimes you just want to switch things up, right? The beauty of this base is how incredibly stable it is, so you can definitely play around without worrying about it falling apart.
The key is to add any flavor elements *before* you add the eggs, just like we discussed about mixing gently. You want to keep that structure intact!
If you’re looking to add some richness, try this: melt about 4 ounces of high-quality dark chocolate until smooth—you can find a great example of rich additions on my turtle cheesecake post! Gently swirl that melted chocolate into about two-thirds of your already-mixed batter right before pouring it into the prepared pan. Don’t go crazy swirling; we just want those beautiful dark ribbons running through the filling.
For a brighter, summery feel, you can add a teaspoon of lemon zest right along with the vanilla extract. It just amps up that natural tanginess we love so much in a proper New York slice. You could also substitute the vanilla for almond extract if you prefer a warmer, nutty note throughout your dessert.
And honestly, the easiest way to make it new every time is with toppings! Once the cheesecake is chilled overnight, you can top it with almost anything. Fresh berries are classic, but a homemade dark cherry sauce or even a salted caramel drizzle makes it feel completely different. That buttery graham cracker crust holds up so well against slightly wetter toppings after it’s been properly rested.
Don’t overthink it! This recipe is strong enough to handle a little creative flair right on top or a gentle mix-in to the batter itself. Happy experimenting!
Storage and Reheating Instructions for your new york cheesecake
This is the part where patience pays off in the biggest way! You’ve done all the hard work—the mixing, the water bath, and that agonizing slow cooling process. Now, you absolutely cannot rush the chilling. This step is what transforms your baked dessert from a beautiful cake into that incredibly dense and creamy New York cheesecake people dream about.
You need to let it chill for a minimum of six hours, but honestly, if you can hold out until the next day, do it! Overnight is when the flavors really meld, and the texture firms up perfectly. It’s just cheating yourself to cut into it too soon.
Once it’s chilled through, gently remove the sides of the springform pan. Cover the whole thing loosely with plastic wrap or foil—don’t press it right onto the surface, or you risk disturbing any tiny imperfections on top. Store it in the fridge. It keeps wonderfully for up to five days! Because it’s such a rich dessert, I find it tastes best when you let a slice sit out on the plate for about 20 minutes before digging in. That little bit of warmth just softens that dense texture and brings out the tanginess from the sour cream.
If you want to freeze it? Yes, you can! Just make sure it’s fully chilled first. Wrap the entire cooled cheesecake tightly in plastic wrap, then wrap it again in foil to block out any freezer smells. You can freeze it like that for about a month. When you’re ready to eat, just transfer the whole package to the fridge overnight to thaw slowly. It tastes just as amazing when thawed slowly—it keeps that velvety smooth texture we are obsessed with!
Frequently Asked Questions About Making new york cheesecake
It’s natural to have questions when attempting a classic like this! We’ve all been there, staring anxiously at the oven door, hoping for that perfect rise. Here are a few things I hear most often when folks are trying to master **How to Make Perfect Cheesecake** right in their home kitchen. If you’ve already mastered the blending in my cream cheese pound cake, you know how important temperature is!
Can I skip the water bath when making new york cheesecake?
Oh, I really, really wouldn’t recommend it if your goal is that professional, dense, and totally crack-free finish. Think of the water bath as your insurance policy against disaster! That steam surrounding the pan keeps the temperature around the cheesecake super even. Without it, the edges cook way faster than the center, causing the whole thing to puff up unevenly and then collapse—or worse, crack—as it cools. For the ultimate bakery-style texture, that surrounding moisture is non-negotiable!
What is the secret to achieving a tall cheesecake?
This goes back to two things we talked about, and they both relate to controlling air. First, you need the right vessel. Make sure you are using a standard 9-inch springform pan, and don’t eyeball the fillings! Using the exact measurement helps ensure you get that beautiful, impressive height characteristic of the very **Best Homemade Cheesecake**.
Second, and this sounds counterintuitive, is *not* incorporating too much air while mixing. Remember how I stressed mixing the eggs only until they disappear? That’s because too much trapped air expands too aggressively in the heat, causing the center to rise too high too fast, which always leads to sinking or cracking later. A **Simple Ingredients Cheesecake** made correctly is all about gentle handling!
Estimated Nutritional Data for this Decadent Dessert Ideas
Now, I want to be super clear here, because while this **new york cheesecake** is one of my absolute favorite ways to treat myself—or my family—it is definitely an indulgence! The nutritional information provided below is just an estimate based on the standard ingredients I use in my kitchen, and it’s calculated per one generous slice, which is what you get out of a 9-inch cake.
If you use different brands of cream cheese or adjust the sugar in your crust slightly, those numbers are going to shift. Think of these figures as a good guideline for portion control rather than a strict lab report. Since we’re celebrating with **Decadent Dessert Ideas**, a little bit of indulgence is totally okay, especially when it’s made from scratch with love!
Before you cut into your masterpiece, remember that the best way to enjoy this dessert is well-chilled, maybe alongside one of my other favorite delicious dessert recipes!
- Serving Size: 1 slice
- Calories: 450
- Fat: 30g
- Saturated Fat: 18g
- Carbohydrates: 40g
- Sugar: 35g
- Protein: 8g
- Cholesterol: 150mg
See? Rich! That’s the beauty of using all that full-fat cream cheese for that classic, **dense creamy cheesecake** texture. It’s worth every bite.
Share Your Bakery Style Cheesecake at Home Success
Well, you did it! You successfully navigated the waters of baking the most iconic American dessert. Whether this is your first attempt at a serious baked cheesecake or you’re a seasoned pro, I am genuinely so excited for you to finally taste this rich, creamy slice of heaven. This **New York Cheesecake** is meant to be shared, celebrated, and enjoyed!
I truly want to know how it turned out for you. Did the water bath work its magic? Did you achieve that elusive, smooth, bakery-style topping that is totally crack-free? Please, come back here and drop a rating and a comment in the section below. Your feedback helps other home cooks gain the confidence to tackle this showstopper!
If you snapped a picture of your beautiful, tall creation—maybe you topped it with fresh berries or kept it perfectly classic—I’d absolutely love to see it on social media! Tag me so I can cheer you on. Seeing your successes is why I built DeliceRecipe in the first place; it’s about celebrating those moments when home cooking creates something magazine-worthy.
Thank you so much for trusting me with this classic recipe. I hope this magnificent dessert joins your table for many celebrations to come. If you are curious about my journey and why I focus so much on foolproof classics, you can read a bit more about me on the About Page. Happy baking, sweet friend!
PrintThe Ultimate Creamy New York Cheesecake Recipe (Foolproof, No-Crack)

Bake the best homemade New York Cheesecake with this foolproof recipe. Achieve the signature dense, rich, and creamy texture with a buttery graham cracker crust and a guaranteed no-crack finish.
- Prep Time: 25 min
- Cook Time: 75 min
- Total Time: 9 hours 40 min
- Yield: 12 servings 1x
- Category: Dessert
- Method: Baking
- Cuisine: American
- Diet: Vegetarian
Ingredients
- 1 1/2 cups graham cracker crumbs
- 1/4 cup granulated sugar (for crust)
- 6 tablespoons unsalted butter, melted
- 4 (8-ounce) packages full-fat cream cheese, softened to room temperature
- 1 1/2 cups granulated sugar (for filling)
- 1/4 cup all-purpose flour
- 1 teaspoon vanilla extract
- 1/4 teaspoon salt
- 1 cup sour cream, room temperature
- 4 large eggs, room temperature
Instructions
- Prepare the crust: Combine graham cracker crumbs, 1/4 cup sugar, and melted butter. Press firmly into the bottom and 1 1/2 inches up the sides of a 9-inch springform pan. Chill the crust for 30 minutes.
- Preheat your oven to 350°F (175°C). Wrap the outside of the springform pan tightly in heavy-duty aluminum foil to prepare for the water bath.
- Beat the cream cheese in a large bowl with an electric mixer until completely smooth. Scrape down the sides of the bowl often.
- Gradually add the 1 1/2 cups sugar and flour to the cream cheese mixture, beating until just combined. Mix in the vanilla extract and salt.
- Beat in the sour cream until smooth. Add the eggs one at a time, mixing on low speed after each addition only until the yolk disappears. Do not overmix the batter.
- Pour the filling over the chilled crust. Place the wrapped springform pan into a larger roasting pan. Carefully pour hot water into the roasting pan until the water reaches halfway up the sides of the springform pan (this is the water bath technique).
- Bake for 60 to 75 minutes. The edges should look set, but the center 2 inches should still jiggle slightly when the pan is gently nudged.
- Turn off the oven, but leave the cheesecake inside with the oven door propped open slightly (about 1 inch) for 1 hour. This slow cooling prevents cracking.
- Remove the cheesecake from the water bath and foil. Let it cool completely on a wire rack at room temperature.
- Once cool, cover the cheesecake loosely and refrigerate for at least 6 hours, or preferably overnight, before serving.
Notes
- Use room temperature ingredients for the filling; this prevents lumps and ensures a creamy texture.
- Do not overbeat the batter once the eggs are added; excess air causes cracks during baking.
- For a tall cheesecake, ensure your springform pan is 9 inches and use the full amount of filling specified.
Nutrition
- Serving Size: 1 slice
- Calories: 450
- Sugar: 35
- Sodium: 300
- Fat: 30
- Saturated Fat: 18
- Unsaturated Fat: 12
- Trans Fat: 0.5
- Carbohydrates: 40
- Fiber: 1
- Protein: 8
- Cholesterol: 150