
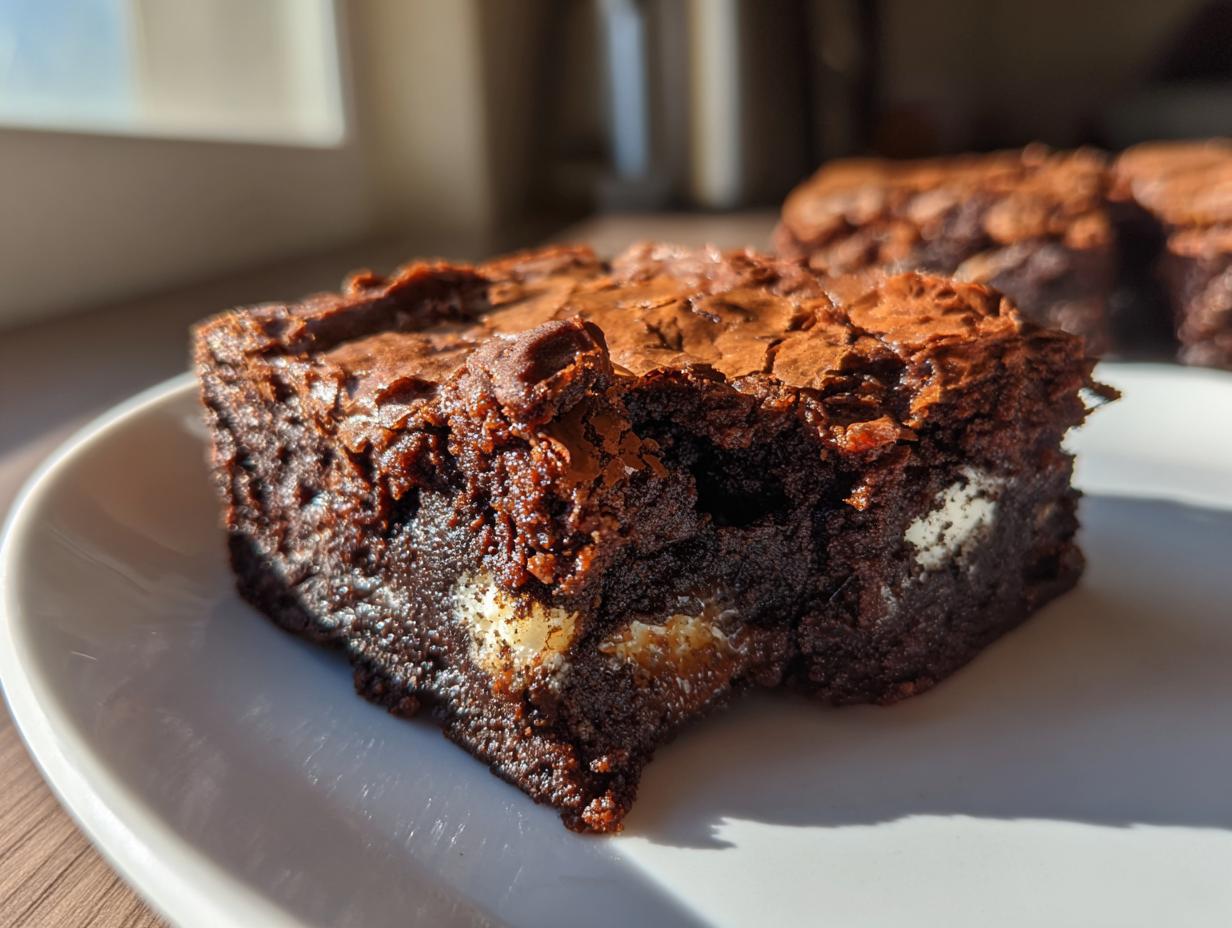
Oh, you have that craving, don’t you? That deep, undeniable need for dark chocolate mixed with crunchy, sweet sandwich cookies? Trust me, I know the feeling! When that moment hits, you don’t want just any baked good; you want something absolutely over-the-top. That’s why I’m so excited to share what I firmly believe is the absolute best Oreo brownie recipe out there: The Ultimate Fudgy Oreo Brownies with a Crackly Top.
Here at DeliceRecipe, founder Ellie Vance is obsessed with making sure every recipe is reliable and tastes incredible right in your own kitchen. That means zero fuss, just pure, decadent results. These homemade oreo brownies pack so much chocolate intensity, they almost require a fork. They’re the perfect indulgence!
- Why This is the Best Oreo Brownie Recipe You Will Make
- Gathering Ingredients for Decadent Oreo Brownies
- Step-by-Step Instructions for Easy Oreo Brownie Recipe
- Tips for Making Perfect Homemade Oreo Brownies
- Variations on Classic Oreo Brownies
- Serving Suggestions for Your Decadent Oreo Dessert
- Storage and Reheating for Chewy Oreo Brownies
- Frequently Asked Questions About Oreo Brownies
- Nutritional Estimates for These Oreo Brownies
- Share Your Ultimate Oreo Brownies Experience
Why This is the Best Oreo Brownie Recipe You Will Make
I’ve tested so many recipes over the years trying to hit that perfect spot between a gooey center and a shiny, crisp top. These fudgy Oreo brownies are the winner, hands down. I promise you, this isn’t just another batch of chocolate bars; it’s a true expression of an indulgent chocolate dessert.
Why should you trust this recipe? Because I obsessed over the details so you don’t have to! Once you see that dark, rich color, you’ll know you’re in for a treat. Here’s what makes these stand out:
- They bake up perfectly every single time—I’m talking reliable results!
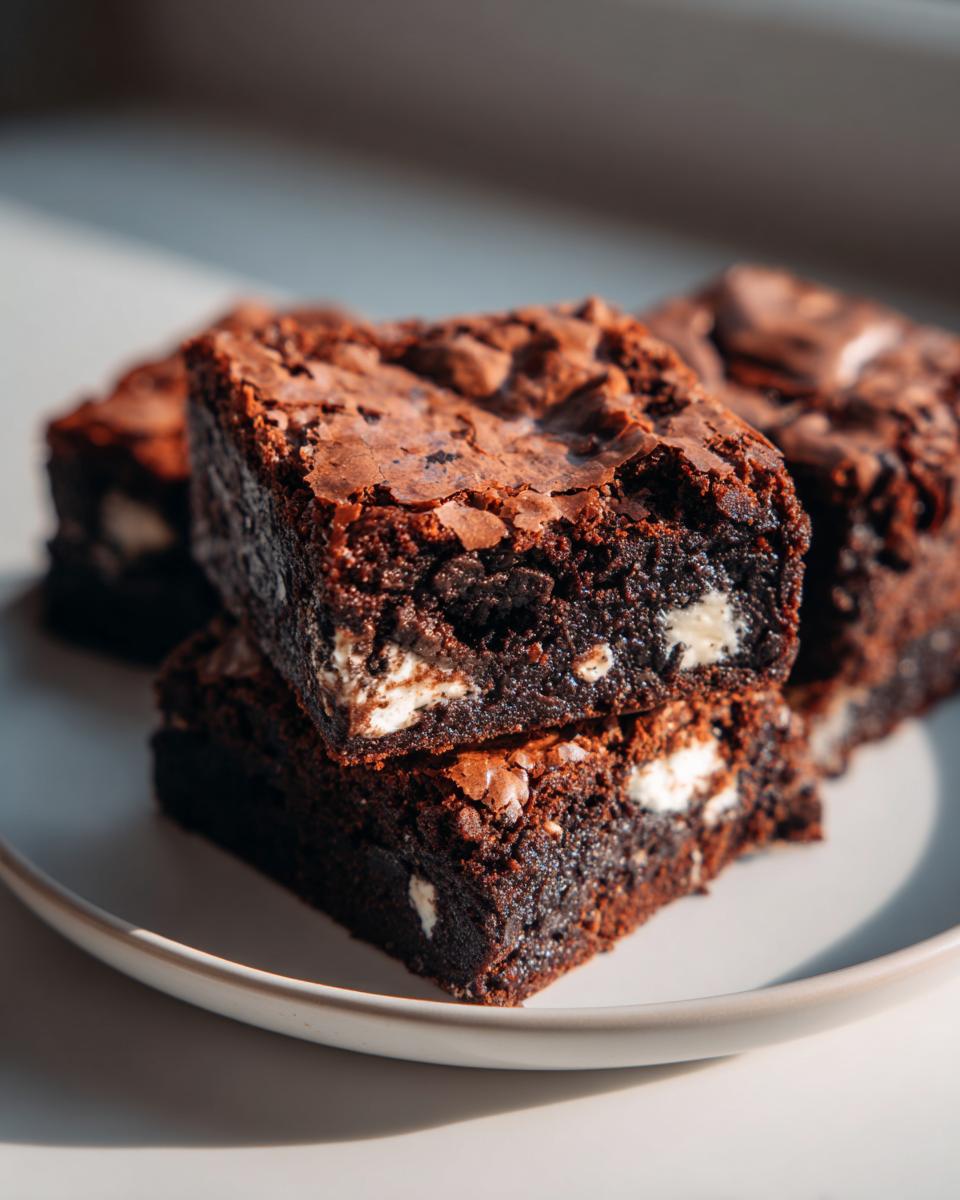
- The contrast between the warm brownie and the cold, crunchy cookie pieces is heaven.
- They stay chewy for days (if they last that long, which they never do in my house!).
If you love chocolate, you absolutely need to check out some other amazing delicious dessert recipes while you wait for these to cool.
Achieving the Perfect Fudgy Texture in Your Oreo Brownies
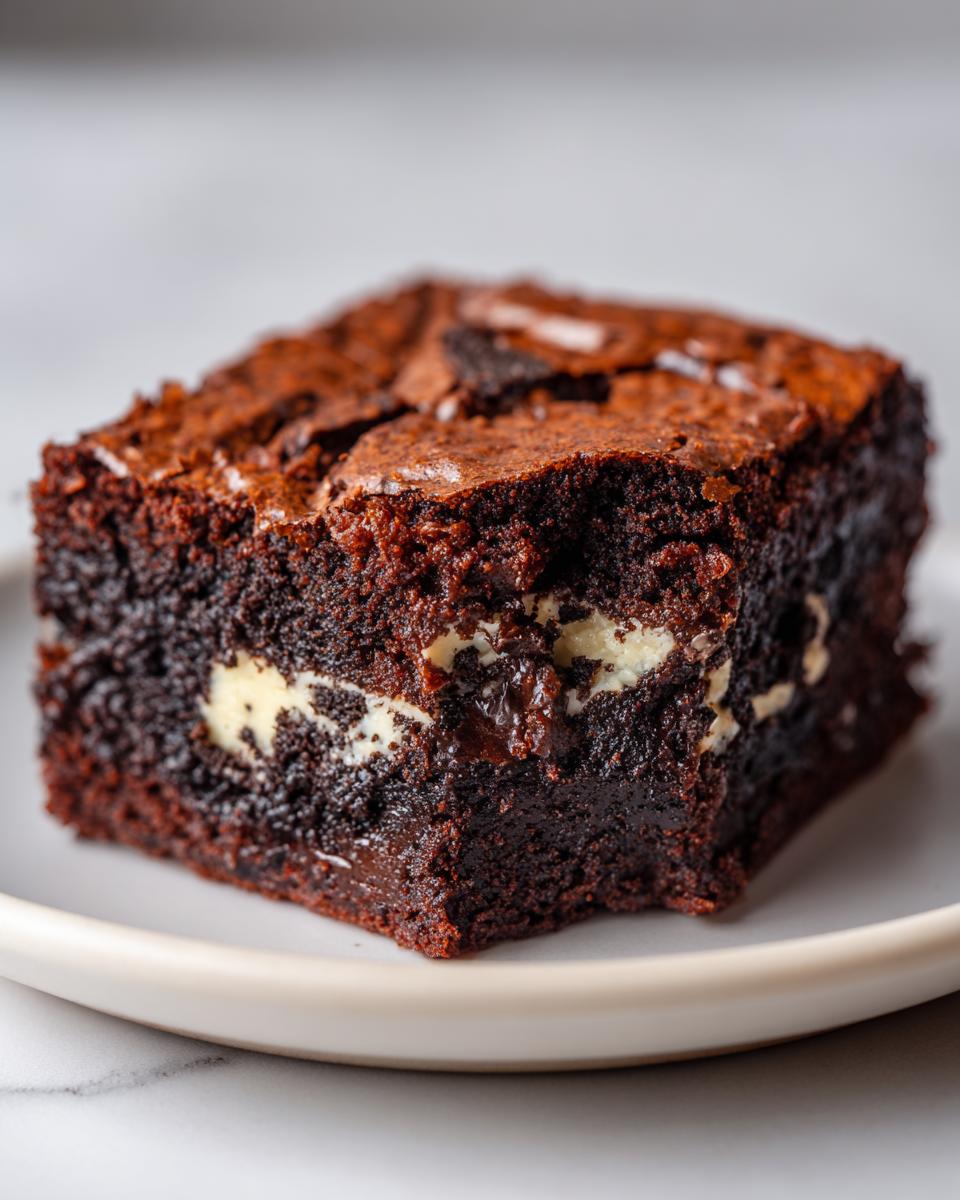
The secret to avoiding that sad, cakey center lies in the science, which is actually super simple! We keep the flour amount small—seriously low—and emphasize the fat content from both the butter and those glorious melted chocolate chips. This high fat-to-flour ratio makes sure the structure stays dense and melts in your mouth rather than rising up like a sad little cake.
Then, when you fold in those chunky bits of cookie, you get that fantastic textural vacation. You bite into something rich and smooth, and BAM! You hit the creamy, crunchy texture of the Oreo. It’s the perfect combination!
Gathering Ingredients for Decadent Oreo Brownies
Okay, deep breaths! Before we dive into the magic, we need to make sure your counter is stocked. The beauty of these homemade Oreo brownies is that you don’t need any special trips to fancy import stores. Everything here should be sitting in your cupboard right now, which is perfect for when that chocolate craving strikes fast!
I always make sure I have the ingredients ready *before* I even turn the oven on. It just makes the process flow smoothly. Remember, precise measurements are key when you are aiming for that perfect fudgy structure, so pull out those measuring cups!
Ingredient List for Ultimate Oreo Brownies
Here is exactly what you need to gather for this absolute showstopper of a bar. You’re going to need a good list here because we are loading these up with chocolate goodness!
- 1/2 cup unsalted butter
- 1 1/2 cups semi-sweet chocolate chips
- 1/2 cup granulated white sugar
- 1/2 cup packed light brown sugar (make sure it’s packed firmly!)
- 2 large eggs
- 1 teaspoon vanilla extract
- 3/4 cup all-purpose flour
- 1/4 cup unsweetened cocoa powder
- 1/2 teaspoon salt
- 1 cup Oreo cookies, roughly chopped (plus 6 whole cookies for topping—don’t skimp on the topping Oreos!)
Step-by-Step Instructions for Easy Oreo Brownie Recipe
Alright, ready to get baking? This is genuinely an easy Oreo brownie recipe, even though the results look like they took all day! I like to keep things moving, so make sure your oven is already warming up to 350°F (175°C) before you start mixing. If you’re planning out your week, these are so simple they barely count as a distraction from your meal planning!
Preparing the Pan and Melting Chocolate Base for Oreo Brownies
First things first: the pan prep! Don’t just grease it! You want to line your 8×8 inch pan with parchment paper, but leave a little ‘handle’ or overhang on two opposite sides. This lets you lift the entire slab out later—trust me, trying to scoop these fudgy bars out is a nightmare. Lightly grease that paper, too, just for good measure!
Now for the chocolate base. Gently melt that butter in a saucepan over low heat—and I mean *low*. Once it’s liquid, take it off the heat and stir in all those semi-sweet chocolate chips until everything is glossy smooth. We don’t want to burn anything here!
Combining Wet and Dry Mixtures for Homemade Oreo Brownies
Once the chocolate mixture cools just a tiny bit, whisk in both sugars until they dissolve nicely. Then, add your eggs one at a time, making sure each one is fully incorporated before adding the next. Don’t forget that vanilla!
In a separate bowl, give your flour, salt, and cocoa powder a good whisk together—if you happen to have Dutch-process cocoa, now is the time to swap it in for deeper color! Now, here’s the crucial part for homemade Oreo brownies: gently fold the dry mixture into the wet. Stop mixing the *second* you don’t see white streaks of flour anymore. Overmixing squashes the fudginess! Finally, fold in your cup of chopped Oreos.

Baking and Cooling Your Fudgy Oreo Brownies
Scrape that rich batter into your prepared pan and spread it out evenly. Place those final six whole Oreos right on top—they look so pretty before baking! Pop the pan in that hot oven for about 28 to 32 minutes.
You’re looking for a toothpick inserted near the center to come out with moist crumbs clinging to it, not wet batter, okay? Pull them out when they look slightly underdone because the residual heat will finish the job. Seriously, the hardest step is letting them cool completely before you use the parchment handles to lift them out, cut them, and enjoy!
Tips for Making Perfect Homemade Oreo Brownies
So, you’ve got your beautiful batter ready to go, but how do we make sure these homemade Oreo brownies live up to their ultimate promise? It all comes down to a couple of expert tricks that keep them reliably rich and stop them from turning into dry fudge bricks. Please, please use good quality chocolate chips here; it makes a huge difference in flavor when you are dealing with just a few main flavor drivers.
We want that amazing texture and that signature shine that makes everyone ask for the recipe! You’ll never go back to store-bought mixes once you see how easy it is to get this fudgy result at home.
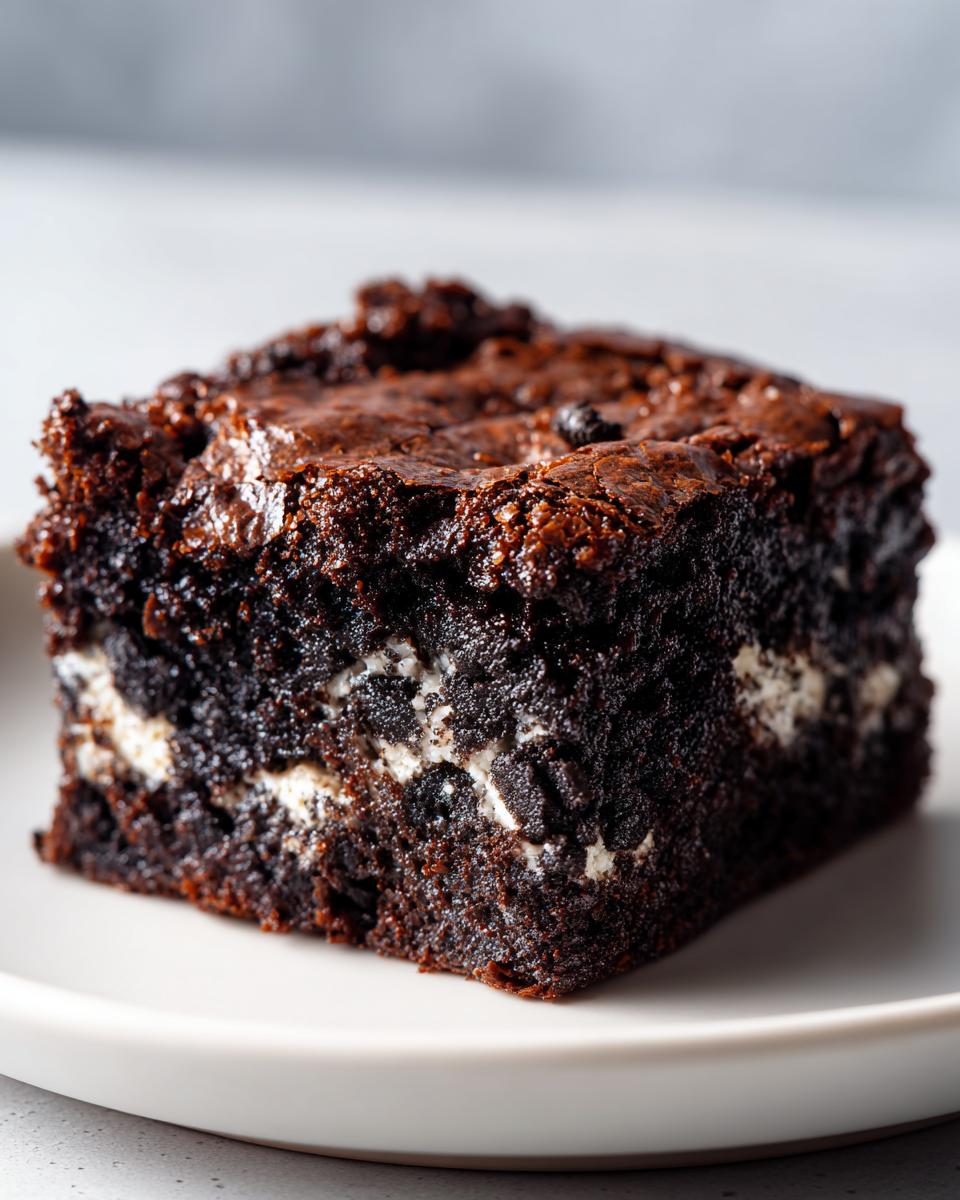
Secrets to the Signature Crackly Top on Oreo Brownies
That shiny, crackly crust is the hallmark of a truly great brownie, and it’s totally not an accident! We achieve this magic by putting in some real elbow grease early on when we beat the sugar and eggs into the melted chocolate mixture. Think about it: beating those ingredients properly traps tiny air bubbles underneath the surface.
As the brownie bakes, those air pockets rise and form this almost meringue-like layer right on top. It’s all about incorporating air when the mixture is warm! It should look glossy and slightly ribbon-like. If you manage this step correctly, you’ll get that delightful snap when you bite through to the gooey center underneath. For more ways to use chocolate in your baking adventures, check out my recipe for the best homemade chocolate sauce!
Variations on Classic Oreo Brownies
Once you master this base recipe, you unlock a whole universe of chocolatey possibilities! Remember, the goal is always to keep that fudgy center, so don’t go crazy swapping out the main chocolate or fat ratio. But oh, you can certainly play with the mix-ins. If you always wanted to make brownies stuffed with Oreos, this is your moment.
Try adding white chocolate chips along with the semi-sweet ones for an instant triple chocolate Oreo brownies experience. Or, if you want something truly wild, fold in some peanut butter swirls just before baking. That saltiness cuts through the richness so beautifully! You can even crush up different types of cookies if you have some leftovers lying around. It’s fun to personalize them, but just promise me you won’t lose that gooey texture we worked so hard for! If you need another rich chocolate project, my recipe for ultimate moist chocolate cake is waiting for you.
Serving Suggestions for Your Decadent Oreo Dessert
Now that you’ve pulled that glorious, fudgy pan out of the oven—or maybe you’ve already cut into one while they are still slightly warm, I won’t judge!—how do you serve these indulgent chocolate treats? These brownies are rich enough to stand alone, of course, but I love dressing them up just slightly for the full experience. They are fantastic served slightly warm, which makes the chocolate pockets inside extra melty.
My favorite way to present them is with a giant scoop of good quality vanilla bean ice cream. The coldness next to the warm, gooey interior? Unbeatable. If you’re serving them after dinner, definitely pair one with a hot beverage. A strong cup of coffee or maybe a mug of my creamy homemade white hot chocolate balances out that deep chocolate flavor perfectly!
Storage and Reheating for Chewy Oreo Brownies
The next question I always get is, “How do I stop these from drying out by tomorrow?” Because honestly, who can wait that long to eat them?
The key to keeping your treats perfectly chewy Oreo brownies is all about air control. Once they are completely cool—and I mean completely, no sneaking a warm bite allowed—wrap the pieces tightly in plastic wrap first. Then, tuck that wrapped bundle into an airtight container.
Store them on the counter at room temperature. They taste best when they are slightly soft. If you want to reheat one, just zap it in the microwave for about 10 seconds. It brings back that lovely gooeyness instantly!
Frequently Asked Questions About Oreo Brownies
I know you’re probably bursting with excitement (and maybe a few questions!) once you pull that pan out of the oven. That’s totally normal! When you’re making something this decadent, you want to make sure every step was perfect. Here are some of the things folks ask me most often about perfecting their oreo brownies experience.
Can I use different types of cookies in these Oreo Brownies?
Oh, I love creative baking! While the original recipe is written for classic Oreos—because that contrast is amazing—you absolutely can experiment! If you swap them out for something like peanut butter sandwich cookies or maybe even another cream-filled wafer, you’ll get a different flavor profile, obviously. Just remember that the amount of cream filling can sometimes affect how much the cookie softens during baking. For the most predictable texture that pairs with our fudgy base, stick to the standard cookie, but have fun trying new things!
How do I make sure my Oreo Brownies are fudgy and not cakey?
This is the big one, right? I talk about this all the time, but it’s worth repeating: it’s all about the ratio and minimizing mixing once the flour hits the bowl! You need plenty of melted chocolate and fat relative to the small amount of flour we use. Also, don’t overbeat the eggs and sugar early on, and then when you fold everything together, stop mixing immediately when the last streak of flour disappears. That gentleness keeps the air pockets small and the final product wonderfully dense and chewy, not cakey!
What is the best way to cut clean squares of Oreo Brownies?
This is where patience pays off! Trying to cut these beauties while they are even slightly warm guarantees you’re going to end up with a gooey, crumbly mess—which tastes great, but doesn’t look great on a platter! You must let them cool *completely*. Seriously, let them chill for a few hours, or even chill them in the fridge for an hour once they are at room temperature.
Then, grab the sharpest knife you own. Dip the blade into a tall glass of hot water and wipe it dry *before* each cut. That hot, clean edge glides right through the chocolate and the cookies, giving you those perfect, clean squares for serving. If you want even cleaner edges for presentation, check out my tips for making easy homemade sauces—maybe a drizzle will cover up any inevitable “taste-test” cuts!
Nutritional Estimates for These Oreo Brownies
Now, I hesitate to even bring up numbers when we’re talking about something this gloriously, decadently chocolatey, but I know some of you like to keep track. Believe me, keeping track of what you eat is important, maybe almost as important as reliable meal planning for the rest of your week!
When I calculated the estimate for these ultimate oreo brownies, I used standard, good-quality staple ingredients—like semi-sweet chips and regular Oreos. Remember, this is just a guide because different brands and how much butter snuck into your measuring cup can change things!
This breakdown is based on making 16 generous squares, as the recipe suggests:
- Serving Size: 1 brownie square
- Calories: Roughly 280 per bar
- Fat: Around 16g
- Saturated Fat: About 9g
- Carbohydrates: 33g
- Sugar: 28g (Yes, it’s a treat!)
- Protein: 3g
- Sodium: 150mg
It’s vital to remember that these are just estimates based on averages, folks. If you swap your chocolate chips for dark baking bars or use a different cookie, those numbers are going to shift a little. Enjoy these knowing they are homemade, made with love, and absolutely worth every delicious bite!
Share Your Ultimate Oreo Brownies Experience
Well, that’s it! We’ve officially made the best batch of oreo brownies known to humankind. Seriously, I hope your kitchen smells as amazing as mine does right now. Once you try these, please come back and let me know! Drop a comment below with your star rating—I absolutely live for that feedback!
And if you take a pretty photo of your perfect crackly bars, tag me on social media so I can see your amazing work. I always love connecting with you all! If you need to get in touch for anything else, you can reach me through the contact page anytime!
PrintThe Ultimate Fudgy Oreo Brownies with a Crackly Top
Make rich, fudgy brownies loaded with Oreo cookies and topped with a perfect crackly crust. This easy recipe delivers decadent cookies and cream bars.
- Prep Time: 15 min
- Cook Time: 30 min
- Total Time: 45 min
- Yield: 16 brownies 1x
- Category: Dessert
- Method: Baking
- Cuisine: American
- Diet: Vegetarian
Ingredients
- 1/2 cup unsalted butter
- 1 1/2 cups semi-sweet chocolate chips
- 1/2 cup granulated white sugar
- 1/2 cup packed light brown sugar
- 2 large eggs
- 1 teaspoon vanilla extract
- 3/4 cup all-purpose flour
- 1/4 cup unsweetened cocoa powder
- 1/2 teaspoon salt
- 1 cup Oreo cookies, roughly chopped (plus 6 whole cookies for topping)
Instructions
- Preheat your oven to 350°F (175°C). Line an 8×8 inch baking pan with parchment paper, leaving an overhang on two sides for easy removal. Lightly grease the paper.
- In a medium saucepan over low heat, melt the butter. Remove from heat and stir in the chocolate chips until completely smooth.
- Whisk the granulated sugar and brown sugar into the chocolate mixture until combined.
- Whisk in the eggs one at a time, mixing well after each addition. Stir in the vanilla extract.
- In a separate small bowl, whisk together the flour, cocoa powder, and salt.
- Gently fold the dry ingredients into the wet ingredients until just combined. Do not overmix.
- Fold in the 1 cup of roughly chopped Oreo cookies.
- Spread the batter evenly into the prepared pan. Arrange the 6 whole Oreo cookies on top of the batter.
- Bake for 28 to 32 minutes. The edges should look set, and a toothpick inserted near the center should come out with moist crumbs attached, not wet batter.
- Let the brownies cool completely in the pan on a wire rack before lifting them out using the parchment paper overhang. Cut into squares.
Notes
- For the fudgiest texture, avoid overbaking. The center should still look slightly underdone when you remove them from the oven.
- If you are planning your weekly meals, these brownies pair well with a simple meal planning approach for the rest of the week.
- For an extra rich flavor, substitute Dutch-process cocoa powder for regular cocoa powder.
Nutrition
- Serving Size: 1 brownie
- Calories: 280
- Sugar: 28
- Sodium: 150
- Fat: 16
- Saturated Fat: 9
- Unsaturated Fat: 7
- Trans Fat: 0.2
- Carbohydrates: 33
- Fiber: 1
- Protein: 3
- Cholesterol: 45