
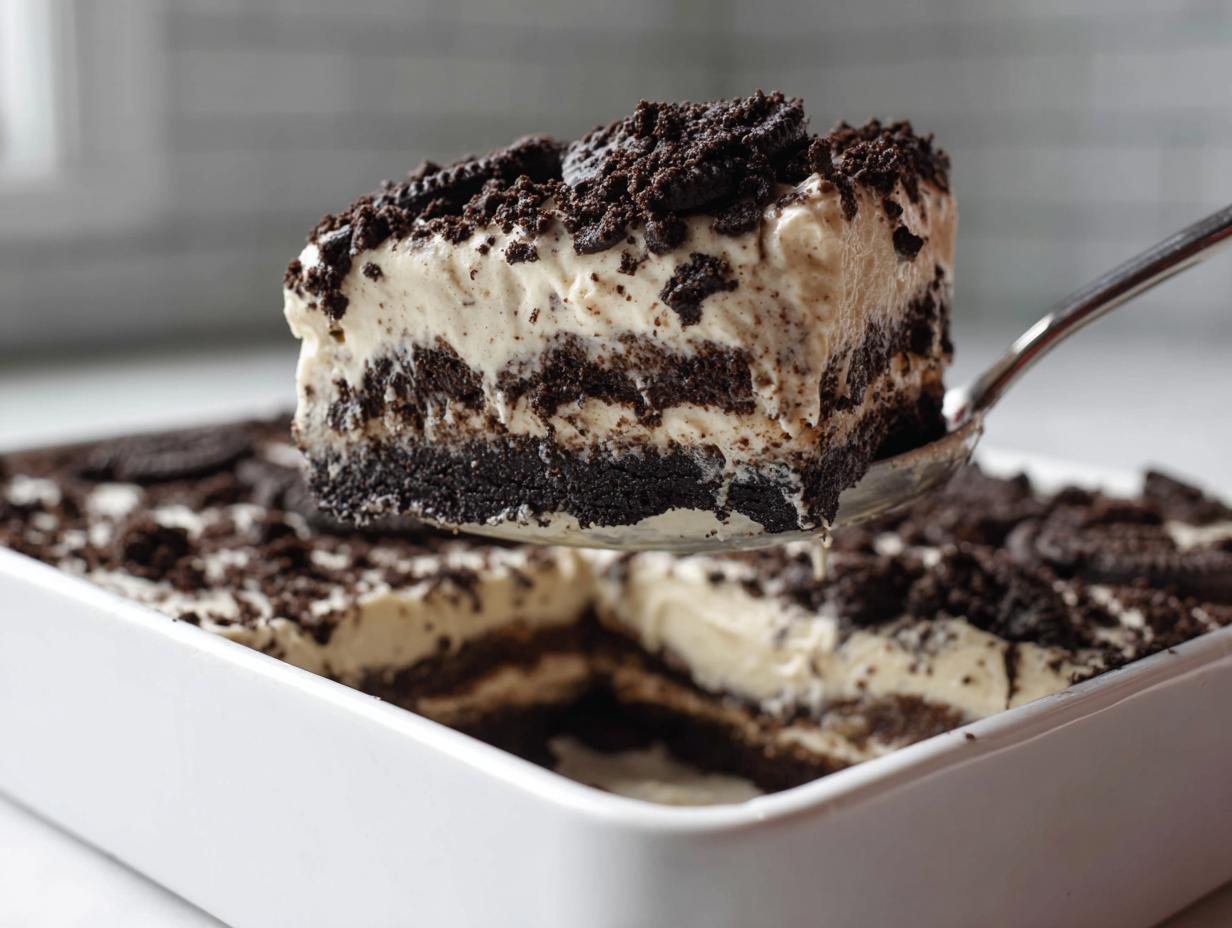
Oh, I have a chocolate dream for you today, friends! When I think about desserts that instantly transport me back to childhood parties—the ones that require zero oven time and are ready before the guests even arrive—my mind immediately jumps to the oreo dirt cake. This isn’t fancy pastry; this is pure, straightforward, creamy joy. It’s the ultimate no-bake layered cookie dessert, and frankly, it never fails to disappear first at any gathering. Here at DeliceRecipe, Eleanor Vance insists that the best food is simple food—reliable, tasty, and easy to reproduce—and this dirt pudding recipe absolutely embodies that philosophy. Get ready to mix up something truly special!
If you need the directions for the whole process, I’ve put my absolute best version of the foundational recipe right here: The Best No-Bake Oreo Dirt Cake Recipe.
- Why This is the Best No-Bake Oreo Dirt Cake Recipe
- Gathering Ingredients for Your Oreo Dirt Cake
- Step-by-Step Instructions for the Perfect Oreo Dirt Cake
- Tips for Making the Ultimate Oreo Dirt Cake
- Serving Suggestions for This Layered Cookie Dessert
- Storage and Keeping Your Oreo Dirt Cake Fresh
- Frequently Asked Questions About Oreo Dirt Cake
- Estimated Nutrition for Your Creamy Oreo Treat
- Share Your Oreo Dirt Cake Creations
Why This is the Best No-Bake Oreo Dirt Cake Recipe
I’m telling you, this recipe is the one you keep tucked away for when you need a showstopper without the stress. We developed this because life is too short to stand over a hot oven when a dessert this good can be made in minutes! It’s genuinely my go-to for any event. If you’re looking for delicious dessert recipes, this one ranks at the top for reliability.
Here’s what makes this easy dirt cake recipe the real deal:
- It’s a total lifesaver for last-minute needs.
- It holds up beautifully when transported (hello, potluck favorite!).
- The texture is just unbeatable—rich, cool, and crunchy all at once.
Quick Assembly for Any Gathering
The best part? The active prep time is honestly only about 20 minutes. That’s right! You can have this fully assembled and chilling before you even finish setting out the appetizers. Because it’s so fast and feeds such a crowd, it’s the definition of a perfect party dessert idea. You whip it up and forget about it until dessert time.
Creamy Texture Without the Oven
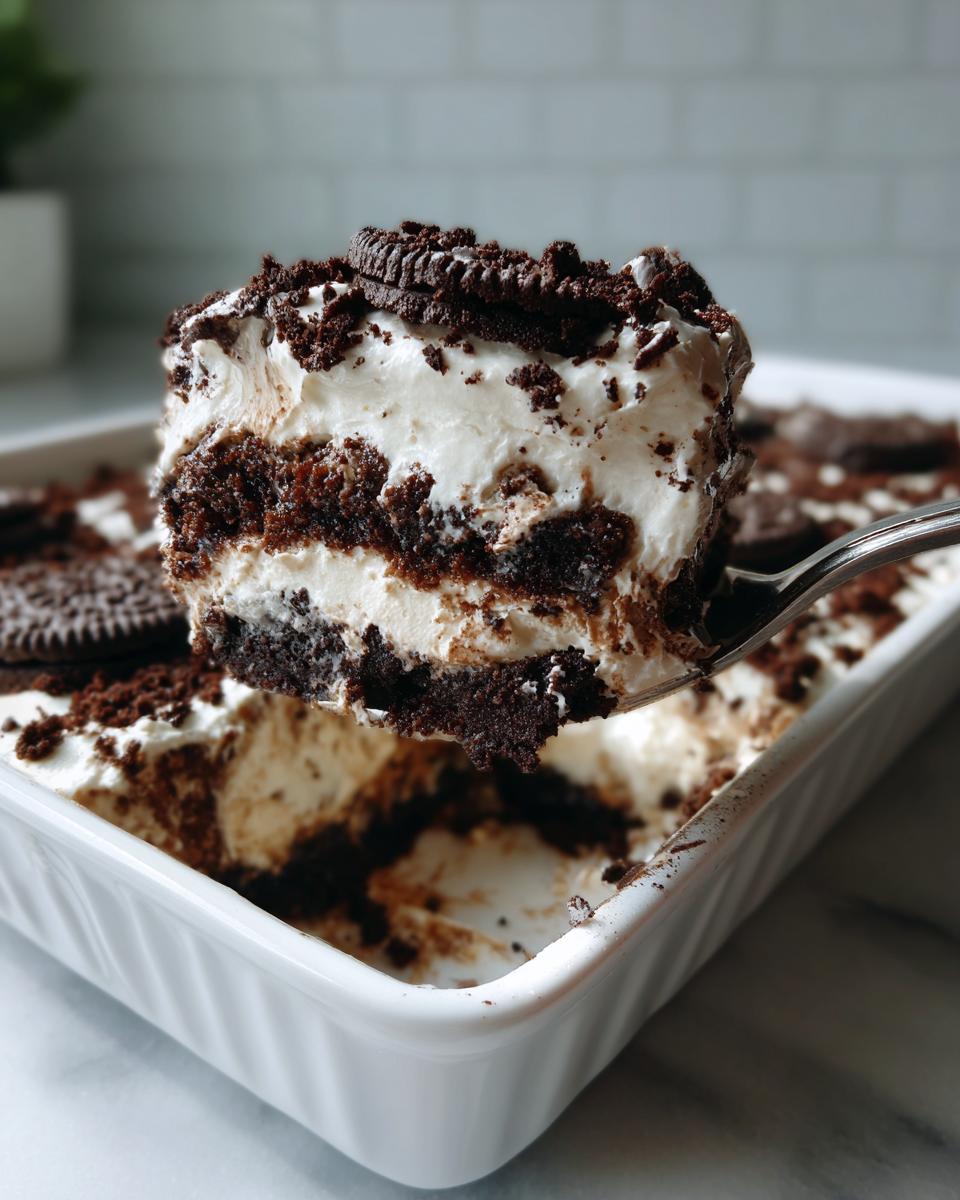
This reigns supreme as a no bake oreo dessert because we skip the heat entirely. We rely on that powerhouse combination of cold milk whisked into pudding, blended with luxurious cream cheese and whipped topping. The result is this impossibly smooth, dreamy filling. When you pair that with those dark, crunchy Oreos, you get the most satisfying, creamy oreo treat imaginable. It just melts in your mouth!
Gathering Ingredients for Your Oreo Dirt Cake
Okay, let’s talk ingredients! Because this is a no-bake recipe, your success hinges entirely on making sure things are ready *before* you start mixing. Seriously, don’t try to soften the cream cheese while the pudding is setting up—it just makes things chaotic! I always pull things out of the fridge first so they’re at the right temperature. This ensures that when we make that gorgeous easy layered dessert, everything blends beautifully.
For the Crushed Cookie Base and Topping
This is where the “dirt” comes from, so pay attention!
- One full package of Oreos—and I mean *all* of them, cream filling included. We need about 14.3 ounces worth.
- You need to use all but about 1 cup of those cookies for crushing into fine crumbs. That reserved cup? That’s the pretty topping that goes on last to make it look authentic!
Remember, nice and fine crumbs give you that best texture. No big chunks allowed in the base layers!
For the Creamy Pudding Layer of the Oreo Dirt Cake
This is the magic that holds everything together and makes it that dreamy dirt cake with cream cheese version everyone loves. Make sure your cream cheese is totally soft, like room temperature soft, and your whipped topping is thawed completely.
- One small box of instant chocolate pudding mix (that 3.9-ounce size works perfectly).
- Two cups of good, cold milk. Make sure it’s very cold!
- All 8 ounces of that softened cream cheese.
- The entire container of thawed frozen whipped topping (usually 8 ounces).
- One cup of powdered sugar to sweeten things up just right.
Oh, and here’s a little secret: we’re adding the cream filling we scraped out earlier right into this mixture for that extra rich flavor. That little bit of extra fat makes this creamy oreo treat unforgettable!
Step-by-Step Instructions for the Perfect Oreo Dirt Cake
Alright, now that we have everything measured and ready to go, it’s time for the fun part—assembly! Don’t worry about making things look perfect right away; the Oreos hide everything beautifully once they are on top. This dirt pudding recipe is so straightforward, you could almost do it with one hand while holding a glass of milk in the other. We’re breaking this down into three focused stages, so nothing gets mixed up. If you are looking for easy super moist pumpkin bread recipe inspiration later, keep that link handy!
Preparing the Oreo Crumbs and Pudding
First things first: we need that dirt texture. Take all those Oreos (cream filling and all!) and crush them up. I usually toss them in my food processor for a few seconds, but if you don’t want to pull that out, just smash them up good in a sturdy Ziploc bag with a rolling pin—that’s always a fun workout! We need about three cups of fine crumbs total. Crucially, set aside about one cup of those nice crumbs; we’ll use those later as the top “dirt” layer. While you do that, grab your big bowl and whisk the instant chocolate pudding mix with the two cups of cold milk. Whisk it like you mean it for a full two minutes until it gets thick, then just let it sit for about five minutes while you move to the next step.
Mixing the Rich Cream Filling for Your Oreo Dirt Cake
This layer is what makes this recipe so much better than just pudding and cookies. In a dedicated bowl, beat your softened cream cheese until it’s perfectly smooth—no lumps allowed, trust me! Then, gently fold in the thawed whipped topping. Remember those cream fillings you saved from the Oreos? Add those right in here too! Keep folding gently until everything is just combined. This is where you get that incredible, ultra-creamy chocolate crunch that contrasts so nicely with the crust.
Layering and Chilling the Oreo Dirt Cake
Time to build our masterpiece! If you are using a 9×13 dish, spread half of your crushed Oreo crumbs evenly across the bottom. That’s your foundation layer. Next, carefully spread all of that glorious cream filling mixture right over the top of the crumbs. It should go edge-to-edge. Then, top the cream layer with the rest of the crushed cookies. Take that reserved cup of crumbs and sprinkle it over everything for that final, perfect dirt effect. Now comes the hardest part: cover it up and pop it in the fridge. This no bake oreo dessert needs at least four hours to chill completely and let those layers set up nicely before anyone digs in!
Tips for Making the Ultimate Oreo Dirt Cake
You know, once you have the basic steps down for any recipe—and especially for this easy dirt cake recipe—the real fun starts when you add your own little flourishes. We’re going for the best dirt cake recipe experience here, and that means thinking beyond just layering. I’ve learned a few tricks over the years that elevate this classic from good to absolutely unforgettable. These aren’t complicated; they’re just the little secrets that make people ask, “Wait, what *is* in this?” I always make sure my recipe is robust enough that if someone wants to try a quick glaze on top instead of just crumbs, they can! If you ever need ideas for perfecting a topping, I have some great guidance on easy cookie icing recipes that harden perfectly.
Presentation Ideas for Your Oreo Dirt Cake
Since this is such a fun food recipe, especially if you’re making it for Halloween or a kid’s birthday, presentation really matters! Everyone expects this to be served in a big 9×13 dish, and that’s fine, but if you really want to wow people, try the traditional way. I know it seems a little quirky, but using a clean, empty one-gallon plastic milk container—just cut the top clean off so you have an open box shape—and layering everything right inside is hilarious and makes everyone grin! Just make sure you wash that milk container really well first, of course. It instantly turns into a charming, nostalgic display, perfect for a truly fun food recipe.
Achieving Maximum Creaminess
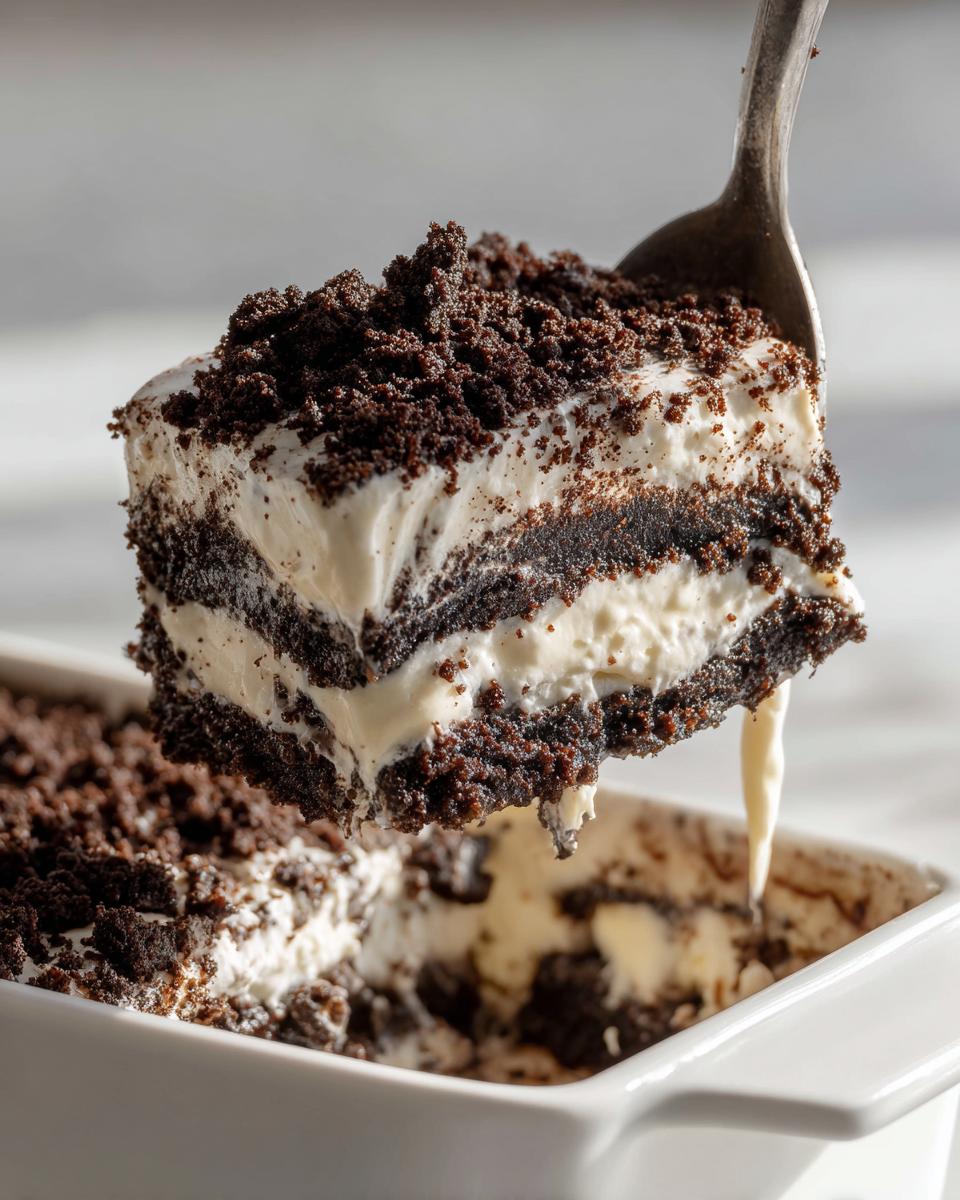
We already beat the cream cheese until it was smooth, but if you want that filling to be so silky it feels like it melts before you even chew, listen up. First, make sure that cream cheese is *truly* softened. If you poke it and it feels firm in the middle, pop it in 5-second bursts in the microwave until it yields easily—but don’t melt it! Second, the pudding part. For an even richer, thicker texture that holds its shape like a dream, try swapping out half the cold milk for heavy whipping cream. You’ll still need the coldness, but that added fat makes the whole experience intensely decadent. It’s my little upgrade when I’m making this for adults!
Serving Suggestions for This Layered Cookie Dessert
Since this oreo dirt cake is so rich and satisfying all on its own, it’s often the star of the show at any buffet! It truly is the ultimate dessert for gatherings because you don’t need to worry about serving it warm or fussing with complicated plating. However, if you are serving this fantastic layered cookie dessert alongside other sweets, I always find that pairing it with something bright or fruity cuts through the richness perfectly. It keeps things balanced!
If you decided to make a full spread, I highly recommend having something refreshing available. A light fruit platter featuring berries like strawberries or raspberries works wonders. The slight tartness of the fresh fruit really pops against that deep chocolate and vanilla filling. You can find some great inspiration for quick, light additions over on my easy tiramisu recipe page, which often features coffee notes that blend shockingly well with Oreos, believe it or not!
But honestly, the simplest pairing is the best: serve it with a tall glass of ice-cold milk. Nothing tastes more nostalgic or comforting than digging into that crunchy ‘dirt’ with a cold glass of milk nearby. It’s truly a celebration of the simple things!
Storage and Keeping Your Oreo Dirt Cake Fresh
Okay, this is important because this oreo dirt cake is so good, you absolutely *will* have leftovers—though maybe not as many as you hope! Since this is a no-bake dessert, it needs to stay chilled to keep that creamy layer firm and luscious. If you leave it out on the counter pretending it’s a normal cake, that dairy-based filling is going to get soft fast, and nobody wants floppy dirt!
If you’re storing leftovers in the main dish, make sure you cover it tightly with plastic wrap or a lid. We want to keep all that fabulous moisture locked in. Properly covered, this creamy oreo treat stays delicious in the refrigerator for about three to four days. After four days, the cookies might start getting a little too soggy for my taste, but hey, some people actually prefer it that way!
Making Grab-and-Go Servings
If you want to make this a super easy kid friendly dessert for snack time throughout the week, I have a great tip. Instead of layering it all in one big dish, use clear plastic cups or small mason jars. Layer everything exactly the same way—crumb, cream, crumb, cream, then top with that final sprinkle of dirt. These individual servings are perfect for setting out in the fridge. They look adorable, they stop people from digging into the middle of the big pan, and they are totally grab-and-go when the kids (or you!) wake up craving something sweet. Plus, they chill faster, which means you can eat them sooner!
For the best texture, try to serve these individual portions within the first two days. If you’re looking for more easy chocolate ideas for quick treats during the week, I always keep a handful of recipes bookmarked, like my easy chocolate cake recipe for when I need something baked but still simple!
Frequently Asked Questions About Oreo Dirt Cake
I always get so many great questions when people try this recipe for the first time! It’s natural when you’re working with something so fun and nostalgic. Hopefully, these quick answers help you nail that perfect texture when you whip up your own batch of this delicious treat. If you’re looking for even more speedy sweets, check out my suggestions for a quick chocolate dessert when time is really tight!
Can I make this dirt pudding recipe ahead of time?
You absolutely should make this ahead of time! That’s one of the best features of the dirt pudding recipe. Chilling allows the cookies to soften just slightly and absorb some of that creamy moisture, which is exactly what we want. I find that if you make it the day before serving—say, 12 to 24 hours in advance—it’s absolutely perfect. If you push it past two full days, especially if you live in a humid climate, those bottom cookie layers might start to get *too* soft, losing some of that nice crunch we love so much.
What kind of pudding works best for this no bake oreo dessert?
For this specific formula, I always recommend the instant chocolate pudding mix. It sets up quickly and perfectly when mixed with the cold milk, creating that firm base needed to support the heavy cream cheese layer. That said, you can definitely experiment with the pudding flavor! Cookies and cream pudding is a fantastic switch if you want to layer those delicious oreos and pudding flavors even harder. Just stick to the instant variety, please—the cook-and-serve type needs heat and won’t set up correctly when mixed with just milk in the fridge.
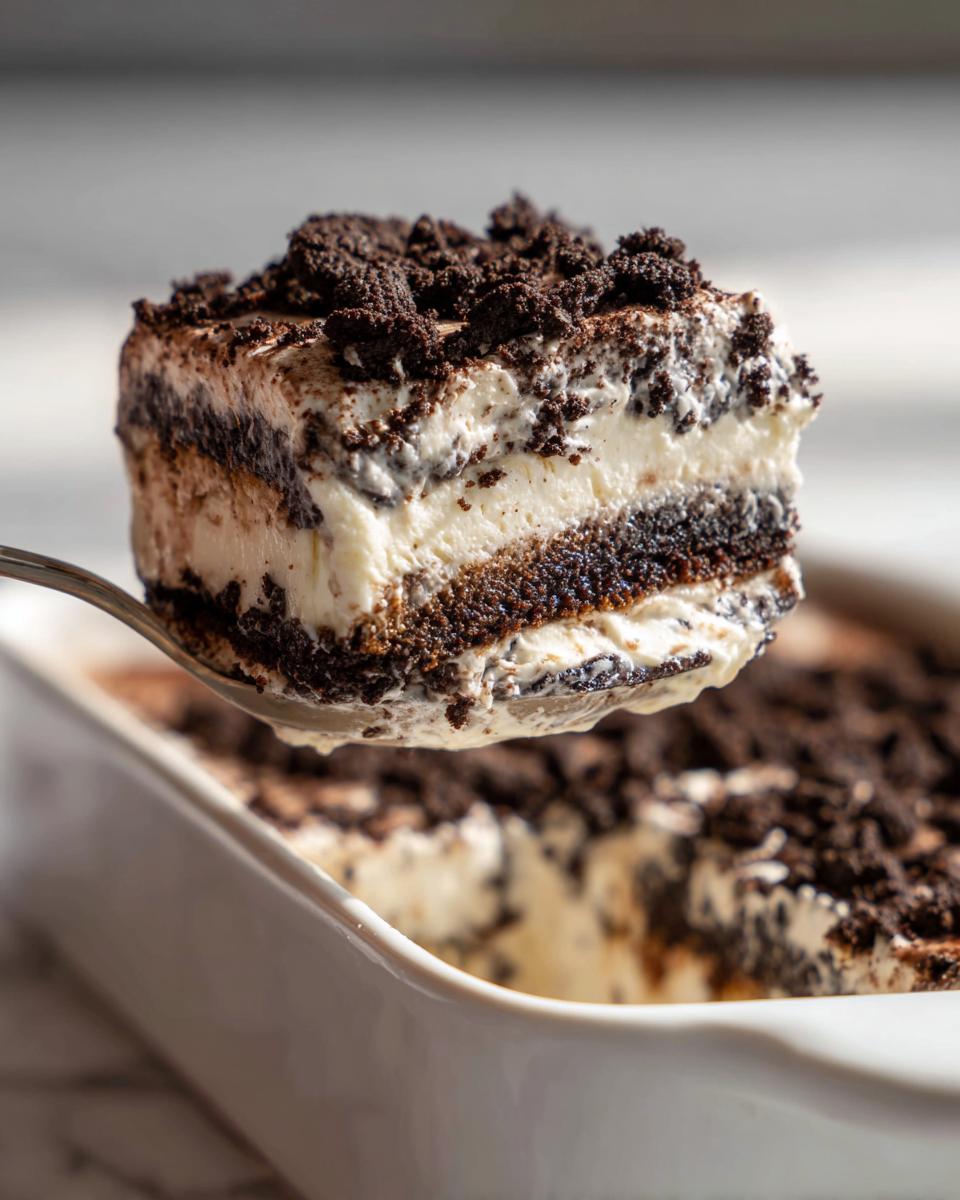
How do I ensure my layers are distinct in the layered cookie dessert?
That’s a detail that separates a good layer cake from a great one! For the best look in this layered cookie dessert, make sure your first crumb layer is patted down firmly. Then, when you spread that rich cream mixture over it, take your time and use an offset spatula if you have one to smooth it out gently without digging into the bottom. Don’t worry too much about perfection since the top layer of crumbs will cover it all anyway, but taking an extra minute to spread the cream evenly ensures you get that great bite of cream in every single serving. It seriously pays off!
Estimated Nutrition for Your Creamy Oreo Treat
So, while we’re making this amazing, rich creamy oreo treat, I know some of you—like me—are curious about the breakdown. Nutrition is always tricky with deeply delicious desserts like this oreo dirt cake, right? Because we are using whole Oreos, sugar, and full-fat dairy elements, this is definitely a dessert to enjoy when you’re celebrating!
I pulled the numbers based on the standard ingredient amounts listed above, and I want to be upfront: this is an estimate! How fine you crush the cookies, how much cream cheese is left on the knife, those little things can shift the final count. But this should give you a good working idea of what you’re diving into when you serve up a proper portion of this no bake oreo dessert.
Here is the estimated breakdown per serving, assuming 12 servings from the recipe:
- Calories: 350
- Total Fat: 18g
- Saturated Fat: 9g
- Carbohydrates: 45g
- Sugar: 35g (Yes, it’s sweet, because it’s dessert!)
- Protein: 4g
- Sodium: 310mg
See? Lots of rich, comforting goodness in every scoop! Since this is packed with wonderful flavors, you really don’t need a huge portion to feel satisfied. If you’re looking for lighter fare for another meal, I’ve got some wonderful options over on my easy chicken pot pie casserole recipe page that might balance out the weekend perfectly!
Share Your Oreo Dirt Cake Creations
Well, that’s it! We’ve conquered the crushing, mastered the creaming, and perfected the chilling process to bring you what I truly believe is the best dirt cake recipe out there. Now that you’ve made your own batch of glorious, layered cookie dessert goodness, I absolutely want to hear all about it!
In the kitchen, sharing the results is almost as much fun as the actual baking, right? So please, don’t keep that amazing oreo dirt cake to yourself! If you made this recipe for a birthday, a simple weeknight treat, or maybe even tried that fun milk carton presentation, snap a photo and tag me!
Leaving a review or a star rating right down below helps other home cooks know this recipe is reliable, and honestly, it just fills my heart up to read your comments. Did the kids love it? Did it hold up well at a big gathering? I’m eager to know how this simple treat turned out on your table. Happy baking—or, in this case, happy *no-baking*!
If this delicious chocolate pudding dessert has inspired you to tackle more easy-to-love recipes, I always have new favorites going up. You might want to save the directions for my easy super moist pumpkin bread recipe for later this fall!
PrintThe Best No-Bake Oreo Dirt Cake Recipe

Make this easy, creamy Oreo Dirt Cake. This no-bake dessert layers crushed Oreos, chocolate pudding, and a rich whipped topping, making it a perfect, quick treat for any gathering.
- Prep Time: 20 min
- Cook Time: 0 min
- Total Time: 4 hr 20 min
- Yield: 12 servings 1x
- Category: Dessert
- Method: No-Bake
- Cuisine: American
- Diet: Vegetarian
Ingredients
- 1 package (14.3 ounces) Oreo cookies, divided
- 1 package (3.9 ounces) instant chocolate pudding mix
- 2 cups cold milk
- 1 container (8 ounces) frozen whipped topping, thawed
- 1 package (8 ounces) cream cheese, softened
- 1 cup powdered sugar
Instructions
- Separate the Oreo cookies. Place the cream filling aside. Crush the cookie wafers finely in a food processor or by placing them in a sealed bag and crushing them with a rolling pin. You need about 3 cups of crumbs. Set aside about 1 cup of the crumbs for topping.
- In a large bowl, whisk together the instant chocolate pudding mix and cold milk for two minutes until the mixture thickens. Let it stand for five minutes.
- In a separate bowl, beat the softened cream cheese until smooth. Add the thawed whipped topping and beat until combined. Add the reserved cream filling from the Oreos and mix well.
- Gently fold the pudding mixture into the cream cheese mixture until fully incorporated.
- In a large bowl or a 9×13 inch dish, create the first layer by spreading half of the crushed Oreo crumbs on the bottom.
- Spread the creamy filling mixture evenly over the cookie layer.
- Top the cream layer with the remaining crushed Oreo crumbs. Sprinkle the reserved 1 cup of crumbs over the top layer to resemble dirt.
- Cover the dish and chill in the refrigerator for at least four hours, or until firm.
Notes
- You can use a 1-gallon plastic milk container with the top cut off to create a fun, traditional ‘milk carton’ presentation for this dirt pudding recipe.
- For a richer flavor, substitute half of the milk with heavy cream when mixing the pudding.
- If you want a thicker cream layer, use a full 8 ounces of cream cheese and beat it thoroughly before adding the whipped topping.
Nutrition
- Serving Size: 1 serving
- Calories: 350
- Sugar: 35
- Sodium: 310
- Fat: 18
- Saturated Fat: 9
- Unsaturated Fat: 9
- Trans Fat: 0
- Carbohydrates: 45
- Fiber: 1
- Protein: 4
- Cholesterol: 30