
Oh my gosh, when I think about desserts that just scream fun and nostalgia, my mind immediately jumps to something wonderfully silly and undeniably delicious. If you’re anything like me—someone who wants maximum impact with minimum time in the kitchen—then you absolutely need to meet the **dirt cake**. This isn’t fancy, layered-for-hours stuff; this is the ultimate easy, no-bake crowd-pleaser that brings everyone back to being a kid again. Here at DeliceRecipe, where our founder Ellie Vance built everything on the idea that delicious home cooking should be simple and reliable, this recipe is a cornerstone. Trust me, this classic **dirt cake** recipe is so foolproof, it guarantees smiles at every single gathering you take it to. You won’t believe how good something this easy tastes!
If you’re looking for more simple sweets that never fail to impress, check out some of my other delicious dessert recipes!
- Why This Easy No-Bake Oreo Dirt Cake is a Crowd Pleaser
- Gathering Ingredients for Your Classic Dirt Cake
- Step-by-Step Instructions for the Ultimate Dirt Cake
- Tips for Success When Making Dirt Cake
- Make Ahead Desserts: Preparing Your Dirt Cake in Advance
- Creative Variations on the Classic Dirt Cake
- Serving Suggestions for Your Fun Kids Desserts
- Frequently Asked Questions About Oreo Dirt Cake
- Estimated Nutritional Profile for This Creamy Chocolate Dessert
Why This Easy No-Bake Oreo Dirt Cake is a Crowd Pleaser
Honestly, there’s a reason this dessert keeps showing up on every potluck list. It’s the perfect marriage of minimal effort and maximum enjoyment. When you’re planning for a big group, the last thing you want is a fussy dessert that needs an oven and three hours of cooling time. This chocolate pudding dessert fixes all those problems!
- It’s completely no-bake, meaning zero heating up your kitchen, which is a lifesaver in the summer.
- Every ingredient is something you can grab easily—no specialty store runs needed!
- Kids absolutely lose their minds over how fun this is.
- It holds up beautifully, making it one of the best **easy weeknight dinners**… wait, no, DESSERTS! My brain is clearly already halfway to the couch!
Perfect for Parties and Potlucks
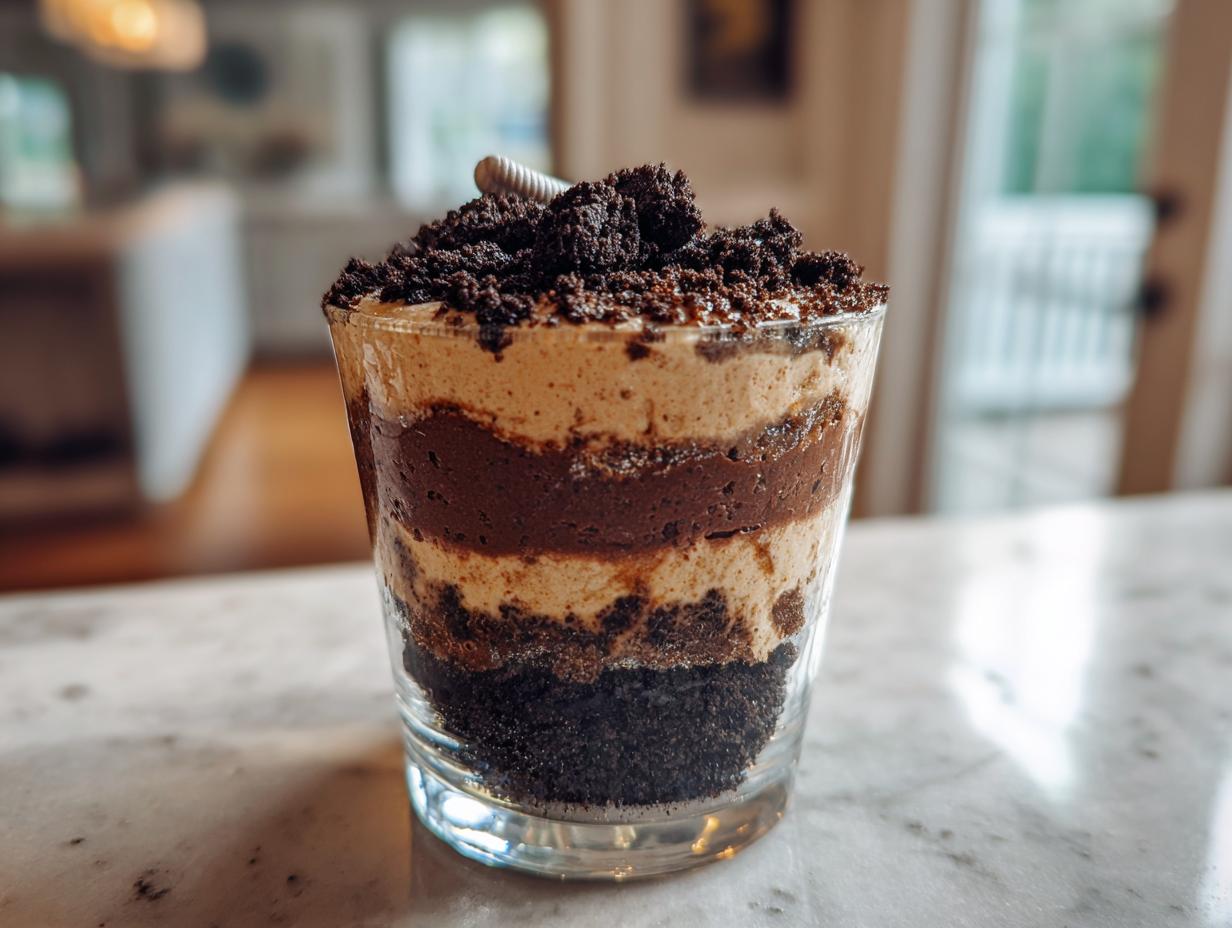
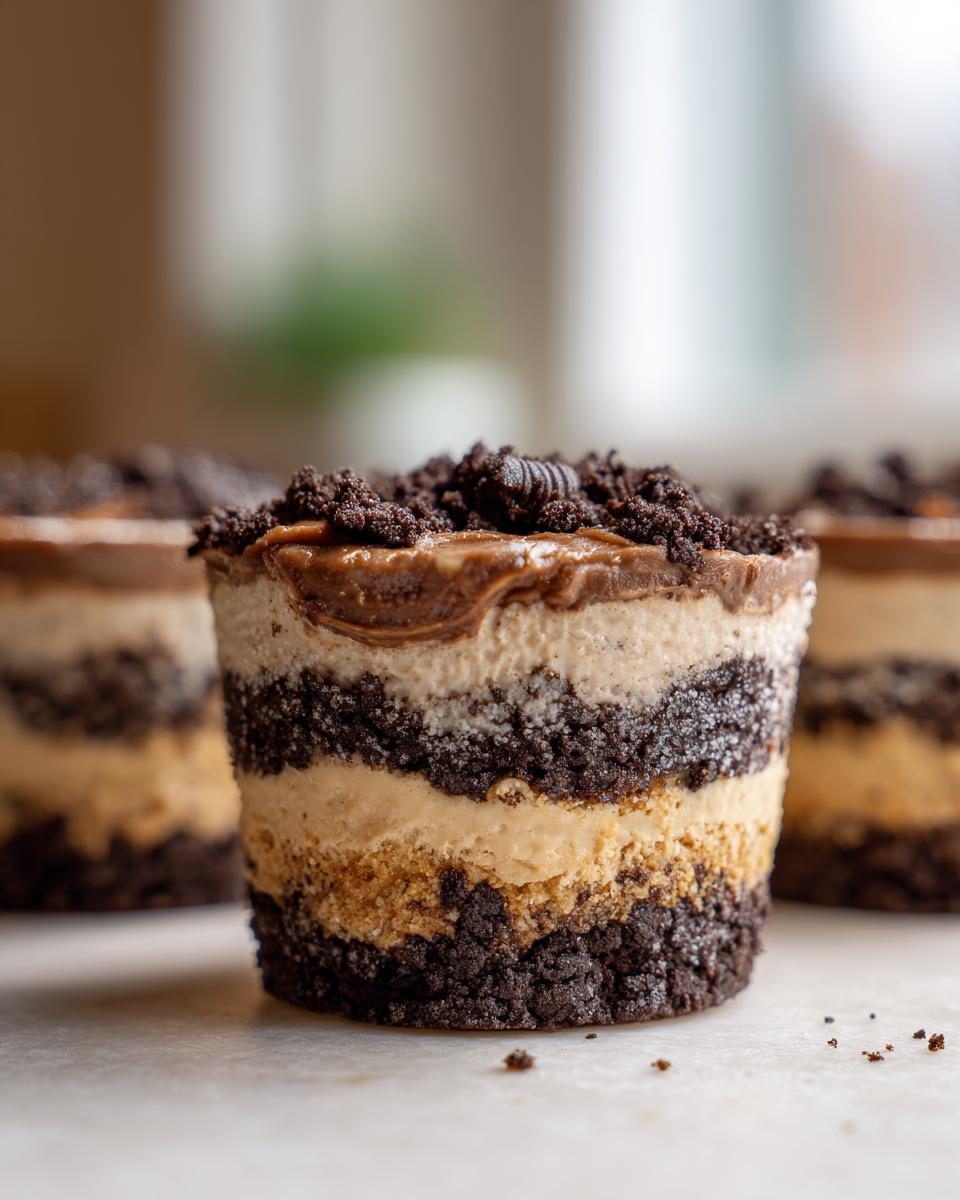
If you need a reliable dish for that big summer BBQ or a guaranteed hit for a Halloween spread, this is it. Serving them in individual cups means no messy slicing, and they look so cute lined up. The creamy chocolate dessert travels like a dream, too. People always ask me for the recipe when I bring this crowd-pleasing **dirt cake**!
Gathering Ingredients for Your Classic Dirt Cake
The best part about this whole scenario is that gathering what you need for this incredible **dirt cake** is so simple. There’s nothing fussy, nothing esoteric—just good, reliable pantry staples that come together to make magic happen. We are keeping things straightforward, just how I like my **No Bake Dessert Recipes**!
Here is absolutely everything you need for eight servings of this creamy, dreamy treat. Make sure you have all your measurements ready before you start mixing, because once the pudding hits the cream mix, things move fast!
- 8 ounces of cream cheese, and this MUST be softened, please!
- 1 cup of unsalted butter, also softened until it’s perfectly pliable.
- 1 cup of powdered sugar. Yes, powdered, not granulated.
- One 12-ounce container of frozen whipped topping, thawed until it’s usable but still cold.
- Two packages of instant chocolate pudding mix—this is key, not the cook-and-serve kind!
- 3 cups of cold milk for the pudding.
- The whole bag (about 14.3 ounces) of Oreo cookies, which we’re crushing until they look like fine, dark soil.
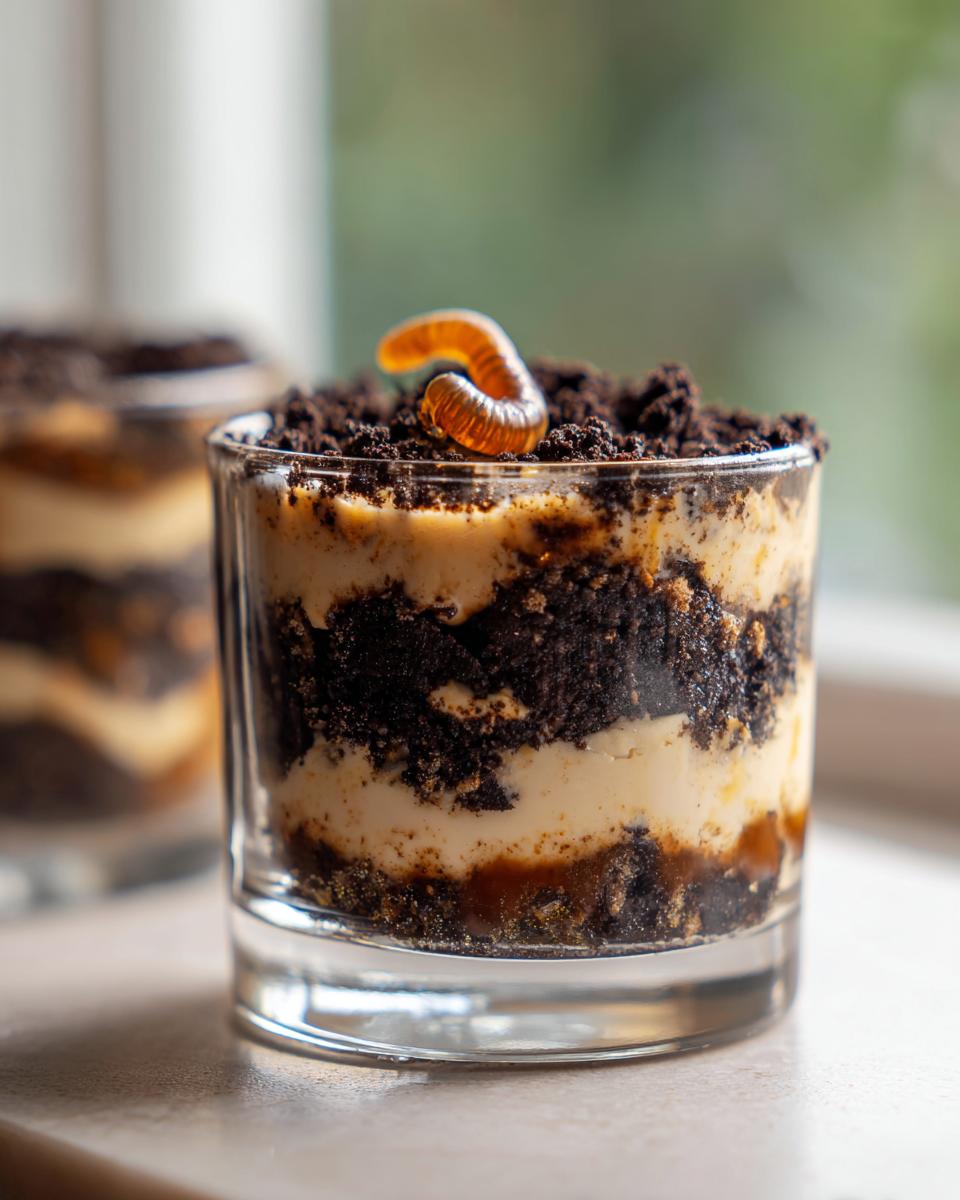
- And finally, gummy worms, because what is **Dirt Cake** without a few creepy crawlies?
Ingredient Notes and Substitutions for Your Dirt Cake
A few quick notes so your layers set up perfectly! You absolutely must use the instant pudding; the cook-and-serve won’t set up right for a sturdy **Creamy Chocolate Dessert**. Also, for the absolute top-tier, fudgiest texture, stick to full-fat cream cheese and butter. Don’t even think about using low-fat here; it gets too watery, and we want that glorious, almost **No Bake Cheesecake Dessert** vibe in the middle layer!
Step-by-Step Instructions for the Ultimate Dirt Cake
Okay, now that we have all our glorious components ready, let’s put this **dirt cake** together! Remember, this is a totally no-bake situation, which is my favorite kind of magic. The most important thing during the mixing stages is gentleness, especially when combining the pudding with the creamy base. You want it fluffy, not flat! Don’t race through the chilling time either—that set time is crucial for this **Chocolate Pudding Dessert** to hold its shape.
Once you’ve built your layers, pop them in the fridge! I usually leave mine for at least four hours, but honestly, overnight is way better, especially if you’re making them for a big event tomorrow. If you need a super quick version, check out these dirt cake cups ideas for serving!
Preparing the Creamy Base for Your Dirt Cake
First, make sure that cream cheese and butter are super soft. Grab your electric mixer and beat those two guys together until they look light and fluffy. Then, slowly add the powdered sugar and beat it again until everything is uniform. Finally, gently, gently fold in that thawed whipped topping. If you beat this mixture too hard after adding the topping, you deflate all the air, and we need that air!
Assembling and Layering the Dirt Cake Cups
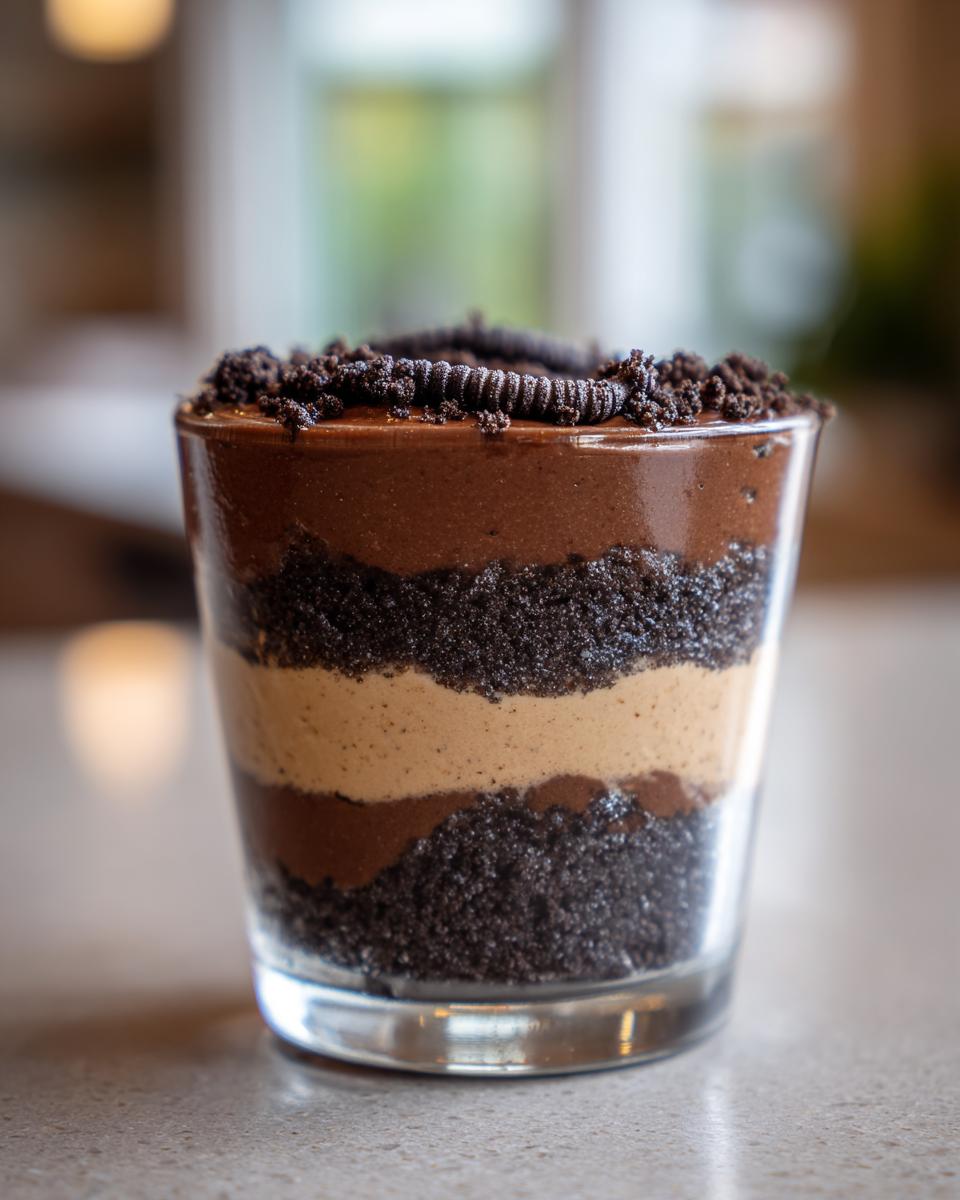
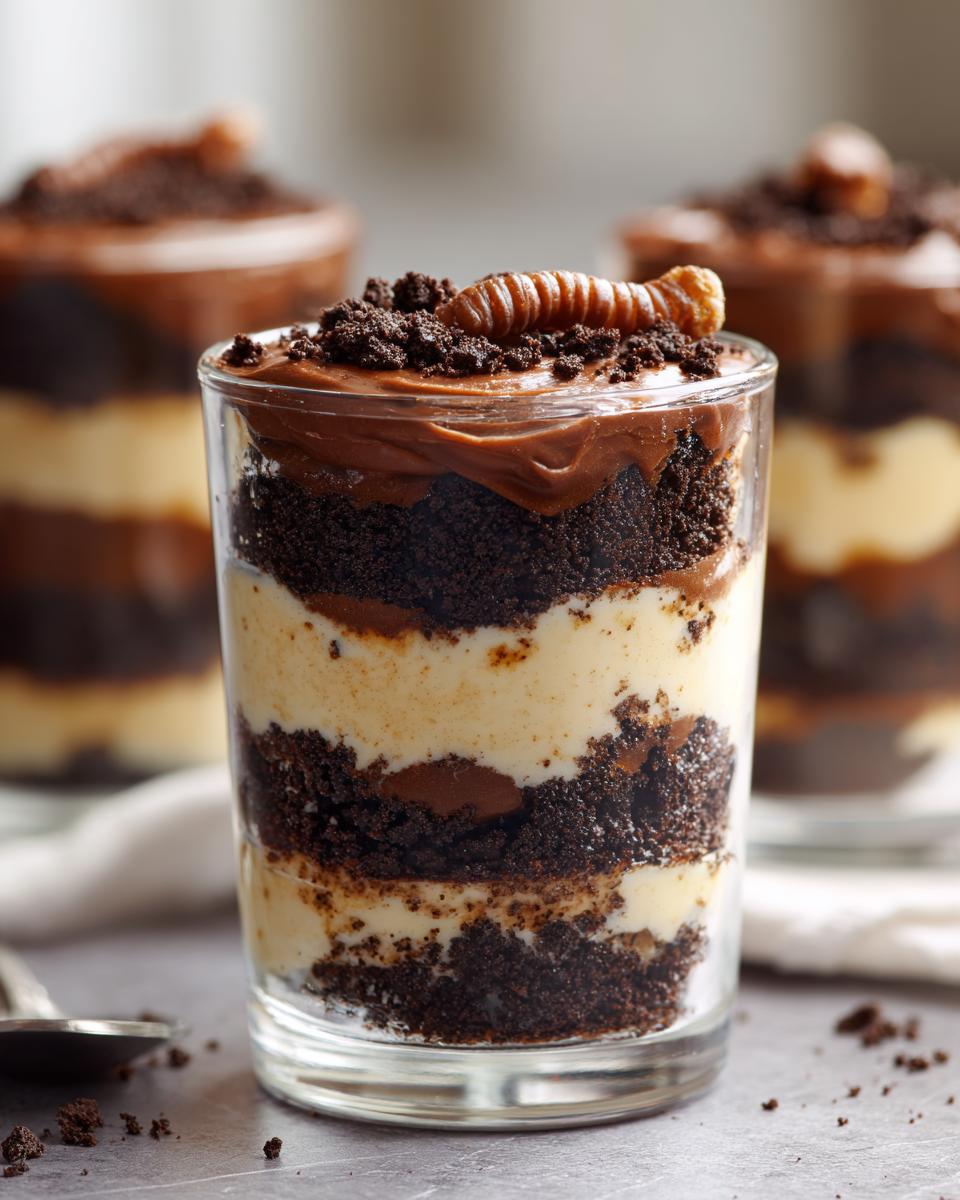
Time to make the dirt! Crush those Oreos—food processor works best for that fine, soil-like texture. Now, start layering in your cups or pan. I always go with a little layer of cookie crumbs on the bottom first. Then spoon in some of that rich cream mixture. Keep alternating until you’re near the top. Finish with the reserved crumbs sprinkled liberally over the top layer, and here’s where the fun happens: push those gummy worms down just enough so they look like they are crawling out of the earth!
If you are looking for simple, reliable recipes that save you time, this is one of my favorites, right up there with my easy homemade BBQ sauce recipe!
Tips for Success When Making Dirt Cake
Making this **dirt cake** is honestly tough to mess up, but if you want it to be *perfectly* set and beautiful when you serve it, I have a couple of pointers that saved me headaches when I first started making this for big groups. The secret to amazing texture isn’t just the mixing, it’s respecting the chill time! You need at least four hours, but if you can wait overnight, your creamy layers will be firmer and won’t squish down oddly when you try to serve them.
If you’re making this ahead of time for a potluck, here’s a great trick: keep the *very top* layer of cookie crumbs separate until about an hour before serving. If you put all the crumbs on right away, they absorb moisture from the pudding mix and get a little soft. Keeping them separate ensures that top layer is delightfully crunchy!
For presentation, if you serve it in a big casserole dish instead of cups, use a spoon to gently swirl the top layer of crumbs and cream—it looks rustic and gorgeous. For more reliable recipes that focus on texture, you might want to check out my tips on easy creamy peppercorn sauce recipe for inspiration on folding techniques!
For those looking for more reliability in their no-bake treats, I always tell people to look at how others handle their chilling times, like the folks over at The First Year Blog often discuss. It really makes a difference!
Make Ahead Desserts: Preparing Your Dirt Cake in Advance
This is, without a doubt, one of my favorite **make ahead desserts** to bring to events! You absolutely have to let this **dirt cake** set up, so preparing it the day before is actually the best way to go. If you are using individual cups, just cover them tightly with plastic wrap—make sure the wrap doesn’t accidentally touch the gummy worms if you’ve already stuck them in!
I find that chilling it for a solid 24 hours makes the creamy layers even firmer, which is fantastic for traveling to a BBQ or potluck. If you need to make it even earlier, you can crush your Oreos ahead of time and store them in an airtight container at room temperature. That way, when it’s time to assemble, you’re just mixing and layering. It’s the ultimate stress-free party food!
If you want more ideas for desserts you can prep early, swing by my collection of make ahead desserts recipes!
Creative Variations on the Classic Dirt Cake
While the classic Oreo version is my absolute favorite for authentic texture, sometimes you just need to mix things up! This base recipe is so sturdy that it handles variations beautifully. They might not be the *original* **dirt cake**, but they sure are fun for a change of pace.
If you want something a little less intense in chocolate flavor for your next gathering, try swapping out one package of the chocolate pudding mix for vanilla pudding. It creates a lighter, almost cookies-and-cream feel that I love in the summer. Or, if you ran out of Oreos (gasp!), chocolate wafer cookies absolutely work, though you lose a bit of that signature crunch.
For those who love layering, think about trying this out with a cheesecake base instead of pure cream cheese and butter—it gives it a denser, richer mouthfeel, similar to a No Bake Cookie Dough Cheesecake experience!
Serving Suggestions for Your Fun Kids Desserts
While I absolutely love the convenience of serving these in individual cups (especially for parties), don’t feel locked into that presentation! If you’re serving a big crowd at a summer BBQ, just layer this whole **dirt cake** right into a large glass trifle dish. Seeing those rich, dark layers separated by the creamy filling is half the fun.
It looks amazing on a buffet table for Halloween or any casual weekend get-together. If you end up having leftovers, they store just as well as the cups do. If you need a great savory side to balance out all this sweetness, you have to try my easy chicken tortilla soup recipe!
Remember to check out how the folks over at Our Love Language is Food plate up their fun versions—it gives you great inspiration for presentation!
Frequently Asked Questions About Oreo Dirt Cake
I totally get it; when you’re making a dessert that’s supposed to be simple, sometimes the little questions pop up right before you start mixing. Don’t stress! I’ve answered the most common things I hear about getting this amazing **Oreo Dessert** just right. We want your layers to be perfect, your texture spot on, and your prep time to be quick!
Can I make this dirt cake without using Oreos?
You certainly can, but I have to be honest—it won’t taste exactly like the classic **dirt cake** we all remember! If you’re totally out of Oreos, chocolate wafer cookies are my second choice; they’ll give you a slightly less sweet, very dark crumble. If you don’t mind a huge change in texture, you could try Nilla Wafers, but then you’re just getting a really lovely, mild cookie crumble on top of your **Chocolate Pudding Dessert**, not that signature dark dirt look.
What is the best way to crush the cookies for the dirt cake?
Okay, if you have a food processor, bust it out! That is hands-down the fastest way to get those ultra-fine crumbs that really look like dirt. You pulse it a few times, and boom, perfectly ground cookies. If you don’t have one, don’t fret! Throw those cookies into a super sturdy zip-top bag, seal it up tight, and then just use a rolling pin or even the bottom of a heavy pan to gently crush them. Leave a few bigger chunks in there—it adds nice texture!
Is this considered a No Bake Dessert Recipe?
Yes! A thousand times, yes! If you see this recipe popping up under **No Bake Dessert Recipes**, they aren’t kidding. There is no oven involved, no water bath, nothing! We are just mixing, layering, and chilling. It’s the ultimate in lazy gourmet satisfaction, perfect for when you need **Quick Crowd Pleaser Dessert** status without turning on the stove!
For any other tricky spots, like balancing richness in other recipes, checking out my thoughts on easy homemade nacho cheese sauce can sometimes help—it’s all about ingredient control!
Estimated Nutritional Profile for This Creamy Chocolate Dessert
So, this is the part where we talk about the numbers, right? Because while this **Creamy Chocolate Dessert** is absolutely worth every little bit of deliciousness, it’s good to have a general idea of what you’re digging into! Remember, since we aren’t using any formal **keto meal plan delivery** measuring systems here, these figures are just solid estimates based on the standard packages of Oreos and full-fat everything we used.
If you are watching your macros closely, you might be looking at options for **meal planning**, but honestly, for a party dessert, we focus on maximum fun! We use regular ingredients, so treat these numbers as a guideline, not gospel.
- Serving Size: 1 cup
- Calories: About 450
- Sugar: Roughly 45g
- Fat: Around 28g
- Carbohydrates: About 50g
- Protein: 6g
Just keep in mind that if you use reduced-fat cream cheese or skip the gummy worms, those numbers will shift! For me, the most important nutritional fact is that this **dirt cake** delivers 100% pure happiness. If you want more inspiration for easy sweets that pair well with a full meal, you might want to look over my chocolate sauce recipe sometime!
PrintEasy No-Bake Oreo Dirt Cake Cups

Make this simple, creamy Oreo Dirt Cake dessert. It uses crushed cookies, chocolate pudding, and a cream cheese base, perfect for parties or as a fun kids’ treat.
- Prep Time: 25 min
- Cook Time: 0 min
- Total Time: 4 hr 25 min
- Yield: 8 servings 1x
- Category: Dessert
- Method: No-Bake
- Cuisine: American
- Diet: Vegetarian
Ingredients
- 1 package (8 ounces) cream cheese, softened
- 1 cup unsalted butter, softened
- 1 cup powdered sugar
- 1 container (12 ounces) frozen whipped topping, thawed
- 2 packages (3.9 ounces each) instant chocolate pudding mix
- 3 cups cold milk
- 1 package (14.3 ounces) Oreo cookies, crushed into fine crumbs
- Gummy worms, for garnish
Instructions
- In a large bowl, beat the softened cream cheese and butter together until smooth.
- Gradually add the powdered sugar to the cream cheese mixture and beat until fully combined.
- Gently fold in the thawed whipped topping until the mixture is uniform. Set this creamy base aside.
- In a separate bowl, whisk together the instant chocolate pudding mix and cold milk for about two minutes, until the pudding begins to thicken.
- Gently fold the thickened chocolate pudding into the cream cheese mixture until just combined. Do not overmix.
- Crush the Oreo cookies until they resemble fine dirt. Set aside about 1 cup of crumbs for the top layer.
- Prepare individual serving cups or a large trifle dish.
- Create the first layer by placing a layer of crushed Oreos at the bottom of each cup.
- Spoon or pipe the chocolate cream mixture over the cookie layer.
- Repeat the layers: cookie crumbs, then cream mixture, until the cups are full, ending with a layer of cream mixture on top.
- Sprinkle the reserved crushed Oreos over the top layer to create the ‘dirt’ look.
- Press a few gummy worms into the top layer of crumbs for decoration.
- Chill the dirt cake cups for at least four hours, or until firm.
Notes
- For the best texture, crush the Oreos in a food processor, leaving some slightly larger pieces for variety.
- You can prepare this dessert one day ahead of time. Cover and refrigerate.
- If you are looking for alternatives to traditional baking, this recipe is a great option, similar to some no-bake cheesecake desserts.
- This recipe works well for meal planning when you need a quick, impressive dessert for a potluck.
Nutrition
- Serving Size: 1 cup
- Calories: 450
- Sugar: 45
- Sodium: 350
- Fat: 28
- Saturated Fat: 15
- Unsaturated Fat: 13
- Trans Fat: 0.5
- Carbohydrates: 50
- Fiber: 2
- Protein: 6
- Cholesterol: 55