
Oh, when I think about true Southern baking, my heart just swells! There’s an elegance and a warmth baked into those classic recipes that you just can’t replicate with a box mix. That’s why I’m so thrilled to share what I call The Best Southern Style Moist Red Velvet Cake from Scratch with Classic Cream Cheese Frosting with you all today. Getting that signature fluffy texture and vibrant hue in a genuine red velvet cake takes just a few core secrets. It’s a dish meant for all those big moments—birthdays, holidays, and celebrations. For me, sharing recipes that honor tradition while being absolutely foolproof is why I started DeliceRecipe. Trust me, this authentic technique yields the most beautifully moist cake you will ever slice.
- Why This is the Best Moist Red Velvet Cake Recipe
- Ingredients for Your Soft Homemade Cake and Best Cream Cheese Frosting Recipe
- How to Prepare the Easy Red Velvet Cake from Scratch
- Tips for Success Making Your Red Velvet Cake
- Serving Suggestions for Your Red Velvet Cake
- Storage and Reheating Instructions for Red Velvet Cake
- Frequently Asked Questions About Red Velvet Cake
- Estimated Nutrition for This Red Velvet Cake Recipe
- Share Your Red Velvet Cake Creations
Why This is the Best Moist Red Velvet Cake Recipe
What makes this my favorite moist red velvet cake recipe? It comes down to honoring the authentic southern red velvet tradition. Some folks think this is just chocolate cake with dye, but absolutely not! We carefully balance just a touch of cocoa powder with the tang from the buttermilk and vinegar. This chemical reaction, combined with the right creaming method, guarantees you get that incredibly soft homemade cake texture—no dry corners here, I promise. This method focuses on keeping every layer tender, which is why it’s an absolute winner for birthdays or holidays. If you love this method, you’ll also adore the light crumb in my recipe for a chocolate cake recipe moist rich easy!
Achieving the Vibrant Red Velvet Cake Color
Getting that iconic, show-stopping crimson hue is key, but we don’t want to taste food coloring, right? My advice for the best vibrant red velvet cake tutorial is to skip the liquid coloring if you can. Gel paste coloring is much more concentrated. You only need a teaspoon or two of gel to get that deep color; liquid coloring requires so much that it throws off the liquid balance in your batter and can mute that subtle cocoa flavor we love so much. Keep that cocoa low, and let the gel do the heavy lifting!
Ingredients for Your Soft Homemade Cake and Best Cream Cheese Frosting Recipe
Okay, let’s talk about what goes into making this showstopping red velvet cake. Having your ingredients ready before you start mixing is half the battle won, especially when you are aiming for that perfectly soft homemade cake texture! I’ve listed everything you need below, separated clearly so you can organize your mise en place before you even turn on the mixer. Remember, the quality of these ingredients really shines through in a classic recipe like this one, especially that cream cheese frosting—it really is the best cream cheese frosting recipe because of the ratios!
For the Fluffy Red Velvet Cake Layers
Here is what you need for those two beautiful, tender cake layers:
- 2 1/2 cups all-purpose flour
- 1 1/2 teaspoons baking soda
- 1 teaspoon salt
- 1 tablespoon unsweetened cocoa powder
- 1 cup unsalted butter, softened
- 1 1/2 cups granulated sugar
- 2 large eggs
- 1 teaspoon vanilla extract
- 1 cup buttermilk
- 1 teaspoon white vinegar
- 1 to 2 tablespoons red food coloring (liquid or gel)
For the Classic Cream Cheese Frosting
We need everything soft here, trust me! If your cream cheese or butter is cold, you’ll end up with lumps, and nobody wants that!
- 1 (8 ounce) package cream cheese, softened
- 1/2 cup unsalted butter, softened
- 1 teaspoon vanilla extract
- 4 cups powdered sugar, sifted
- 1/4 teaspoon salt
How to Prepare the Easy Red Velvet Cake from Scratch
Alright, time to get our hands dirty! Don’t let the step count scare you; this is actually one of the easiest recipes for a showstopping dessert once you get into the rhythm. We’ve broken down the process so you can confidently whip up this gorgeous red velvet cake from scratch. Just follow these steps, and you’ll see why this is such a beloved baking method. Having everything measured out first makes this way less stressful, which is why I love promoting easy baking recipes like this one!
Mixing the Cake Batter
First things first, get that oven preheated to 350°F (175°C) and get those two 9-inch pans greased and floured. Now, whisk your dry stuff—flour, baking soda, salt, and cocoa—in one bowl. In your big mixing bowl, you need to cream that softened butter and sugar until it goes from gritty to wonderfully fluffy; this takes about three solid minutes with the mixer. Beat in your eggs one at a time, making sure they blend in well after each addition, then stir in the vanilla. Now for the crucial bit: in a separate small bowl, mix your buttermilk, vinegar, and all that glorious red coloring together until it’s uniform. You’ll alternate adding the dry mixture and the colorful buttermilk, always starting and ending with the dry ingredients. Keep the mixer speed slow and stop as soon as everything looks combined. Seriously, mix only until just combined; that’s the secret right there to keep the crumb soft homemade cake perfection!
Baking and Cooling the Red Velvet Layer Cake
Once the batter looks ready, divide it evenly between your prepared pans. Pop them into the middle rack of that hot oven for about 25 to 30 minutes. You want to test doneness with a wooden pick—if it slides in and comes out clean, they are done! Don’t rush them out of the pans, though. Let them chill out in those pans for a good 10 minutes. This little bit of time firms them up so they don’t crumble when you turn them out. After those 10 minutes, gently flip them onto a wire rack to cool completely. And I mean completely. Trying to frost a warm cake is a disaster waiting to happen if you want a nice, clean red velvet layer cake.
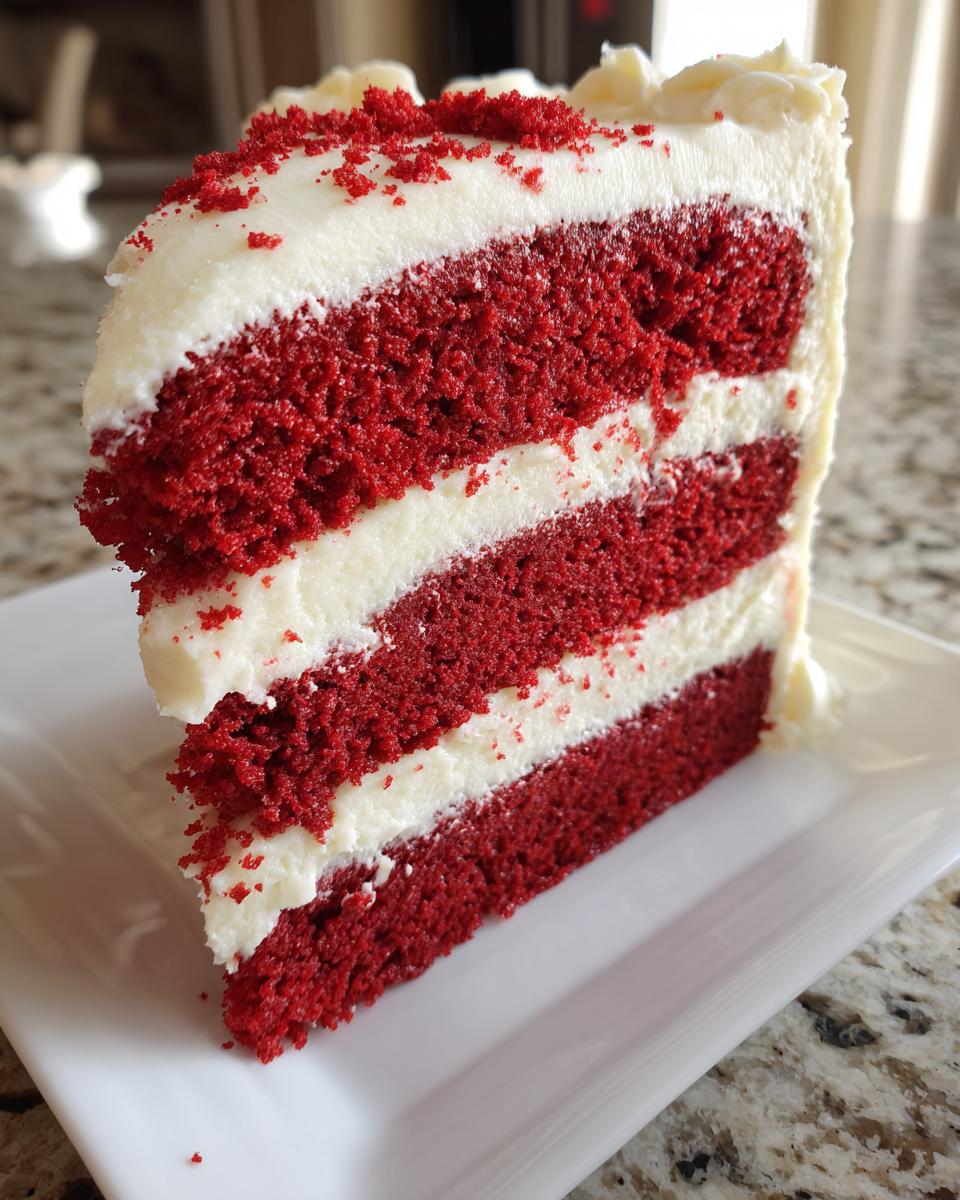
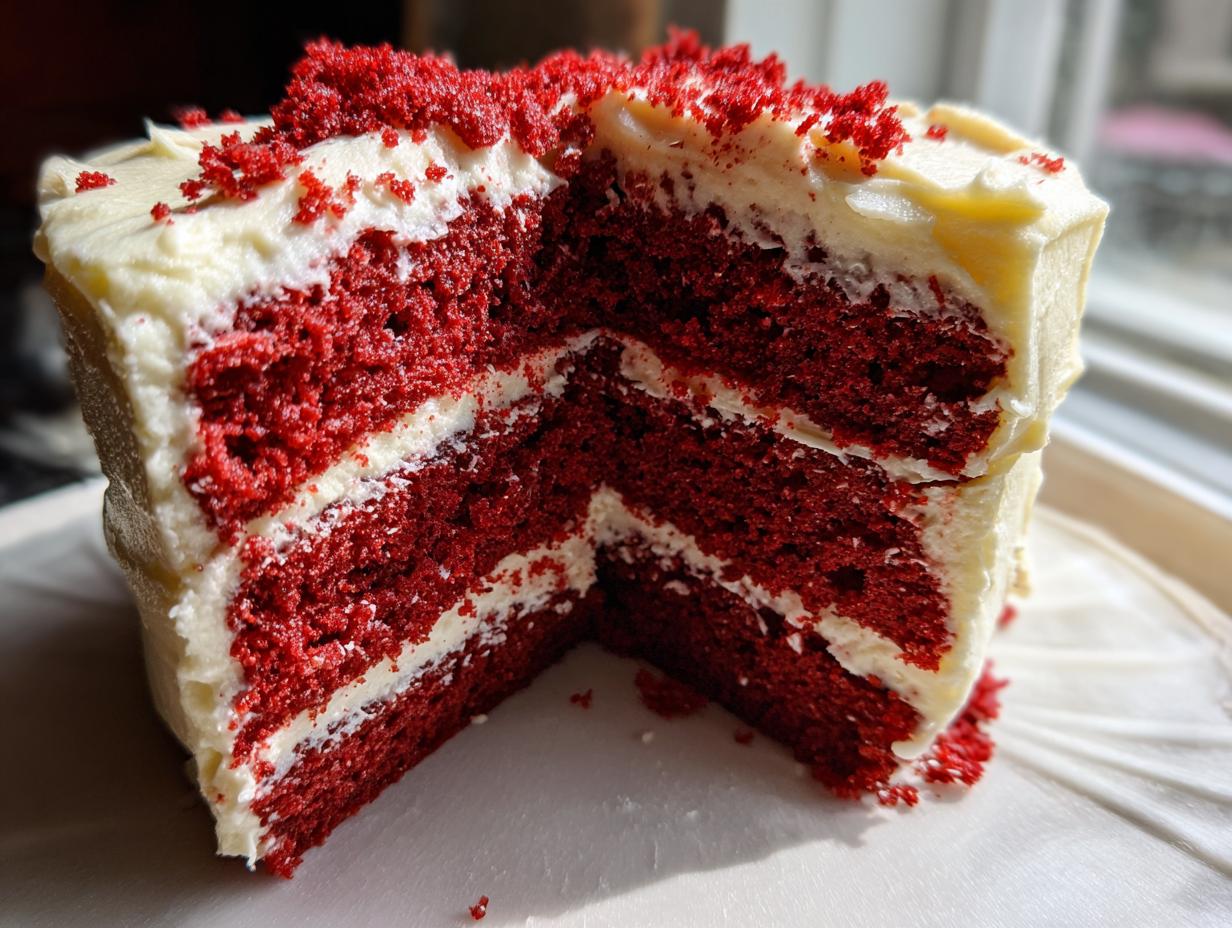
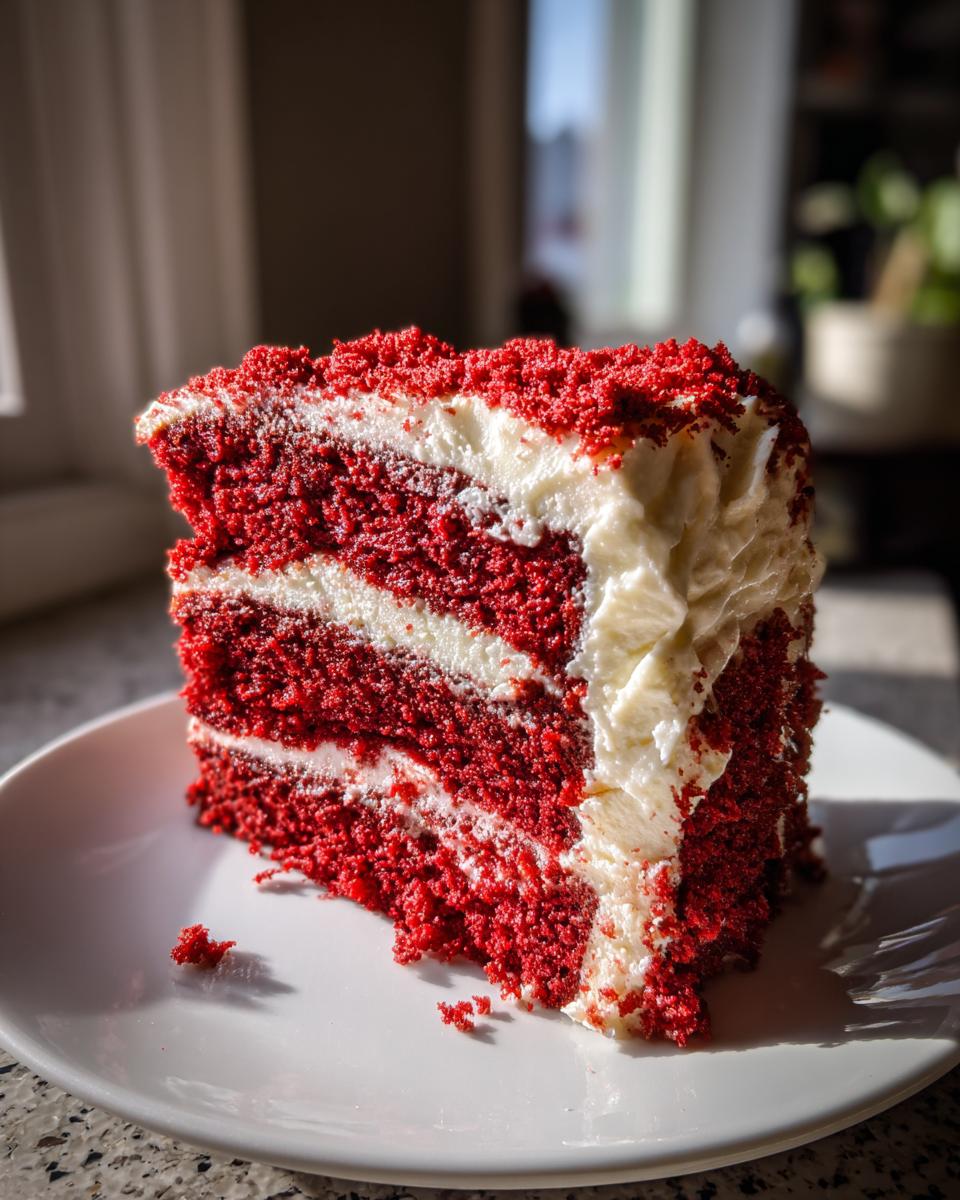
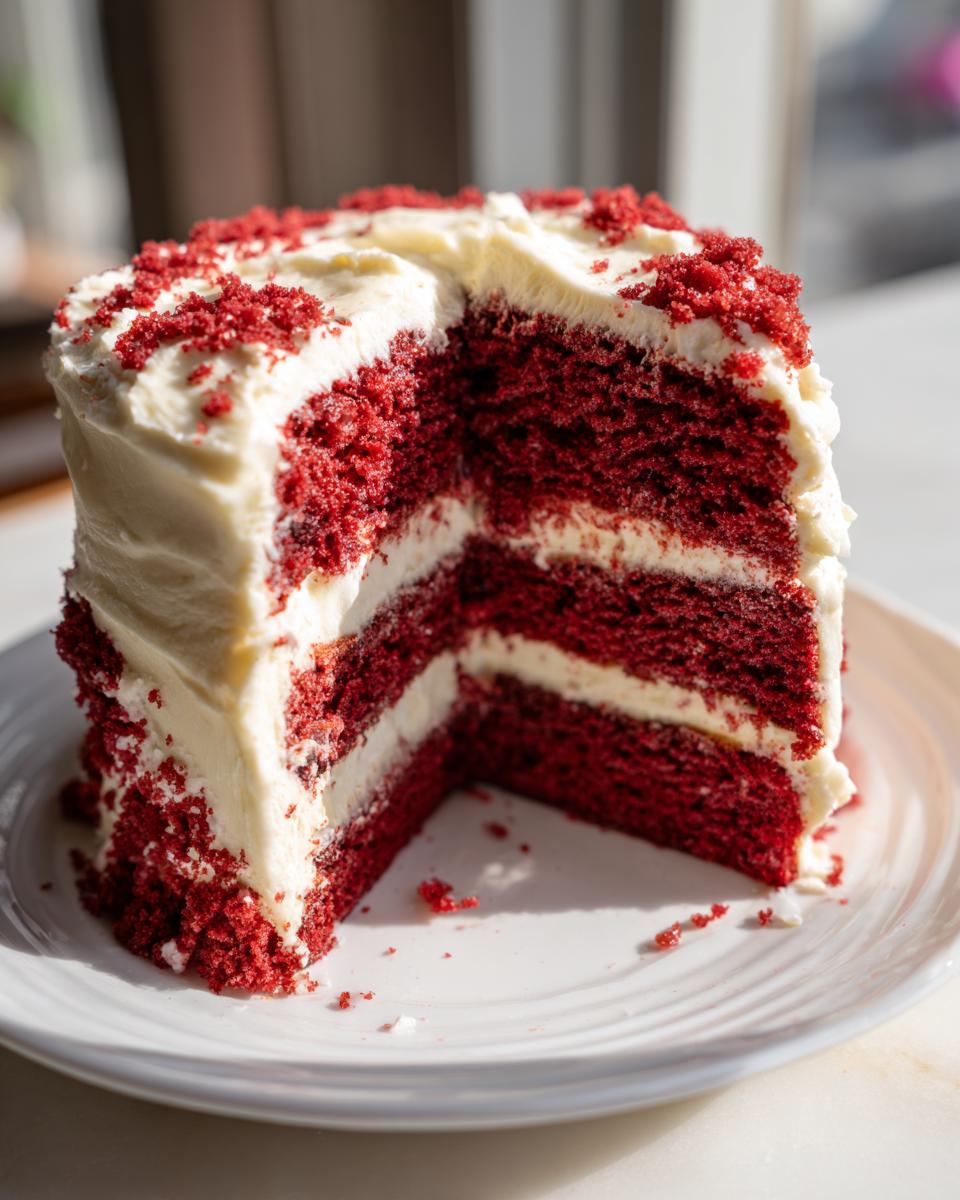
Assembling the Red Velvet Cake with Frosting
While those layers cool down—and they have to be totally cool, promise!—we make the magic! For the best cream cheese frosting recipe, start by beating the softened cream cheese and the 1/2 cup of softened butter together until they are wonderfully smooth and have no lumps. Mix in your vanilla and salt, and then slowly, I mean slowly, add those four cups of sifted powdered sugar. Keep beating until it’s perfectly creamy and easily spreadable. Once those layers are completely cool to the touch, you stack them up and generously cover every surface with that tangy frosting. This final assembly turns it into that stunning red velvet cake presentation everyone loves!

Tips for Success Making Your Red Velvet Cake
I want you to have the absolute best outcome making this, because you deserve a truly showstopping bake! Remember those notes I put on the recipe card about not overmixing? That’s rule number one for getting that wonderfully fluffy red velvet cake; when you add the flour, literally stop mixing the second you don’t see white streaks anymore. Seriously, stop. Also, that buttermilk isn’t just for flavor; it reacts with the baking soda to give you that signature lift, so please don’t skip it—if you’re ever out, you can make a quick substitute but I hope you check out my guide to keeping your baked goods moist for other helpful ideas too! Finally, for the color, just stick to the gel coloring advice I gave earlier. You’re going to nail that beautiful texture!
Serving Suggestions for Your Red Velvet Cake
Now that you have this gorgeous, tender cake cooling, let’s talk about how to present it! This soft homemade cake is already a showstopper, but a few simple touches can elevate it even more for your next event. Think birthdays or maybe a special Valentine’s Day treat—this color is just perfect for those celebrations!
If you’re serving it plain with just that amazing buttercream, sometimes I like to add a little bit of crunch right around the base of the layers. Chopped pecans or walnuts work wonderfully and add a nice texture contrast to the soft cake. Just press them lightly into the frosting around the bottom edge.
Other than that, I usually keep it simple. A few shavings of high-quality white chocolate across the top look elegant, or you could use fresh berries! A handful of bright red raspberries or strawberries placed right on top of the frosting really makes that deep red color pop. Honestly, though, a slice of this cake paired with a strong cup of black coffee or a nice cup of tea is pure perfection all on its own.
Storage and Reheating Instructions for Red Velvet Cake
This beautiful red velvet cake is best enjoyed fresh, but leftovers are a happy problem to have! Because we used that luxurious cream cheese frosting—which is dairy-based—you absolutely must store any remaining cake in an airtight container right in the refrigerator. It keeps wonderfully for about three or four days that way.
Now, here’s the key tip: never serve it cold straight from the fridge! Cold cake tastes stiff. So, before you dig in the next day, take your slice out about 30 minutes ahead of time. Letting it come back to room temperature allows the butter and cream cheese in the frosting to soften up again, giving you that soft, melt-in-your-mouth texture we worked so hard to achieve!
Frequently Asked Questions About Red Velvet Cake
I know sometimes when you look at a recipe, you’ve got a few nagging thoughts about substitutions or deep-dive questions. That’s totally normal! Baking, especially classic American favorites, has a lot of little fine points. I’ve gathered some of the most common questions I get about this wonderful red velvet cake recipe so you can bake with total confidence.
Isn’t this just chocolate cake with red food coloring?
That’s the eternal question! Truly, no. While this recipe does use a small amount of unsweetened cocoa powder (you can check out my guide on best buttermilk pie recipes for why buttermilk is magical), the flavor profile is completely different from a standard chocolate cake. The cocoa is muted by the acidity from the buttermilk and vinegar, creating a subtle, tangy backdrop. The red color was historically used to enhance that slight chocolate flavor, not mask it! If you use too much cocoa, you accidentally get chocolate cake, so we keep it light!
What happens if I skip the buttermilk?
Oh, please don’t! Buttermilk is one of the stars here, making this a true buttermilk cake recipe staple. The acidity is vital because it reacts with the baking soda to give you that signature lift and that tender crumb. If you skip it, the cake won’t rise properly, and it certainly won’t be as moist. If you’re completely out, you can mix 1 tablespoon of white vinegar or lemon juice into 1 cup of whole milk and let it sit for five minutes to curdle; that’s your emergency substitute!
My cake came out tasting totally dry—how do I fix this next time?
That breaks my heart! A dry cake is usually due to two things: overbaking or overmixing. If you baked it too long, the liquids evaporate, of course. But more often with a fluffy red velvet cake, it’s from overmixing once the flour goes in—that develops gluten, making it tough instead of soft! Next time, scrape down the sides, fold everything gently, and pull the cake out the second that toothpick is clean. A little moisture left on the pick is okay if you catch them early!
Can I use this recipe for cupcakes?
Absolutely! This recipe is wonderful as a red velvet layer cake, but dividing the batter into standard cupcake liners works brilliantly. You’ll want to keep baking them closer to the 18- to 20-minute mark since they are smaller and bake faster. Just keep an eye on them! They are fantastic for parties because everyone gets their own perfect frosting-to-cake ratio.
Estimated Nutrition for This Red Velvet Cake Recipe
I always want to be transparent with you all about what you’re putting on your table, which is why I include this section. Since we are baking purely from scratch using whole ingredients, these numbers give you an idea of what’s in each generous slice of our fantastic cake. Please remember, exactly like my grandmother used to say when she used up whatever butter she had on hand, these figures are close estimates!
These values are based on dividing the recipe into 12 servings. If you happen to slice your birthday cake ideas a bit thinner or thicker, those totals are going to shift, so use this as a helpful guide, not an exact science.
- Serving Size: 1 slice
- Calories: 450
- Fat: 24g (with 14g saturated)
- Carbohydrates: 60g
- Sugar: 55g
- Protein: 4g
- Cholesterol: 80mg
- Sodium: 300mg
We’re using real butter and cream cheese here, so the fat content is certainly something to note, but every ounce of that flavor is worth it! Enjoy this rich dessert responsibly!
Share Your Red Velvet Cake Creations
Baking isn’t truly finished until you share the joy, right? Seeing your creations makes all the testing and tweaking worth it for me here at DeliceRecipe. I genuinely hope you had a wonderful time making red velvet cake from scratch; it’s such a rewarding bake when it comes out that beautiful, moist color!
If this recipe worked its magic for your family celebration or just made a Tuesday evening feel special, please take a moment to come back here and leave a rating. A star rating helps other home cooks like you know that this recipe is reliable and delivers on its promise of being the best, easiest, and moistest cake ever.
And I absolutely love seeing your beautiful photos! Tag me on social media—I want to see how your cream cheese frosting turned out and what kind of wonderful occasion you made your red velvet layers for. Did you add any fun decorations? Did you serve it with coffee or maybe a slice of that gorgeous cheesecake trifle I keep hearing about? Don’t be a stranger; I want to hear all about your baking triumphs or even any funny kitchen mishaps!
PrintThe Best Southern Style Moist Red Velvet Cake from Scratch with Classic Cream Cheese Frosting
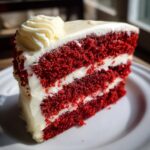
Make this authentic Southern Red Velvet Cake from scratch. This recipe yields a perfectly moist, soft cake with a tender crumb, balanced cocoa flavor, and a vibrant red color. Top it with a rich, homemade cream cheese frosting for a showstopping dessert perfect for birthdays or holidays.
- Prep Time: 25 min
- Cook Time: 30 min
- Total Time: 55 min
- Yield: 12 servings 1x
- Category: Dessert
- Method: Baking
- Cuisine: American
- Diet: Vegetarian
Ingredients
- 2 1/2 cups all-purpose flour
- 1 1/2 teaspoons baking soda
- 1 teaspoon salt
- 1 tablespoon unsweetened cocoa powder
- 1 cup unsalted butter, softened
- 1 1/2 cups granulated sugar
- 2 large eggs
- 1 teaspoon vanilla extract
- 1 cup buttermilk
- 1 teaspoon white vinegar
- 1 to 2 tablespoons red food coloring (liquid or gel)
- 1 (8 ounce) package cream cheese, softened
- 1/2 cup unsalted butter, softened
- 1 teaspoon vanilla extract
- 4 cups powdered sugar, sifted
- 1/4 teaspoon salt
Instructions
- Preheat your oven to 350°F (175°C). Grease and flour two 9-inch round cake pans.
- In a medium bowl, whisk together the flour, baking soda, salt, and cocoa powder. Set this dry mixture aside.
- In a large bowl, beat the 1 cup of softened butter and 1 1/2 cups of granulated sugar with an electric mixer until the mixture is light and fluffy. This takes about 3 minutes.
- Beat in the eggs one at a time, mixing well after each addition. Mix in the 1 teaspoon of vanilla extract.
- In a separate small bowl, mix the buttermilk, vinegar, and red food coloring until the color is uniform and vibrant.
- Gradually add the dry ingredients to the wet ingredients, alternating with the buttermilk mixture, beginning and ending with the dry ingredients. Mix only until just combined; do not overmix.
- Divide the batter evenly between the prepared cake pans.
- Bake for 25 to 30 minutes, or until a wooden pick inserted into the center comes out clean.
- Let the cakes cool in the pans for 10 minutes before inverting them onto a wire rack to cool completely.
- Prepare the cream cheese frosting: In a large bowl, beat the softened cream cheese and 1/2 cup of softened butter until smooth. Beat in the 1 teaspoon of vanilla extract, salt, and gradually add the powdered sugar until the frosting is creamy and spreadable.
- Once the cakes are completely cool, frost and stack the layers.
Notes
- For the most vibrant red velvet cake color, use a good quality gel food coloring instead of liquid coloring.
- Buttermilk is essential for the authentic texture and slight tang in this Southern recipe.
- Do not overmix the batter once you add the flour; this keeps your cake soft and fluffy.
Nutrition
- Serving Size: 1 slice
- Calories: 450
- Sugar: 55g
- Sodium: 300mg
- Fat: 24g
- Saturated Fat: 14g
- Unsaturated Fat: 10g
- Trans Fat: 0.5g
- Carbohydrates: 60g
- Fiber: 1g
- Protein: 4g
- Cholesterol: 80mg