
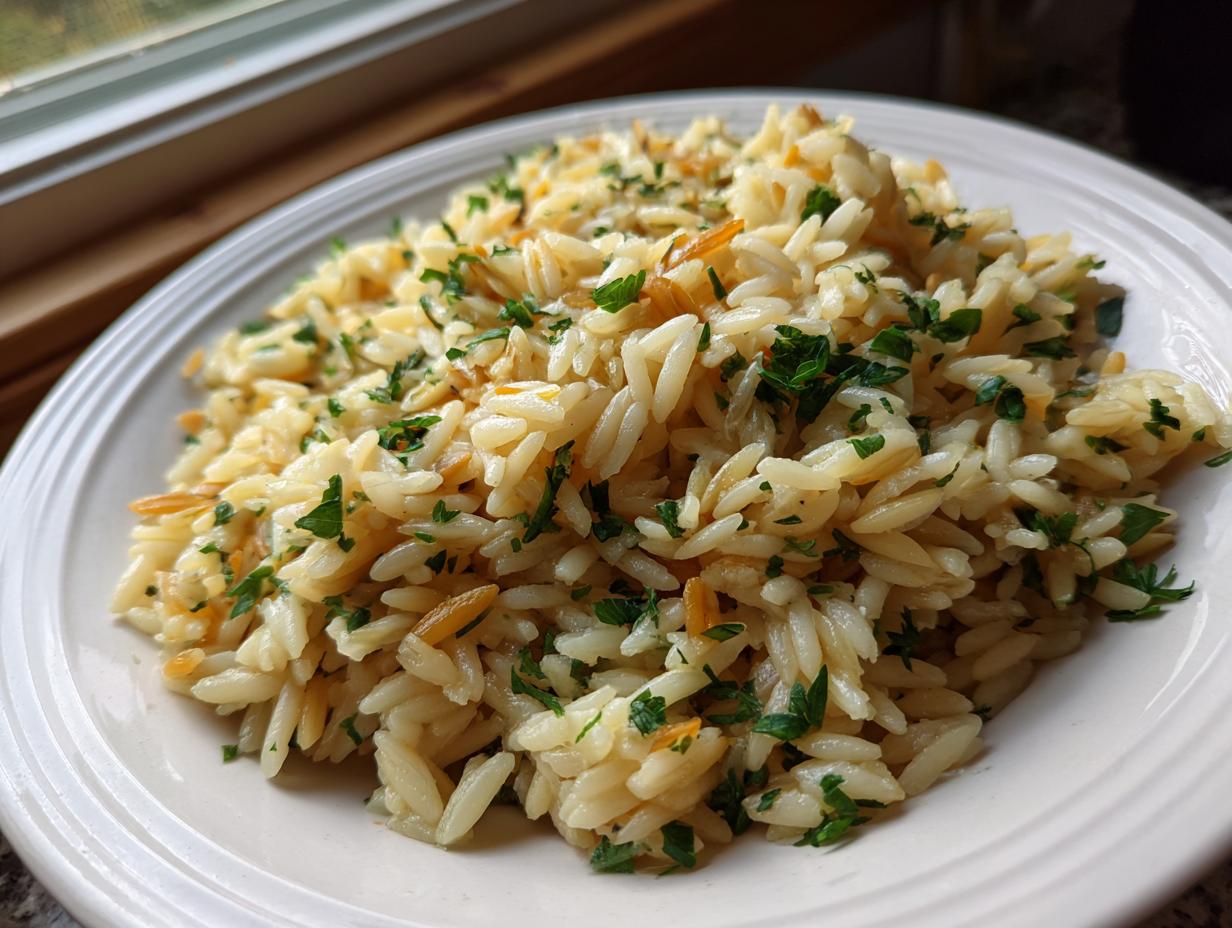
Oh, if there’s one thing that can make a busy Tuesday night feel just a little bit more special, it’s a stellar side dish, right? I mean, the main course gets all the applause, but a great side dish is the reliable star backing it up! I rely on them to make any meal feel complete. That’s why I’m sharing my absolute favorite recipe for a perfect rice pilaf. Forget that stuff that clumps together in a big sticky mess. This Easy Homemade Fluffy Rice Pilaf with Orzo is quick, foolproof, and delivers those beautifully separate, aromatic grains every single time. Trust me, once you master this, you’ll never go back to plain steamed rice again!
- Why This Homemade Rice Pilaf Recipe Works So Well
- Gathering Ingredients for Your Easy Side Dish Recipe
- How to Make Rice Pilaf: Step-by-Step Instructions
- Tips for Success with Your Flavorful Rice Dish
- Rice Pilaf Variations: Making It Your Own
- Serving Suggestions for This Savory Rice Accompaniment
- Storage and Reheating Instructions for Leftover Rice Pilaf
- Frequently Asked Questions About Making Rice Pilaf
- Nutritional Estimates for This Simple Skillet Rice
Why This Homemade Rice Pilaf Recipe Works So Well
There are a few little secrets packed into this recipe that elevate it beyond just cooking rice on the stove. Honestly, this dish is built for weeknights because it comes together so fast while still tasting like you spent way more time on it than you actually did. It really is the perfect quick rice side when you need something substantial but speedy. We are aiming for that classic, fluffy result that always impresses guests, which is why this rice pilaf recipe became a keeper in my files.
When people email me asking how I get my rice so perfectly separate—never gummy—it always comes down to two steps. This is the magic that makes this homemade rice pilaf consistently fantastic, meal after meal.
Achieving the Perfect Fluffy Rice Pilaf Texture
First thing: you absolutely must rinse your rice! Don’t skip this step, please. Rinsing removes that extra surface starch. That starch is what turns rice into one big sticky clump, and we don’t want that here; we want individual, fluffy grains. My second non-negotiable is the resting period after cooking. Once the steam time is up, take the pot off the heat and just leave it alone under the lid for a full ten minutes. That trapped steam finishes cooking the center of the grains gently. If you try to peek or fluff early? Oops! You let all that essential moisture escape. Patience here is key to that light, airy texture.
Flavor Secrets for Your Aromatic Rice Recipe
This isn’t just boiled rice, honey. The flavor starts right at the beginning with the toasting. Sautéing the orzo pasta until it gets that nice little nut-brown color adds this incredible depth and subtle toasted flavor that plain rice just doesn’t have. It’s a game-changer! Then, we use chicken broth instead of water. That liquid immediately infuses every grain with savoriness. Combining that toasted orzo base with the rich broth creates the most wonderful aromatic rice recipe you’ll ever serve as a simple side dish.
Gathering Ingredients for Your Easy Side Dish Recipe
Okay, pulling together what you need for this side dish is nearly as quick as cooking it! Since we’re aiming for real flavor here, the quality of what you put in really matters. Don’t rush this part, even though it’s just measuring—it sets the whole delicious scene for your easy side dish recipe.
Here’s exactly what you need to make this beautiful pilaf. Remember, I’ve linked to my favorite recipe for buttery rice if you want to skip the orzo next time, but for this version, stick to this list!
- 1 tablespoon olive oil
- 1 tablespoon butter (Use the real stuff, please!)
- 1/2 cup orzo pasta (This is our little secret for texture!)
- 1 small yellow onion, finely chopped
- 2 cloves garlic, minced—don’t even think about garlic powder here, trust me
- 1 1/2 cups long-grain white rice, rinsed thoroughly until the water runs clear
- 2 1/2 cups chicken broth (Low sodium is best so you control the salt!)
- 1/2 teaspoon salt
- 1/4 teaspoon black pepper
- 2 tablespoons fresh parsley, chopped, reserved just for that bright green garnish at the end
See? Nothing scary or hard to find! Just simple pantry staples that, when treated right, turn into something spectacular. Make sure those onions are chopped small so they blend in nicely while they soften and give off their sweetness.
How to Make Rice Pilaf: Step-by-Step Instructions
Ready to put it all together? Making this rice pilaf feels like a culinary little trick because the final result is always so much better than the sum of its simple parts. The key here isn’t rushing; it’s timing. You’ll want a medium saucepan with a tight-fitting lid for this whole process. Don’t settle for a pan where the lid wobbles, because that means steam keeps escaping!
When you are following these steps, remember that we want layers of flavor built gently, not smacked on all at once. I explain everything in detail below, including the crucial silent waiting period at the very end. Follow these steps exactly, and you’ll have the fluffiest side dish you’ve ever made. You can check out my main guide on how to make rice pilaf if you ever need a visual reminder, but honestly, this method is straightforward.
Toasting the Orzo and Aromatics
Start by setting your stovetop heat to medium. We need that butter and oil to get nice and warm, but not smoking hot. Once melted together, toss in that half-cup of orzo pasta. Now, this is important: stir constantly! We are toasting it, not burning it. You’re watching for it to turn that lovely light brown color, which usually takes about three to four minutes. It’s going to smell nutty and amazing.
Once the orzo is toasted, drop in your finely chopped onion. We cook that down until it’s softened and translucent—that should take around five minutes. Don’t rush the onion; it’s providing sweetness. Next, bring in that minced garlic. Garlic burns fast, so just stir it in and cook it for exactly one minute until you can really smell it. Then, throw in your rinsed rice and stir everything together for just one minute more, coating those grains in all that wonderful fat we melted earlier. This step truly seals in the flavor before the liquid goes in.
Simmering and the Essential Resting Period for Fluffy Rice Pilaf
Time for the liquid! Pour in your chicken broth—that’s where all that savory flavor comes from—along with your salt and pepper. Give it one good stir to make sure nothing is stuck to the bottom, and bring the whole pot up to a rolling boil. Right when it hits that boil, you need to move fast!
Immediately reduce your heat down to the absolute lowest setting possible. Cover that saucepan *tightly*. Here is the most important part: you will simmer this for exactly 18 minutes. And I mean it—do not lift the lid even an inch during those 18 minutes! If you do, you mess up the internal steam balance, and you lose that fluffiness. Once the timer goes off, take the pan completely off the burner—don’t just turn the heat off, take it somewhere cooler—and let it stand, still covered, for another whole 10 minutes. That residual heat is cooking the last bit of starch and making your fluffy rice pilaf perfect. Seriously, those 10 minutes are mandatory waiting time!
Tips for Success with Your Flavorful Rice Dish
Even though this is such a straightforward rice pilaf, I always have a few extra tricks up my sleeve to ensure it comes out tasting like it was made by a seasoned pro. These little tweaks—especially regarding the liquid—are why my version always seems to have that extra ‘something’ that makes people ask for the recipe.
Don’t be tempted to just use water! That’s the oldest trick in the book for a boring side. Stick to using that broth—whether it’s chicken, beef, or even high-quality vegetable broth—because it’s the main vehicle for flavor delivery. Water just boils the rice; broth seasons it from the inside out. If you use low-sodium broth, you can always add a pinch more salt at the end, but you can’t take salt out if you use regular broth.
Another thing I learned watching my mom is how to give it a boost right before finishing. While the recipe calls for fresh parsley as a garnish, try stirring in a teaspoon of dried thyme or even a pinch of dried dill right along with the broth. You don’t need much, but dried herbs bloom beautifully during that steam time, boosting the overall savoriness of your flavorful rice dish. If you want a little richness, swirl in an extra half-tablespoon of butter right before you fluff it—it makes the grains glossy and irresistible. It’s cheating a little, but nobody has to know! If you’re looking for other quick ways to jazz up your dinner routine, check out my thoughts on quick stovetop cheesy rice; sometimes you just need that creamy element, but this pilaf keeps things light and fluffy!
Rice Pilaf Variations: Making It Your Own
The beauty of this basic rice pilaf template is how easily you can pivot it to match what you have in the pantry or what flavors you’re craving! It starts as a fantastic canvas, and once you master the heat and steam (which you already have, because you’re following my rules!), the sky’s the limit for rice pilaf variations.
We kept the original recipe super simple with just orzo and parsley because sometimes simple is best, but when you have a little extra time, jazzing it up is so much fun. Think about what pairs well with the savory broth base we established.
If you want an earthy, deep mushroom flavor, dice up some cremini mushrooms right along with that yellow onion. Sauté them with the onion until they release their liquid and start to brown—they soak up the flavor from the butter and oil beautifully. Or, if you’re feeling a bit brighter, think Mediterranean! You can always look at my recipe for Mediterranean rice with pine nuts for inspiration on adding lemon zest and toasted nuts, though you’ll want to adjust your cooking liquid slightly if you bring in bigger additions like those.
Another easy swap that changes the whole mood is the spice blend. Instead of just black pepper, try adding a tiny pinch of smoked paprika during the toasting stage, or maybe a half teaspoon of dried oregano works wonders if you’re serving this with roast chicken. Remember, the goal is always maximum flavor with minimum fuss. These little flavor tweaks mean this one simple skillet rice recipe can show up on your table once a week and never feel boring!
Serving Suggestions for This Savory Rice Accompaniment
So, you have this perfectly fluffy, deeply flavorful rice pilaf sitting in your pot, patiently waiting its turn. What are we serving with it? That’s the fun part because this dish is seriously versatile! It acts as the kind of sturdy, comforting base that just elevates whatever protein is sitting next to it on the plate.
Because we used that quality chicken broth, this pilaf leans perfectly into savory territory, making it a natural partner for heartier meals. You absolutely cannot go wrong pairing this with simple roasted meats. Think about a big, juicy roast chicken—it practically begs for this rice soaking up those pan juices. If you’re looking for an incredibly easy main course to match the simplicity of this side, I’ve got my recipe for juicy baked chicken breast that pairs beautifully!
On the red meat side, this rice is excellent with simple pan-seared steak or even meatballs. It soaks up gravy like a dream! But please don’t limit yourself to just meat! If you’re doing a vegetarian night, this rice pilaf for chicken replacement works wonders under roasted seasonal vegetables—think asparagus, carrots, or Brussels sprouts tossed lightly in olive oil and salt.
The orzo gives it just enough texture to feel substantial, so it really can stand in for mashed potatoes or plain white rice any night of the week. It’s a true crowd-pleaser as a savory rice accompaniment for any casual dinner or more dressed-up gathering!
Storage and Reheating Instructions for Leftover Rice Pilaf
You know I always make extra, because leftover rice pilaf is almost better the next day once the flavors have really slept on it! Don’t be afraid to double this recipe if you’re feeding a crowd, because the storage is super easy.
Here’s the deal on keeping it fresh. Once the pilaf has cooled down a bit after resting—you don’t want to store scalding hot food—transfer it to an airtight container. This is important to keep it from drying out in the fridge. Properly stored, this savory rice accompaniment will stay fresh and flavorful for about three to four days. Yes, that’s right, nearly a full week of delicious side dishes ready to go!
Now, reheating is where most people mess up rice pilaf, turning it back into dry crunchiness. You want to treat it gently. Don’t just blast it in the microwave uncovered; that sucks out all the moisture we worked so hard to keep in there!
The best way to bring it back to life is to add a tiny bit of liquid back into the portion you’re heating up. I mean a splash—maybe a teaspoon or two of water or broth per cup of rice. Put the rice in a microwave-safe bowl, sprinkle that liquid on top, cover the bowl loosely with a damp paper towel, and heat it in short bursts until it’s warmed through. That damp towel traps just enough steam to rehydrate those lovely grains.
If you’re reheating a big batch on the stovetop, use a non-stick skillet over medium-low heat and stir in that splash of broth. Cook it slowly, covered, until it’s steaming hot throughout. It shouldn’t take more than five or six minutes this way. It’s so satisfying knowing you already have this amazing, flavorful rice dish ready for an unexpected weeknight dinner!
Frequently Asked Questions About Making Rice Pilaf
I know you might have a few lingering questions when you’re trying a new technique, especially when grain texture is involved. That’s totally normal! I’ve gathered some of the most common things people ask me when they bake along at home. If I can help you feel more confident about making this flavorful rice dish, then I’ve done my job!
Can I use Basmati Rice instead of long-grain white rice in this rice pilaf?
That is such a smart question! Yes, you absolutely can use Basmati rice or even Jasmine rice, but you have to watch your liquid ratio closely. Basmati can behave a little differently than standard long-grain white rice because it’s generally longer and sometimes absorbs liquid faster. While the recipe calls for 2 1/2 cups of broth for 1 1/2 cups of rice, if you use Basmati, I would suggest starting with just 2 1/4 cups of broth. Basmati is known for being naturally fluffy, so you don’t want to risk over-saturating it during the simmer. Make sure you still follow that 18-minute simmer and 10-minute rest time—that steaming process is what sets the Basmati grains perfectly!
How long does it takes to make this quick rice side dish?
That’s what I love most about this recipe—it’s sneaky fast! The actual hands-on time, which includes chopping the onion and toasting the orzo, is only about ten minutes. Then the cooking and resting time clocks in right around 28 minutes total. So, if you are starting from scratch, you can be fluffing this beautiful quick rice side in under 40 minutes total! It’s a wonderful, reliable choice when you need a weeknight side dish that doesn’t feel like weeknight food.
What if I don’t have orzo pasta on hand?
Oh, don’t panic if you’re missing orzo! That toasted pasta is just there to add chewiness and a slightly nutty flavor, but it’s not essential for success. If you skip the orzo, your cooking time for the onions might be slightly shorter since you don’t have that pasta to toast first. Simply sauté your onions and garlic directly in the butter/oil mix, then move straight to coating the rice. Honestly, if you need a substitute right away, you can use a quarter cup of dried vermicelli noodles, broken up into little pieces, and toast those instead of the orzo! It gives a similar effect. You can find more ideas for how exactly to boost your sides here!
Can you make this entire rice pilaf in a rice cooker?
Yes, but you have to treat the beginning steps like an actual recipe, not just dumping everything in! You must sauté the orzo, onions, and garlic first, just as we do in the pot, to build that flavor foundation. Once those are fragrant and toasted, transfer that whole mixture into your rice cooker pot. Then, add the rinsed rice and your broth. Set your rice cooker to cook as usual. The only potential snag is the resting time; once it finishes its cycle, leave the cooker untouched on the ‘Keep Warm’ setting for those crucial 10 minutes before you gently fluff it. Don’t rely on the cooker’s automatic shut-off to do the resting for you!
Nutritional Estimates for This Simple Skillet Rice
So, you’ve made this absolutely gorgeous, flavorful side dish, and maybe you’re watching your intake, or maybe you’re just curious! While the focus here at DeliceRecipe is always on flavor and making sure the food tastes amazing, I always try to give you a general idea of what you’re serving up. Remember, because this is a homemade recipe, every little swap—like using brown rice instead of white, or using lower-sodium broth—will swing these numbers!
Think of these figures as a general guide for one serving (about 1 cup cooked) of this simple skillet rice, based on the standard ingredients listed. If you want to see how this stacks up against other things you might be making alongside dinner, like my rich garlic mashed potatoes, you can compare notes, but the pilaf is generally a lighter option!
Here are the estimated values based on our rice pilaf recipe:
- Serving Size: 1 cup cooked
- Calories: 320
- Fat: 6g
- Saturated Fat: 2g
- Trans Fat: 0g
- Cholesterol: 5mg
- Sodium: 450mg (This really depends on your broth choice, so keep that in mind!)
- Carbohydrates: 58g
- Fiber: 2g
- Protein: 8g
- Sugar: 1g
It’s a lovely balance of carbs and protein to keep everyone satisfied at the dinner table. It proves you don’t need heavy sauces or tons of extra fat to end up with a truly satisfying and savory meal accompaniment!
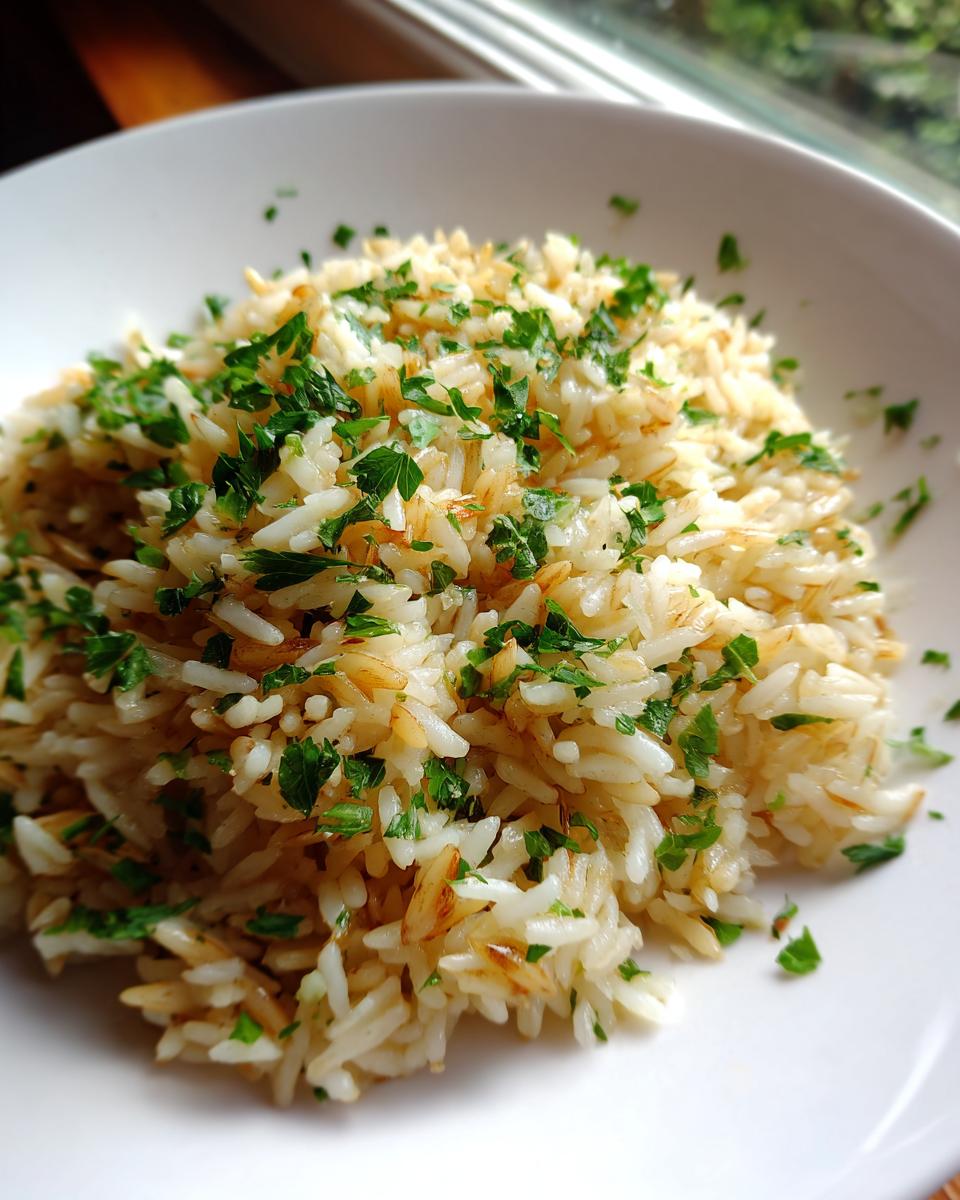
PrintEasy Homemade Fluffy Rice Pilaf with Orzo

This recipe gives you fluffy, flavorful rice pilaf using simple ingredients like orzo, onion, garlic, and chicken broth. It is a quick and easy side dish perfect for weeknight dinners.
- Prep Time: 10 min
- Cook Time: 25 min
- Total Time: 35 min
- Yield: 4 servings 1x
- Category: Side Dish
- Method: Stovetop
- Cuisine: American
- Diet: Vegetarian
Ingredients
- 1 tablespoon olive oil
- 1 tablespoon butter
- 1/2 cup orzo pasta
- 1 small yellow onion, finely chopped
- 2 cloves garlic, minced
- 1 1/2 cups long-grain white rice, rinsed
- 2 1/2 cups chicken broth
- 1/2 teaspoon salt
- 1/4 teaspoon black pepper
- 2 tablespoons fresh parsley, chopped (for garnish)
Instructions
- Heat the olive oil and butter in a medium saucepan over medium heat.
- Add the orzo pasta and cook, stirring frequently, until it turns light brown, about 3 to 4 minutes.
- Add the chopped onion to the saucepan and cook until softened, about 5 minutes.
- Stir in the minced garlic and cook for 1 minute until fragrant.
- Add the rinsed rice to the pan and stir to coat with the fat, cooking for 1 minute.
- Pour in the chicken broth, salt, and pepper. Bring the mixture to a boil.
- Once boiling, reduce the heat to low, cover the saucepan tightly, and simmer for 18 minutes without lifting the lid.
- Remove the saucepan from the heat and let it stand, covered, for 10 minutes. Do not lift the lid during this time.
- Fluff the rice gently with a fork. Garnish with fresh parsley before serving.
Notes
- Rinsing the rice helps remove excess starch, which contributes to a fluffier final texture.
- You can substitute vegetable broth for chicken broth to make this dish vegetarian.
- This savory rice accompaniment pairs well with chicken, beef, or roasted vegetables.
Nutrition
- Serving Size: 1 cup cooked
- Calories: 320
- Sugar: 1
- Sodium: 450
- Fat: 6
- Saturated Fat: 2
- Unsaturated Fat: 4
- Trans Fat: 0
- Carbohydrates: 58
- Fiber: 2
- Protein: 8
- Cholesterol: 5