
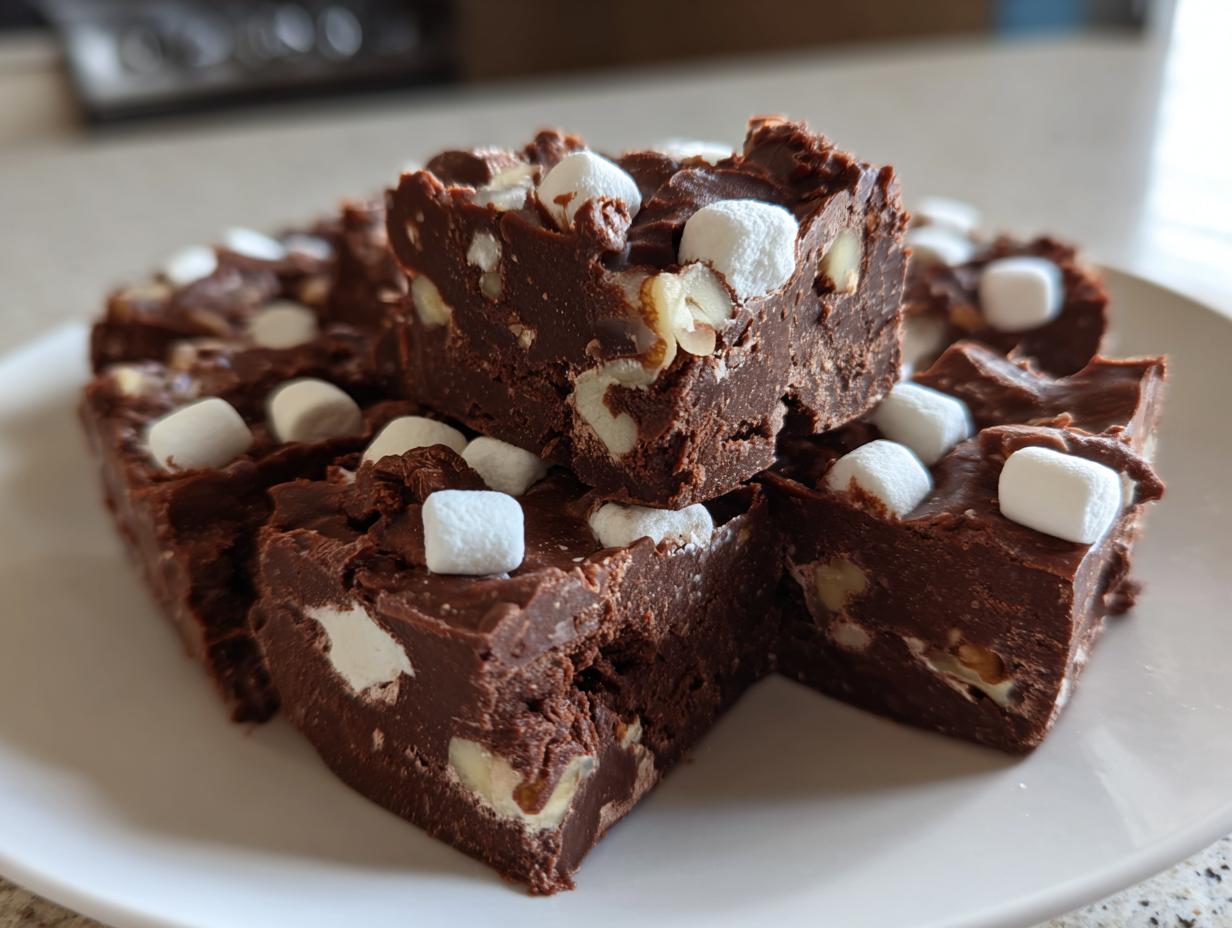
When you need a serious chocolate fix, but the idea of turning on the oven feels like too much work, I have the ultimate answer for you. Forget hours of careful tempering! We are diving headfirst into one of my favorite homemade candy recipes: the rocky road fudge. If you’ve been searching for the absolute easiest dessert, look no further. This version is incredibly satisfying, comes together faster than ordering takeout, and is completely no bake. It’s ready to chill in about 15 minutes, maximum! Here at DeliceRecipe, founder Ellie Vance strives to bring you recipes just like this—delicious, reliable, and totally fuss-free. Trust me, this quick chocolate fudge is about to become your weeknight hero and your holiday staple. You can check out more amazing simple sweets here: delicious dessert recipes.
- Why This is the Best Rocky Road Fudge Recipe You Will Ever Make
- Gathering Ingredients for Your Rocky Road Fudge
- Step-by-Step Instructions for Easy Rocky Road Fudge
- Tips for Achieving the Best Rocky Road Fudge Texture
- Variations on Classic Rocky Road Fudge
- Storage and Make Ahead Fudge Tips for Your Rocky Road Fudge
- Frequently Asked Questions About Rocky Road Fudge
- Estimated Nutritional Data for Rocky Road Fudge
- Share Your Homemade Candy Recipes
Why This is the Best Rocky Road Fudge Recipe You Will Ever Make
I truly stand by this recipe. When you are short on time or just want satisfying results without the commitment of baking, this is the way to go. Life is too short to wrestle with candy thermometers when you can have this amazing texture so easily. Here’s why I think you’ll love it as much as I do:
- It’s impossibly rich—truly decadent chocolate fudge goodness.
- The balance of chewy marshmallows and crunchy nuts in this marshmallow nut fudge is perfection.
- It sets up beautifully, giving you those clean squares you see in bakery cases.

Speed and Simplicity: The No Bake Fudge Recipe Advantage
Seriously, the prep time is only about 15 minutes! It’s a full-on no bake fudge recipe, meaning you skip preheating the oven entirely. You just melt, mix, and chill. If you need a quick chocolate fudge fix right now, this is the answer. It’s truly the lowest effort for the highest reward!
Perfect for Holiday Fudge Recipes and Gifting
I rely on this year after year for holiday baskets. Because it cuts so cleanly, it’s one of the best recipes when it comes to fudge for gifting. You can whip up a huge batch and package it up beautifully in no time at all. It’s a stunning contribution to any table featuring holiday fudge recipes.
Gathering Ingredients for Your Rocky Road Fudge
The beauty of this rocky road fudge is that it uses simple items, but quality really does matter here, especially for that satisfyingly decadent chocolate fudge taste. Since this is a melted stovetop recipe, the chocolate chips you choose are the star of the show. Don’t skimp! I always grab the best semi-sweet chips I can find. Don’t forget to have your ingredients pre-measured—this is so quick that you won’t have time to hunt around for that missing bag of marshmallows once the pan is warm!
Remember, even though this is mostly assembly, the little things count. You’ll need to make sure those walnuts or pecans are nicely chopped up before they go in. If you have extra time or are looking for another great recipe to try after this one sets, check out how to make perfect hard-setting cookie icing!
Here is what you need gathering up before you start:
- One can of sweetened condensed milk (the 14 oz size is standard).
- A 12-ounce bag of quality semi-sweet chocolate chips.
- A tablespoon of real unsalted butter—it adds such a nice richness.
- Vanilla extract and salt, just a touch for depth.
- Mini marshmallows—important that they are minis so they distribute well!
- One cup of chopped walnuts or pecans, depending on what you love best.
Step-by-Step Instructions for Easy Rocky Road Fudge
Mixing up this fantastic simple fudge dessert is about to become your new favorite way to make candy. Since everything happens so fast, make sure your pan is ready to go before you even turn on the stove! I promise, those 15 minutes fly by, and you want to be ready to pour the minute the chocolate is smooth.
Preparing the Pan and Melting the Chocolate Base
First things first: grab your 8×8 pan and line it with parchment paper, but make sure you leave a nice overhang flap on two sides. This is your handle for getting the fudge out later—don’t skip it! Next, we melt. Combine the condensed milk, chocolate chips, and butter in your saucepan. Keep the heat on low, and stir constantly. I mean it, stir constantly! If it scorches even a little bit, the texture of your rocky road fudge will be grainy, and we want velvety smooth chocolate.
Folding in Marshmallows and Nuts for the Perfect Rocky Road Fudge
Once everything is fully melted and super smooth, pull that pan right off the heat immediately. Now, stir in your vanilla and salt quickly. Then, it’s time for the fun bits! Gently fold in those mini marshmallows and your chopped nuts. You need to fold gently so you don’t crush the marshmallows into sugary dust! Pour that glorious mixture into your lined pan and spread it out evenly. Now the hardest part: you have to let it chill for at least two hours to get firm. You can cheat by putting it in the freezer for 30 minutes if you absolutely cannot wait!
After it’s set, just lift it right out using those parchment handles. If you need other fast, no-fuss recipes, I’ve got a great guide for easy no-bake haystack cookies you might want to try next!
Tips for Achieving the Best Rocky Road Fudge Texture
Getting that dreamy, melt-in-your-mouth texture for your rocky road fudge is all about a few little secrets. Since this is a non-bake recipe, we rely heavily on the melting step to create that beautiful structure. When it comes to the nuts, if you are sticking with walnuts or pecans for that classic walnut marshmallow fudge flavor, I always suggest giving them a quick, light toast in a dry skillet for just a few minutes. This wakes up their flavor immensely!
Also, a quick note about the chocolate chips: I mentioned using good quality ones earlier, and I meant it. Cheaper chips sometimes contain stabilizers that fight the melting process and can lead to a duller finish. We want that glossy, rich look!
And please, go easy on stirring once the marshmallows go in. If you beat them too vigorously, they dissolve into sugar instead of sitting there as those delightful, chewy pockets we all look for. It’s a delicate balance, but once you nail it, you’ll use this recipe forever. If you’re interested in other foolproof recipes that focus on moisture, you might love my guide on making easy, super moist pumpkin bread!
Variations on Classic Rocky Road Fudge
While the standard combination of chocolate, marshmallow, and walnuts is unbeatable, I always encourage having fun with your rocky road fudge! It’s such a forgiving quick chocolate fudge base. If you use pecans instead of walnuts, you get a slightly sweeter crunch. I’ve even tried using slivered almonds for a different chew factor. My absolute favorite trick for making the chocolate taste even deeper and richer? A tiny pinch—like, just barely a pinch—of instant espresso powder stirred in with the vanilla.
It doesn’t make the fudge taste like coffee, it just boosts the chocolate intensity! If you are looking for other ways to deepen that decadent chocolate experience, you have to check out my recipe for ultimate fudgy Oreo brownies. It uses similar flavor boosters! Just remember, whatever variation you choose, the key is still that super simple no bake fudge recipe process.
Storage and Make Ahead Fudge Tips for Your Rocky Road Fudge
One of the greatest things about this rocky road fudge is how wonderfully it keeps. This recipe is fantastic for planning ahead, making it a true make ahead fudge champion, especially during the busy holiday season. It holds its shape beautifully, making those neat squares perfect for stacking into treat boxes or storing as simple chocolate dessert bars for later snacking.
Once you have cut your fudge squares, I highly recommend storing them in a single layer in a truly airtight container. Wax paper tucked between the layers helps keep them from sticking together if you have to stack them for storage. If you keep them in a cool, dark pantry spot, they stay perfectly fresh for about a week. Pop them in the fridge if your kitchen runs warm, but let them sit out for about 15 minutes before serving so they soften just a tiny bit. If you want to keep them even longer, you can freeze them! If you love rich, make-ahead chocolate treats, you might also want to look into my recipe for moist and rich chocolate cake.
Frequently Asked Questions About Rocky Road Fudge
I always get questions after someone tries this basic but amazing recipe for the first time. It’s just so versatile! Here are a few things I hear most often about making this super simple version of rocky road fudge. I hope this helps you feel super confident as you make your batch. If you need another quick option after finishing this one, you can always check out my guide on quick sweet fixes!
Can I substitute the nuts in this easy rocky road fudge recipe?
Absolutely, you can! This easy rocky road fudge recipe really shines because it lets you customize. If you have allergies or just aren’t a fan of walnuts or pecans, feel free to swap them out. Pumpkin seeds or sunflower seeds offer a nice crunch without nuts. You could even try dried cherries or cranberries for a chewy, fruity twist! Just make sure whatever you use is chopped small enough to distribute evenly.
Is this a true no bake fudge recipe?
Yes, darling, it is 100% a no bake fudge recipe! The only heat involved is low stove heat used strictly to melt down the chocolate and condensed milk until they are smooth—you never have to touch the oven. That’s why it’s one of my top picks for quick sweet fixes when you need dessert fast!
Can I use milk chocolate instead of semi-sweet chips?
You certainly can switch to milk chocolate chips if that’s what you prefer! Just know that since milk chocolate has more sugar, your final rocky road fudge will be distinctly sweeter than the semi-sweet version. I find that semi-sweet balances the sweetness of the marshmallows best, but if you love that sweeter profile, go for it!
How long does this homemade candy recipe stay fresh?
Because we are using sweetened condensed milk, this candy keeps quite well. Stored tightly covered at cool room temperature, these squares will stay fresh for about a week. If you are making them for a big party or holiday event, you can definitely make them a few days in advance, which is why I love it as part of my homemade candy recipes collection!
Estimated Nutritional Data for Rocky Road Fudge
Now remember, while this rocky road fudge is a total dream to make and eat, it is still a rich chocolate treat! I have included the estimated nutritional data below for reference. Please keep in mind that these numbers are based on standard measurements and the *exact* brands of chocolate chips or nuts you use can make them shift a bit. Think of this as a good guideline, not a strict lab report!
- Serving Size: 1 square
- Calories: 150
- Sugar: 18g
- Sodium: 45mg
- Fat: 8g
- Protein: 2g
It’s absolutely worth every single calorie when you whip up a batch of this fantastic quick chocolate fudge, especially knowing you made it yourself with such minimal effort!
Share Your Homemade Candy Recipes
I really hope you’ve got your mixing bowls ready because now it’s your turn! Making this rocky road fudge has been such a joy for me, and I want you to experience that same happy feeling when you see how fast these turn out. If you try this recipe—and I sincerely hope you do—please come back and let me know how it went in the comments below. Did you stick to the walnuts, or did you try an adventurous nut variation?
Leave a star rating so other home cooks know just how much you loved this simple fudge dessert! Every review helps me keep bringing you the most reliable, easy-to-follow homemade candy recipes possible. Every time you make one of these wonderful treats, you are adding another beautiful memory to your own family’s recipe collection. If you’re already dreaming up your next sweet project, I think you’ll really enjoy my recipe for easy tiramisu. Happy stirring, friends!
PrintExtremely Easy No-Bake Rocky Road Fudge Ready in 15 Minutes
Make this simple, no-bake Rocky Road Fudge quickly. This recipe delivers velvety chocolate fudge loaded with chewy marshmallows and crunchy nuts. It is perfect as a quick sweet fix or as a homemade candy recipe for holiday gifting.
- Prep Time: 15 min
- Cook Time: 5 min
- Total Time: 20 min
- Yield: About 36 pieces 1x
- Category: Dessert
- Method: No-Bake
- Cuisine: American
- Diet: Vegetarian
Ingredients
- 1 (14 ounce) can sweetened condensed milk
- 1 (12 ounce) package semi-sweet chocolate chips
- 1 tablespoon unsalted butter
- 1 teaspoon vanilla extract
- 1/2 teaspoon salt
- 1 1/2 cups mini marshmallows
- 1 cup chopped walnuts or pecans
Instructions
- Line an 8×8 inch baking pan with parchment paper, leaving an overhang on two sides for easy removal. Lightly grease the paper.
- In a medium saucepan over low heat, combine the sweetened condensed milk, chocolate chips, and butter. Stir constantly until the chocolate and butter are completely melted and the mixture is smooth. Do not let it boil.
- Remove the saucepan from the heat. Stir in the vanilla extract and salt.
- Gently fold in the mini marshmallows and the chopped nuts until they are evenly distributed throughout the chocolate mixture.
- Pour the fudge mixture into the prepared pan. Spread it evenly using a spatula.
- Refrigerate the fudge for at least 2 hours, or until firm enough to cut.
- Use the parchment paper overhang to lift the fudge from the pan. Place it on a cutting board.
- Cut the fudge into 1-inch squares. Store the squares in an airtight container.
Notes
- For the best texture, use good quality chocolate chips.
- You can substitute the nuts with your preferred variety, like almonds or peanuts.
- This fudge sets faster if you place it in the freezer for 30 minutes instead of the refrigerator.
- If you are making this for gifting, cut the squares neatly and wrap them individually in small squares of wax paper.
Nutrition
- Serving Size: 1 square
- Calories: 150
- Sugar: 18
- Sodium: 45
- Fat: 8
- Saturated Fat: 4
- Unsaturated Fat: 4
- Trans Fat: 0
- Carbohydrates: 19
- Fiber: 1
- Protein: 2
- Cholesterol: 10