
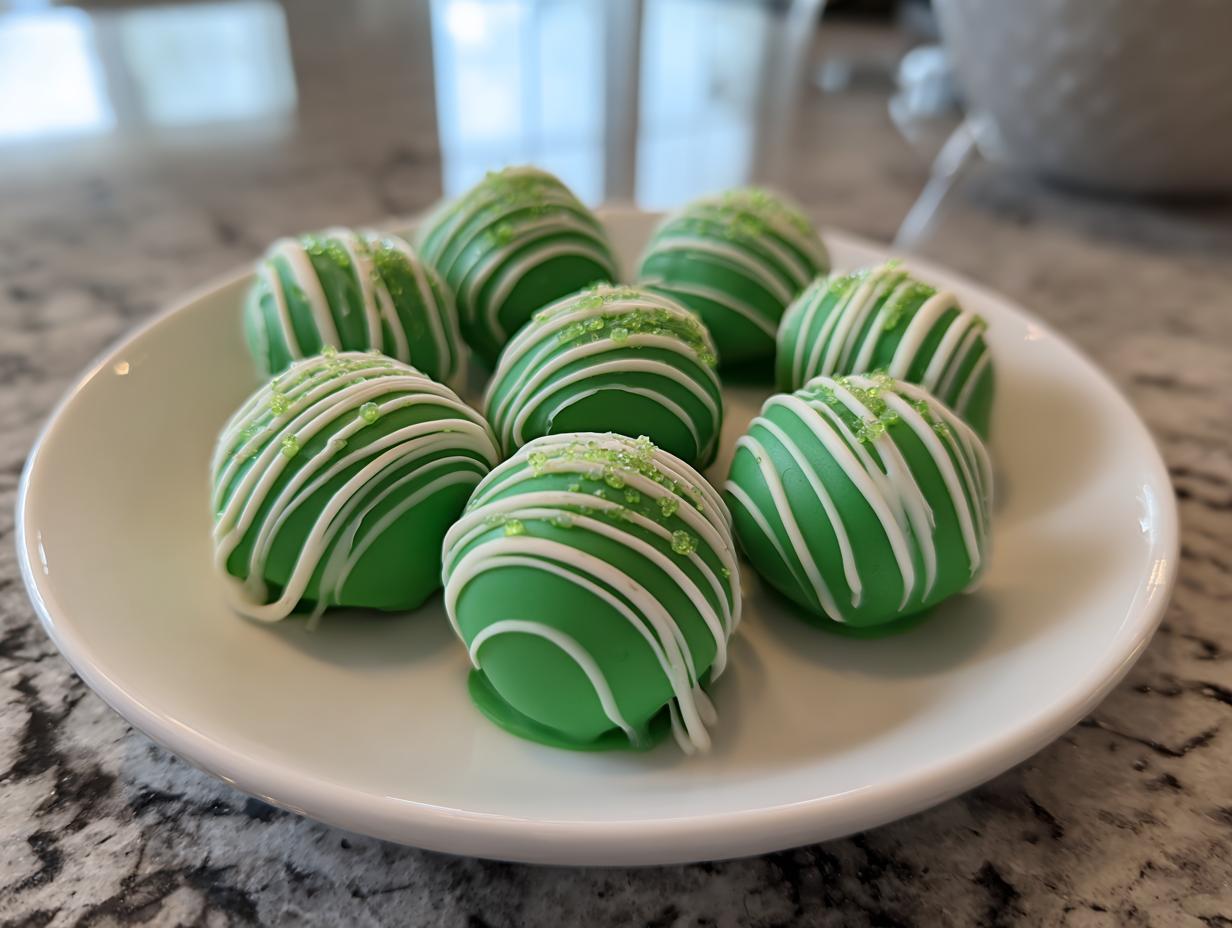
Oh, the holidays! They always sneak up on me, don’t they? Suddenly, it’s a whirlwind of decorating, shopping, and trying to whip up enough goodies for everyone. This year, I needed a serious shortcut, something that felt totally festive but wouldn’t keep me in the kitchen all day. That’s exactly how these super easy Little Debbie cake balls came about! Seriously, if you’re looking for a last-minute party dessert hack or just a fun way to use up those iconic Christmas Tree Cakes, you’ve found your golden ticket. They’re almost ridiculously simple and taste like pure holiday magic.
- Why You'll Love These Little Debbie Cake Balls
- Gather Your Ingredients for Little Debbie Cake Balls
- Step-by-Step Guide to Making Christmas Tree Cake Truffles
- Tips for Perfect No-Bake Holiday Truffles
- Ingredient Notes and Substitutions for Candy Coated Cake Balls
- Making Ahead and Storing Your Little Debbie Cake Balls
- Serving Suggestions for Your No Bake Holiday Truffles
- Frequently Asked Questions about Little Debbie Cake Balls
- Estimated Nutritional Information
- Share Your Holiday Creations!
Why You’ll Love These Little Debbie Cake Balls
Trust me, these aren’t just any treats; they’re pure holiday joy in little portable bites! Here’s why you’ll be making these again and again:
- So Easy It’s Crazy: We’re talking minimal ingredients and zero baking. Seriously, it doesn’t get much simpler than 3 ingredient truffles!
- Super Speedy: You can whip up a batch of these no bake holiday truffles in under 30 minutes. Perfect for when company’s coming!
- Festive Flavor Bomb: That classic Christmas Tree Cake taste gets a delicious upgrade. They’re so good, they instantly make any cookie tray ideas spectacular.
- Kid-Friendly Fun: Get the little ones involved! They’ll love crumbling the cakes and helping to roll the balls.
- Total Crowd-Pleaser: These Little Debbie cake balls are always a hit, whether it’s for a party or just a sweet afternoon treat.
- Make-Ahead Magic: These are total lifesavers as make ahead christmas treats. Just whip ’em up and have them ready to go!
Gather Your Ingredients for Little Debbie Cake Balls
Alright, to whip up these magical Little Debbie cake balls, you really only need a few things. It’s almost like a recipe whispering, “You got this!” Here’s what you’ll want to grab:
- One package of those adorable Little Debbie Christmas Tree Cakes – the standard 10.5 oz size is perfect.
- About 4 ounces of cream cheese, make sure it’s softened so it mixes in like a dream.
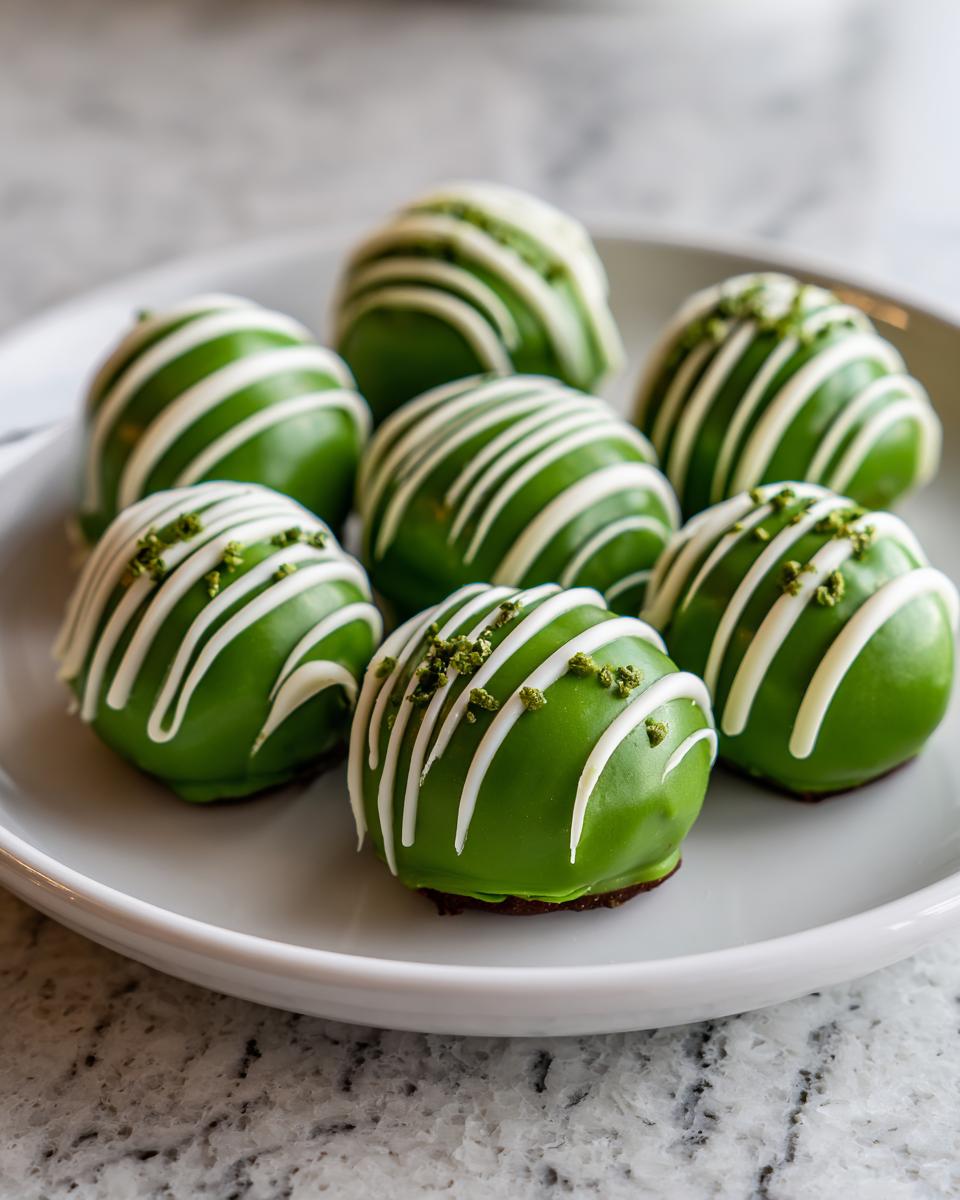
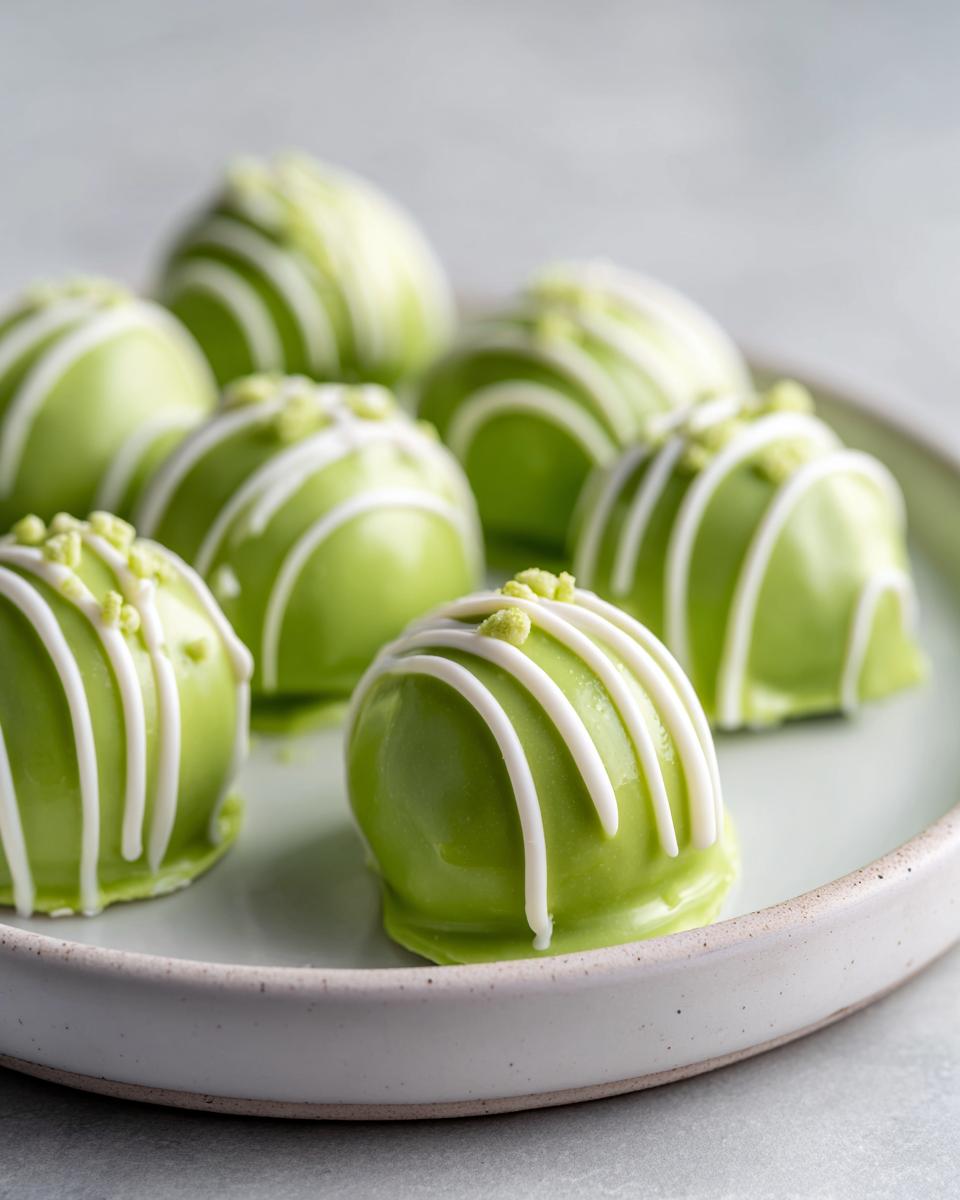
- Roughly 12 ounces of candy melts. White or green are super festive, but honestly, whatever you have works!
- And if your candy melts seem a little thick when you melt ’em, just have about 1 tablespoon of vegetable shortening handy. It’s optional, but it can really help get that smooth coating.
Step-by-Step Guide to Making Christmas Tree Cake Truffles
Alright, let’s get these festive little guys made! It’s honestly a breeze, and so satisfying when you see them come together. Just follow along, and you’ll have a tray full of holiday cheer in no time. It takes me back to making granola with my grandma, just a different kind of magic!
Preparing the Cake Mixture
First things first, grab a baking sheet and line it with some parchment paper. This is going to be your staging area! Now, take your Little Debbie Christmas Tree Cakes and crumble them all up into a medium-sized bowl. Try to get rid of any big chunks of frosting, you want pretty even crumbles. Toss in your softened cream cheese. Now, get your hands in there (or use a sturdy spoon if you’re not feeling it!) and mix it all up really well. You’re aiming for a smooth, dough-like consistency where everything is just perfectly combined.
Shaping and Freezing the Cake Balls
Once your cake and cream cheese mix is all happy together, it’s time to roll! Grab about a tablespoon of the mixture at a time and roll it into nice, neat 1-inch balls. Place these little dough orbs onto your prepared baking sheet. Don’t worry if they aren’t perfectly round; they’re meant to be cute and rustic! Pop this whole sheet into the freezer for at least 15 to 20 minutes. This step is super important – it firms them up so they don’t fall apart when you dip them in the warm candy coating.
Melting and Dipping the Candy Coating
While those cake balls are chillin’, let’s get the candy coating ready. Melt your candy melts according to the package instructions. Usually, this means doing it in the microwave in short bursts – like 30 seconds at a time – stirring in between. Keep going until it’s all smooth and luscious. If it looks a little too thick to coat nicely, stir in that optional vegetable shortening, just a tiny bit at a time, until it reaches a drizzly consistency. Now, take one of those cold cake balls and dip it into the melted candy. Use a fork or a special dipping tool to make sure it’s totally covered, then lift it out and let all that extra coating drip back into the bowl. So satisfying!
Setting and Finishing Your Little Debbie Cake Balls
Gently place your freshly dipped truffle back onto the parchment-lined baking sheet. Repeat this process with all your frozen cake balls. Now, just let them sit and get happy. They can set up right there at room temperature if your house isn’t too warm, or you can pop them back into the fridge for a bit to speed things up. Once that candy coating is totally hard and set, you’re basically done!
Tips for Perfect No-Bake Holiday Truffles
Okay, so making these little gems is pretty straightforward, but like any good recipe, a few little tricks can make them *extra* special. You want that smooth, perfect coating and for them to look like they came straight from a fancy bakery, right? Don’t worry, I’ve got you covered!
First off, that coating consistency is key. If your candy melts are too thick, they’ll be clumpy and sad. A little splash of vegetable shortening, like I mentioned, is your best friend here. Another tip is to melt them slowly and stir often – microwaves can be tricky! If you’re feeling fancy, grab some fun sprinkles or colored sugars and toss them on *right* after you dip each truffle. They stick best when the coating is still wet. Speaking of dipping, make sure those cake balls are properly frozen. If they’re still soft, they’ll fall apart in the warm candy, and nobody wants that! Think of it like decorating Christmas bark – timing is everything. And if you ever had trouble with cookies sticking, remember how important parchment paper is? Same idea here for a clean finish. For even more simple holiday baking fun, check out these 3-ingredient butter cookies – so easy and always a hit!
Ingredient Notes and Substitutions for Candy Coated Cake Balls
Okay, let’s chat ingredients! While the recipe calls for specific items, sometimes you need options, right? The Little Debbie Christmas Tree Cakes are pretty central to the whole vibe, so sticking with those is best for that authentic holiday flavor. But for the coating, feel free to get creative! If you’re not a fan of candy melts, good quality white chocolate chips can work, but they tend to be a bit trickier to get smooth. Just be sure to add a little bit of extra fat, like coconut oil or maybe even a tiny bit of butter (though that can affect setting), to help them melt beautifully.
As for the cream cheese, really, any full-fat block cream cheese will do the trick. Make sure it’s softened, though – nobody wants lumpy cake balls! The goal is smooth, delicious, and super easy holiday magic.
Making Ahead and Storing Your Little Debbie Cake Balls
One of the best parts about these magical Little Debbie cake balls is that they are total superstars when it comes to making them ahead! You can totally whip these up a few days before your party or when you’re assembling those gorgeous holiday dessert trays. Just pop the finished truffles into an airtight container. They’ll stay perfectly fresh at room temperature for about 3 days. If you need them to last a bit longer, tuck them into the fridge!
Serving Suggestions for Your No Bake Holiday Truffles
These Little Debbie cake balls are absolute stars when it comes to serving! They’re the ultimate party dessert hack, adding a touch of festive fun without any fuss. Tuck them onto your holiday cookie trays alongside other goodies – they look fantastic next to things like Christmas sprinkle buttermilk bread or rich Christmas pudding cupcakes. They also make adorable edible gifts! Just pop a few into little cellophane bags tied with a festive ribbon, and you’ve got a sweet surprise that anyone would love.
Frequently Asked Questions about Little Debbie Cake Balls
Got questions about whipping up these super simple Little Debbie cake balls? I totally get it! It’s always good to have a little extra guidance. Here are a few things people often ask:
Can I use different Little Debbie cakes besides Christmas Tree Cakes?
Oh, absolutely! While the Christmas Tree Cakes give you that perfect festive flavor and shape, you can totally get creative. Snack Cakes, Oatmeal Creme Pies, even Cosmic Brownies could work! Just know that the texture and flavor will change a bit, but hey, experimentation is half the fun, right? They’ll still be delicious 3 ingredient truffles!
Why are my cake balls falling apart when I dip them?
This usually happens if the cake balls weren’t frozen long enough or if the frosting is too thick. Make sure they’re nice and firm from the freezer – pop them back in for another 10-15 minutes if they seem soft. Also, ensure your candy melts are a good dipping consistency; add a touch more shortening if they’re too stiff. Patience is key for perfect candy coated cake balls!
How do I get a super smooth candy coating on my truffles?
The secret to a glossy, smooth coating is all about the melt! Melt your candy melts slowly and gently, stirring frequently. A microwave-safe bowl with bursts of 30 seconds is usually best. If it’s still too thick, that little bit of vegetable shortening is your best friend for thinning it out without sacrificing flavor. Also, make sure your cake balls are fully frozen when you dip them; the cold helps the coating set quickly and smoothly.
How long do these no-bake holiday truffles last?
These little guys are pretty resilient! They’re great as make ahead christmas treats. Stored in an airtight container, they’ll be delicious at room temperature for about 3 days. If you want them to last longer, up to a week, pop them in the refrigerator. Just a little heads-up: the coating might get a bit chalky if refrigerated for too long, but they’ll still taste great!
Estimated Nutritional Information
Just a friendly heads-up, the nutritional info here is an estimate, okay? It can totally change depending on the exact brands you use and how big you roll those little guys. But generally, expect around 150 calories per truffle, with about 9g of fat, 17g of carbs, and just 1g of protein. So, they’re a fun, sweet treat for your holiday spread!
Share Your Holiday Creations!
Alright, you’ve made these amazing Little Debbie cake balls, and I bet they turned out SPECTACULAR! I would absolutely LOVE to hear all about it. Did you try them? What did your family think? Drop a comment below and let me know how they went, or even share a pic on social media! You can always reach out via my contact page too. Happy baking (or, you know, no-baking)!
PrintLittle Debbie Christmas Tree Cake Truffles
Make easy, no-bake truffles using Little Debbie Christmas Tree Cakes, cream cheese, and candy coating. Perfect for holiday dessert trays and edible gifts.
- Prep Time: 20 min
- Cook Time: 5 min
- Total Time: 25 min
- Yield: Approximately 20-24 truffles 1x
- Category: Dessert
- Method: No-Bake
- Cuisine: American
- Diet: Vegetarian
Ingredients
- 1 package (10.5 oz) Little Debbie Christmas Tree Cakes
- 4 oz cream cheese, softened
- 12 oz candy melts (white or green recommended)
- 1 tablespoon vegetable shortening (optional, for thinning candy coating)
Instructions
- Line a baking sheet with parchment paper.
- Crumble the Christmas Tree Cakes into a medium bowl, discarding any large frosting pieces.
- Add the softened cream cheese to the crumbled cakes. Mix well with your hands or a sturdy spoon until fully combined and a dough forms.
- Roll the mixture into 1-inch balls and place them on the prepared baking sheet.
- Freeze the cake balls for at least 15-20 minutes until firm.
- Melt the candy melts according to package directions. If the coating is too thick, stir in the vegetable shortening one teaspoon at a time until desired consistency is reached.
- Dip each frozen cake ball into the melted candy coating, ensuring it is fully covered. Use a fork or dipping tool to lift the truffle and allow excess coating to drip off.
- Place the coated truffles back on the parchment-lined baking sheet.
- Let the truffles set completely at room temperature or in the refrigerator until the candy coating hardens.
Notes
- For a smoother coating, melt candy melts in a microwave-safe bowl in 30-second intervals, stirring between each, until smooth.
- You can add sprinkles to the wet candy coating for extra decoration.
- Store finished truffles in an airtight container at room temperature for up to 3 days, or refrigerate for longer storage.
- These truffles are a great addition to cookie tray ideas and serve as a simple party dessert hack.
Nutrition
- Serving Size: 1 truffle
- Calories: 150
- Sugar: 15g
- Sodium: 50mg
- Fat: 9g
- Saturated Fat: 5g
- Unsaturated Fat: 4g
- Trans Fat: 0g
- Carbohydrates: 17g
- Fiber: 0g
- Protein: 1g
- Cholesterol: 5mg