
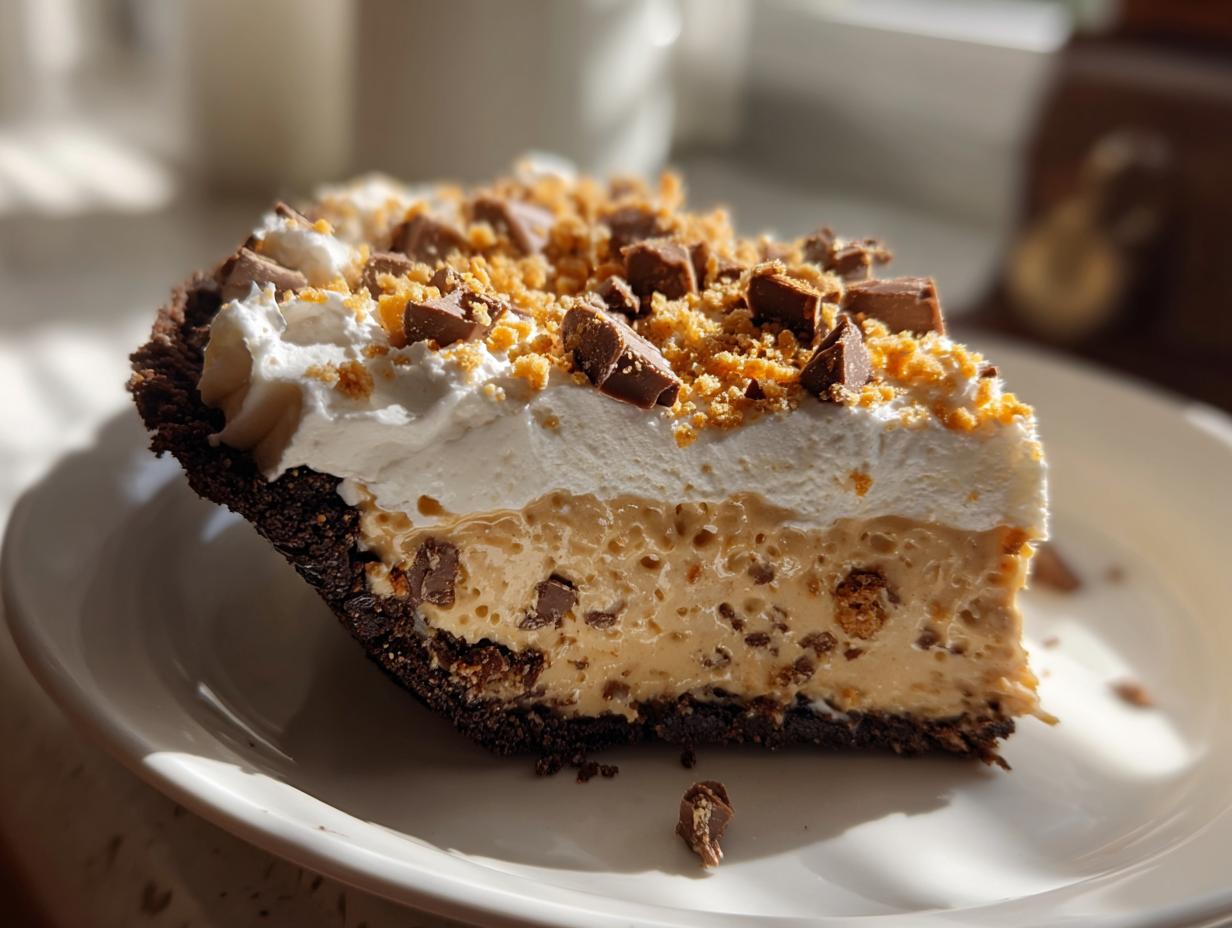
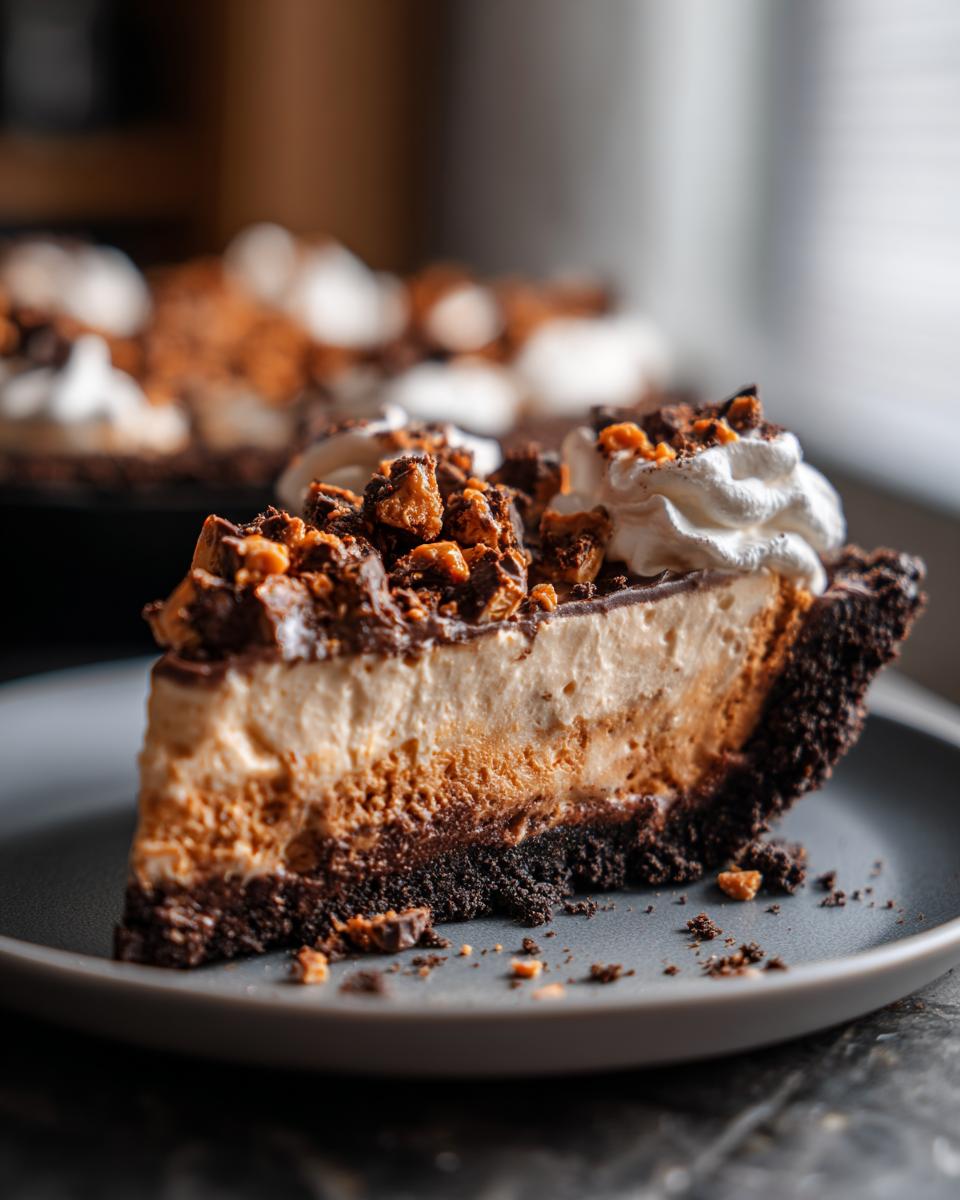
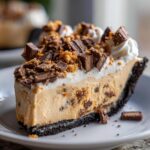
Okay, listen up! If you’re anything like me—and I hope you are—you love a dessert that screams “effortlessly impressive” without actually demanding you turn on the oven in July. I’m talking about a dessert that shows up to your potluck and instantly becomes the star of the table. That, my friend, is why we are diving into the ultimate crowd-pleaser: the **Butterfinger Pie**! This recipe is pure gold; incredibly creamy, completely no-bake, and built on that perfect crunchy layer of chocolate Oreo crust we all dream about. It follows the whole DeliceRecipe philosophy exactly: simple, reliable food made with love that guarantees everyone leaves happy. Trust me, this is the sweet treat your neighbors will beg you for. If you love keeping things simple in the kitchen, you really need to check out how easy we make those easy no-bake haystack cookies too!
- Why This No Bake Butterfinger Pie Recipe is a Crowd Pleaser
- Gathering Ingredients for Your Oreo Crust Butterfinger Pie
- Step-by-Step Instructions for the Best No Bake Butterfinger Pie Recipe
- Ingredient Notes and Substitutions for a Simple Indulgent Dessert
- Tips for Success Making a Perfect Butterfinger Pie
- Making This Easy Make Ahead Dessert for Future Enjoyment
- Serving Suggestions for Your Chocolate Peanut Butter Crunch Pie
- Frequently Asked Questions About Your Homemade Butterfinger Dessert
- Estimated Nutrition for This Crowd Pleasing Pie
Why This No Bake Butterfinger Pie Recipe is a Crowd Pleaser
You might wonder, what gives this particular **Butterfinger Pie** that legendary status at every party? It comes down to absolute dependability! When I test recipes here at DeliceRecipe, they have to deliver maximum reward for minimum fuss, just like Eleanor Vance insists. This pie balances pure indulgence with pure simplicity, making it a winner whether you’re a baking superstar or a kitchen newbie.
- It sets up beautifully in the fridge, meaning no tricky baking times to worry about!
- The combination of textures—smooth filling, crisp crust, crunchy candy—is addictive.
- It’s designed to travel well, which is essential for church socials or neighborhood get-togethers.
If you’re looking for other sweets that are just as fuss-free, you definitely need to check out my recipe for easy no-bake eclair cake—it’s another make-ahead magic trick!
The Perfect Potluck Desserts Easy Factor
When you’re dealing with an assortment of dishes at a potluck, you need desserts that are stable and easy to scoop, right? That’s where the ‘no-bake’ part shines. This **Butterfinger Pie** holds its shape perfectly after chilling. It falls squarely into the category of Potluck Desserts Easy because you mix it, chill it, and you’re done! No worries about keeping it warm or worrying about delicate layers collapsing during transport.
Achieving That Creamy Peanut Butter Candy Pie Texture
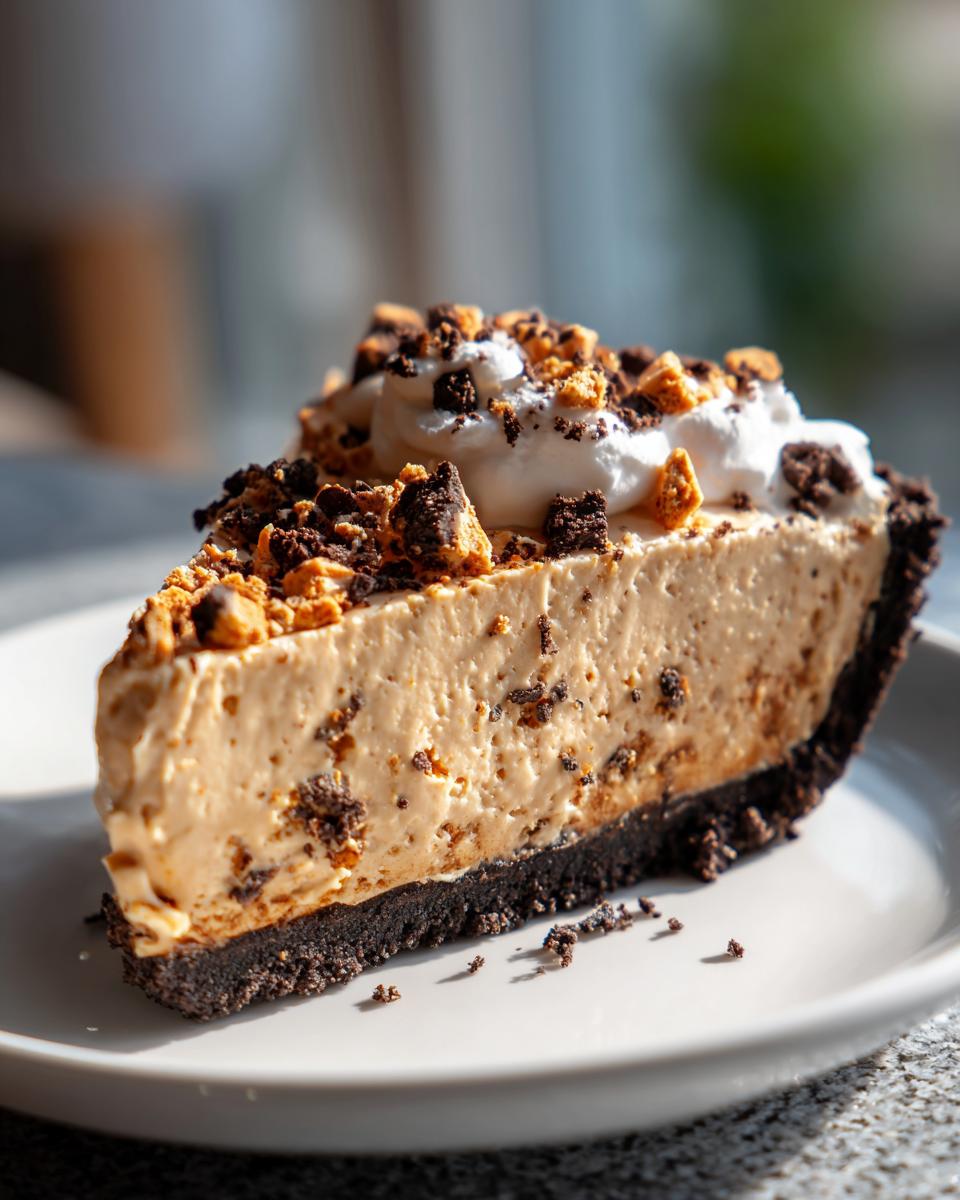
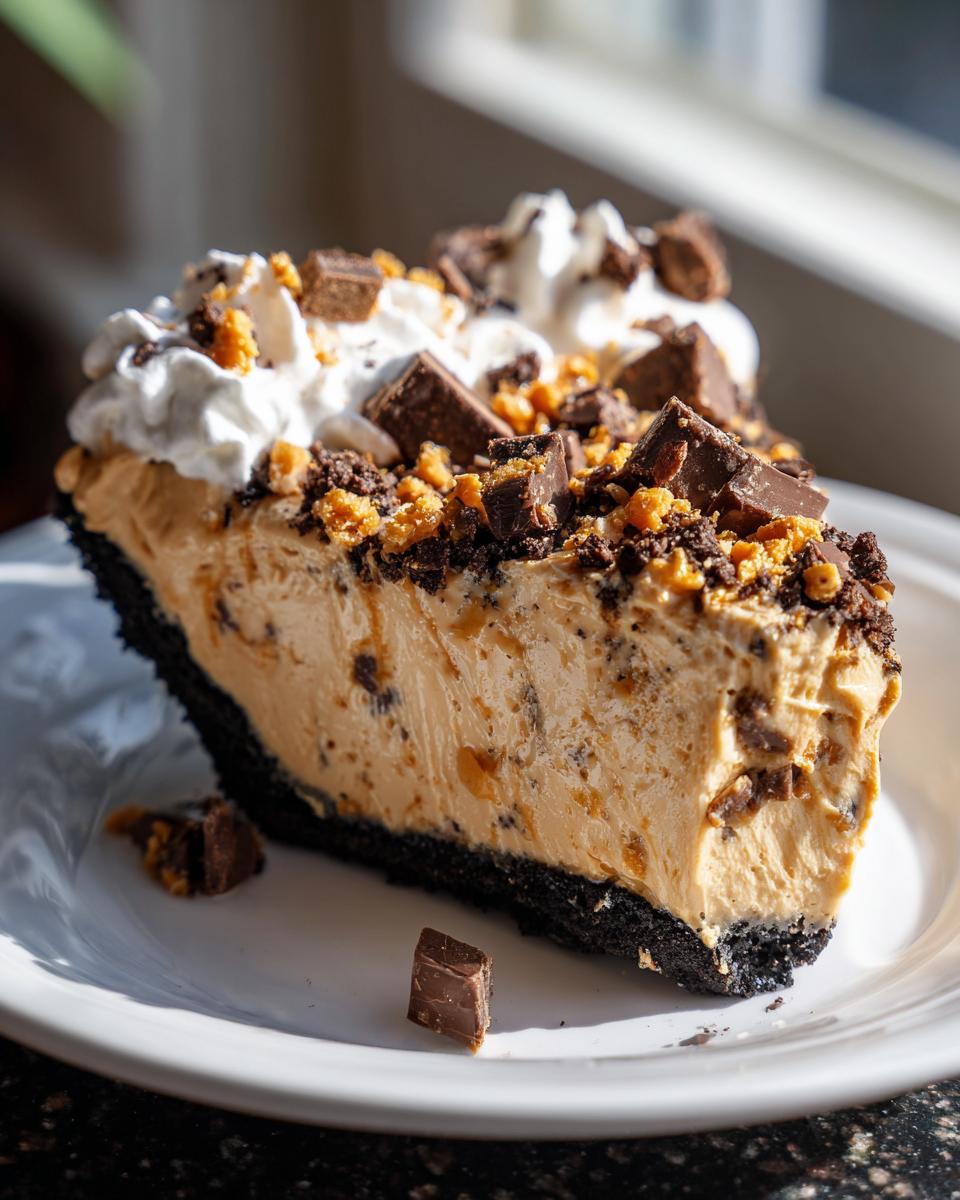
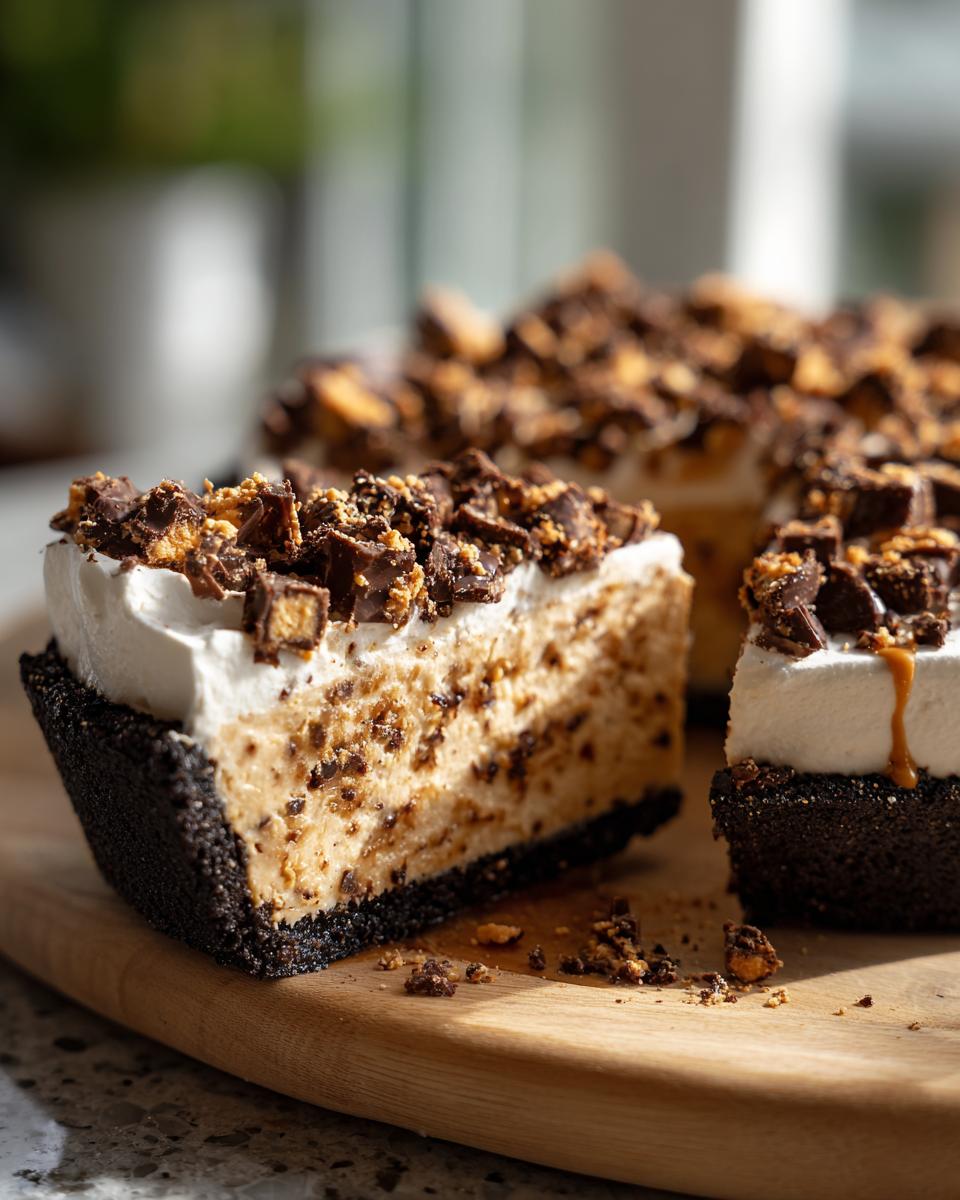
Oh, the texture is everything! We aren’t skimping on rich ingredients here, folks. We are hitting that perfect spot between airy fluff and dense indulgence. That’s why we use both heavy cream and whipped topping—it creates structural integrity while keeping the mouthfeel luxuriously light. This achieves the signature Creamy Peanut Butter Candy Pie texture that lets that sweet, crunchy Butterfinger piece really sing!
Gathering Ingredients for Your Oreo Crust Butterfinger Pie
Alright, let’s talk supplies! Because this is a no-bake recipe, the ingredient list is super straightforward, but the ingredients we *do* use are crucial for getting that iconic flavor. We need those dark chocolate crumbs for the base—Oreo crumbs are my go-to for that perfect crunch, but feel free to explore other chocolate biscuits if you want to get creative!
The filling is where the magic happens: soft cream cheese, loads of powdered sugar for sweetness, that little hint of vanilla, and, of course, the peanut butter. Make sure your cream cheese is actually soft, or things get lumpy fast! You must use heavy whipping cream for the real lift, too. Don’t forget the candy bars—they need rescuing from their wrappers so we can crush them up! If all this sounds like too much gathering, remember you can always cheat slightly and grab a pre-made crust, check out the tips later on! Speaking of easy wins, if you love this type of chocolate crust base, you absolutely have to see my recipe for easy no-bake dirt cake!
Step-by-Step Instructions for the Best No Bake Butterfinger Pie Recipe
Now for the part you’ve been waiting for! Since this whole thing is a magnificent No Bake Butterfinger Pie recipe, we’re moving quickly! You’ll see we handle this in three easy phases: the crust, the layers of filling, and then letting it all set up beautifully. Remember, the only real cooking involved here is melting butter, so it’s super fast prep time—only about 20 minutes!
Preparing the Chocolate Crust Base
First things first: the foundation! Grab a 9-inch pie dish. Mix your chocolate cookie crumbs—I love Oreos—with the melted butter. Really work that butter in until everything looks like wet sand. Then, press that mixture firmly into the bottom and up the sides of your dish. Don’t be shy here; press it hard so it holds together when you slice it later. Once it’s packed in tight, pop that whole thing straight into the freezer while we deal with the good stuff.
Constructing the Creamy Filling for Your Butterfinger Pie
Okay, in a big bowl, beat your softened cream cheese until it’s nice and smooth—no lumps allowed! Beat in the powdered sugar, vanilla, and creamy peanut butter until you have a slick, uniform base. Now, for the airy magic: In a separate, very cold bowl, whip your heavy whipping cream until it forms stiff peaks. This is important! Gently fold that glorious whipped cream into your peanut butter mixture. Take your time here; we want to keep those air bubbles! Finally, softly fold in the majority of your crushed Butterfingers and that thawed whipped topping. Stop mixing as soon as it’s just blended.
Chilling and Garnishing Your Quick Candy Bar Pie
Pour all that creamy goodness right into that chilled crust you set aside earlier. Spread it out nice and even. Then, cover it loosely (we don’t want plastic sticking to the top!) and slide it into the fridge. It needs at least four hours to set up firm enough to slice cleanly. Honestly, if you can wait that long! When it’s time to serve this lovely Quick Candy Bar Pie, dollop some extra whipped topping on top and shower it with the remaining crushed Butterfingers for that final, irresistible crunch. To see how we handle other creamy no-bake wonders, take a peek at my recipe for the creamy no-bake blueberry cheesecake!
Ingredient Notes and Substitutions for a Simple Indulgent Dessert
You know I’m all about making every step foolproof, and that starts right here with the ingredients for this Simple Indulgent Dessert. Even though it’s no-bake, the quality and state of your ingredients truly matter for getting that perfect set.
First, let’s talk cream cheese. If you try to beat cold cream cheese, you’re going to end up with tiny, hard lumps in your beautiful filling, and nobody wants that! Take it out an hour before you plan to start mixing. You want it soft enough that your finger sinks in easily without resistance. It should give way gently.
What about the peanut butter? The recipe calls for creamy, and honestly, that’s my recommendation because we want the filling to be as velvety as possible. If you absolutely adore crunch—and who doesn’t?—you could try swapping out maybe half of the creamy for crunchy. But I’d stick to creamy for the filling base itself, just to respect that creamy texture we worked so hard to build!
And listen, if time is truly your enemy, remember those notes I mentioned? It’s totally fine to use a pre-made frozen chocolate pie crust. It saves you that quick step of mixing crumbs and butter, so you can get straight to the fun part! Just make sure it’s fully thawed before you pour in your filling. For more tips on simplifying meals when life gets busy, you should check out how I handle my easy creamy taco pasta salad recipe.
Tips for Success Making a Perfect Butterfinger Pie
Even though this pie is called ‘no-bake,’ there are a few little tricks that turn a good **Butterfinger Pie** into a spectacular one. Since we aren’t using an oven to set things, we have to rely on careful technique with our cold ingredients. I’ve learned these little secrets through a few slightly sad, soupy attempts early on, and I don’t want that happening to you!
The most important thing you need to conquer is whipping that heavy cream. It has to be stiff. Stiff peaks mean your cream is holding tons of air, which keeps the whole pie light! Make sure your bowl and your beaters are chilled first—I often pop them in the freezer for 15 minutes before I start whipping. If you use room-temperature cream, you’ll just end up with sad, runny milk, and the whole thing will deflate later. Cold is king here!
And what about the Butterfingers? You don’t want giant chunks in your creamy base, but you also don’t want dust! My favorite way to crush them for the best texture distribution is putting them in a sturdy zip-top bag with a kitchen towel over the top, then using a heavy rolling pin. Roll lightly until you get a mix of small shards and a little sugary dust. That mix ensures you get that satisfying crispity, crunchety texture in every single bite. You don’t want the candy to get soggy either, so only fold them in right at the very end before you put the filling into the crust!
If you are looking for other simple bar recipes that are just as reliable, you must try my recipe for easy apple pie bars—they are just as forgiving!
Making This Easy Make Ahead Dessert for Future Enjoyment
This is honestly one of my favorite things about this **Butterfinger Pie**: it’s the perfect Easy Make Ahead Dessert! If you’re doing any kind of party prep or need to handle the dessert course early so you can focus on the main meal, this pie does all the heavy lifting for you ahead of time. Since there’s no baking involved, it’s designed specifically to chill out and firm up!
You absolutely need to make this pie the day before your event, if possible. Why? Because the longer the filling sits with those yummy crushed Butterfingers soaking in just a little bit of that moisture, the better the flavors meld! I always aim to have it fully assembled and in the fridge by dinnertime the night before a party.
When it comes to storage, you definitely want to cover it, but don’t let the plastic wrap touch the top if you’ve already added the final whipped topping garnish. If you top it before chilling, place a layer of parchment paper over the pie, and then wrap loosely with foil or plastic wrap over that. If you wait to garnish until serving time, just cover it gently.
How long will it last in the fridge? Because this pie is loaded with cream cheese and heavy cream, it’s at its absolute peak the first 1 to 2 days. After that, the crust might start to get a tiny bit softer than I prefer, but it’s still perfectly safe and delicious for up to 4 days. If you need to make it even further ahead, you can freeze it! Just make sure you skip adding the final whipped topping until after it thaws a bit. It thaws beautifully after about two hours on the counter, or you can let it soften slowly in the fridge overnight. It’s so versatile, much like my recipe for creamy chicken gnocchi soup, which is fantastic for prepping early!
Serving Suggestions for Your Chocolate Peanut Butter Crunch Pie
Once your **Butterfinger Pie** has magically set up nice and firm from its cold slumber, the fun moves from the kitchen to the dining table! Presentation is everything, even for a dessert as delightfully casual as this one. We want to make sure this **Chocolate Peanut Butter Crunch Pie** looks as incredible as it tastes before we slice into it.
Since the filling is already so rich and loaded with peanut butter and candy goodness, you don’t need a ton of bells and whistles on the side. Less is truly more here so you don’t overwhelm that beautiful contrast between the creamy peanut butter layer and the crunchy Butterfingers.
If you want a little something extra drizzled on top right before serving, a thin stream of warmed caramel syrup looks absolutely gorgeous against the white whipped topping. It really plays up the candy flavor profiles already present in the pie. You can also get away with maybe dusting the edges of the plate lightly with extra crushed Butterfinger crumbs for visual texture!
What about pairing it with a beverage? Since this pie is so sweet and indulgent, I always preach pairing it with something to cut through that richness. A small cup of strong, hot black coffee balances the sweetness perfectly. If you’re looking for something cold, even a glass of plain cold milk works wonders! For something that complements the chocolate crust beautifully, try serving a small slice alongside my recipe for ultimate fudgy Oreo brownies—though you better be ready for a truly epic chocolate experience!
Frequently Asked Questions About Your Homemade Butterfinger Dessert
I know you’ve got questions! When a dessert is this good, people always want to make sure they’re doing everything right. I get asked the same things over and over again, usually right after someone gets hooked on this **Homemade Butterfinger Dessert**. That’s totally fine! My goal is to make sure your experience is just as successful as mine has been every single time I’ve whipped this up. It’s all about building confidence in the kitchen!
Can I use a graham cracker crust instead of Oreo Crust Butterfinger Pie?
You totally can! While the dark chocolate Oreo crust provides that wonderful contrast to the sweet peanut butter filling, if you prefer a less intense chocolate flavor, swapping to a buttery graham cracker crust works beautifully. Just remember that graham crackers are a bit softer than Oreos, so make sure you press that crust in extra tight so it doesn’t crumble right away!
How long does this No Oven Dessert Recipe need to set?
This is crucial for a successful slice! Since this is the ultimate No Oven Dessert Recipe, the setting time is non-negotiable if you want those clean slices. You absolutely must refrigerate the pie for a minimum of four hours. Seriously, just walk away! It needs that time for the cream cheese and whipped cream structure to firm up completely around the crushed candy. If you are super rushed, you can firm it up in the freezer for about two hours, but the texture is softer and creamier when it sets slowly in the fridge.
Is this a good recipe for meal planning?
Is it ever! This is where this pie truly wins in my book. Because it’s a no-bake recipe that *must* be made ahead of time, that makes it a dream for any kind of large-scale meal planning. You can assemble the entire thing—crust, filling, everything—the day before you need it. It actually tastes better the longer those Butterfinger crumbles sit in the filling! It takes one thing completely off your plate on the day of the event, leaving you time to focus on the main dishes or maybe try out some other favorites, like my recipe for classic old-fashioned bread pudding!
Estimated Nutrition for This Crowd Pleasing Pie
So, we’ve created this gorgeous, easy, and absolutely massive **Butterfinger Pie**, and now maybe you’re wondering what’s lurking inside if you’re tracking things. I want to be super clear: since this recipe is built on cream cheese, heavy cream, and candy bars, it is definitely an indulgent treat! It’s designed for gatherings where flavor rules over counting calories, but I always like to give you a ballpark idea of what you’re serving your guests.
The numbers below are just estimates, okay? They are calculated based on the ingredients listed for 8 servings, using standard store brands. If you use lower-fat cream cheese or skip some of the topping, your numbers will shift. But this gives you a baseline for what makes this such a satisfying, Crowd Pleasing Pie!
- Serving Size: 1 slice
- Calories: 450
- Sugar: 35g
- Sodium: 310mg
- Fat: 30g
- Saturated Fat: 12g
- Carbohydrates: 40g
- Protein: 6g
If you’re looking for recipes that lean a little lighter, perhaps you’d prefer my sweet potato pound cake recipe next time! But for this rich, candy-loaded Butterfinger Pie, treat yourself! You’ve earned it.
PrintNo-Bake Creamy Butterfinger Pie with Oreo Crust
Make this easy, creamy, no-bake Butterfinger Pie featuring a chocolate Oreo crust, rich peanut butter filling, and crushed Butterfinger candy bars. It is a simple, crowd-pleasing dessert perfect for potlucks.
- Prep Time: 20 min
- Cook Time: 0 min
- Total Time: 4 hr 20 min
- Yield: 8 servings 1x
- Category: Dessert
- Method: No-Bake
- Cuisine: American
- Diet: Vegetarian
Ingredients
- 1 1/2 cups chocolate cookie crumbs (like Oreo)
- 1/4 cup unsalted butter, melted
- 8 ounces cream cheese, softened
- 1 cup powdered sugar
- 1 teaspoon vanilla extract
- 1/2 cup creamy peanut butter
- 1 cup heavy whipping cream, cold
- 1 1/2 cups Butterfinger candy bars, crushed (about 10 standard bars)
- 1 cup whipped topping (like Cool Whip), thawed, plus more for topping
- 1/4 cup Butterfinger candy bars, crushed (for garnish)
Instructions
- Prepare the crust: Mix the chocolate cookie crumbs and melted butter in a bowl until combined. Press the mixture firmly into the bottom and up the sides of a 9-inch pie dish. Place the crust in the freezer while you prepare the filling.
- Make the cream cheese base: In a large bowl, beat the softened cream cheese, powdered sugar, vanilla extract, and peanut butter until the mixture is smooth and creamy.
- Whip the cream: In a separate, chilled bowl, beat the cold heavy whipping cream until stiff peaks form. Gently fold the whipped cream into the cream cheese mixture until just combined.
- Fold in candy: Gently fold in 1 1/2 cups of the crushed Butterfinger bars and 1 cup of the thawed whipped topping into the peanut butter mixture.
- Assemble the pie: Pour the filling into the chilled Oreo crust and spread evenly.
- Chill: Cover the pie loosely with plastic wrap and refrigerate for at least 4 hours, or until firm. For faster setting, you can freeze it for 1-2 hours.
- Garnish and serve: Before serving, top the pie with additional whipped topping and sprinkle the remaining 1/4 cup of crushed Butterfinger bars over the top. Slice and serve cold.
Notes
- You can substitute a pre-made frozen chocolate pie crust to save time.
- If you are preparing this for a gathering, this pie is an excellent make ahead dessert.
- For a richer chocolate flavor, use chocolate graham cracker crumbs instead of Oreo crumbs for the crust.
- This recipe is a great alternative if you are looking for simple indulgent dessert options that do not require turning on the oven.
Nutrition
- Serving Size: 1 slice
- Calories: 450
- Sugar: 35g
- Sodium: 310mg
- Fat: 30g
- Saturated Fat: 12g
- Unsaturated Fat: 18g
- Trans Fat: 0.5g
- Carbohydrates: 40g
- Fiber: 1g
- Protein: 6g
- Cholesterol: 45mg