
Oh, that smell! There is nothing in the world quite like the aroma of freshly baked yeast hitting the hot air of your oven—it just instantly makes your whole house feel like home. When I first started trying to recreate that perfect Parisian experience, I failed a few times, getting loaves that were either too dense or too pale. But I’m so excited to share that after endless testing, I finally nailed the absolute best recipe for achieving a truly crusty homemade french bread. Baking this classic bread brings me such joy, and I know you’ll feel that same accomplishment when you pull these loaves out. Forget the store-bought stuff; this is the real deal when it comes to simple, magnificent French bread!
- Why This Homemade French Bread Recipe Works for Beginners
- Gathering Simple Bread Ingredients for Your French Bread
- Step-by-Step Instructions: How to Make French Bread
- Tips for Perfect Artisan Bread at Home
- Variations: From Crusty to Soft French Bread
- Storage and Reheating Your Freshly Baked Bread
- Serving Suggestions for Homemade French Bread
- Frequently Asked Questions About Baking French Bread
- Nutritional Estimates for Classic French Bread
Why This Homemade French Bread Recipe Works for Beginners
If you think making artisan bread is only for experts, I want you to ditch that belief right now! This Homemade French Bread Recipe is built on reliability. We keep the ingredient list super short, relying on pantry staples, which means less fuss and fewer trips to specialty stores. It’s truly the best place to start your Beginner Bread Baking adventure. Making this bread is so rewarding, you might even check out my recipe for easy crusty Italian bread next!
- Uses Simple Bread Ingredients—just flour, water, yeast, and salt.
- The rise times are generous, so if life interrupts you, the dough is forgiving.
- You get that stunning bakery-style payoff without complex pre-ferments.
Achieving the Perfect Crusty French Loaf
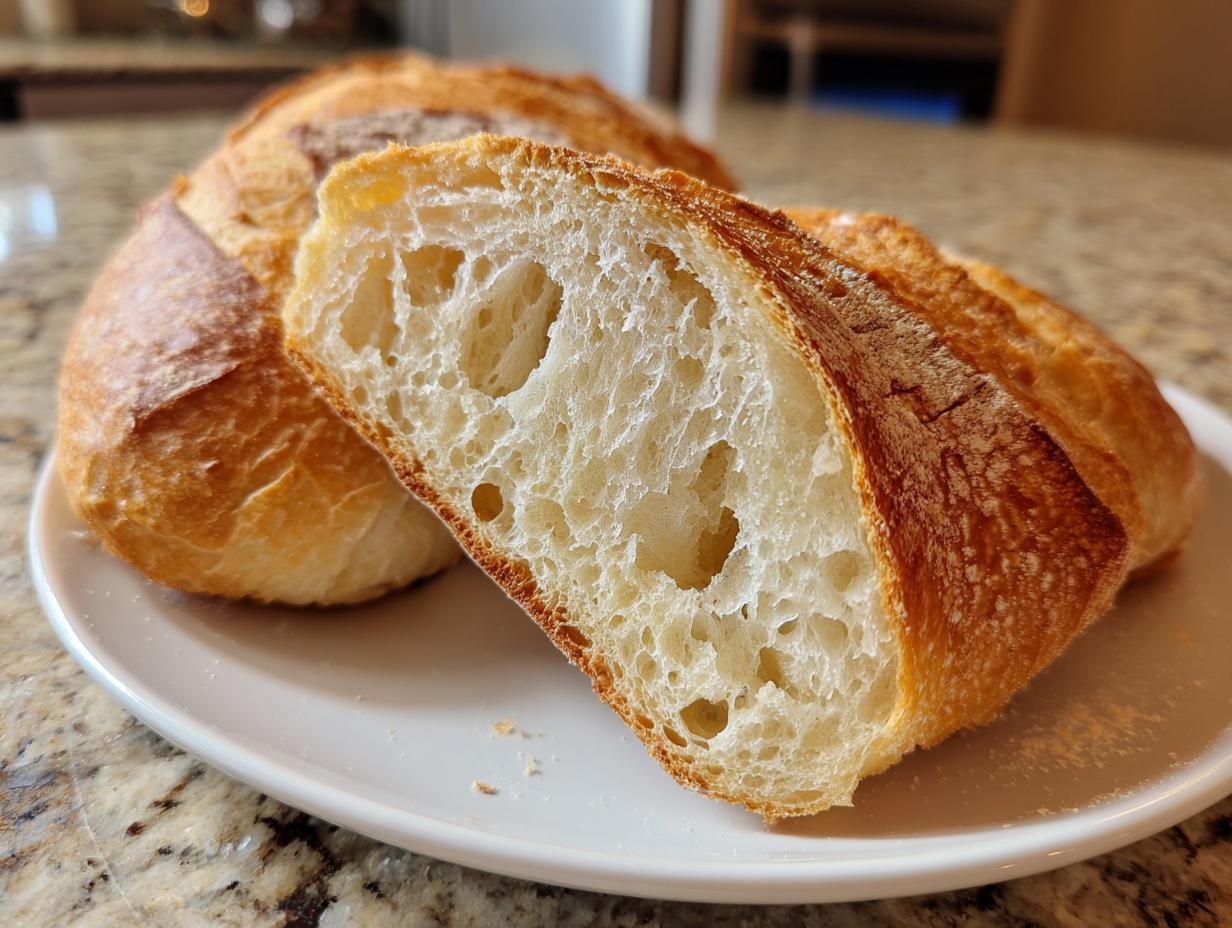
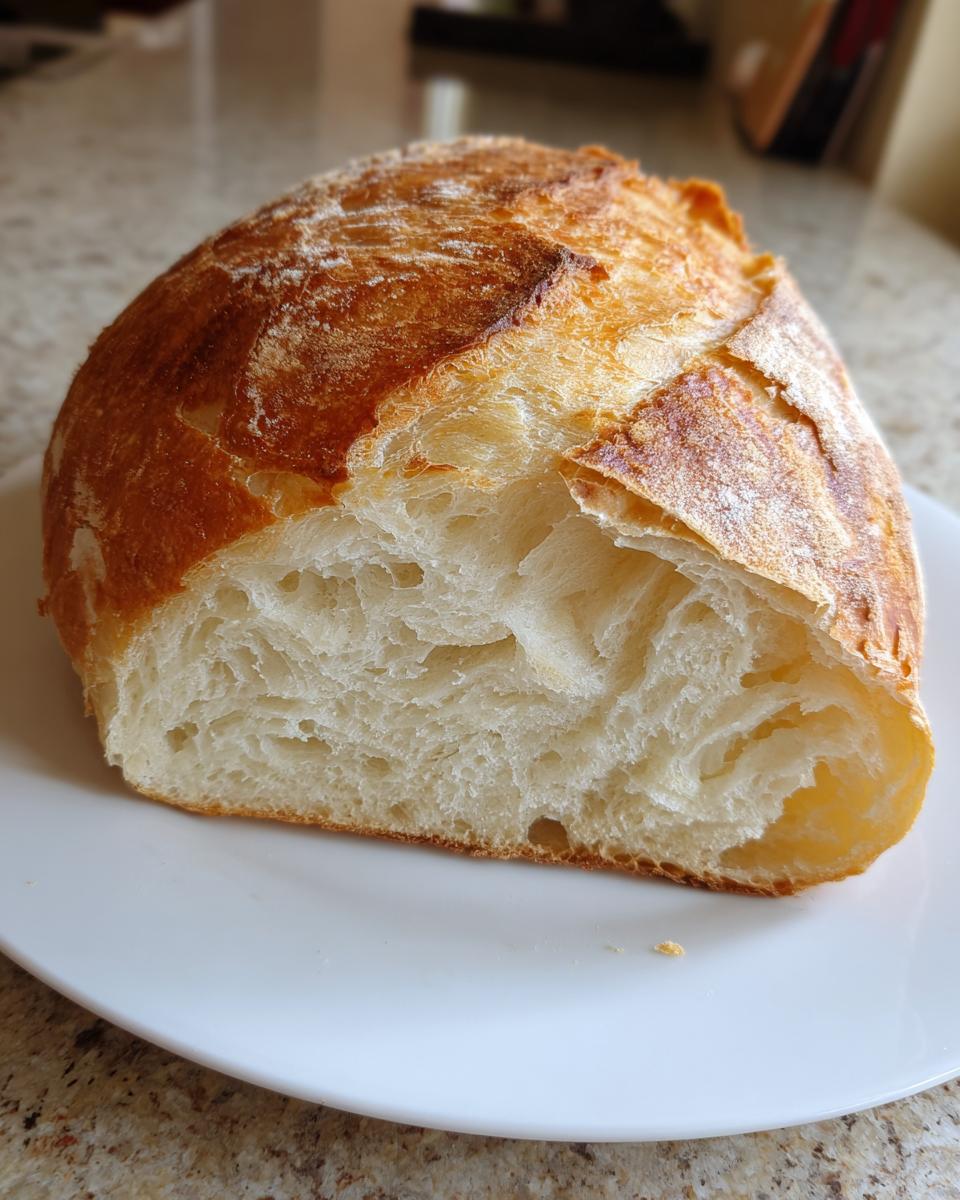
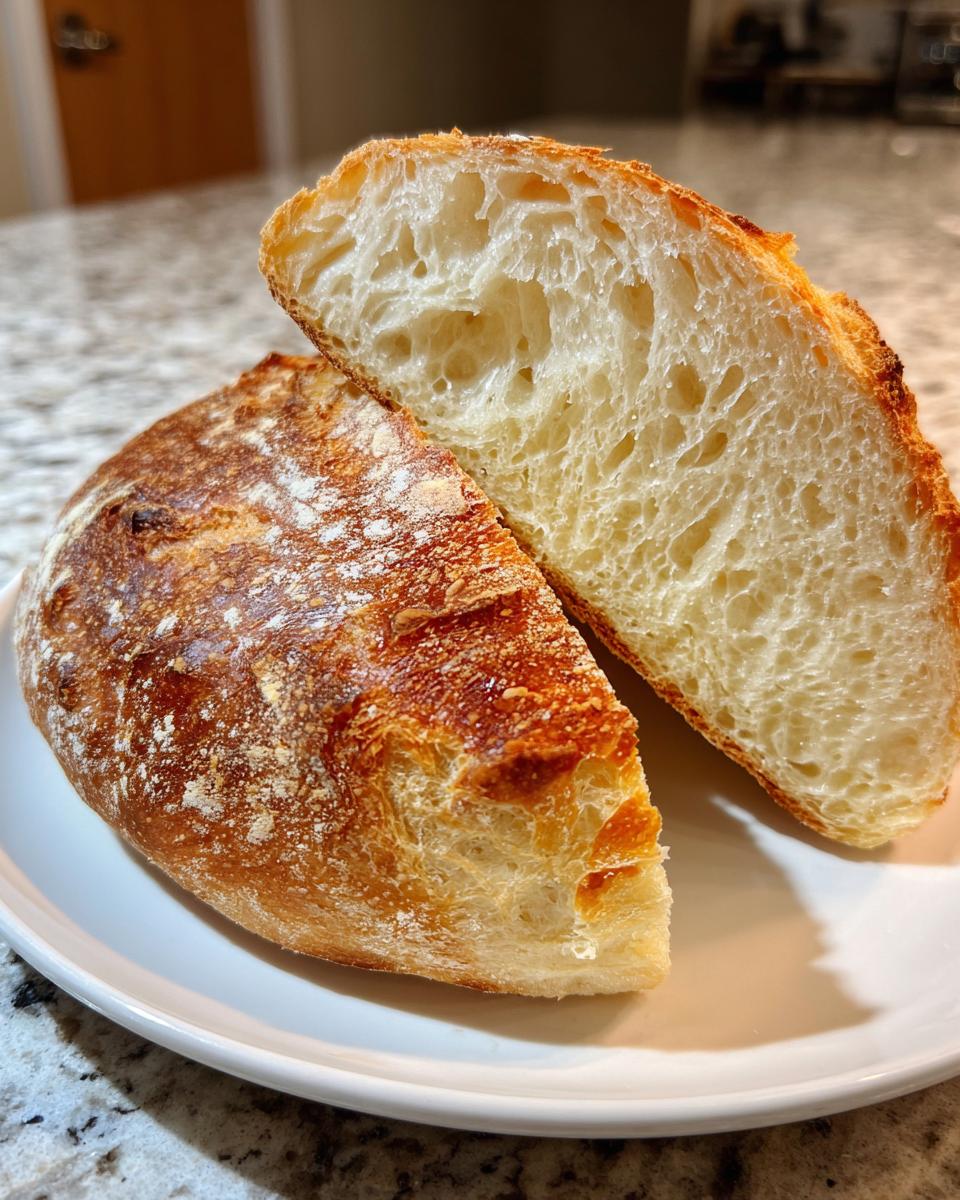
The secret weapon for the Crusty French Loaf you see in bakeries? Steam! I learned that to get that signature crackle, you need to scare the oven a little bit. Adding hot water to a pan underneath the bread creates a burst of steam early on. That steam keeps the outer layer soft just long enough for the dough to really expand—that’s the oven spring—before hardening into that perfect shatteringly crisp crust. Trust me, it’s fun to watch!
Gathering Simple Bread Ingredients for Your French Bread
The beauty of this French bread is that we are only relying on Simple Bread Ingredients—the kind you probably already have stocked! You’ll need about 1 1/2 cups of warm water, making sure it hits that sweet spot between 105 and 115°F. Anything colder and your yeast won’t wake up; too hot and you’ll shock it. Next comes 2 1/4 teaspoons of active dry yeast and just one tiny teaspoon of sugar to get that yeast excited. We follow that up with a good amount: 3 3/4 cups of all-purpose flour, and make sure you set aside extra for dusting later. Finally, don’t skip the 1 1/2 teaspoons of salt for flavor, along with one tablespoon of cornmeal to keep the loaves from sticking to your baking surface.
Ingredient Notes and Substitutions
When it comes to flour, all-purpose works beautifully for this recipe, giving you that lovely balance between soft interior and crust. However, if you want an even chewier, artisan-style result, you can swap out about a cup of the AP flour for bread flour. That extra protein really helps build structure! Seriously though, water temperature is non-negotiable for activating your yeast correctly; use a thermometer if you’re unsure! That’s how you ensure this beginner-friendly recipe behaves exactly as expected.
Step-by-Step Instructions: How to Make French Bread
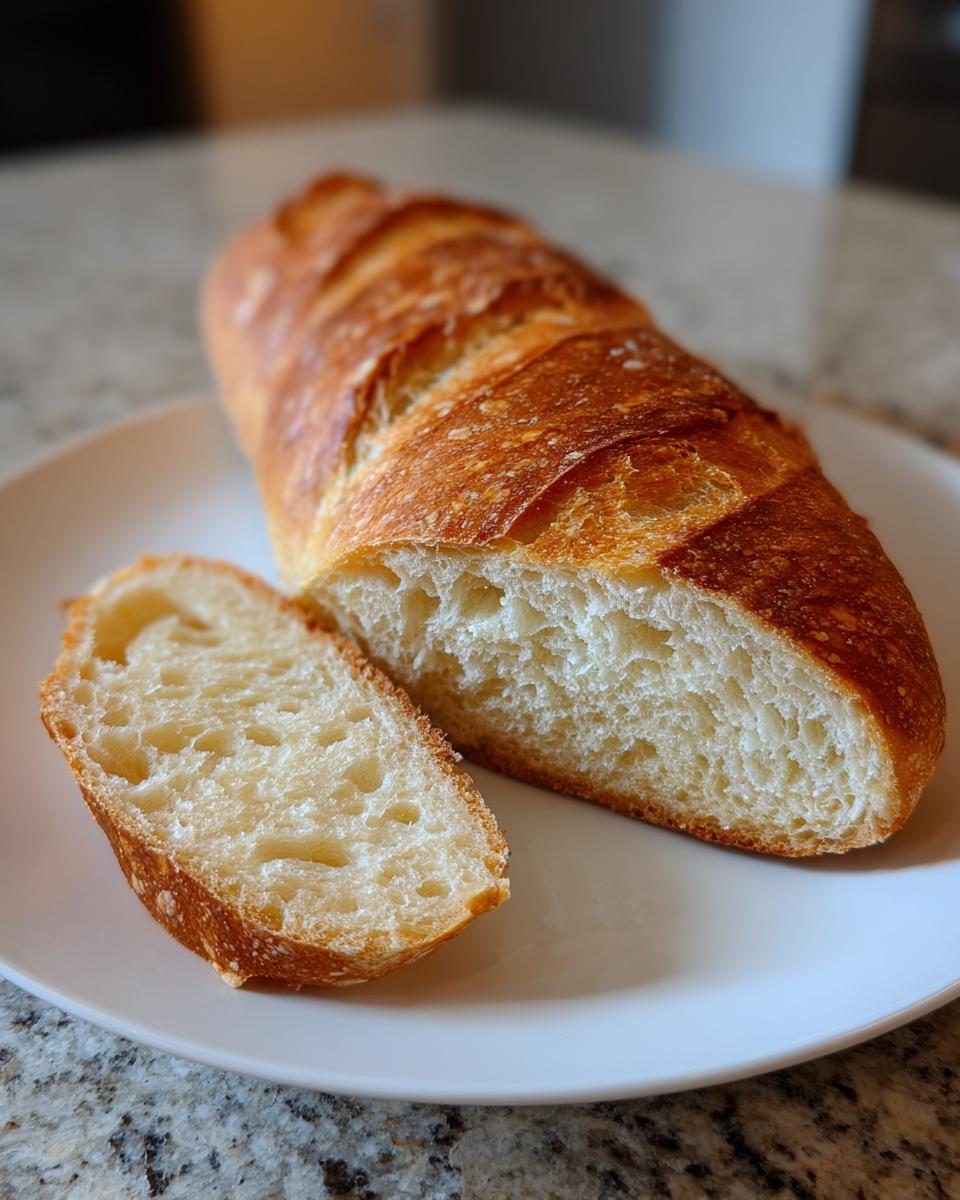
Now for the fun part! Getting the dough ready for these beautiful loaves of French bread is straightforward, but it requires a little bit of patience, that’s all. First, we wake up the yeast! Mix your warm water, yeast, and sugar together in a big bowl and let it sit until it’s nice and foamy—about 5 to 10 minutes. That bubbling is your signal everything is working! Once foamy, you dump in the flour and salt and mix until it’s just shaggy. Then, it’s time to work those arms! Turn that shaggy mass onto your floured counter and knead, knead, knead for a solid 8 to 10 minutes until it feels smooth and elastic. You’ll know it’s ready because it won’t stick to your hands anymore.
Tuck that dough into an oiled bowl, cover it up, and let it rest in a warm spot for at least an hour, or until it’s doubled. Don’t rush this rise! After the first nap, gently punch it down, divide it in two, and shape them into long, rustic loaves, about 12 to 15 inches long. Let them nap again for 30 minutes on a cornmeal-dusted baking sheet. While they rest, get your oven roaring to 450°F (232°C) and make sure you pop a shallow pan on that bottom rack—it needs to get screaming hot for the next step!
Creating Steam for the Crusty French Loaf
This is where we transform average bread into a spectacular Crusty French Loaf! Right before you slide those loaves in, you need to create that steamy environment. Be careful here—you’re working with a *very* hot oven. Carefully pour about a cup of hot water into that preheated shallow pan on the bottom rack. Slam that oven door quickly so the steam stays in! That cloud of moisture is your best friend because it keeps the surface of the dough moist, allowing the bread to expand quickly (that oven spring we talked about) before the crust locks up. It’s the easiest trick for bakery-style results. For more tips on getting those crackly crusts, you can check out this great article on Truly Crusty Homemade French Bread!
Scoring and Baking Your French Bread
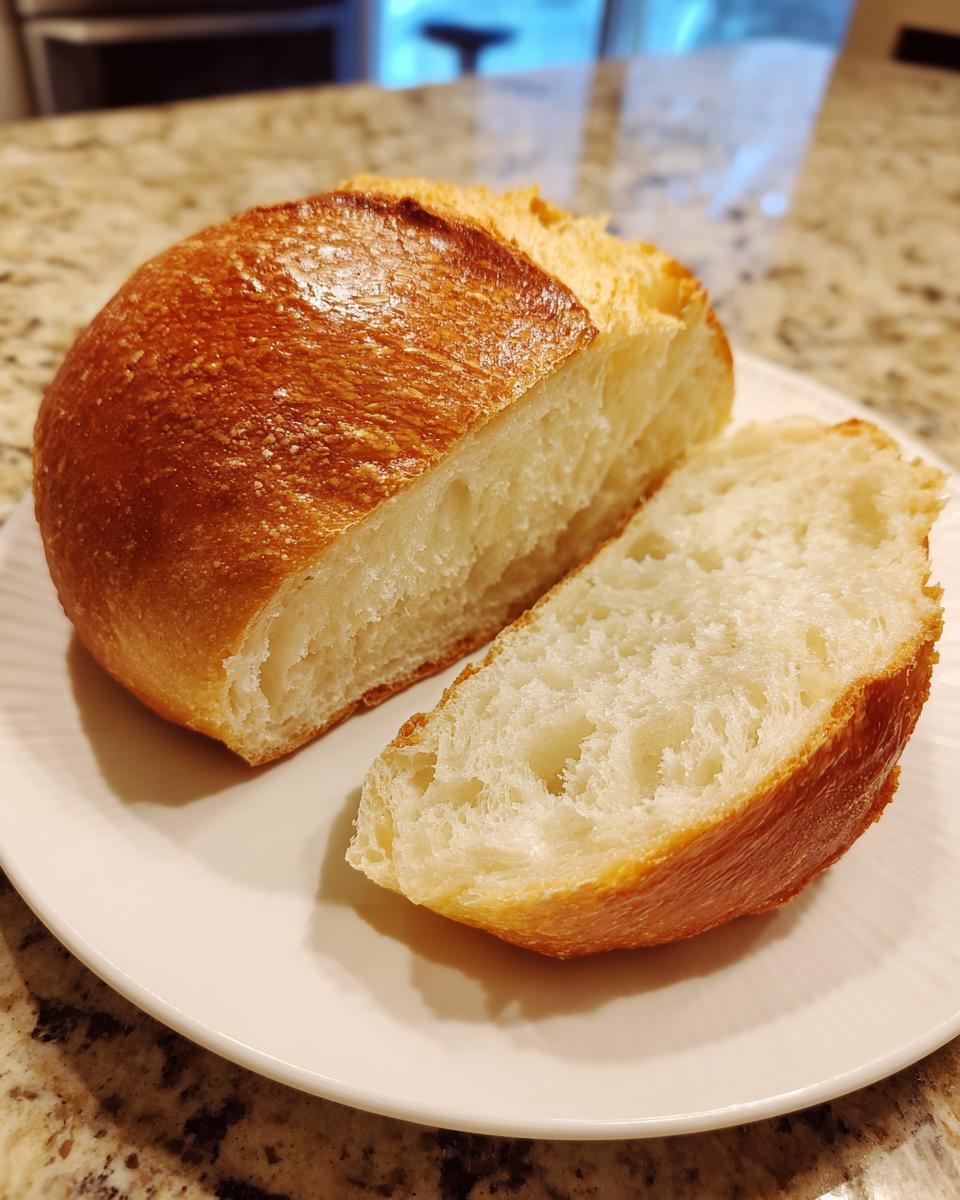
Once your steam bath is ready, quickly score each loaf with three diagonal slashes using a really sharp knife or a razor blade—don’t saw at it, make one confident, swift cut! Bake for about 20 to 25 minutes. You are looking for a deep, rich golden brown color, not pale yellow. More importantly, tap the bottom: it should sound satisfyingly hollow. If you’re looking for other ways to use yeast doughs, my moist pumpkin bread recipe uses a slightly different technique for tenderness!
Tips for Perfect Artisan Bread at Home
Getting that bakery style bread feeling at home isn’t just about following the steps; it’s about paying attention to those little details that professional bakers obsess over. For the absolute best French bread, focus on the environment. Yeast loves warmth! If your kitchen is a little chilly, try putting your dough bowl in your oven with just the light turned on—it creates a perfect, cozy spot for that first rise.
Also, when you’re kneading, don’t panic if the dough feels a little sticky at first. Keep working it! If you add too much flour during kneading just to make it behave, you’ll end up with a dense loaf, and we want airy! Remember, that 8 to 10 minutes of kneading builds the necessary structure.
The absolute hardest part is cooling it down after it comes out of the oven. I know, I know, you want to tear into that crusty golden exterior immediately! But you must let your French bread cool completely on a wire rack. If you slice it too early, the steam escapes too fast, and the interior crumb will turn gummy. Patience is the final ingredient for truly artisan bread at home. If you’re curious about other yeasted projects, you might enjoy my guide to homemade English muffins!
For more tricks on achieving that incredible crunch, this guide on the perfect crust is fantastic reading.
Variations: From Crusty to Soft French Bread
This recipe is fantastic because it’s really a foundational technique, meaning we can easily tweak it based on what you’re serving it with! While I personally live for that loud, crackly sound of a truly crusty French loaf, sometimes you need something softer, especially if you’re using the bread for dipping or making little tea sandwiches. Don’t worry, transforming this into Soft French Bread is super simple; it just means we adjust the baking phase slightly.
To get that tender, pillowy inside that some people prefer, you actually skip the steam step entirely. That hot water pan we added at the bottom of the oven? Leave it out! The steam is what encourages that brittle, crisp shell, so without it, the crust stays much softer right from the start.
Another trick, which is wonderful if you are making this French bread for younger kids or just love a richer flavor, is what you do the second the loaves come out. Instead of letting them cool naked on the rack, immediately take a stick of softened butter and generously brush the top and sides of the hot loaves. That melted butter soaks right into the surface, softening the crust beautifully and adding a lovely shine. It gives you that melt-in-your-mouth texture you sometimes crave!
If you’re looking for something leaning towards ultra-soft, almost like a dinner roll in loaf form, definitely check out my recipe for simple homemade milk bread loaf—milk and a quick butter brush are your best friends there! But for this recipe, those two small changes—no steam and a post-bake butter wash—will give you delicious Soft French Bread every time. For more inspiration on fluffy baking, take a look at this great guide from Bex’s Kitchen on soft fluffy french bread.
Storage and Reheating Your Freshly Baked Bread
This is the tough part about making a truly crusty loaf of French bread: that amazing crackle doesn’t last forever, especially not in humid weather! If you try to store this bread in a plastic bag or an airtight container to “keep it soft,” you’re just guaranteeing that the lovely crisp crust turns rubbery. Not okay!
For the first day, I just wrap the cooled loaf loosely in a clean kitchen towel at room temperature. That lets the crust breathe while keeping the inside from drying out totally. If you have leftovers on Day Two, don’t throw them out! We can revive them instantly.
To bring that crackly texture back, just spritz the loaf lightly with water—just a few fine sprays—and pop it back into a 350°F oven for about five minutes. It comes out smelling and sounding like it just came out of the oven! It’s perfect for serving with something warm, like my easy stovetop cinnamon applesauce.
Serving Suggestions for Homemade French Bread
Honestly, part of the fun of making this glorious Homemade French Bread Recipe is tearing into it fresh from the cooling rack! If you want an easy dinner enhancement, this bread is absolutely the best Dinner Roll Substitute you could ask for. It’s perfect for soaking up the last bits of sauce from a big pasta dish.
But my personal favorite way to serve it? Sliced thick on the diagonal, lightly toasted, and topped with good quality butter while it’s still warm. It’s also fantastic alongside something hearty, like a big bowl of my creamy chicken wild rice soup. Or, use those long loaves to make the most incredible, crusty sandwiches. It seriously elevates everything!
Frequently Asked Questions About Baking French Bread
It’s totally normal to have a few questions pop up when you’re trying a new bread recipe! I’ve answered the most common things people ask me about achieving that perfect crusty French loaf right here. If you’ve nailed this recipe, you might even try my easy chicken pot pie casserole next, which is the perfect cozy meal to serve with thick slices of this bread!
Can I make this a Quick French Bread Recipe?
Oh, who doesn’t love a faster bake? While I stand by the 2-hour timeline for the best flavor and texture, you can definitely speed up the process if you’re short on time. The best way to get a Quick French Bread Recipe going is to supercharge your first rise. Use water that’s slightly warmer—closer to 115°F—and place your covered dough in the toastiest spot possible, like inside an oven with just the light on. You might shave 20 to 30 minutes off that initial proofing time. If you’re desperate for speed, some folks have incredible luck with recipes that use less yeast and rely on a higher oven temperature early on, like the truly crusty recipes that focus on rapid baking!
What is the best flour for this French Bread?
For this particular Homemade French Bread Recipe, I call for standard all-purpose flour because it’s just so dependable, and it works perfectly with the yeast to give you that lovely internal structure that isn’t too tough. It’s great for Beginner Bread Baking because it’s easy to handle!
Now, if you’re aiming for something that has a bit more chew, more like what you’d find in an authentic French baguette, then you should absolutely consider swapping out about half or even all of the AP flour for bread flour. Bread flour has higher protein content, which means more gluten development. That extra structure will give you a chewier crumb and a slightly more artisan feel to your French bread. Both work wonderfully; it just depends on which texture you prefer!
Nutritional Estimates for Classic French Bread
Okay, talking about calories isn’t my favorite part of sharing a wonderful baking recipe, but I know so many of you like to track those details! Before we dive into the numbers, please remember this—these are just estimates based on the ingredients listed in the recipe and how the loaves divide out. Every oven, every measurement, every tiny bit of flour you dust on your counter makes a difference, so take these figures as a guideline, not a strict fact!
When divided into 14 slices total (7 slices per loaf), here is what we are looking at for one serving size of this glorious, freshly baked bread:
- Serving Size: 1 slice
- Calories: 150
- Total Fat: 0.5g (and only 0.1g Saturated Fat—amazing!)
- Sodium: 250mg
- Total Carbohydrates: 31g
- Fiber: 1g
- Protein: 5g
- Sugar: 0.5g
- Cholesterol: 0mg
Isn’t that just gorgeous? For something so incredibly satisfying and perfect for serving alongside something like my easy steak fajitas, those numbers are really reasonable! It just goes to show that simple flour, water, and yeast can create something truly wonderful without packing in the extras.
PrintClassic Crusty Homemade French Bread Recipe

Bake bakery-style French bread at home. This recipe delivers a loaf with a crisp, crackly crust and a soft, airy interior using simple ingredients.
- Prep Time: 20 min
- Cook Time: 25 min
- Total Time: 2 hours 5 min
- Yield: 2 loaves 1x
- Category: Baking
- Method: Baking
- Cuisine: French
- Diet: Vegetarian
Ingredients
- 1 1/2 cups warm water (105-115°F)
- 2 1/4 teaspoons active dry yeast
- 1 teaspoon sugar
- 3 3/4 cups all-purpose flour, plus more for dusting
- 1 1/2 teaspoons salt
- 1 tablespoon cornmeal (for dusting the baking surface)
Instructions
- In a large bowl, combine the warm water, yeast, and sugar. Let this mixture sit for 5 to 10 minutes until it becomes foamy. This shows the yeast is active.
- Add the flour and salt to the yeast mixture. Mix with a wooden spoon until a shaggy dough forms.
- Turn the dough out onto a lightly floured surface. Knead for 8 to 10 minutes until the dough is smooth and elastic.
- Lightly oil a large bowl. Place the dough in the bowl, turning it once to coat. Cover the bowl with plastic wrap or a clean kitchen towel. Let the dough rise in a warm place for 1 to 1.5 hours, or until it has doubled in size.
- Gently punch down the risen dough. Divide it into two equal pieces. Shape each piece into a long, rustic loaf shape, about 12 to 15 inches long.
- Place the shaped loaves on a baking sheet dusted generously with cornmeal. Cover loosely and let them rest for 30 minutes.
- Preheat your oven to 450°F (232°C). Place a shallow pan on the bottom rack of the oven.
- Just before baking, use a sharp knife or razor blade to make three diagonal slashes across the top of each loaf.
- Carefully pour about 1 cup of hot water into the shallow pan on the bottom rack to create steam. Quickly close the oven door.
- Bake for 20 to 25 minutes, or until the crust is deep golden brown and sounds hollow when tapped.
- Remove the French bread from the oven and let it cool completely on a wire rack before slicing.
Notes
- For a softer crust, skip adding water to the bottom of the oven during baking.
- If you prefer a soft and fluffy texture instead of crusty, reduce the baking time slightly and brush the tops of the loaves with melted butter immediately after they come out of the oven.
- This bread is excellent served warm with butter or used as a substitute for dinner rolls.
Nutrition
- Serving Size: 1 slice
- Calories: 150
- Sugar: 0.5
- Sodium: 250
- Fat: 0.5
- Saturated Fat: 0.1
- Unsaturated Fat: 0.4
- Trans Fat: 0
- Carbohydrates: 31
- Fiber: 1
- Protein: 5
- Cholesterol: 0