
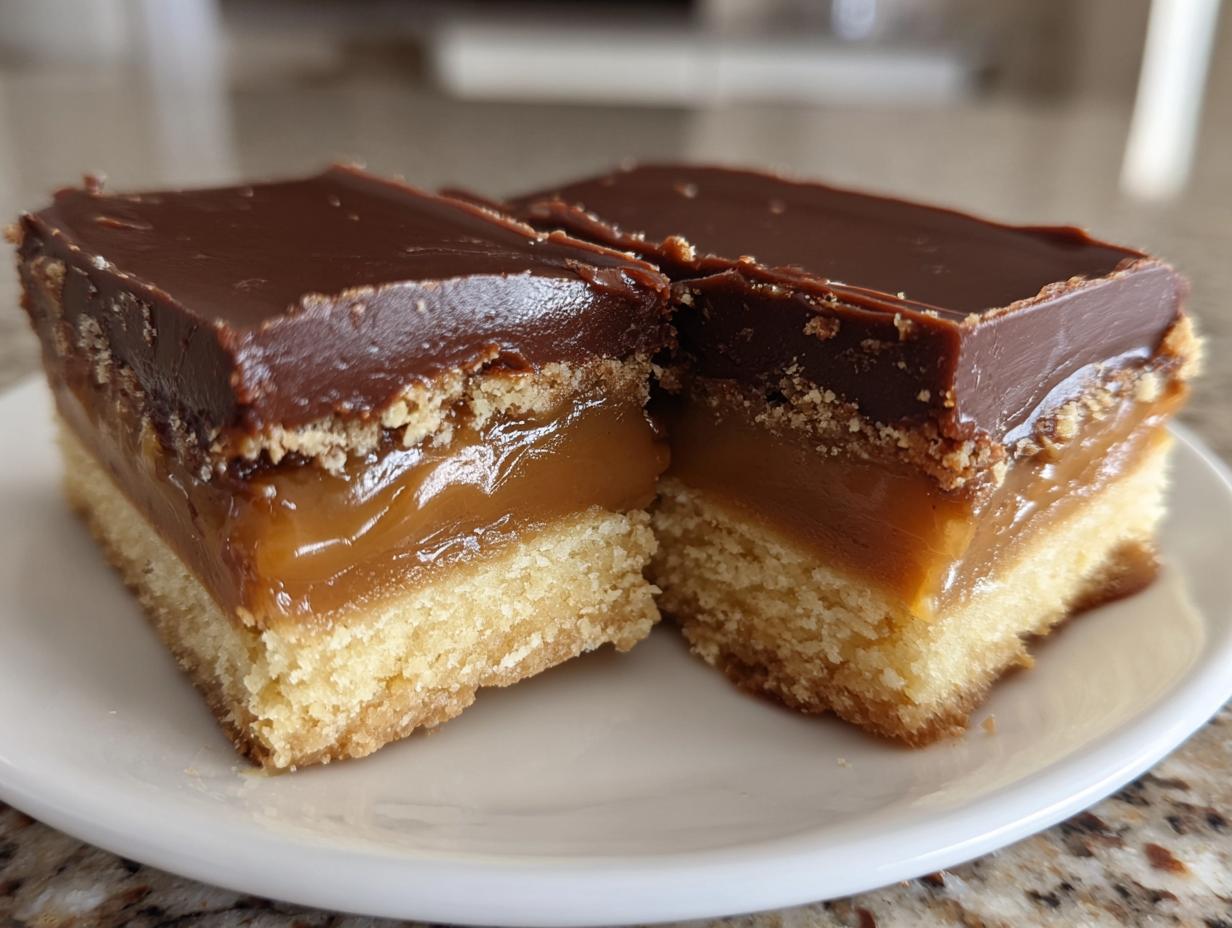
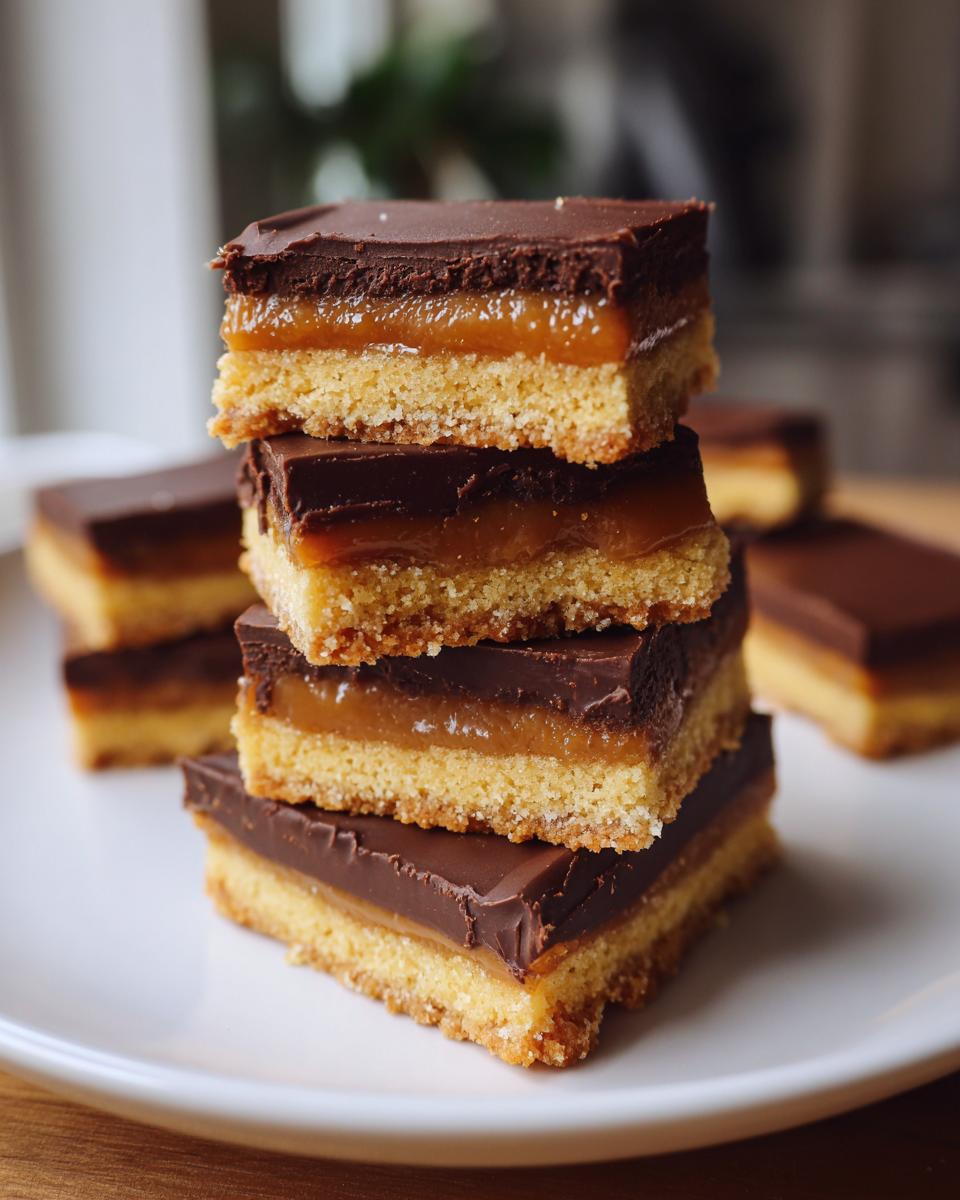
Oh, that irresistible craving for something perfectly crunchy, chewy, and coated in chocolate—you know the one! If you’ve ever stared sadly at an empty candy wrapper wishing you could have just one more, I have fantastic news for you. We are finally recreating that classic candy bar experience right here in your home kitchen! This recipe for homemade twix copycat bars delivers that perfect trio: a supremely buttery shortbread cookie base, a thick, chewy caramel layer, and a smooth, snappy chocolate topping.
When I started developing this recipe, my goal wasn’t just ‘similar’; it needed to taste exactly like the real deal. After plenty of testing with different butter amounts and caramel thicknesses—because Eleanor Vance doesn’t share anything that hasn’t been perfected for your kitchen—I am so proud to share this reliable version. Get ready to make the best chocolate caramel shortbread you’ve ever had!
- Why You Will Love These Homemade twix Bars
- Ingredients for the Perfect twix Copycat Dessert
- How to Prepare twix Bars: Step-by-Step Instructions
- Tips for Success Making Your twix Recipe Flawless
- Ingredient Notes and twix Variations
- Serving Suggestions for Bite Sized Chocolate Treats
- Storage and Reheating Instructions for twix Cookie Bars
- Frequently Asked Questions About Homemade twix
- Share Your Caramel Cookie Creations
Why You Will Love These Homemade twix Bars
Honestly, these bars are everything you want when that sweet tooth strikes! They scratch that nostalgic itch perfectly without requiring a trip to the store. Here’s why they are going straight into your favorites file:
- The shortbread base is unbelievably buttery and crumbly.
- You get that signature chewy caramel layer that pulls just right.
- They taste exactly like the classic candy bar—a true Twix copycat dessert!
- Super straightforward steps mean less fuss and more delicious results.
Ingredients for the Perfect twix Copycat Dessert
Gathering your ingredients is half the fun! Since we are aiming for that exact familiar taste, precision matters here, especially with the fats and sugars. Don’t worry if you need a refresher on making easy caramel candy and sauce recipe; we keep it simple! Everything is broken down by layer so you can prep efficiently.
For the Buttery Shortbread Cookies Base
This base has to be sturdy but melt-in-your-mouth tender. You’ll need 1 cup (2 sticks) unsalted butter that’s been softened up just right, along with 1/2 cup granulated sugar. To give it that classic structure, grab 2 cups all-purpose flour and just a pinch of 1/4 teaspoon salt.
For the Chewy Caramel Layer
This is where the chew comes in! You must use 1 (14 ounce) bag soft caramel candies, unwrapped—this is crucial for a smooth melt. To keep our chewy caramel layer perfectly pliable, we thin it slightly with 2 tablespoons milk or heavy cream.
For the Chocolate Dipped Cookies Topping
To finish our Homemade Candy Bar Recipes off right, we need high-quality chocolate. Use 1 1/2 cups semi-sweet chocolate chips. To get that beautiful, shiny finish that sets up nicely, mix in 1 tablespoon coconut oil or shortening. If you prefer results like milk chocolate, just swap those chips out!
How to Prepare twix Bars: Step-by-Step Instructions
These Easy Caramel Cookie Bars come together in three distinct, manageable phases. Don’t rush the cooling moments; that’s my biggest secret for layers that don’t merge into one gooey mess! You’ll preheat your oven to 350°F (175°C) and you absolutely must line that 9×13 inch baking pan with parchment paper, letting the edges hang over like little handles. Trust me, this makes removing the final bar so much easier. If you’ve ever perfected my soft and chewy cutout sugar cookies, you know how important even baking is!
Baking the Shortbread Foundation
First up is that buttery base. You will want to beat your softened butter and the sugar until they are really light and fluffy—think pale yellow and airy. Then, gently mix in the flour and salt until you have a soft dough, but stop mixing as soon as it comes together; we don’t want tough cookies here! Press this dough firmly and evenly right into the bottom of your prepared pan. Bake this foundation for about 15 to 18 minutes until you see just the slightest golden color creeping around the edges. Once done, pull it out and let it relax while you tackle the caramel.
Creating the Chewy Caramel Layer
For the caramel layer, put those unwrapped soft caramels and your milk or cream into a microwave-safe bowl. I usually zap this in 30-second bursts, stirring really well after every zap, until it’s totally smooth and glossy. Pour that beautiful, smooth caramel evenly over your still-warm shortbread. Back into the oven it goes for five to seven more minutes, just until you see it start to bubble slightly. After this second short bake, you have to let it cool completely—seriously, an hour at least—so the caramel sets up before the chocolate hits it.
Finishing with the Chocolate Coating and Cutting
Once the bars are totally cooled, it’s chocolate time! Gently melt your chocolate chips with the coconut oil using the same short burst microwave method. Spread this luscious melted chocolate over the cooled caramel layer, making sure the whole surface is covered evenly. Now, this is the hardest part: patience! The whole pan needs at least two hours in the refrigerator until that chocolate is totally firm. Once chilled, use those parchment paper handles to lift the whole slab out, and then slice into perfect little rectangular bite sized chocolate treats that look just like the real thing.
Tips for Success Making Your twix Recipe Flawless
Even though these are fundamentally simple, I have a couple of little tricks up my sleeve from my testing process to ensure these turn out looking store-bought perfect! For starters, cutting them cleanly is key, especially with that gooey caramel layer underneath. If you struggle getting perfect rectangles, pop the whole pan into the freezer for about 30 minutes right before you slice. That short chill firms up everything just enough!
Also, remember my note on the chocolate? If you want that perfect snap when you bite into your bar, don’t skip adding that tiny bit of coconut oil or shortening to the chips when melting. It lowers the melting point just enough to give you a smoother pour and a sharper set. For that ultimate homemade candy bar experience, always trust the quality of your ingredients—especially that butter in the shortbread base. You can read more about getting a perfect pastry base over here with my butter pie crust recipe, which follows the same principles of using quality chilled fats!
Ingredient Notes and twix Variations
I always encourage bakers to play around, but when replicating something as classic as a Twix bar, there are a few swaps that work beautifully and others you might want to skip. Remember, we are aiming for that perfect textural contrast. It’s about balancing the rich chocolate coating with the structure of the base. I’ve tested so many versions, including some I talk about over on my easy super moist pumpkin bread recipe, but these tweaks are specific to this candy bar treat.
Quick Dessert Hacks for Your twix
If you are completely short on time—maybe you need these bite sized chocolate treats for a last-minute party—I have an amazing quick hack for you! You can skip making the shortbread base entirely. Just use two sleeves of good quality, plain vanilla wafer cookies or even store-bought shortbread cookies as your base layer. Layer them snugly in the pan, melt your caramel, pour it over, and proceed as normal. It speeds up the process by ages!
Making Gluten Free twix Recipe Options
If you need to adapt this for gluten-free friends, it’s very easy to do! The overall structure relies heavily on the flour, but you can absolutely swap the all-purpose flour in the shortbread base for a good 1-to-1 gluten-free baking blend. Make sure you gently incorporate the GF flour mixture just as you would the regular one—overmixing is still the enemy of tenderness!
Serving Suggestions for Bite Sized Chocolate Treats
These homemade twix bars are perfect just the way they are, cut into neat little rectangles, but presentation always makes things feel more special! If you’re making a big batch for a holiday gathering or gifting, try cutting them into smaller, truffle-sized squares—instant bite sized chocolate treats that are easier for guests to pop in their mouths.
They look stunning arranged on a tiered tray alongside other holiday candy recipes. A little sprinkle of sea salt right over the wet chocolate before it sets adds a gourmet touch, balancing that sweetness beautifully! You can even wrap individual bars in small squares of wax paper tied with festive twine. It’s a great way to share your hard work!
Storage and Reheating Instructions for twix Cookie Bars
Because of that glorious, chewy caramel layer and the chocolate coating, these homemade twix bars truly shine when stored cold. You need to keep them airtight in the refrigerator. They stay wonderfully fresh this way for about a week—if they last that long!
Don’t worry about reheating these at all, honestly. Warming them up will turn that beautiful chocolate coating soft and the caramel runny again, making them quite messy to handle. Just pull them out of the fridge about 10 minutes before serving so the chocolate loses its hard chill, but keep them cool!
Frequently Asked Questions About Homemade twix
I know when you try a new copycat recipe, questions always pop up! That’s perfectly normal, especially when dealing with layers of texture like we have here in these Chocolate Caramel Shortbread bars. Here are a few things folks ask me most often about perfecting their homemade Twix.
Can I make these into No Bake twix Bites?
While the best shortbread base needs that little golden kiss in the oven to get its signature sandy texture, the spirit of this recipe definitely leans toward quick treats! If you use a pre-made cookie base—like the hack I mentioned above—you skip the baking entirely and go straight to layering. The main thing is making sure you chill or freeze the bars really well after the chocolate goes on. That firm chill mimics the setting that baking starts, resulting in perfect little No Bake Twix Bites (almost!).
What makes a good Chewy Caramel Layer?
Ah, the heart of the Chewy Caramel Layer! The absolute secret here is starting with soft, individually wrapped caramel candies, not caramel blocks meant for dipping. If your caramel seems too stiff or breaks when you cut the cooled bars, it usually means the caramels weren’t fully melted, or you needed that tiny bit more milk or cream to keep them soft after cooling. Make sure you stir constantly when melting so you don’t scorch them!
What is the best chocolate to use?
I love semi-sweet because it cuts through the richness of the caramel layer so nicely, but honestly, whatever chocolate chips you love works! If you are after a truly satisfying bite, use a good quality dipping chocolate or even melted bittersweet chips. For the best coating shine, remember that tiny bit of coconut oil or shortening—it’s magic for keeping things smooth when you pour them over the top like a professional baker!
If you want to see more of my favorite ways to work with chocolate, check out my tips on making a really moist chocolate cake recipe; working with melted chocolate uses similar principles of temperature control!
Share Your Caramel Cookie Creations
Now that you’ve made your very own batch of homemade twix bars, I would just absolutely love to see what you cooked up! Honestly, seeing your results is what keeps me motivated in the kitchen every single day. Did your shortbread bake up perfectly buttery? Was your caramel layer nice and chewy?
Please take a moment to leave a star rating right below the recipe card, and don’t be shy about sharing any little variations you tried out. If you snapped a picture of your beautiful rectangles of Caramel Cookie Creations, tag me on social media! It means the world to me to see this recipe making memories on your kitchen counter.
Creating this kind of delicious, nostalgic food together is what DeliceRecipe is all about. If you want to dive into another classic treat that’s fun to shape and share, you should definitely try out my easy tiramisu recipe next. Happy baking, everyone!
PrintHomemade Twix Cookie Bars
Make copycat Twix bars at home featuring a buttery shortbread base, a chewy caramel layer, and a rich chocolate coating. These are simple to make and taste like the classic candy bar.
- Prep Time: 20 min
- Cook Time: 25 min
- Total Time: 145 min
- Yield: 24 bars 1x
- Category: Dessert
- Method: Baking
- Cuisine: American
- Diet: Vegetarian
Ingredients
- 1 cup (2 sticks) unsalted butter, softened
- 1/2 cup granulated sugar
- 2 cups all-purpose flour
- 1/4 teaspoon salt
- 1 (14 ounce) bag soft caramel candies, unwrapped
- 2 tablespoons milk or heavy cream
- 1 1/2 cups semi-sweet chocolate chips
- 1 tablespoon coconut oil or shortening
Instructions
- Preheat your oven to 350°F (175°C). Line a 9×13 inch baking pan with parchment paper, leaving an overhang for easy removal.
- Prepare the shortbread base: In a large bowl, beat the softened butter and granulated sugar together until light and fluffy.
- Gradually mix in the flour and salt until a soft dough forms. Press this dough evenly into the bottom of the prepared baking pan.
- Bake the shortbread for 15 to 18 minutes, or until the edges are lightly golden brown. Remove from the oven and let it cool slightly while you prepare the caramel.
- Prepare the caramel layer: Place the unwrapped caramels and milk or cream in a microwave-safe bowl. Microwave in 30-second intervals, stirring well after each, until the caramel is smooth and completely melted.
- Pour the melted caramel evenly over the warm shortbread base. Return the pan to the oven and bake for an additional 5 to 7 minutes, just until the caramel is bubbly.
- Remove from the oven and let the bars cool completely to room temperature, about 1 hour. This step is important so the caramel sets before adding chocolate.
- Prepare the chocolate coating: Place the chocolate chips and coconut oil in a microwave-safe bowl. Microwave in 30-second intervals, stirring until the chocolate is smooth and fully melted.
- Pour the melted chocolate over the cooled caramel layer, spreading it evenly to cover the entire surface.
- Refrigerate the bars for at least 2 hours, or until the chocolate is firm.
- Lift the bars out of the pan using the parchment paper overhang. Cut into rectangular bar shapes resembling the candy bar.
Notes
- For a cleaner cut, you can chill the bars in the freezer for 30 minutes before slicing.
- If you prefer a milk chocolate flavor, substitute milk chocolate chips for the semi-sweet chips.
- For a quick hack, you can substitute store-bought shortbread cookies for the homemade base if you are short on time.
Nutrition
- Serving Size: 1 bar
- Calories: 250
- Sugar: 25
- Sodium: 110
- Fat: 15
- Saturated Fat: 9
- Unsaturated Fat: 6
- Trans Fat: 0.5
- Carbohydrates: 28
- Fiber: 1
- Protein: 3
- Cholesterol: 30