
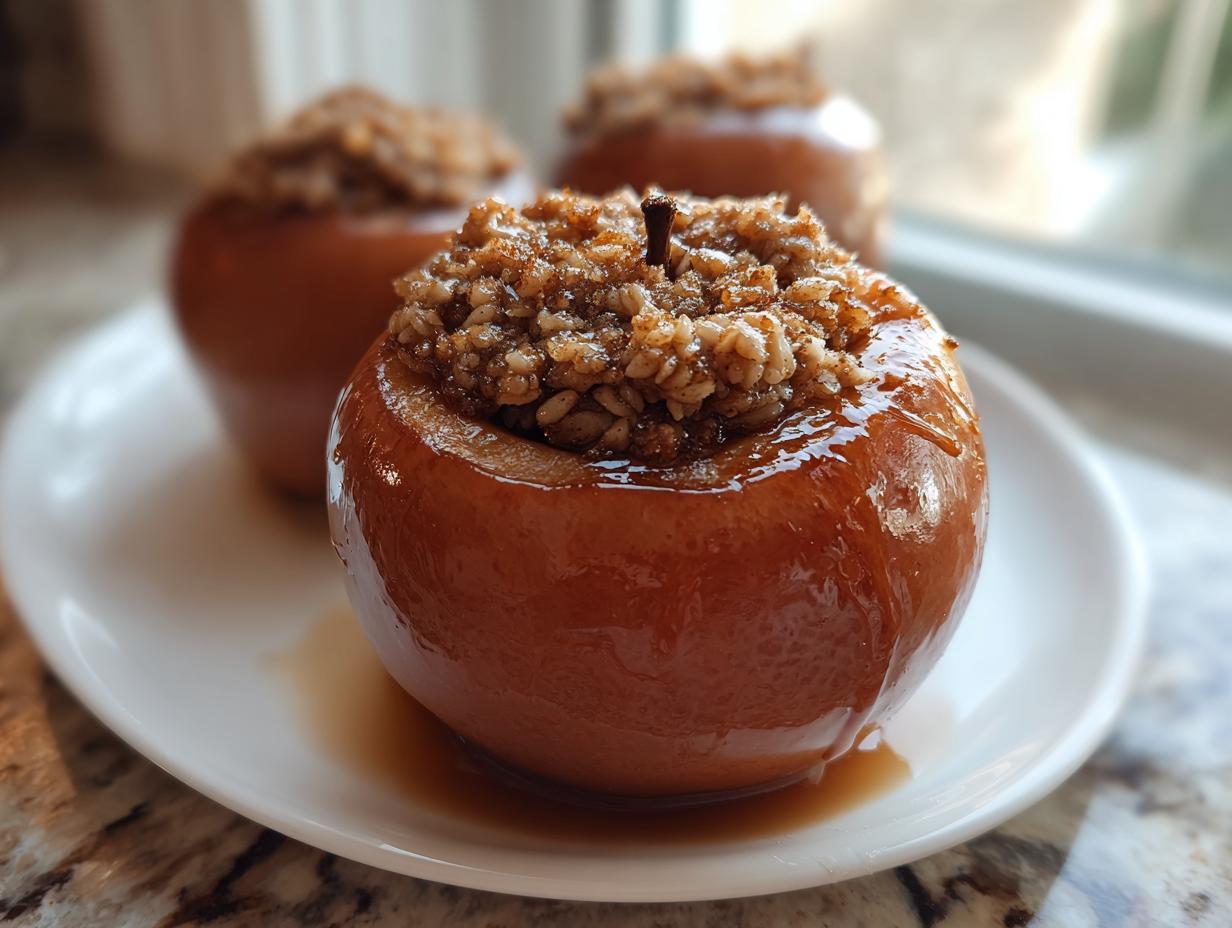
When the air turns crisp and the leaves outside start putting on their show, honestly, nothing settles my soul quite like the scent of warm spices coming from the oven. That deep, sweet aroma of cinnamon and brown sugar is my favorite sign that true comfort season has arrived. Today, I’m sharing what I consider the absolute best homemade baked apples recipe you could ever need. Forget fussy techniques; this is simple, classic, and so reliable. Trust me when I say these oven baked apples will become your staple fall treat because they’re foolproof and deliver that soul-soothing flavor every single time. I developed this recipe right here in my kitchen to be deeply accessible for everyone. If you love this kind of cozy baking, you should also check out my recipe for easy, super moist pumpkin bread!
- Why You Will Love This Easy Baked Apples Recipe
- Gathering Ingredients for Perfect Stuffed Baked Apples
- Step-by-Step Instructions for Tender Baked Apples
- Tips for the Best Homemade Baked Apples Success
- Making Baked Apples a Simple Baked Apples Side Dish
- Variations for Brown Sugar Baked Apples
- Storing and Reheating Your Oven Baked Apples
- Frequently Asked Questions About Baked Apples
- Serving Suggestions for This Fall Apple Dessert
Why You Will Love This Easy Baked Apples Recipe
I know you’re busy, so I promise this won’t ask for much time! This easy baked apples recipe is a genuine winner because:
- It takes less than fifteen minutes of prep time—seriously!
- The filling is pure comfort food: tender apples loaded with cinnamon and brown sugar.
- They work perfectly as a simple dessert OR a cozy side dish for Sunday dinner.
- We use sturdy apples, so you get that wonderful structure that doesn’t turn to mush halfway through baking!
Gathering Ingredients for Perfect Stuffed Baked Apples
Getting the ingredients ready is half the battle, and I want to make sure you’re set up for success here. For these beauties, we are focusing on firm apples that won’t collapse when they get nice and hot. Don’t reach for those super soft ones!
Here is what you’ll need to grab from your pantry and fridge:
- 4 large baking apples; please grab firm ones like Honeycrisp or Granny Smith. They keep their shape so well!
- 1/2 cup rolled oats—make sure these are the old-fashioned kind, not the instant microwave stuff!
- 1/4 cup packed brown sugar—that dark molasses flavor is essential here.
- 1 teaspoon ground cinnamon and 1/4 teaspoon ground nutmeg for that classic, warm spice.
- 2 tablespoons unsalted butter, cut into four small little cubes.
- 1/4 cup hot water; this goes into the pan, not the filling, remember!
Once you have everything measured out, you are basically ready to bake! It’s so simple. If you’re looking for other easy recipe components, I have a great tutorial on how to make perfect cookie icing.
Step-by-Step Instructions for Tender Baked Apples
Okay, let’s get these cozy autumn treats into the oven! The steps here are straightforward, but attention to detail in the coring and the steaming process is what gets you those perfectly tender spiced apples we’re dreaming about. Follow along closely, and you’ll have success on your very first try.
Preparing the Apples and Oven Setup
First things first, grab a baking dish and lightly grease it up. We need the oven running hot at 375 degrees Fahrenheit so it’s ready when the apples are prepped. Now for the coring! Wash those apples well. You need to scoop out the core carefully, but this is my big tip: stop before you hit the bottom! Use a small knife or a melon baller and just go deep enough to create a nice little well for the filling. You absolutely must leave about a half-inch base so the yummy filling doesn’t just boil out into the dish while they bake. Don’t worry if it seems tricky at first; it’s just practice!
Mixing and Stuffing the Cinnamon Baked Apples Filling
In a small bowl, you’re going to mix the dry components for your filling. Get that rolled oats, brown sugar, cinnamon, and nutmeg all mingled together. I like to use a tiny whisk here—it helps everything blend so there aren’t any clumps of pure spice. Once it looks uniform, scoop that oat mixture into the apple cavities. Don’t just sprinkle it in; gently press it down so it packs in a little bit. Since we want these cinnamon baked apples to be rich, make sure you place one or two little knobs of that cold butter right on top of the filling in each apple cup.
Baking and Steaming the Baked Apples
This next part is key for moisture! Carefully pour that 1/4 cup of hot water onto the bottom of your prepared baking dish—this water turns to steam and keeps the apples from drying out. Set the stuffed apples right into the pan. Now, bake them for 35 to 45 minutes. I always test them by piercing the side with a fork; if the fork slips in easily, they are done! This steam treatment is what delivers those gorgeous, tender spiced apples that melt in your mouth. Once they are baked, scoop up any delicious liquid at the bottom of the dish and drizzle it right over the apples before serving warm. If you need one-pot versatility later, check out my easy parmesan pasta recipe!
Tips for the Best Homemade Baked Apples Success
Even though this recipe is wonderfully straightforward, a couple of little insider tips can elevate your results from good to great. If you want to claim the title for making the best homemade baked apples on the block, pay close attention to your starting materials. First, I mentioned using firm apples, and I stand by that—Granny Smith or Honeycrisp are my go-tos because they handle the oven heat without losing their beautiful structure. Anything too soft just turns sweet applesauce, and we want a bit of bite!
If you want to experiment next time, try swapping out just some of that brown sugar for maple syrup. It adds a different layer of caramelized depth that’s fantastic, especially if you have darker maple syrup sitting around. Also, when it comes to serving, don’t skip drizzling that syrupy liquid from the bottom of the pan over the top! It’s where all the flavor concentrates. For more sweet, buttery goodness, you simply must try my easy blueberry scones recipe!
Making Baked Apples a Simple Baked Apples Side Dish
It’s funny how just a few tweaks can turn a dessert into the star side dish for dinner! Apples and pork chops or roasted chicken? A match made in heaven, if you ask me. If you’re aiming for a savory accompaniment rather than a sweet fall apple dessert, it’s really easy to adapt this recipe into a fantastic simple baked apples side dish.
The main change involves adjusting the sweetness level. I’d cut the brown sugar in the oat filling down by half, maybe even just using a teaspoon or two for flavor enhancement. Instead of relying on sugar, bump up the savory spices. Add a tiny pinch of dried thyme or even a whisper of smoked paprika to the oat mix. This gives the apples an earthy note that pairs beautifully with roasted meats. Trust me, your guests will be raving about this non-traditional side! When you’re ready for another savory hit, my flaky butter pie crust recipe is amazing for savory tarts too!
Variations for Brown Sugar Baked Apples
While the classic oat and cinnamon mix is unbeatable, sometimes you just need to switch things up! That’s the beauty of home cooking, right? We can tweak and play with what we already love. These brown sugar baked apples are incredibly adaptable, which is why I always keep the base recipe in my rotation.
If you’re out of oats or want something a bit earthier, try trading those out completely! Chopped pecans or walnuts are an amazing swap—they toast up beautifully inside that warm apple cup and add a lovely crunch. Or, if you want a fruitier filling, toss in some dried cranberries or chopped dried apricots along with the sugar and spice.
Another fun trick for flavor depth: instead of relying only on brown sugar, use a tablespoon of real maple syrup when mixing your filling. It brings a totally different caramel note that complements the baked fruit in a wonderful way. Feel free to look at my recipe for easy stovetop cinnamon applesauce for other spice inspiration!
Storing and Reheating Your Oven Baked Apples
Now, I know if you’re anything like me, you probably made more than four apples because who can stop at just one? Good news! These oven baked apples keep really well, which is perfect for easy dessert grab-and-go options later in the week. Once they’ve cooled down completely, just pop them into an airtight container and pop that container right into the refrigerator. They stay lovely for about three to four days.
When you want to enjoy them again, you have options! For the best texture—keeping that nice, tender bite—I highly recommend reheating them in a lower oven, say at about 300 degrees, for about 10 minutes. That gently warms everything through. If you are in a huge rush, the microwave works too, but use short 20-second bursts and check them often. Microwaving can sometimes turn the apples a little softer than you’d like, but they’ll still be delicious, especially drizzled with some juice from my juicy baked chicken breast cooking water substitute, if you have any savory remnants, just kidding!).
Frequently Asked Questions About Baked Apples
I know when you’re trying a new recipe, you always have a few little questions bubbling up, and that’s totally normal! I’ve compiled the questions I usually get asked about this dish to make sure you feel confident before you even turn the oven on. If I missed anything you’re wondering about, just let me know!
What are the best apples to use for baked apples?
This is probably the most important question for this recipe, because the wrong apple can lead to mush! You want apples that are naturally firm and hold up to heat, which also gives you that lovely contrast between the tender fruit and the sweet, slightly crumbly filling. Granny Smith apples are my absolute favorite because they have a nice tartness to cut through the sweetness. Honeycrisp is a close second, or even a firm Fuji. Just avoid anything that easily bruises or is already soft when you buy it—we need structure!
Can I make these without oats for a gluten-free option?
Oh yes, absolutely! We want everyone to enjoy this lovely fall apple dessert, right? If you need to skip the oats, you still need *something* to absorb some of the juices and give that filling some body. You can substitute those rolled oats with an equal amount of finely chopped nuts—pecans or walnuts work beautifully and add a great richness. If you happen to have a gluten-free apple crisp topping on hand, that works perfectly too! This keeps them satisfyingly crunchy while still being a more healthy baked apples choice.
How do I ensure my baked apples are perfectly tender?
The tender texture is the thing that separates a good baked apple from a truly great one! While the butter helps, the secret weapon here is the steam we create in the baking dish. Remember that hot water we added to the bottom? That doesn’t just flavor the bottom sauce; it wraps the apples in moisture as they bake. So, make sure you don’t skip that step! The best way to check is using a fork; if it slides easily into the thickest side of the apple flesh—right near the bottom core—they are ready. They should give just a little bit when you gently wiggle the fork.
If you’re looking for other ways to get perfectly tender results in baking, you might want to look over my guide on making creamy roasted garlic mashed potatoes; sometimes the steam environment is just as important as the direct heat!
Serving Suggestions for This Fall Apple Dessert
Honestly, the best part about making a wonderful fall apple dessert is deciding what lovely thing you’re going to drown it in! These apples are fantastic hot right out of the oven on their own, but they truly shine when you add something creamy or decadent on top. My go-to move is always a big scoop of vanilla bean ice cream. The contrast between the hot, spiced apple and that cold, melting cream is just heavenly. That’s why this recipe is a favorite for holiday tables! If you love simple apple bakes, check out this classic easy baked apples recipe for comparison.
If you’re feeling particularly indulgent, a drizzle of thick caramel sauce makes these irresistible. Even simpler? A dollop of freshly whipped cream works wonders to cut through the sweetness of the brown sugar filling. For more show-stopping finales, you absolutely have to see my easy tiramisu recipe, though that’s a different kind of showstopper entirely!
Print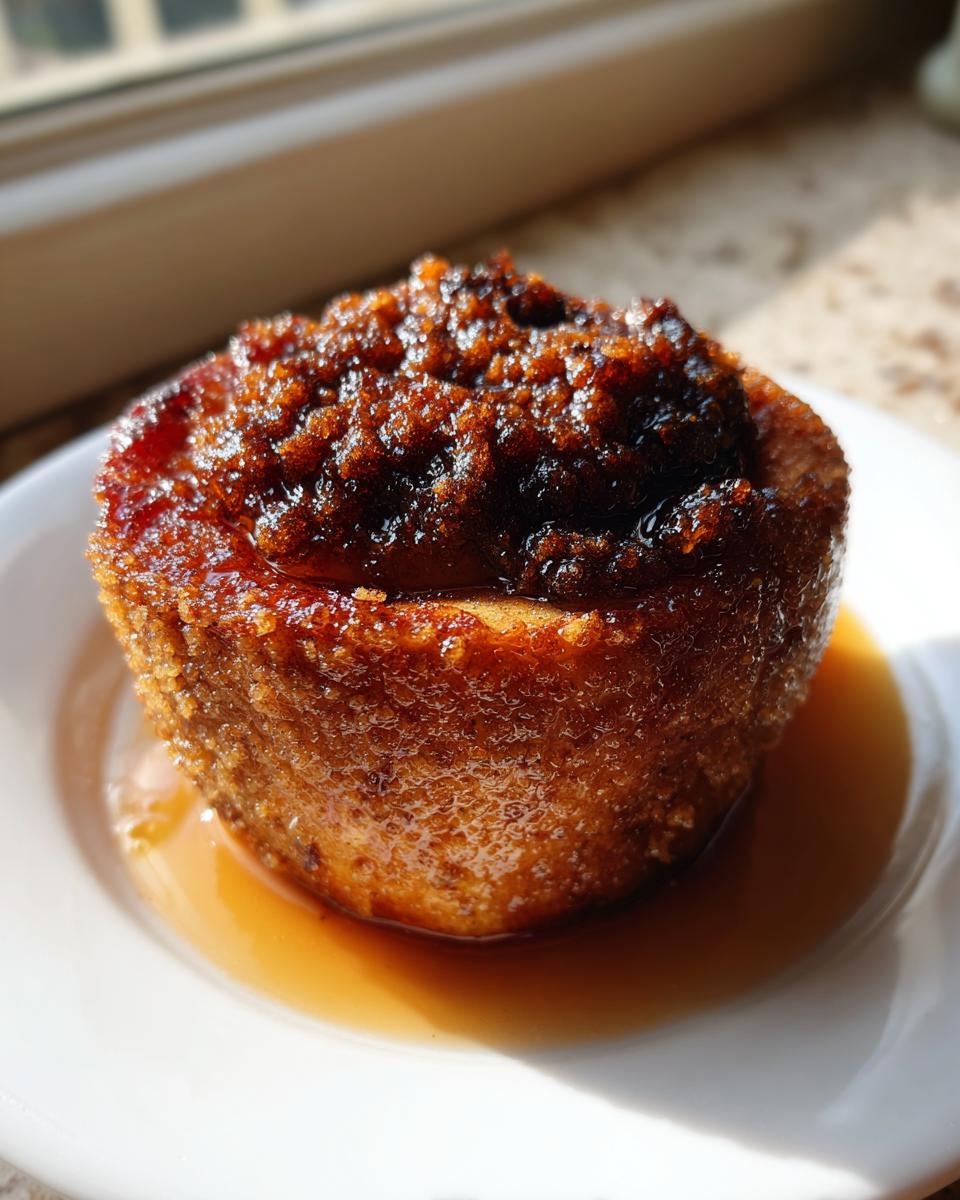
Classic Stuffed Baked Apples with Cinnamon and Brown Sugar
Make these simple, tender baked apples stuffed with a warm cinnamon-oat mixture. This easy baked apples recipe is a perfect fall dessert or side dish.
- Prep Time: 15 min
- Cook Time: 45 min
- Total Time: 60 min
- Yield: 4 servings 1x
- Category: Dessert
- Method: Baking
- Cuisine: American
- Diet: Vegetarian
Ingredients
- 4 large baking apples (like Honeycrisp or Granny Smith)
- 1/2 cup rolled oats
- 1/4 cup packed brown sugar
- 1 teaspoon ground cinnamon
- 1/4 teaspoon ground nutmeg
- 2 tablespoons unsalted butter, cut into small pieces
- 1/4 cup hot water
Instructions
- Preheat your oven to 375 degrees Fahrenheit. Lightly grease a baking dish.
- Wash the apples. Use a small knife or melon baller to carefully core the center of each apple, leaving about a half-inch base so the filling stays inside. Do not cut all the way through the bottom.
- In a small bowl, combine the rolled oats, brown sugar, cinnamon, and nutmeg. Mix these dry ingredients well.
- Divide the oat mixture evenly and stuff it into the cored center of each apple. Gently press the filling down.
- Place 1-2 small pieces of butter on top of the filling in each apple.
- Pour the hot water into the bottom of the prepared baking dish. This creates steam to keep the apples moist.
- Bake for 35 to 45 minutes, or until the apples are tender when pierced with a fork.
- Carefully remove the dish from the oven. Spoon any liquid from the bottom of the dish over the apples before serving warm.
Notes
- Use firm apples that hold their shape well during baking.
- For a richer flavor, substitute maple syrup for some of the brown sugar in the filling.
- Serve these spiced fruit treats with vanilla ice cream or a dollop of whipped cream for a classic comfort food dessert.
Nutrition
- Serving Size: 1 apple
- Calories: 280
- Sugar: 35
- Sodium: 5
- Fat: 10
- Saturated Fat: 6
- Unsaturated Fat: 4
- Trans Fat: 0
- Carbohydrates: 48
- Fiber: 6
- Protein: 2
- Cholesterol: 25