
If you’re aiming for that perfect Sunday roast, you know the sides are what really make the meal sing, right? And nothing shouts ‘British comfort food’ quite like a plate piled high with towering, puffy goodness. I’m talking about the ultimate Yorkshire pudding. Forget those flat, sad excuses for batter! Here at DeliceRecipe, founder Ellie Vance insists that everything we share must be reliable, delivered with a warm smile, and never overly complicated. That’s why I’ve obsessed over this recipe until I found the magic combination—it all comes down to that classic 4:1:1 ratio which guarantees you get those tall, unbelievably crispy puddings with centers so fluffy they practically float off your plate. Trust me; this is the foolproof method you’ve been missing!
- Why This is the Best Yorkshire Pudding Recipe for Your Sunday Roast Sides
- Ingredients for Foolproof Yorkshire Puddings
- How to Make Yorkshire Puddings: Step-by-Step Instructions
- Troubleshooting Common Yorkshire Pudding Issues
- Serving Suggestions for Your Homemade Yorkshire Puddings
- Storage and Reheating Instructions for Perfect Yorkshire Pudding
- Frequently Asked Questions About Yorkshire Pudding Recipe
- Estimated Nutritional Data for Yorkshire Pudding
- Share Your Golden Brown Puddings Experience
Why This is the Best Yorkshire Pudding Recipe for Your Sunday Roast Sides
I know what you might be thinking—Yorkshire puddings? Aren’t those just American popovers? Well, yes and no! While they share DNA, the traditional British version we’re making here is destined for a very specific job: soaking up rich gravy alongside roast beef. We meticulously tested batch after batch to nail the ratios, and that effort pays off in the final product.
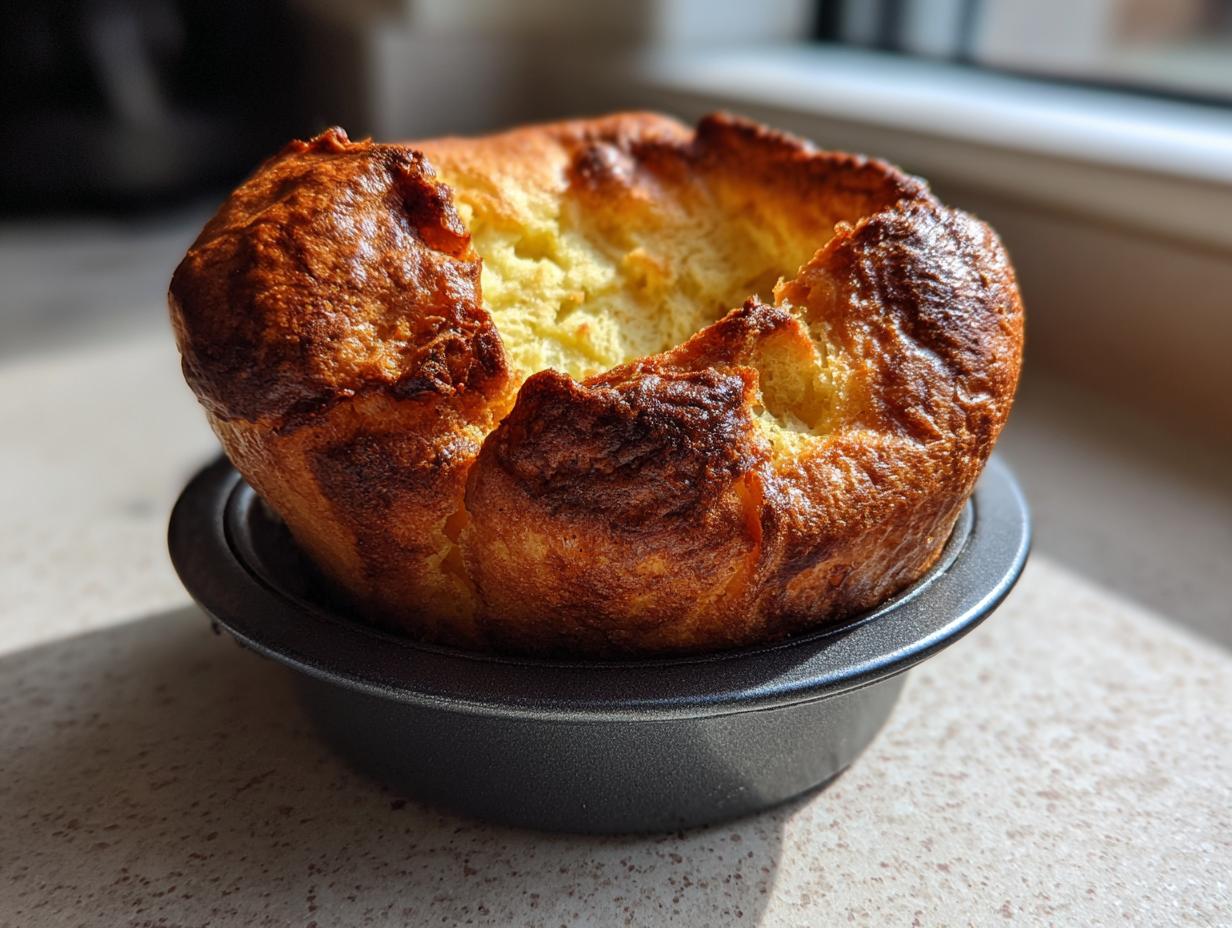
What makes this the best Yorkshire pudding is what happens in that oven. You get that unbelievable height, a gorgeous golden-brown exterior that shatters when you cut into it, and an interior that stays delightfully light and airy. If you want truly fluffy Yorkshire puddings that elevate your entire meal, this is the one that works every single time. Forget everything else you’ve tried; these are absolutely essential for a proper British spread of Sunday roast sides.
Ingredients for Foolproof Yorkshire Puddings
Okay, let’s look at what you need. Honestly, the simplicity is part of why this recipe is so brilliant! We rely on that famous 4:1:1 ratio—four parts egg, one part flour, and one part milk—using volume measurement here because it’s just easier for a quick batter. This balance is the secret to that perfect rise in your Yorkshire pudding.
You need:
- 4 large eggs (please make sure these are room temperature!)
- 4 oz all-purpose flour
- 4 oz whole milk (also room temp, if you can manage it!)
- A tiny pinch of salt
- And for the tin: Vegetable oil or, if you’re feeling traditional, glorious beef dripping.
Bringing your milk and eggs up to room temperature first really helps everything combine better and prevents that batter from getting lumpy.
Ingredient Notes and Substitutions for Yorkshire Pudding Batter
Don’t stress too much about the flour if you have dietary needs! If you need a Gluten Free Yorkshire Pudding, just swap the standard flour out for a good quality GF blend that you trust. The technique is what really matters most here.
Now, let’s talk fat. You must use a fat with a high smoke point, like vegetable oil or lard. But here’s my real tip for that *tall* puff? If you can get your hands on beef dripping, use it! It adds incredible flavor, and critically, it gets hotter than most oils, which is non-negotiable for that first jolt of steam that launches your pudding skyward.
How to Make Yorkshire Puddings: Step-by-Step Instructions
Alright, this is where the magic happens! If you follow these steps for how to make Yorkshire puddings precisely, you won’t run into any trouble. First things first, get your batter made. I like to start by mixing the flour and salt, then making a little well in the middle—like a tiny swimming pool for the eggs. Whisk those eggs in slowly, just incorporating the flour around the edges until you have a thick, almost gluey paste. Don’t worry if it looks a little heavy at this stage; that consistency is important! My neighbor tried using a blender once and ended up with soup because she overmixed it—stick to the whisk!
Next, we introduce the milk. Pour in that milk bit by bit while whisking constantly. You want the final batter consistency to be like heavy cream—smooth, no lumps, but still thin enough to pour easily. Once it looks perfect, cover that bowl! Seriously, you must let the batter rest. Thirty minutes in the fridge is good, but if you can let it sit for a few hours—or even overnight—the results are always better. Resting calms down the flour and helps create that amazing texture for your final product, making it a perfect accompaniment to a Sunday pot roast.
While your batter is chilling, turn your oven up high—we are talking 450°F (230°C). Pop your muffin tin in with a good dollop of oil or dripping in each hole. That oil needs to get screaming hot—we aren’t just warming it up, we want it smoking! After about 10 minutes of preheating the tin, carefully pull it out (watch your hands!). Pour the batter right into the center of that sizzling oil, filling each section just about one-third full. Don’t splash!

And here’s the golden rule, the place where most people mess up their big hopes for a giant puff: Once that tin is back in the oven, do not open the door for at least 15 minutes. Peeking lets the heat escape, and your tall dreams will instantly deflate. Just let them bake undisturbed until they’re beautifully golden and set, maybe 20 to 25 minutes total. They come out looking like little golden cups, ready for some rich gravy! I’ve learned that patience right here is the ultimate secret to success.
Achieving Maximum Puff: Temperature Control for Yorkshire Pudding Success
Listen, if you want those tall, gravity-defying beauties, it’s all about the clash of temperatures. We need the coldest possible batter—that’s why we rest it in the fridge—hitting the absolute hottest fat. The second that cold batter hits that smoking hot oil, it creates an immediate, explosive burst of steam inside the mix. That steam is what forces the pudding up and out, creating those towering walls. People who use lukewarm oil or don’t preheat their tins enough end up with pancake puddings, and nobody wants that!
As an expert tip, once you pull the tin out to pour the batter, you need to work super fast, because that hot oil starts cooling the second the oven door opens. If you’re ever worried about how hot the oil is, just flick one tiny drop of batter onto the surface—if it sizzles aggressively and starts setting instantly against the sides of the tin, you’re good to go. If it just sort of sits there, put the tray back in for five more minutes. It’s extreme, I know, but it’s how we get results like the ones you see in classic Yorkshire pudding recipes!
Troubleshooting Common Yorkshire Pudding Issues
It happens to the best of us, truly! Even after all that attention to detail, sometimes your Yorkshire puddings just don’t puff like you hoped. Don’t chuck them! Most flatness issues come down to one of two things, and they are totally fixable next time.
The number one reason your puddings deflate is greed—you open the oven door too soon! If you peek before that initial 15 minutes are up, the sudden drop in temperature lets the steam collapse, and that beautiful rise is gone forever. Second, if your batter wasn’t rested properly, you won’t get enough internal structure, leading to dense bottoms.
If they are flat, chances are the oil wasn’t scorching hot when the batter went in. Remember, we need that instantaneous, violent sizzle when the batter touches the tin to create our crispy coating and force the rise. If they look pale instead of gloriously crispy Yorkshire puddings, your oven temperature might be running low, so definitely check that with a separate thermometer next time you roast.
Serving Suggestions for Your Homemade Yorkshire Puddings
There is really only one correct way to serve these, isn’t there? A proper British side dish deserves to be served immediately alongside a gorgeous roast. Of course, they are utterly essential for roast beef, but honestly, I adore them just as much with a big roasted chicken, like the one I use for my Sunday dinner ideas.
You’ve put in the effort to make these truly homemade Yorkshire puddings from scratch, so reward yourself by skipping those pre-made kits or even services like some meal-delivery companies might offer! The payoff is magnificent when they are smothered in a rich, dark brown gravy. That’s the ultimate goal—a perfectly crisp shell ready to catch every drop.
Making Giant Yorkshire Pudding or Individual Yorkshire Puddings
You have options here depending on how fancy you want the presentation to be! If you’re making traditional individual Yorkshire puddings in a muffin tin, they cook fast and get that great individual puff structure. They look incredible lined up on a platter.
But if you want a showstopper, go giant! Use a large roasting tin, pour in enough batter to cover the bottom maybe an inch deep, and you’ll need longer in the oven—maybe 30 to 35 minutes. The downside of the giant one is that the center will be soft and bread-like rather than perfectly hollowed out. Whichever way you go, the heat source is the same: piping hot fat!
Storage and Reheating Instructions for Perfect Yorkshire Pudding
Honestly, nothing beats a Yorkshire pudding straight from the oven when it’s piping hot and crispy! They are an absolute one-time-use item if you want perfection. If you absolutely must make them ahead, the best way is to let them cool completely and then store them in an airtight container at room temperature for a day. Forget the microwave; it turns them instantly soggy!
To bring them back to life—and you must—you need a hot oven, around 400°F (200°C). Pop them directly on the rack for about five to seven minutes. That quick, dry heat sucks all the moisture out of the surface and makes them delightfully crispy again. It’s the only way to ensure they are still worthy of your delicious gravy!
Frequently Asked Questions About Yorkshire Pudding Recipe
Okay, I know sometimes after you read all the steps, you might still have a few little questions swirling around, especially because getting that perfect rise feels like such a huge challenge. Don’t worry; I’ve heard all the same scrambles when I first started making these for my family dinners!
Can I make the batter ahead of time?
Yes! And my advice is that you absolutely should! Remember how I stressed resting the batter? Well, resting it overnight in the fridge is actually ideal. The batter should rest for a minimum of 30 minutes, but leaving it covered in the refrigerator for up to 12 hours lets the flour fully hydrate. This makes your final Yorkshire pudding lighter and produces those gorgeous tall sides we love. Just make sure you give it a quick, gentle whisk before pouring—but don’t overdo it!
What is the difference between Yorkshire pudding and a popover recipe?
It’s the eternal question, isn’t it? Technically, they are extremely similar quick breads made from a thin batter of eggs, flour, and milk. The real difference lies in tradition and fat. A true Yorkshire pudding traditionally uses beef dripping, baked in a pan coated with the fat, and is specifically served with a roast dinner—it’s a core British side dish. Popovers, which are our American cousins, are usually lighter, often baked in taller, thinner popover tins, and sometimes sweetened slightly. But if you want that deep, savory crust perfect for soaking up gravy, stick to my traditional recipe!
Can I use different types of fat for these puddings?
You sure can, but remember what I said about the heat! You want the fat to reach its smoke point quickly. Vegetable oil or any neutral oil works fine, and it will help you achieve good results for homemade Yorkshire puddings. However, if you want the deep, authentic flavor that truly makes these stand out alongside dinner, use beef dripping or lard. That beef flavor seeps right into the crust—it’s amazing! If you’re looking for a dessert vibe, perhaps check out some other interesting baking ideas like my recipe for old-fashioned bread pudding instead!
My puddings are always flat, even when I follow the heat instructions!
Ugh, that is the most frustrating thing! If you’ve checked your heat and rested your batter, the next thing to check is your oven calibration. Are you sure it’s hitting 450°F (230°C)? A lot of home ovens lie, bless their hearts. If you’re not getting reliable high heat, your pudding won’t puff consistently. Also, make sure you aren’t using too much batter—filling the cups more than one-third full means there isn’t enough room for steam to push the batter up quickly. Follow the steps laid out on sites like this one, and you should see incredible improvement! Stick with it; you’ll get those spectacular, tall puddings soon enough!
Estimated Nutritional Data for Yorkshire Pudding
I always feel a little weird putting strict numbers on something so clearly meant to be enjoyed guilt-free, especially when you think about how much of that delicious fat gets left behind in the tin! But, for those of you who like to keep track, here are the estimates based on the ingredients list we used for our homemade Yorkshire puddings.
Remember, these numbers are just a general guide. If you use vegetable oil instead of rich beef dripping, the saturated fat content will shift differently. Also, if you’re planning a healthy week and maybe looking into what keto meal plan delivery services offer, know that these results are based on standard all-purpose flour.
Here is the rough breakdown for one individual pudding:
- Serving Size: 1 pudding
- Calories: 120
- Fat: 6g (Saturated Fat: 1.5g)
- Carbohydrates: 14g (Sugar: 1g)
- Protein: 4g
- Cholesterol: 65mg
A little disclaimer from my kitchen to yours: These figures are based on our specific ingredient weight and preparation method. If you make a giant Yorkshire pudding or use copious amounts of gravy (which you absolutely should!), those numbers change fast! Enjoy them fresh hot from the oven; that’s when they count the most.
Share Your Golden Brown Puddings Experience
Now that you have the secret to making those amazing, tall, golden brown puddings, I absolutely need to see what you come up with! Seriously, seeing your successes is the reason we pour so much energy into testing these recipes here at DeliceRecipe.
Ellie Vance started this whole operation because she believes food is about connection, and what better way to connect than sharing a photo of something you just created perfectly? So, when you pull that tray of magnificent, puffed-up Yorkshire puddings out of the oven, snap a quick picture!
Tag us on social media! We keep an eye out for everyone who tries these essential Sunday roast sides. If you loved how easy this came together, or if you figured out a fun way to serve them (maybe you tried the giant one or stuck with individual servings?), let us know in the comments below or shoot us a message through our contact page. I cook to bring people together, and seeing your table filled with delicious, homemade food tells me we succeeded. Happy roasting!
PrintFoolproof Classic Yorkshire Puddings

Make tall, crispy Yorkshire puddings with light, airy centers every time. This recipe focuses on the correct batter ratio and high heat for maximum rise, perfect for your Sunday roast.
- Prep Time: 10 min
- Cook Time: 25 min
- Total Time: 65 min
- Yield: 12 individual puddings 1x
- Category: Side Dish
- Method: Baking
- Cuisine: British
- Diet: Vegetarian
Ingredients
- 4 large eggs
- 4 oz all-purpose flour
- 4 oz whole milk
- Pinch of salt
- Vegetable oil or beef dripping for the tin
Instructions
- Combine the flour and salt in a large bowl. Make a well in the center.
- Crack the eggs into the well. Begin whisking the eggs slowly, gradually incorporating the flour from the sides until you have a thick, smooth paste.
- Slowly whisk in the milk until the batter is smooth and the consistency of heavy cream. Do not overmix.
- Cover the bowl and rest the batter in the refrigerator for at least 30 minutes, or up to 12 hours. Resting is key for a good rise.
- Preheat your oven to 450°F (230°C). Place a 12-hole muffin tin (or a large roasting tin for a giant pudding) into the oven.
- Add about 1/2 inch of vegetable oil or beef dripping to each cup in the tin. Heat the oil in the oven for 10 minutes until it is smoking hot.
- Carefully remove the hot tin from the oven. Work quickly.
- Pour the rested batter evenly into the hot oil, filling each cup about one-third full.
- Immediately return the tin to the hot oven. Do not open the oven door for the first 15 minutes of cooking.
- Bake for 20 to 25 minutes, or until the puddings are well risen, golden brown, and crisp.
- Serve immediately with roast beef and gravy. This recipe is a great alternative to standard meal planning for a special Sunday dinner.
Notes
- For the tallest puddings, the oil must be extremely hot before you add the batter.
- If you prefer a gluten-free Yorkshire pudding, substitute the wheat flour with a quality gluten-free blend.
- These pair perfectly with rich gravy, making them an essential part of any roast dinner idea.
Nutrition
- Serving Size: 1 pudding
- Calories: 120
- Sugar: 1
- Sodium: 80
- Fat: 6
- Saturated Fat: 1.5
- Unsaturated Fat: 4.5
- Trans Fat: 0
- Carbohydrates: 14
- Fiber: 0.5
- Protein: 4
- Cholesterol: 65