
Oh, you know those desserts that just *feel* like a hug from your favorite relative or a perfect cozy afternoon? That’s exactly what this Neiman Marcus cake is for me. It’s not just a dessert; it’s pure comfort baked into a gooey, delicious square. Honestly, I always think of my grandmother’s kitchen when I make them – that wonderful mix of simple ingredients coming together to make something truly special. It reminds me so much of why I started DeliceRecipe: to share amazing flavors that are totally doable for anyone. If you’re looking for an easy potluck dessert that’ll disappear fast, trust me, this is it!
- Why You'll Love This Neiman Marcus Cake
- Gather Your Ingredients for Neiman Marcus Cake Bars
- Step-by-Step Guide to Making Your Neiman Marcus Cake
- Tips for Perfect Neiman Marcus Cake Bars
- Ingredient Notes and Substitutions for Your Cream Cheese Dessert
- Make-Ahead and Storage for These Crowd Pleaser Bars
- Frequently Asked Questions about Neiman Marcus Cake
- Estimated Nutritional Information
- Share Your Neiman Marcus Cake Creations!
Why You’ll Love This Neiman Marcus Cake
Seriously, these bars are a dream. We’re talking:
- Super Simple to Make: You can whip these up in a flash using a yellow cake mix – no complicated steps!
- Incredibly Gooey and Rich: That perfect balance of a soft cake base and a luscious cream cheese filling is just divine.
- The Ultimate Potluck Dessert: They slice beautifully into perfect squares and are always the first to go!
- Uses Pantry Staples: No need for a special grocery run; these use everyday ingredients.
- A Huge Crowd-Pleaser: Everyone, and I mean everyone, absolutely adores these rich dessert squares.
Gather Your Ingredients for Neiman Marcus Cake Bars
Alright, let’s get our kitchen ready for some serious deliciousness! You only need a few things for these amazing Neiman Marcus cake bars, and chances are you’ve already got most of them hiding in your pantry. Just picture it: a dreamy yellow cake base topped with a creamy layer, all made with simple ingredients. It’s going to be so good!
- 1 box (about 18.25 oz) yellow cake mix (I love a good quality one here!)
- 3 large eggs
- 1/2 cup (1 stick) unsalted butter, completely melted
- 1/4 cup milk
- 1 package (8 oz) cream cheese, make sure it’s nice and softened
- 1 cup powdered sugar
- 1 teaspoon pure vanilla extract
- For dusting later (optional, but lovely!): Powdered sugar
- Or for a little crunch (also optional!): Chopped pecans
Step-by-Step Guide to Making Your Neiman Marcus Cake
Alright, let’s get down to business! Making these Neiman Marcus cake bars is honestly a breeze, and you’ll be so proud of yourself when you see the finished product. Follow these simple steps, and you’ll have a tray of pure gooey heaven ready in no time. Think of it like making delicious sopapilla cheesecake bars – easy layers, big payoff!
Preparing the Base Layer
First things first, get that oven preheated to 350°F (175°C). Grab your trusty 9×13 inch baking pan and give it a good grease and flour so nothing sticks. Now, in a big bowl, just toss in your yellow cake mix, the three eggs, that melted butter, and the milk. Give it a mix until it’s just combined. Seriously, don’t go crazy overmixing it; we want a tender base!
Crafting the Cream Cheese Filling
Next up is that luscious, dreamy cream cheese layer. Grab another bowl and beat your softened cream cheese until it’s super smooth – no lumps allowed! Then, beat in the sugary goodness: that cup of powdered sugar and the teaspoon of vanilla extract. Keep going until everything is a beautiful, homogenous swirl. It should spread like a thick, decadent frosting.

Assembling and Baking the Neiman Marcus Cake Bars
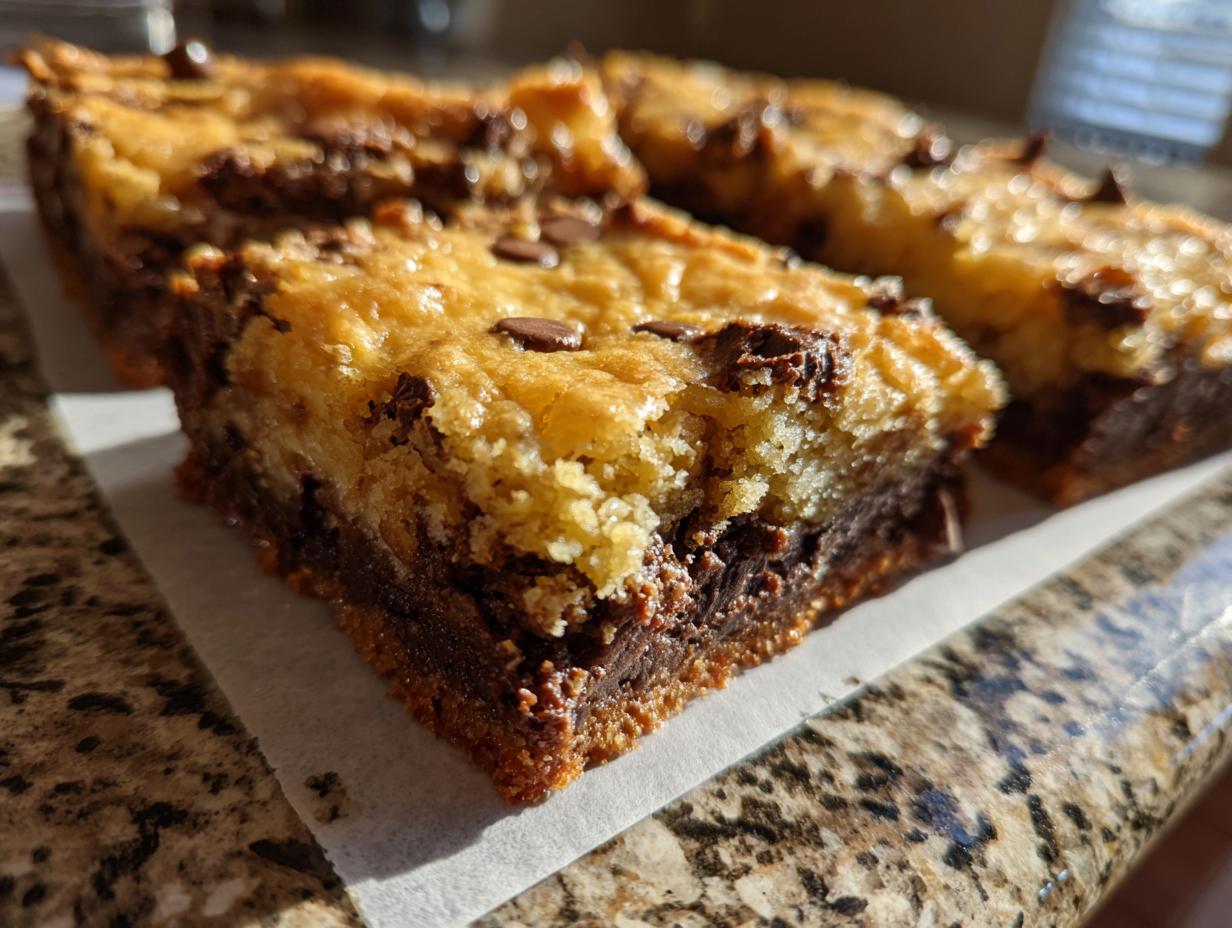
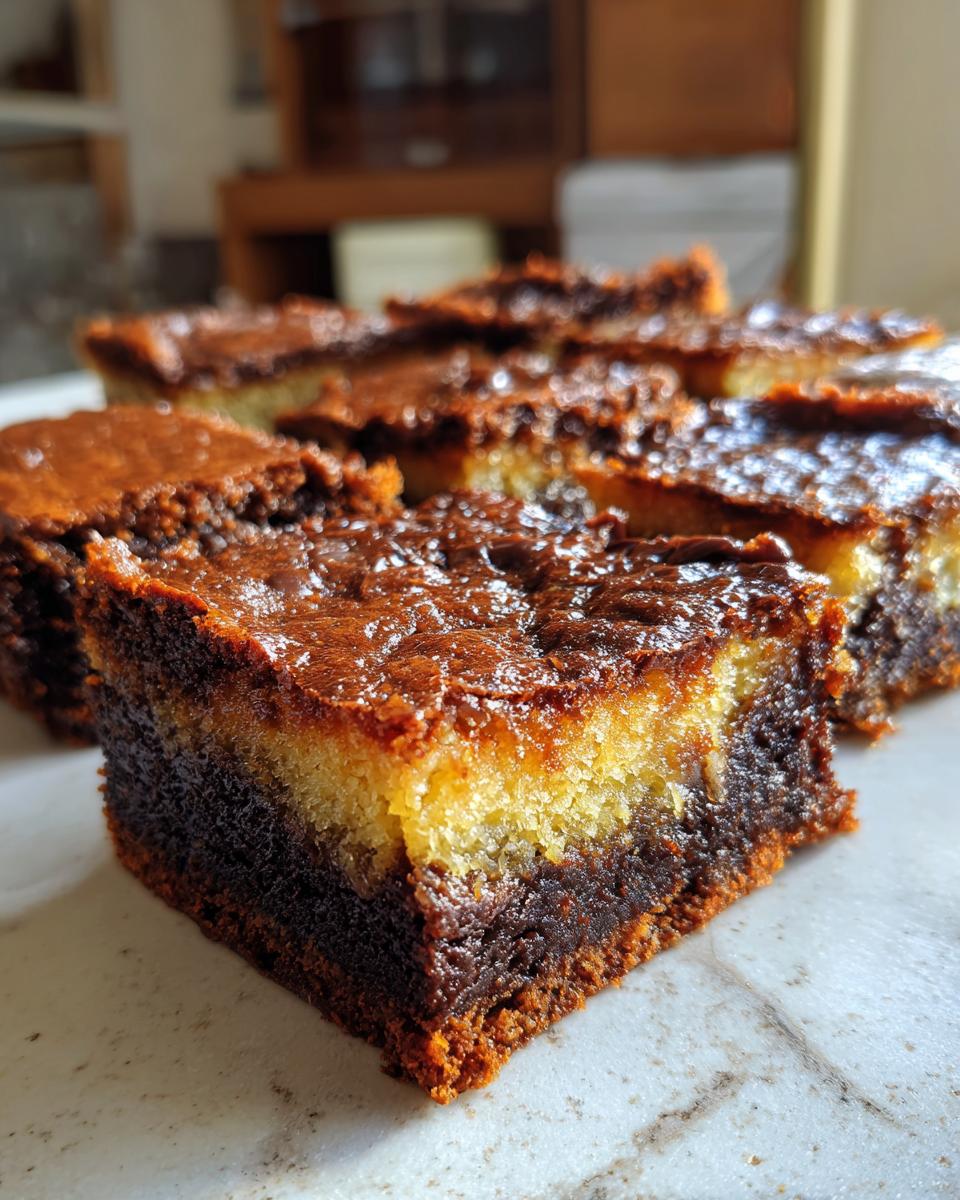
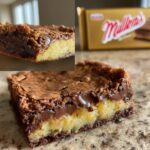
Spoon about half of your gooey cake batter into the prepared pan and spread it out evenly. Now, lovingly spread that smooth cream cheese mixture right over the top. Don’t worry if it’s not perfectly even; remember, we’re going to dollop the rest of the cake batter over it! Gently drop spoonfuls of the remaining batter on top of the cream cheese layer. You can use a spatula or the back of a spoon to gently coax it into covering most of the filling. Bake for about 30 to 40 minutes. You’re looking for golden brown edges, and when you peek at the cake part (make sure not to hit the cream cheese!), a toothpick should come out clean. The center should still have a little wobble – that’s the magic gooey part!
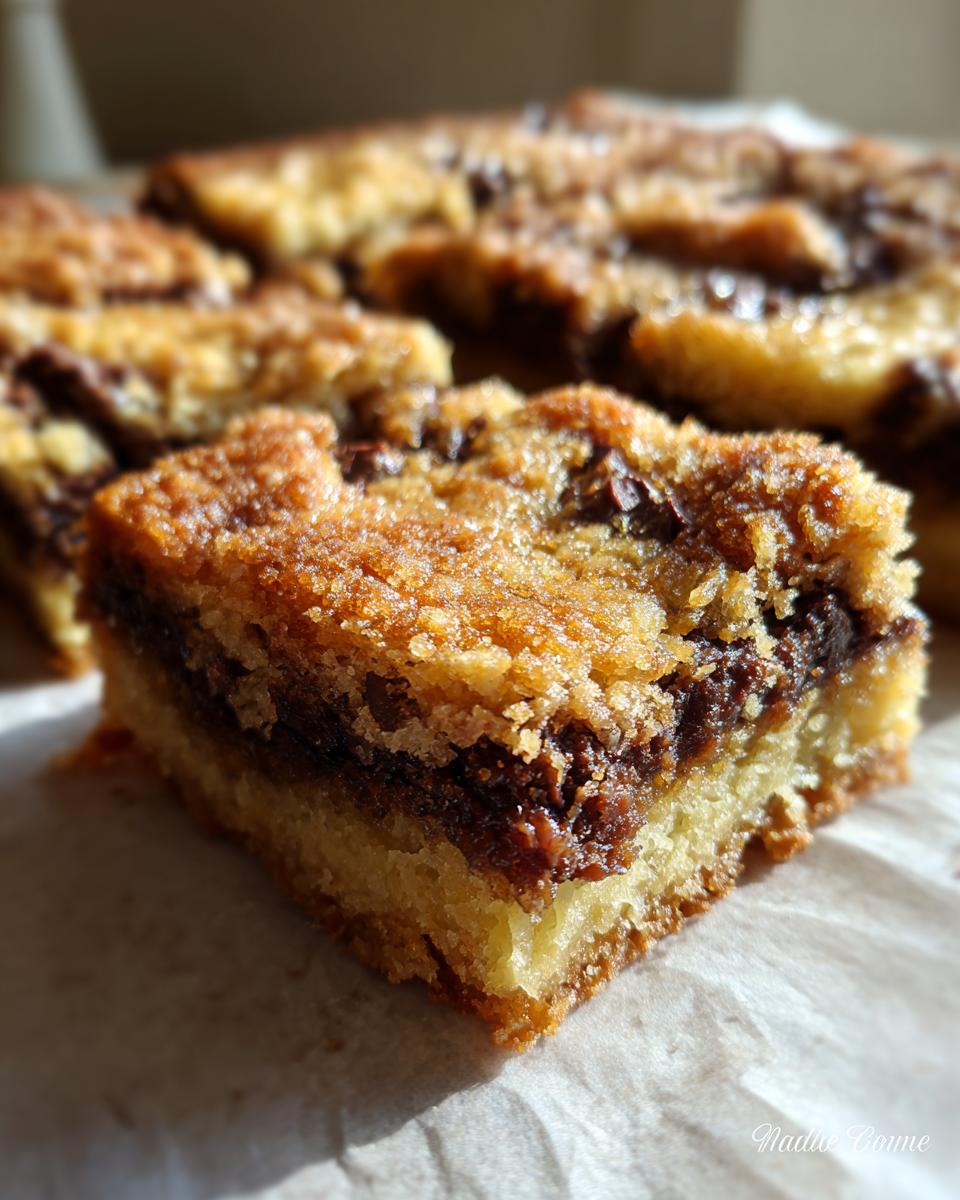
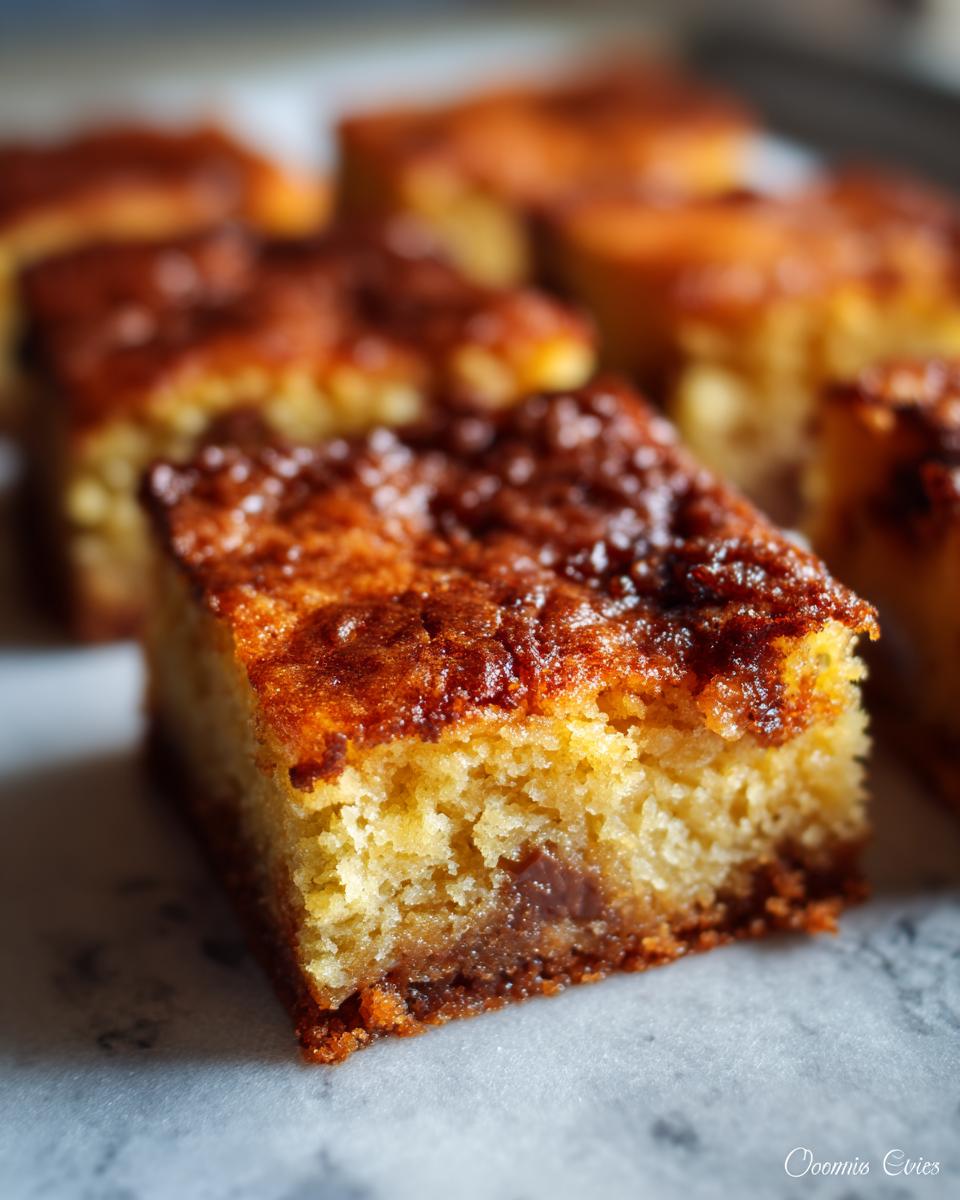
Cooling and Serving Your Dessert Squares
This is maybe the hardest part: waiting! You absolutely *have* to let these bars cool completely in the pan. I know, it’s tough, but it’s crucial for them to set up properly so you get those neat squares. Once they’re totally cool, slice them up. If you’re feeling fancy, give them a light dusting of powdered sugar or sprinkle on some chopped pecans. They look so pretty and taste even better!
Tips for Perfect Neiman Marcus Cake Bars
You know, even with the simplest recipes, a few little tricks can make all the difference! For these Neiman Marcus cake bars, it’s all about getting that signature gooey texture just right. My biggest tip? Don’t you dare overbake them! That slight softness in the center is exactly what makes them so irresistible. Also, make sure your cream cheese is *truly* softened. It makes such a difference in getting that smooth, luscious layer without any lumps. Trust me, as Ellie always says, a little patience here goes a long way. And if you’re looking for other amazing recipes that are simple yet impressive, check out my homemade guacamole – it’s a party favorite!
Ingredient Notes and Substitutions for Your Cream Cheese Dessert
Let’s chat about a few things for these Neiman Marcus cake bars. Sometimes brand differences in yellow cake mix can be a bit surprising, but honestly, most work just fine here. Feel free to try your favorite! If you don’t have milk on hand, a splash of half-and-half or even water can work in a pinch, though milk gives the best flavor. And for that oh-so-important cream cheese layer, make sure it’s fully softened – if you’re in a rush, you can cut it into cubes and microwave it for about 15-20 seconds. If you’re curious about other simple, crowd-pleasing recipes, you’ve got to try my homemade salsa – it’s a game-changer!
Make-Ahead and Storage for These Crowd Pleaser Bars
Planning a party is a lot, right? So, the good news is you can totally make these Neiman Marcus cake bars ahead of time! Bake them completely, let them cool, and then just cover the pan tightly with plastic wrap. They’re usually still fantastic the next day. If you need to store them longer, just cut them into squares and keep them in an airtight container in the fridge for up to 3 days. They also freeze beautifully! Wrap those squares really well in plastic wrap, then tuck them into a freezer bag. They’ll last for about 2 months like that. I know, it’s so handy, just like these apple pie cupcakes I make!
Frequently Asked Questions about Neiman Marcus Cake
Got questions about these amazing Neiman Marcus cake bars? I’ve got answers! It’s one of those recipes that’s super straightforward, but a few little things can make it even better.
Can I use a different type of cake mix?
You know, while the classic yellow cake mix is what makes these *the* iconic Neiman Marcus cake bars, you could experiment! A vanilla cake mix would probably work similarly. Just be aware that the flavor profile might shift slightly. Stick with a standard size box, though!
How do I know if my cake bars are perfectly done?
This is key to getting that wonderful gooey center! Bake them until the edges are golden brown and set. The real trick is the toothpick test. Stick it into the cakey part (try to avoid hitting the cream cheese layer directly), and it should come out clean. However, the very center of the cake layer should still look a *little* wet and gooey. That’s exactly what you’re going for! Don’t overbake, or you’ll lose that signature texture.
Can these Neiman Marcus cake bars be made gluten-free?
Yes, you can totally adapt these! Use a good quality gluten-free yellow cake mix, and make sure you keep all the other ingredients the same. Sometimes gluten-free mixes can be a bit drier, so keep an eye on the baking time. You might find yourself needing to check them a few minutes sooner. For more tips on gluten-free baking, you might find my gluten-free focaccia recipe helpful for understanding GF flour blends!
Estimated Nutritional Information
So, here’s a little look at what you can expect nutritionally from these dreamy Neiman Marcus cake bars. Keep in mind, these are just estimates per serving, and they can totally change depending on the brands you use and exactly how you slice them! It’s all part of the fun of home baking, right?
Share Your Neiman Marcus Cake Creations!
Now that you’ve made these incredible Neiman Marcus cake bars, I’d absolutely love to hear how they turned out! Did you add pecans? Maybe a different topping? Please drop a comment below and let me know all about your baking adventure. Seeing your photos and hearing your stories makes my day! If you enjoyed them as much as we do, a quick rating would be wonderful. Happy baking, and don’t forget to check out my chewy chocolate chip cookies too!
PrintNeiman Marcus “Gooey” Cake Bars
Easy two-layer cake bars with a yellow cake base and a rich cream cheese topping, perfect for potlucks and dessert tables.
- Prep Time: 15 min
- Cook Time: 35 min
- Total Time: 50 min
- Yield: 24 servings 1x
- Category: Dessert
- Method: Baking
- Cuisine: American
- Diet: Vegetarian
Ingredients
- 1 box (18.25 oz) yellow cake mix
- 3 large eggs
- 1/2 cup (1 stick) unsalted butter, melted
- 1/4 cup milk
- 1 package (8 oz) cream cheese, softened
- 1 cup powdered sugar
- 1 teaspoon vanilla extract
- Optional toppings: powdered sugar, chopped pecans
Instructions
- Preheat your oven to 350°F (175°C). Grease and flour a 9×13 inch baking pan.
- In a large bowl, combine the yellow cake mix, 3 large eggs, 1/2 cup melted butter, and 1/4 cup milk. Mix until just combined. Do not overmix.
- Spread half of the cake batter evenly into the prepared baking pan.
- In a separate bowl, beat the softened cream cheese with 1 cup powdered sugar and 1 teaspoon vanilla extract until smooth.
- Spread the cream cheese mixture evenly over the cake batter in the pan.
- Dollop the remaining cake batter over the cream cheese layer. You can gently spread it with a spatula or use the back of a spoon to distribute it.
- Bake for 30-40 minutes, or until the edges are golden brown and a toothpick inserted into the cake portion (avoiding the cream cheese) comes out clean. The center should still be slightly soft and gooey.
- Let the bars cool completely in the pan before cutting into squares.
- Dust with powdered sugar or sprinkle with chopped pecans before serving, if desired.
Notes
- For a richer flavor, use a good quality yellow cake mix.
- Ensure your cream cheese is fully softened to avoid lumps in the topping.
- Do not overbake, as the center is meant to be gooey.
- These bars are best served at room temperature.
- These bars freeze well. Wrap them tightly in plastic wrap and then aluminum foil.
Nutrition
- Serving Size: 1 bar
- Calories: 250
- Sugar: 25g
- Sodium: 180mg
- Fat: 13g
- Saturated Fat: 7g
- Unsaturated Fat: 6g
- Trans Fat: 0g
- Carbohydrates: 30g
- Fiber: 1g
- Protein: 3g
- Cholesterol: 40mg