
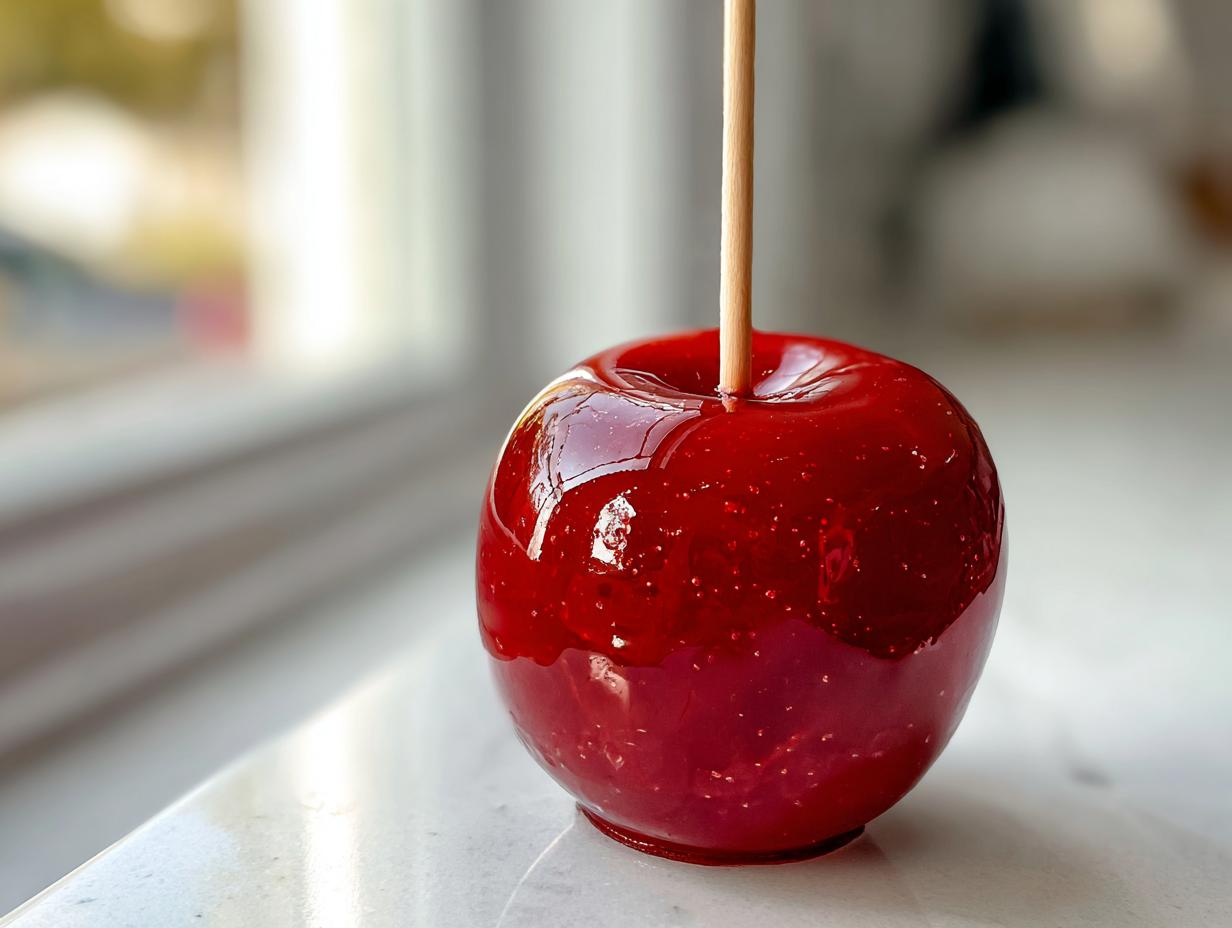
Oh, those classic, beautiful, shiny red **candy apples**! Isn’t just seeing one instantly transport you back to the county fair or that perfect autumn evening? I remember Ellie—our founder here at DeliceRecipe—testing batches obsessively until she nailed that perfect, mirror-like, hard shell. So many people get discouraged because the coating is sticky or cracks the second you bite it, but that stops today! I promise you, this foolproof recipe for hard candy coating delivers that satisfying, nostalgic crunch you’ve been chasing. We’ve worked hard to make sure this classic method is easy enough for your first attempt, giving you the glossiest, prettiest, crack-free **candy apples** you’ve ever made right in your own kitchen. If you’ve ever wondered how they compare to their chewy cousins, you can check out our guide on easy caramel candy and sauce recipes, but for now, let’s focus on the crunch!
- Why Our Classic Candy Apples Recipe Works Every Time
- Gathering Supplies for Perfect Candy Apples
- Step-by-Step Instructions for Classic Candy Apples
- Tips for Achieving the Perfect Candy Apple Coating
- Making Gourmet Decorated Apples and Fun Variations
- Serving Suggestions for Your Crisp Apple Treats
- Storage & Reheating Instructions for Candy Apples
- Frequently Asked Questions About Candy Apples
- Share Your Homemade Candy Apples Creations
Why Our Classic Candy Apples Recipe Works Every Time
Honestly, making a truly great candy apple feels like a secret handshake that most home cooks never quite figure out. It’s not enough just to boil sugar; you have to capture that perfect moment of chemistry. This recipe is different because we focus relentlessly on getting that flawless, glossy, hard candy coating right here on the stovetop. Forget those messy batches that end up sticky or cloudy—we’re aiming for the show-stopping result you see at the best fairs!
We’ve tweaked this so many times, pulling inspiration from every source, just to make sure you get something truly special. You’ll find that our method results in several things that many other tries miss:
- Incredible, mirror-like shine that lasts!
- A sturdy, no-crack shell that doesn’t shatter too easily.
- Simple execution, focusing on crucial temperature control rather than fancy gadgets.
If you’ve ever had a batch of icing or sugar glaze turn sticky later, you’ll appreciate the security of this hard-shell approach. For those looking for other rock-solid coatings, our recipe for sugar cookie icing that hardens perfectly uses similar principles of temperature science!
The Secret to Glossy Candied Apples
This is where most people panic, but trust me, it’s easy once you know the magic number. For that glass-like, beautiful shine on your glossy candied apples, you absolutely must hit the Hard Crack Stage. That means getting your candy thermometer to exactly 300 degrees Fahrenheit. That temperature locks the sugar structure so it hardens instantly and remains clear. And here’s the HUGE one: once the mixture starts boiling, put down your spoon! Stirring after boiling begins invites crystallization, which turns your beautiful clear syrup cloudy and gritty. We want shine, not sand!
Distinguishing Caramel Apple vs Candy Apple
People mix these up all the time, but they are wonderfully different things! A caramel apple relies on a soft, chewy, buttery coating—delicious, but messy. Our mission here is the hard-shelled, crunchy classic. These are true candy apples; when you bite into them, you get that loud *crack* followed immediately by the crisp apple. They are nostalgic, cleaner to eat, and hold up much better for decorating if you choose to go that route later!
Gathering Supplies for Perfect Candy Apples
Alright, before we can even think about turning up the heat, we need our battlefield prepped. When you’re dealing with sugar that hits 300 degrees, there’s no time for running around looking for a thermometer! Getting your tools and ingredients ready beforehand is honestly half the battle for achieving smooth, professional-looking hard candy coating. Trust me on this one—prep is everything!
Equipment Needed for Homemade Hard Candy Coating
You don’t need a bunch of fancy gadgets, but a few things are non-negotiable if you want those beautiful, glossy results. First, you absolutely need a reliable candy thermometer; temperature is key, period. Also, grab your sturdy, heavy-bottomed saucepan—thin pans cook unevenly, and that’s trouble when you’re making candy. Finally, make sure you have wooden skewers ready to go in, and line a baking sheet heavily with parchment paper. That parchment is going to save your life later!
Ingredients for Classic Candy Apples
The ingredient list is surprisingly short, which means the quality of what you use really shines through. For the best texture contrast in your **candy apples**, using the right kind of fruit is everything:
- 6 medium crisp apples (I always reach for Granny Smith or Fuji because they hold up so well and give you that nice tartness against the sweet shell).
- 6 wooden skewers or lollipop sticks.
- 2 cups granulated sugar—the good old white stuff works here!
- 1 cup water.
- 1/2 cup light corn syrup (this is what keeps the sugar from totally seizing up on you).
- 1 teaspoon red food coloring (pro tip: get the gel coloring if you can; it makes achieving those vibrant **bright red candy apples** so much easier without thinning the candy mixture).
- 1/2 teaspoon cinnamon extract or vanilla extract—I sometimes use cinnamon extract just to give it that warm, fairground smell!
Step-by-Step Instructions for Classic Candy Apples
I know you’re just itching to get that sugar boiling, but promise me you’ll follow these steps exactly! This is where the magic happens—or where things go sideways if you rush things. When you take your time up front, these **candy apples** come out absolutely flawless, giving you that professional, glossy finish. We’re going to walk through prepping the fruit, nailing the candy stage, and then getting that perfect dip.
Preparing the Crisp Apple Treats
Okay, this step, Step 1, is arguably the most important if you want the coating to stay put! Those grocery store apples have a waxy coating on them, and if you dip them straight into the hot syrup, the candy will just slide right off like water off a duck’s back. So, here’s the trick: get a bowl of almost-boiling hot water—don’t worry, the quick dip won’t cook the apple. Dip each apple in for maybe ten seconds, pull it out, and dry it *aggressively*. I mean pat it dry until it feels totally naked! Then, stick your skewer in firmly up in the stem hole. Now they are ready for greatness!
Cooking the Homemade Hard Candy Coating
Time to make the shell! In your heavy-bottomed pot, combine the sugar, water, and corn syrup. Heat it over medium, stirring gently *only* until the sugar dissolves. The second it hits a rolling boil, you walk away from the spoon! Pop your candy thermometer in—make sure it’s not touching the bottom of the pan, or you’ll get a wild reading. Now, you just let it boil, undisturbed, for about 15 to 20 minutes. You are waiting patiently until that thermometer screams 300 degrees Fahrenheit. That’s the Hard Crack Stage, my friend. If you stop early, it’ll be sticky. If you go way past, it gets burnt. 300°F is the goal for these **candy apples**!
Dipping and Setting Your Candy Apples
Once you hit 300°F, yank that pot off the heat *immediately*. Seriously, move fast now. Let those big chaotic bubbles settle down for about 60 seconds—you don’t want to dip while it’s actively erupting! Then, stir in your red food coloring and that tiny bit of extract. Tilt the pot ever so slightly so the syrup pools on one side. Grab an apple by the stick and dip it straight down, swirling it around quickly to get that full coverage. Pull it straight up, let the extra drip off for a few honest seconds, and place it right back down onto that waiting parchment paper. Remember, these need a solid 30 minutes untouched to cool and harden perfectly. Don’t be tempted to touch them!
If you’re looking for a great recipe to utilize those crisp apples if you don’t finish them all in candy, you should definitely try my easy stovetop cinnamon applesauce recipe!
Tips for Achieving the Perfect Candy Apple Coating
You’ve managed to nail the temperature (yay!), but now we move into the finer points that separate a good batch of **candy apples** from an absolutely stellar one. This is where all that testing Ellie did finally pays off for you! We’re talking about fighting humidity, knowing when to panic (and when not to), and customizing the color. If you follow these little secrets, your coating will be vibrant and crack-free for days.
Troubleshooting Common Candy Apple Issues
So, you pull the apples out, and maybe things aren’t looking perfectly clear, or perhaps your candy started getting thick mid-dip. Don’t toss the whole pot! If your coating looks cloudy, that means you stirred after it started boiling—that crystallization sneaks in every time. There’s no fixing the cloudiness other than starting over (next time, remember: hands off the spoon!), but sometimes it’s just a small bit of cloudiness around the bottom of the saucepan.
What about the pot hardening on you? If you set the pan down for more than a minute when dipping, the edges start to set up. If that happens, put the pan back on the very lowest heat setting and just let the edges melt for just a moment. You’re only trying to loosen the hardened syrup, not boil it again! Just a quick warm-up—that quick remedy keeps your dipping time going smoothly, which is essential for a tight coating on your perfect candy apple coating.
Coloring and Flavor Variations for Candy Apples
Our recipe calls for bright red, which is the classic look, but you absolutely don’t have to stop there! If you want those eye-catching **colored candy apples tutorial** looks, just swap out that red gel coloring for something else. Want beautiful pink ones? Use a vibrant pink gel. Blue? Add blue! It works exactly the same way. Gel colors are best because they are concentrated and won’t mess with the sugar structure.
For next-level flavor treats, you can actually incorporate crushed hard candies like Jolly Ranchers into the syrup *after* you hit 300°F, just before you add any color. This takes you into the realm of making your own **unique candy apple flavors**—a little bit of strawberry or green apple hard candy tossed in before dipping creates an amazing flavor punch. For more inspiration on that next step, check out how the folks at Sugar Geek Show approach these specialized candy apples!
Making Gourmet Decorated Apples and Fun Variations
Okay, so you’ve mastered the gorgeous, glossy red shell—I’m so proud of you! That classic look is always a huge hit, especially for Halloween treats. But if you’re feeling adventurous, making these **candy apples** opens up a whole world of fun, creative variations. Once you know how to control that hard candy structure, trying things like swirls or adding intense flavor infusions is surprisingly easy. It’s time to take your skills from ‘classic’ to ‘showstopper’! For a completely different kind of apple decadence, just wait until you see my recipe for apple pie cheesecake; it’s pure heaven!
Ideas for Swirled Candy Apples
Do you love that spooky, dark, rich look you sometimes see, like the “poison swirl” effect? It sounds complicated, but it really just relies on timing! To get those beautiful ribbons of color, you’ll need to work quickly and perhaps work with slightly smaller batches. The easiest way to do this is to take your main batch of syrup (say, the red one) off the heat as directed. Then, quickly, in a separate tiny little saucepan, melt down a small amount of a different color candy—maybe black or a contrasting bright color.
Once both syrups have cooled just slightly (you don’t want them boiling hot, but still dip-able), tilt your primary pot. Then, drizzle or pour the second, smaller batch of syrup right over the surface of the first. Dip your apple straight down and pull it up fast. Because the colors aren’t perfectly mixed, the movement of the dip drags the colors together into cool lines and amazing **swirled candy apples**. It’s instant drama!
Unique Candy Apple Flavors Inspiration
We already touched on crushing hard candies, but that’s just the beginning of creating **unique candy apple flavors**! If you want to stay strictly in the extraction flavor lane, you can ditch the cinnamon or vanilla extract we used in the main recipe and try something fun, like a tart cherry or even coconut extract, though you only need about half a teaspoon. Extract flavors bloom beautifully in that hot sugar.
Now, if you want a true flavor bomb, try using flavored hard candies, which is how folks make those amazing **Jolly Rancher apples**. You’d follow the basic recipe but substitute most of the granulated sugar with crushed, unwrapped hard candies (keep the corn syrup and water the same). The beautiful thing about this is that the color is built right in! If you want something truly memorable, check out this guide for making Glow in the Dark Jolly Rancher Candy Apples for your next big party—that’s next-level fun!
Serving Suggestions for Your Crisp Apple Treats
Whew! You’ve got these gorgeous, shiny, perfectly crunchy **fall dessert recipes** sitting on the counter. Now, how do you show them off? Honestly, a beautiful candy apple is practically its own decoration, but presentation really elevates the whole experience, especially if you’re making them for a party or a holiday table. Don’t just stick them in a jar; let these beauties shine!
Since the shell is so hard and the apple is so crisp, these treats stand up beautifully on their own. You don’t have to drown them in drizzle or nuts unless you want to! For your next gathering, think of these not just as dessert, but as edible décor. They look amazing grouped together on a tiered stand.
Here are a few ways I love to display my finished crisp apple treats:
- The Centerpiece Cluster: Stick all the finished apples into a nice large ceramic bowl or basket, making sure the skewers are pointing upwards like a colorful, sweet bouquet. If you use different colors—maybe some bright red, some pink—the effect is stunning!
- Individual Wraps: If you’re sending these home as favors or stacking them somewhere where they might touch, wrap each one snugly in clear cellophane bags. Tie the tops with some fun, curly ribbon that matches your color scheme. It keeps them perfect and makes for easy grab-and-go.
- Display Height: If you’re worried about humidity (and you should be!), keep them in a cool, dry spot until just before serving. They look fantastic placed around the bottom of a cake stand that holds another dessert. They draw the eye without taking up too much real estate on the serving platter.
These treats have such a nostalgic, classic vibe, they practically scream ‘harvest festival’ or ‘Halloween party’! Enjoy showing off your handiwork!
Storage & Reheating Instructions for Candy Apples
Okay, look, this is the moment of truth. You’ve made the most gorgeous, shiny, **perfect candy apple coating**, and we absolutely cannot let humidity ruin all your hard work! If you’ve ever pulled a candy apple out of the fridge the next day and found it sticky, weeping, or worse—cracked—you know the heartbreak I’m talking about. The enemy of hard candy is moisture. Period.
Do not, under any circumstances, wrap these tightly in plastic wrap or put them in the refrigerator. The cold environment and any condensation that forms will immediately make that beautiful shell draw ambient moisture, and it turns tacky fast. We want crisp, right? So, we’re keeping things cool and dry!
Keeping Your Candy Apples Crisp and Shiny
The absolute best place for your finished **candy apples** is a cool, dry spot on your counter, away from the sink, the dishwasher, or any steamy areas. Think of them like little glass sculptures you need to protect! If you made them on a humid or rainy day, you have to be extra careful—humidity is basically kryptonite for hard candy.
If you absolutely must store them for more than a day, even in a cool kitchen, you need an airtight container. I find that placing a paper towel on the very bottom of a largish container helps wick away any trace moisture that might sneak in. Lay the apples down gently, making sure they aren’t touching each other, and seal that container up tight. They are usually best eaten within 24 to 48 hours to guarantee that signature snap.
Can You Actually Reheat Candy Apples Safely?
This is a tricky one, and I’ll be straight with you: no, you cannot easily *reheat* them in the way you might reheat a dinner. If the candy shell has softened or gotten sticky thanks to being in a warm spot, putting it back under heat will just melt the coating off the apple, and you risk burning the sugar, which is just a disaster. If they feel a little soft the day after, the best thing you can do is put them in the fridge for just 15 minutes—and I mean *only* 15 minutes—to give the sugar a chance to firm up again before serving.
If you have leftover apples that weren’t dipped yet, or if you want to make something utilizing the apples themselves, I always have a batch of easy, super-moist pumpkin bread going in the fall. It’s the perfect cozy antidote to that hard candy crunch!
Frequently Asked Questions About Candy Apples
This is where we tackle all those little burning questions you might have after making your first batch of gorgeous, crunchy **candy apples**! I know when I first started, I had a million thoughts running through my head about timing, fruit choice, and keeping them looking good. Don’t worry if you feel like you missed a step; we’ve covered the essentials here, just like we make sure everything in my friend Ellie’s easy chicken pot pie casserole recipe is crystal clear!
Can I make these no crack candy apples ahead of time?
You certainly can, but treat them carefully! Because the number one enemy of hard candy is moisture, you want to keep the timeline tight. I’d say 24 to a maximum of 48 hours is the sweet spot for these **no crack candy apples**. If you need longer storage, you absolutely have to keep them away from any humidity—no fridge! Seal them tightly in an airtight container with a paper towel layered on the bottom to catch any rogue moisture. If your kitchen is steamy, eat them sooner!
What is the best apple variety for fairground style apples?
When aiming for that authentic, satisfying crunch of genuine **fairground style apples**, you need apples that are firm and a little tart. Why? Well, they have to withstand the shock of the boiling hot syrup without turning mushy! Plus, the tartness—think Granny Smith or Honeycrisp—cuts through the intense sweetness of the hard candy coating perfectly. Avoid softer varieties; they get mealy under that shiny shell.
How do I get the bright color for bright red candy apples?
Getting that super intense, almost artificial-looking glow is all about the coloring agent and timing. If you use standard liquid food coloring, it adds too much water to the sugar and can ruin the texture. The secret to those fabulous **bright red candy apples** is using a concentrated gel food coloring. Add your teaspoon of gel coloring only *after* you’ve taken the saucepan completely off the burner and let the big boil subside for a minute. Adding it at that point lets the high concentration tint the syrup beautifully without introducing excess moisture, which keeps things glossy!
Share Your Homemade Candy Apples Creations
Now, doesn’t that feel good? You’ve conquered the Hard Crack Stage, you’ve got the shine, and you’ve got a pile of beautiful, crunchy **candy apples** cooling on the counter! Honestly, I can just smell the sweet cinnamon extract from here. Those fairground treats are yours now, made by your very own hands!
I truly want to see what gorgeous creations you came up with. Did you stick with the classic bright red? Did you try one of those fun **colored candy apples tutorial** looks we talked about, maybe a glittering pink or a deep blue? Head down to the comments section, please! Tell me how your day went. Was the drying step the key for you? Did you manage to keep waving off that spoon? I love hearing your victories!
If you’re willing, leave a star rating for this recipe right below—it really helps other home cooks who might be nervous about tackling hard candy coatings for the first time. And if you snap a picture, tag us on social media! I always share my favorite reader photos on my own feed. We started DeliceRecipe to bring this kind of joy to everyday kitchens, and your success is what keeps that mission going strong. If you’re looking for another simple sweet treat to whip up next, trying my easy tiramisu recipe is a wonderful next step!
PrintFoolproof Classic Hard Candy Apples

Make glossy, bright red, hard-shelled candy apples that do not crack. This recipe delivers the perfect fairground style treat every time.
- Prep Time: 15 min
- Cook Time: 20 min
- Total Time: 35 min
- Yield: 6 servings 1x
- Category: Dessert
- Method: Stovetop Cooking
- Cuisine: American
- Diet: Vegetarian
Ingredients
- 6 medium crisp apples (like Granny Smith or Fuji)
- 6 wooden skewers or lollipop sticks
- 2 cups granulated sugar
- 1 cup water
- 1/2 cup light corn syrup
- 1 teaspoon red food coloring (gel coloring works best for bright color)
- 1/2 teaspoon cinnamon extract or vanilla extract
Instructions
- Wash and thoroughly dry the apples. Remove any wax residue by briefly dipping apples in hot water (about 10 seconds) and immediately drying them completely. This step is key for coating adhesion.
- Insert a wooden skewer firmly into the stem end of each apple. Set the apples aside on a parchment-lined baking sheet.
- Combine the sugar, water, and corn syrup in a medium, heavy-bottomed saucepan. Stir gently over medium heat until the sugar dissolves.
- Stop stirring once the mixture boils. Insert a candy thermometer into the side of the pan, making sure it does not touch the bottom.
- Boil the syrup without stirring until it reaches 300 degrees Fahrenheit (Hard Crack Stage). This usually takes 15 to 20 minutes. Watch the temperature closely.
- Remove the pan from the heat immediately when it reaches 300 degrees F. Let the bubbling subside for about one minute.
- Quickly stir in the red food coloring and the extract. Work fast, as the mixture will begin to set.
- Tilt the saucepan slightly. Dip each apple into the hot syrup, rotating it to coat completely. Lift the apple and allow excess syrup to drip back into the pan.
- Place the coated apples back onto the parchment-lined sheet. Let them cool completely and harden, about 30 minutes, before serving.
Notes
- For the glossiest finish, do not stir the syrup once it begins to boil. Stirring can cause crystallization, leading to a cloudy coating.
- If the candy coating starts to harden in the pan before you finish dipping, return the pan to low heat briefly to re-melt the edges, but avoid overheating.
- If you want a different color, substitute the red food coloring with gel colors like pink, blue, or green.
- Keep the apples away from humidity before and after coating, as moisture causes the candy shell to become sticky or crack.
Nutrition
- Serving Size: 1 apple
- Calories: 350
- Sugar: 85g
- Sodium: 2mg
- Fat: 0g
- Saturated Fat: 0g
- Unsaturated Fat: 0g
- Trans Fat: 0g
- Carbohydrates: 90g
- Fiber: 1g
- Protein: 0g
- Cholesterol: 0mg