
Oh, are you tired of waking up only to find your beautifully decorated sugar cookies are still tacky? I absolutely detest that soft, sticky layer that ruins stacking, gifting, or even just getting them ready for cleanup! After years of wrestling with runny glazes, I finally landed on the one recipe that never fails: my signature no-fail royal icing that dries rock hard and utterly smooth. This is the secret weapon for cut-out cookies, trust me. Founder Ellie Vance built this site on reliability, and this recipe is no exception—it delivers that perfect, glossy professional finish every single time you mix it up.
- Why This Sugar Cookie Icing Recipe Works So Well
- Gathering Ingredients for Your Sugar Cookie Icing Recipe
- Step-by-Step Instructions for a Perfect Sugar Cookie Icing Recipe
- Tips for Success with Your Decorating Icing Recipe
- Making Ahead and Storing Your Sugar Cookie Icing Recipe
- Common Questions About This Hardening Sugar Cookie Icing Recipe
- Serving Suggestions for Your Beautifully Decorated Cookies
- Estimated Nutritional Data for This Sugar Cookie Icing Recipe
- Share Your Creations Using This Sugar Cookie Icing Recipe
Why This Sugar Cookie Icing Recipe Works So Well
I know, I know, you’ve tried five different recipes promising a hard finish, and you ended up with crusty clouds or a sticky disaster. I’ve been there, wiping sugary residue off my nice serving plates! The total game-changer here—the thing that finally got me that perfect, smooth cookie glaze that actually sets up—is the meringue powder. Seriously. Don’t skip it!
Using meringue powder instead of trying to figure out raw egg whites keeps things super stable and gives us the structure we need. Raw whites can be unpredictable, but this powder guarantees that robust structure, meaning you get that reliable icing that hardens completely. We are talking about cookies you can stack right up to Christmas Eve and box them without them sticking together. This specific blend gives you that professional, glossy cookie icing finish without any of the headache, making it the best choice when you need your decorations to last. Once you master this, you’ll find it so much easier than handling delicate shortbreads, check out my Christmas shortbread recipe for a different kind of holiday treat!
It’s all about predictability, which is what we aim for in the kitchen. If you’re stressed about your icing being too soft, trust me, this is the one to grab. You can stack these cookies like little gems after they dry completely because this formulation ensures a lasting, hard shell. For more inspiration on icing that dries just right, check out what the pros are doing over here before you start!
Gathering Ingredients for Your Sugar Cookie Icing Recipe
Okay, let’s get our ducks in a row before we start mixing! Honestly, finding the right sugar cookie icing recipe is half the battle, and trust me, this one is beginner-friendly. It looks like fancy stuff, but it’s so simple once you have your ingredients ready. If you’ve ever had icing that clumped up or looked gritty, you know that prep work truly matters here. We need to ensure everything is ready *before* the mixer starts twirling, or things get messy fast!
The biggest secret to avoiding that gritty texture that plagues lesser frostings? Sifting that powdered sugar. Do not skip it! It’s an extra step, sure, but it’s what guarantees that silky smooth cookie glaze you’re dreaming of. We aren’t whipping up a simple buttery frosting; we are making a structural masterpiece!
Ingredient Clarity and Preparation Notes
We absolutely have to be specific about these few items, so listen up! First, that powdered sugar needs to be sifted right into your bowl. No cheating! Next, that meringue powder is non-negotiable; that’s our ticket to getting icing that hardens beautifully—it replaces the tricky raw egg whites we don’t want to mess with.

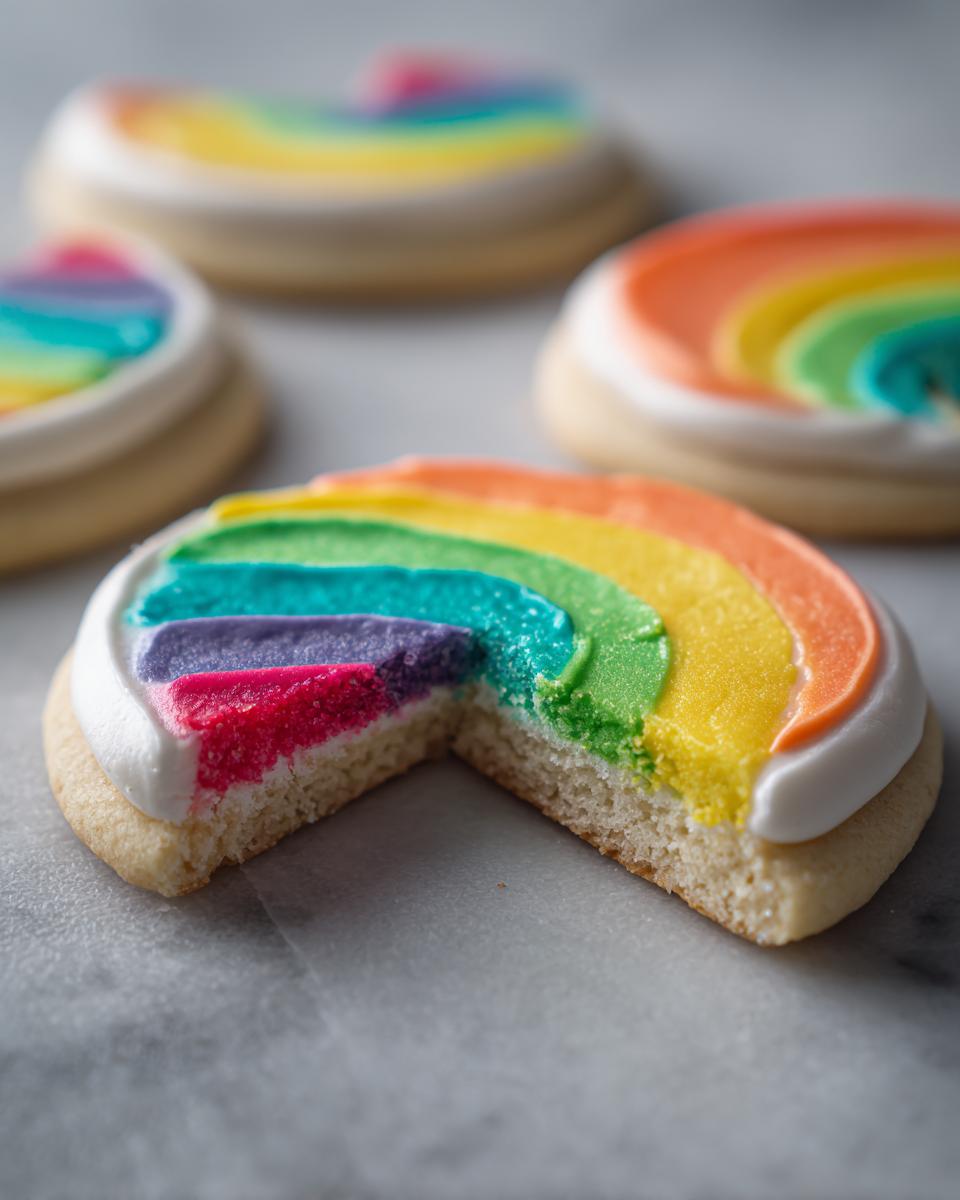
When you measure your water, make sure it’s just slightly warm, not hot. This helps everything dissolve nicely. And one final, crucial point about color: Please, please use gel food coloring if you want vibrant shades. If you pour in regular liquid coloring, you’ll end up needing way more, and that extra liquid completely messes up the structural balance. We need that thick consistency for decorating, so only use gel drops!
Once you have your sifted sugar and your meringue powder, you are ready to move on to the mixing stage. You can check out my favorite recipe for whipped shortbread cookies next if you need a different base biscuit to decorate!
Step-by-Step Instructions for a Perfect Sugar Cookie Icing Recipe
Alright, deep breath, because this part is where the magic happens for our sugar cookie icing recipe. Don’t let the idea of royal icing scare you; we keep this super straightforward! The goal here is that amazing, stiff icing that pipes beautifully and dries hard, so you can actually gift these beauties without them turning into a sticky mess in the box.
First things first: grab your electric mixer—stand mixer or a good hand mixer works fine. You need to whip this stuff! We’re mixing the dry ingredients we prepped, then adding the warm water and vanilla. Now, turn it on low just until everything comes together, and then scrape down the bowl. Seriously, scraping the sides is vital so everything incorporates evenly. Once you’ve scraped, crank that speed up to medium-high! You have to beat this for a solid 5 to 7 minutes. Yes, that long! This whipping action incorporates the air we need so that icing doesn’t stay sticky; it’s what makes it dry hard!
Achieving Stiff Outline Consistency
After those long 5 to 7 minutes, you’ll know it’s right because the icing looks thick, glossy, and when you lift the mixer attachments, it should hold stiff peaks. This is what we call the ‘outline consistency.’ Think of it like thick toothpaste—it should hold its shape perfectly when piped along the edges of your cookies. If it slumps even a little bit, keep whipping for another minute! This stiff icing is what creates the dam that keeps the thinner icing from running everywhere when you decorate those beautiful holiday cookie bars.

Thinning for Flooding and Drawing the 10-Second Rule
Once you have that stiff icing for outlining, you need to temper a portion of it down for the ‘flood’ layer. Divide what you need, and then slowly, teaspoon by tiny teaspoon, add extra warm water. You only want to add enough water until it hits the perfect flow. How do you test that? This is rule number one for beginner cookie icing success: Once you draw a line through the icing with a toothpick or a scribe tool, that line should disappear back into the whole mixture in about 10 seconds. If it vanishes instantly, it’s too thin! If it stays visible, it’s still too tight. Wait for that 10-second sweet spot before you flood your cookie centers.
The Crucial Drying Process for Hard Icing
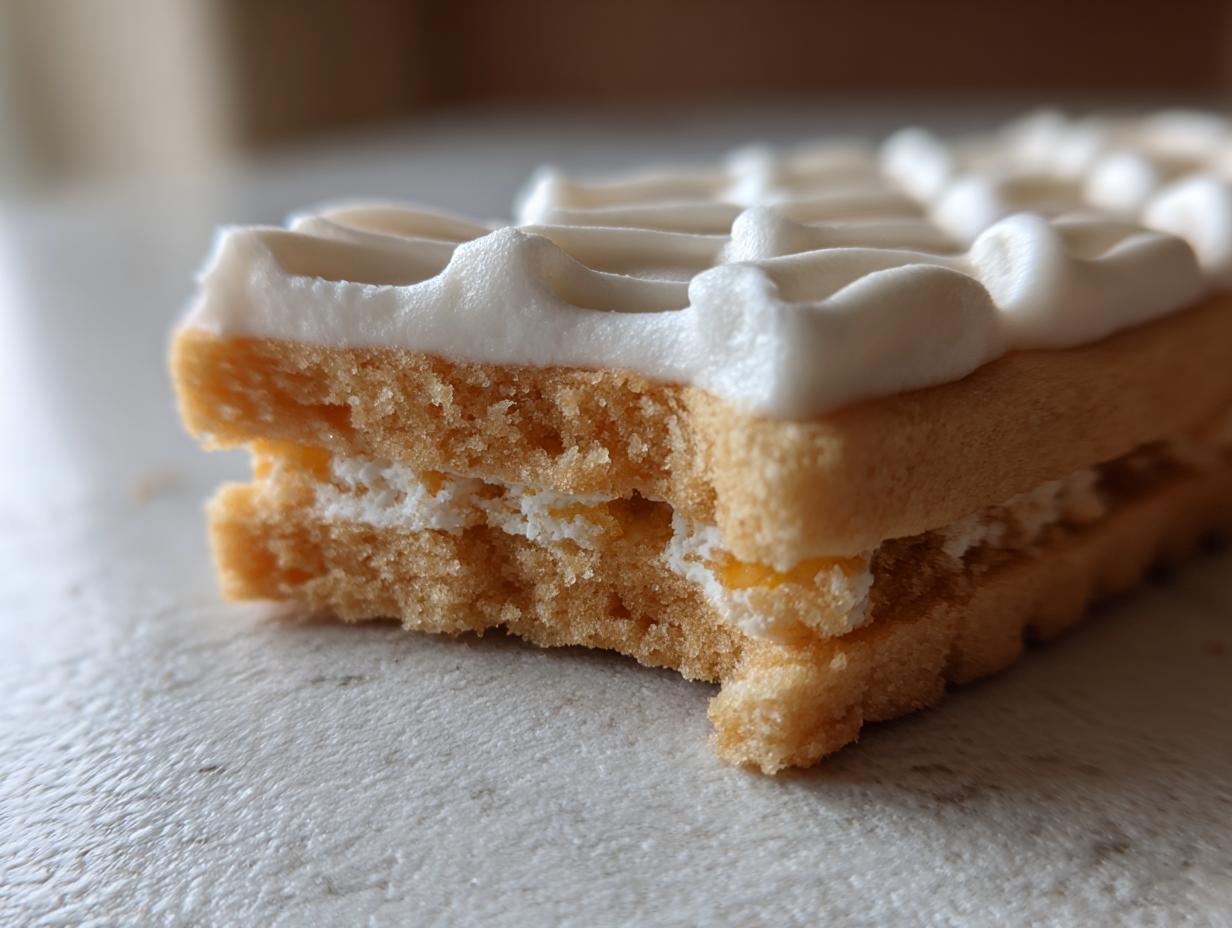
Okay, outline done, flood done. Now comes the hardest part: waiting! This is what separates the pros from the panickers. You absolutely cannot rush the drying process if you want that hard shell. Let those cookies sit out uncovered at room temperature for at least 6 to 12 hours. Putting them in the fridge just traps moisture and guarantees a sticky surface. Resist the urge to touch them! We need that full drying time so that icing hardens completely. Trust me, if the icing is dry and smooth, you can move on to stacking or packaging your beautiful sugar cookie creations without a single fingerprint smudge!
Tips for Success with Your Decorating Icing Recipe
Honestly, even with the best sugar cookie icing recipe, sometimes things go a little sideways, right? That’s okay! Baking is all about troubleshooting, and these little tricks are what make the difference between an okay cookie and one that looks like it came from a bakery window. You want that smooth, professional look, and I’ve learned exactly what keeps this royal icing behaving perfectly.
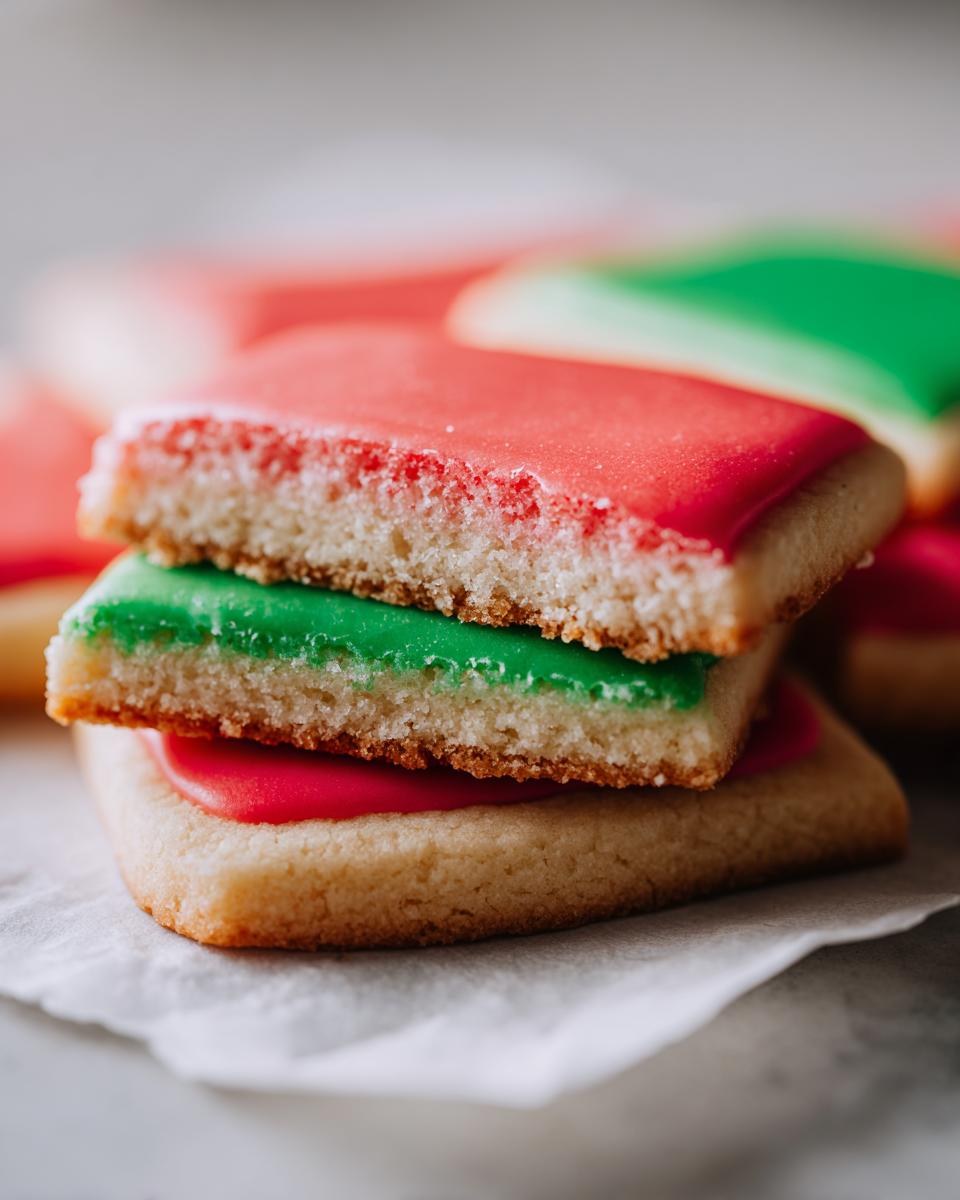
First, let’s talk color again because this is one of the top baking tips for perfect icing: only reach for gel colors. If you use the liquid drops you have in your pantry, you’ll be adding too much water to fix the consistency, and then your icing won’t dry hard—it will just stay a tacky mess. Gel colors are concentrated, so you get amazing hue payoff with almost no extra liquid.
Now, what if you see little cracks forming while the icing is drying? That’s usually a sign that your flood consistency (the thinner icing) was just a tad too thick when you applied it. Don’t panic! Just whisk in a few extra drops of water very gently to ease the tension. If you are making things in advance, like my lemon blueberry cookies, remember to keep the bowls covered tight. If you leave it exposed, the top layer dries into a crust, which nobody wants!
Oh, and when you’re done decorating your beautiful batches, maybe for the holidays or you’re preparing for a big party, try my maple pumpkin cookies next time! For more guidance on tweaking your decorating icing, I often reference tips found when learning how to make icing for the very first time, like what’s shared here.
Making Ahead and Storing Your Sugar Cookie Icing Recipe
I always want to be ahead of the game, especially when the holidays roll around and I’m trying to coordinate cookies, cakes, and sides—like my favorite apple cranberry coleslaw! Luckily, this royal icing is fantastic for planning ahead. You can totally make your icing mixture a day or so before you plan to decorate your cookies, which takes a huge chunk of stress off the actual decorating day. This is practically my personal version of organized meal planning, just for sweets!
The main thing you have to remember when storing leftover icing—whether it’s perfectly colored or still pure white—is air! Air is the enemy because it makes the icing dry out and form that hard, unusable crust on top. If you have icing left over in your mixing bowl or a small container, you need to cover it so tightly that not even a speck of air can squeeze in. I mean it; take a huge sheet of plastic wrap and physically press it down until it’s touching the surface of the icing itself. No gaps allowed!
If you’ve already colored your icing and need to save it until the next day, keep it in an airtight container with that plastic wrap pressed directly onto the surface. When you pull it out to use it again, don’t panic if it seems super stiff. Just let it come to room temperature for about 30 minutes and then mix it again gently, maybe adding half a teaspoon of water if it seems too stiff for piping. It should come right back to life without losing its structure.
What about the finished cookies? Once they are fully dry—and I mean totally hard, not tacky at all—you can stack them carefully, or slide them into tins or gift boxes. Because this icing dries so firm, you don’t have to worry about them sticking to each other like they would with a softer glaze. I usually put a small square of parchment paper between layers just to be extra cautious, especially if I’m shipping them!
Common Questions About This Hardening Sugar Cookie Icing Recipe
I know when you’re finally ready to decorate, a million little worries pop up. Will it set right? Did I add too much liquid? I totally get it! It’s frustrating to do all that cookie baking only to have the final decorative touch turn into a sloppy mess. Since this is my go-to, no-fail sugar cookie icing recipe, I’ve got the answers to the most common things folks ask me about getting that perfect hard finish.
Let’s clear up a few things. Don’t hesitate to look up more advanced tips, either; sometimes seeing a moist spice cake recipe tutorial just gives you a better idea of mixing principles overall!
Can I use milk instead of water in this icing?
This is the million-dollar question, and honestly, for this recipe, I strongly advise against it. We are using warm water specifically because it activates the meringue powder perfectly without adding any fat. If you use milk, you are introducing fat and solids that prevent the icing from reaching that super hard, smooth finish we are aiming for. Milk tends to keep things softer and tackier, which defeats the whole purpose of making a hardening royal icing in the first place. Stick to water for the base structure, and only introduce milk if you were making a soft glaze, which is a totally different thing!
Why did my icing crack as it was drying?
Ah, cracking! That’s frustrating when you’ve spent time making intricate piping work. Usually, cracking means your icing was just a bit too thick when you applied the final layer—either the outline dam was too tight or the flooded icing didn’t have quite enough moisture to relax as it dried. Remember the 10-second rule we talked about? If it was stiffer than that, it struggles to cure evenly. If you catch it early, you can sometimes gently smooth the crack with a damp fingertip. For next time, add just a few extra drops of water when thinning down your flood consistency. That little bit of extra hydration will help everything dry smooth and glossy.
How long does this icing actually last once prepared?
This is a great question for holiday prep work or when figuring out your meal planning schedule! If you keep the icing stored correctly—that means plastic wrap pressed directly onto the surface in an airtight container—it’s pretty robust. Uncolored icing can last a week or maybe even ten days in the fridge, though I still prefer using it within 4 or 5 days. Colored icing is best used within 2 or 3 days. When you bring it out, gently mix it again and adjust the consistency if needed with a drop of water. Once it’s on the cookie, and it’s fully dry (that 6 to 12 hours!), those decorated cookies will last for weeks at cool room temperature, stacked safely because the icing is so hard!
Is this considered a ‘beginner cookie icing’ recipe?
Absolutely! While royal icing has a reputation for being finicky, this specific sugar cookie icing recipe really shines for beginners because we swapped fickle raw egg whites for reliable meringue powder. The steps are clear: whip until stiff, thin exactly to the 10-second rule, and let it dry. If you follow those three basic rules, you’ll get results that look professional immediately. It’s about learning the two key consistencies—stiff for piping and thin for flood—and that’s it. You’ve got this!
Serving Suggestions for Your Beautifully Decorated Cookies
Now that you’ve put in the hard work to get that perfect, glossy, hard icing, it’s time to show off! Because this royal icing sets so firmly, you get so many more options for presentation than with a soft frosting. Think about stacking these beautifully decorated cookies carefully in clear tins as gifts—they won’t smudge or smear at all. This is essential when you are putting together big batches for holiday cookie decorating events!
These cookies look amazing piled high on rustic wooden stands or tucked into cellophane bags tied with cheerful ribbons. Since they dry fully, they are perfect for shipping too, which means your friends and family far away can still enjoy your amazing creations. Don’t forget to check out my recipe for a fun Christmas snack mix to round out your holiday platter!
Estimated Nutritional Data for This Sugar Cookie Icing Recipe
Because we are striving for total transparency here at the site, just like Ellie Vance insists upon in all our baking guides, I wanted to lay out the typical nutritional breakdown for this icing. Now, you have to remember that this is just an estimate! If you use a slightly different brand of powdered sugar or if you use a tiny bit more or less vanilla, those numbers can shift around. But this gives you a really good ballpark idea for the whole batch!
This is purely the data for the icing mixture itself, of course. It doesn’t include the cookie underneath, so keep that in mind when you are looking at the sugar count—I mean, we know this is a treat, not a health food, but knowing the totals helps when you’re managing things like protein bars on the side!
- Serving Size: About 1/4 cup of icing mixture
- Calories: 180
- Total Sugar: 45g
- Carbohydrates: 45g
- Protein: 1g
As you can see, it’s pretty much pure sugar and air—that air is what helps it dry hard, remember? The fat content is zero because we stuck to water and avoided any milk or corn syrup in the base recipe which helps keep the final product from becoming sticky. Enjoy that glossy finish—you earned it!
Share Your Creations Using This Sugar Cookie Icing Recipe
Okay, bakers, now it’s your turn! I’ve shared all my secrets for getting that perfectly smooth, hard-drying finish using this royal icing. I truly hope this helps you tackle your next batch of cut-out cookies with confidence. I always love seeing what beautiful things you all create once you master the consistency!
Once you’ve let those cookies dry completely—and I mean totally hard, not even a little bit tacky—snap a picture of your beautifully decorated masterpieces! Make sure you tag me in your holiday cookie decorating photos on social media. It just makes my day to see how this reliable sugar cookie icing recipe helped you pull off those intricate designs.
And please, don’t be shy about leaving a star rating right below this section! If you had success—especially if you struggled with soft icing before—let us know why this recipe finally worked for you in the comments. If you’re looking for another incredible cookie to put that icing on, you absolutely have to try my classic soft and chewy oatmeal cookie recipe next!
PrintNo-Fail Royal Icing for Smooth, Hard Sugar Cookies

Follow these clear steps to make a reliable royal icing that dries hard and smooth, perfect for decorating cut-out sugar cookies for gifting or holidays.
- Prep Time: 15 min
- Cook Time: 0 min
- Total Time: 15 min
- Yield: Covers approximately 2 dozen medium cookies 1x
- Category: Dessert
- Method: Mixing/Decorating
- Cuisine: American
- Diet: Vegetarian
Ingredients
- 4 cups powdered sugar, sifted
- 3 tablespoons meringue powder
- 6 tablespoons warm water
- 1 teaspoon vanilla extract
- Gel food coloring (optional)
Instructions
- In a large bowl, whisk together the sifted powdered sugar and meringue powder until fully combined.
- Add the warm water and vanilla extract to the dry ingredients.
- Using an electric mixer (handheld or stand mixer with paddle attachment), start mixing on low speed until the ingredients are just combined. Scrape down the sides of the bowl.
- Increase the mixer speed to medium-high and beat for 5 to 7 minutes until the icing is very thick, glossy, and holds stiff peaks. This whipping action incorporates air, which helps it dry hard.
- Test the consistency: For outlining (stiff consistency), the icing should hold its shape when lifted. For flooding (thinner consistency), add water one teaspoon at a time until the icing flows slowly off the spoon and you can draw a line through it that disappears in about 10 seconds.
- Separate the icing into bowls for coloring, if desired. Add gel food coloring sparingly and mix until the color is uniform.
- Transfer the icing to piping bags fitted with small tips for outlining, or use squeeze bottles for flooding.
- Outline your cooled sugar cookies first. Let the outline dry for 15 to 30 minutes until firm to the touch.
- Flood the outlined areas with the thinner consistency icing. Gently spread with a scribe tool or toothpick if needed.
- Allow the cookies to dry completely, uncovered, at room temperature for 6 to 12 hours, or until the surface is completely hard and not tacky.
Notes
- For a glossy finish, avoid over-mixing once the flooding consistency is reached.
- If your icing cracks while drying, it may be too thick; add a few drops of water and remix gently.
- If you are using this icing for meal planning or as part of a larger baking project, store unused icing covered tightly with plastic wrap pressed directly onto the surface to prevent crusting.
- This recipe works well for holiday cookie decorating and can be adapted for various designs.
Nutrition
- Serving Size: 1/4 cup
- Calories: 180
- Sugar: 45g
- Sodium: 5mg
- Fat: 0g
- Saturated Fat: 0g
- Unsaturated Fat: 0g
- Trans Fat: 0g
- Carbohydrates: 45g
- Fiber: 0g
- Protein: 1g
- Cholesterol: 0mg