
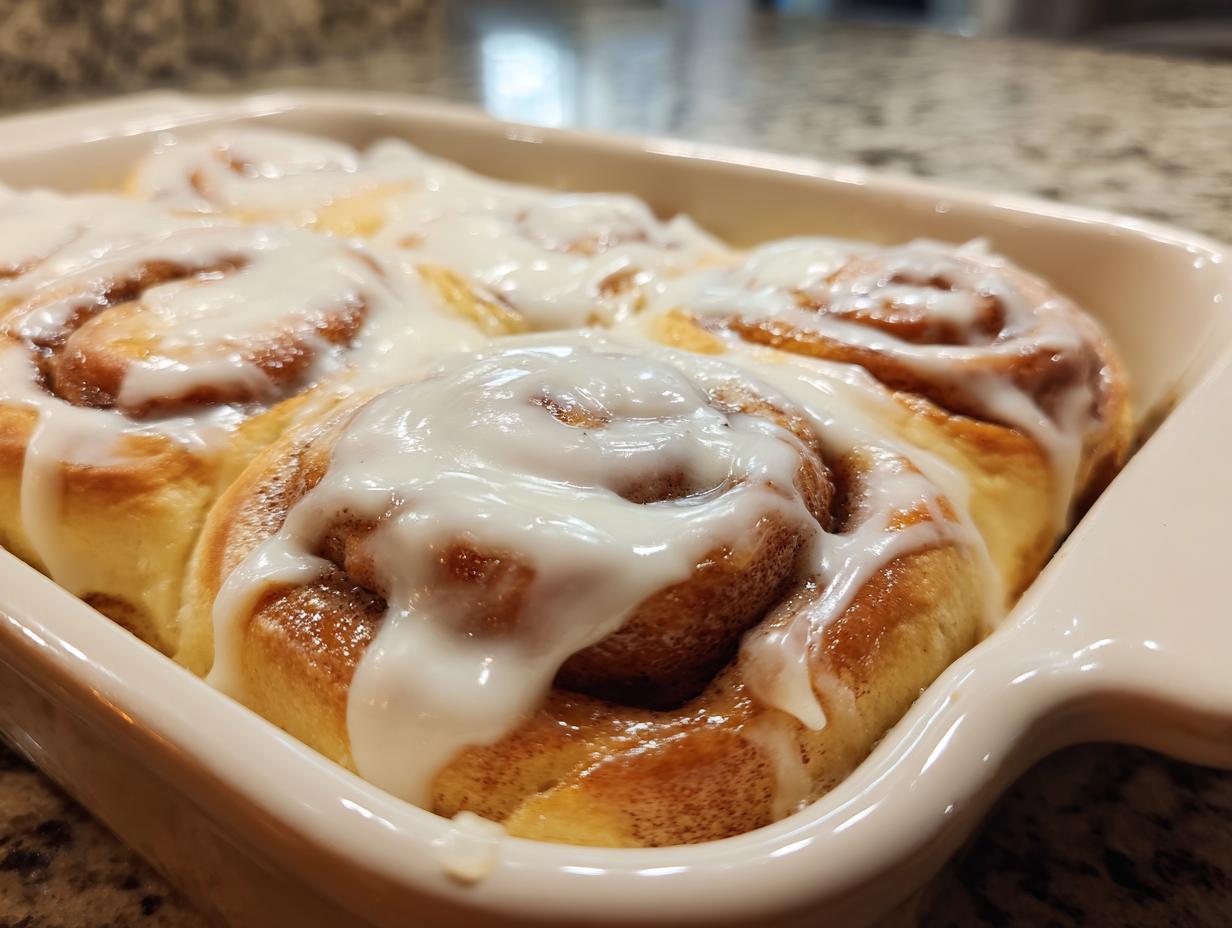
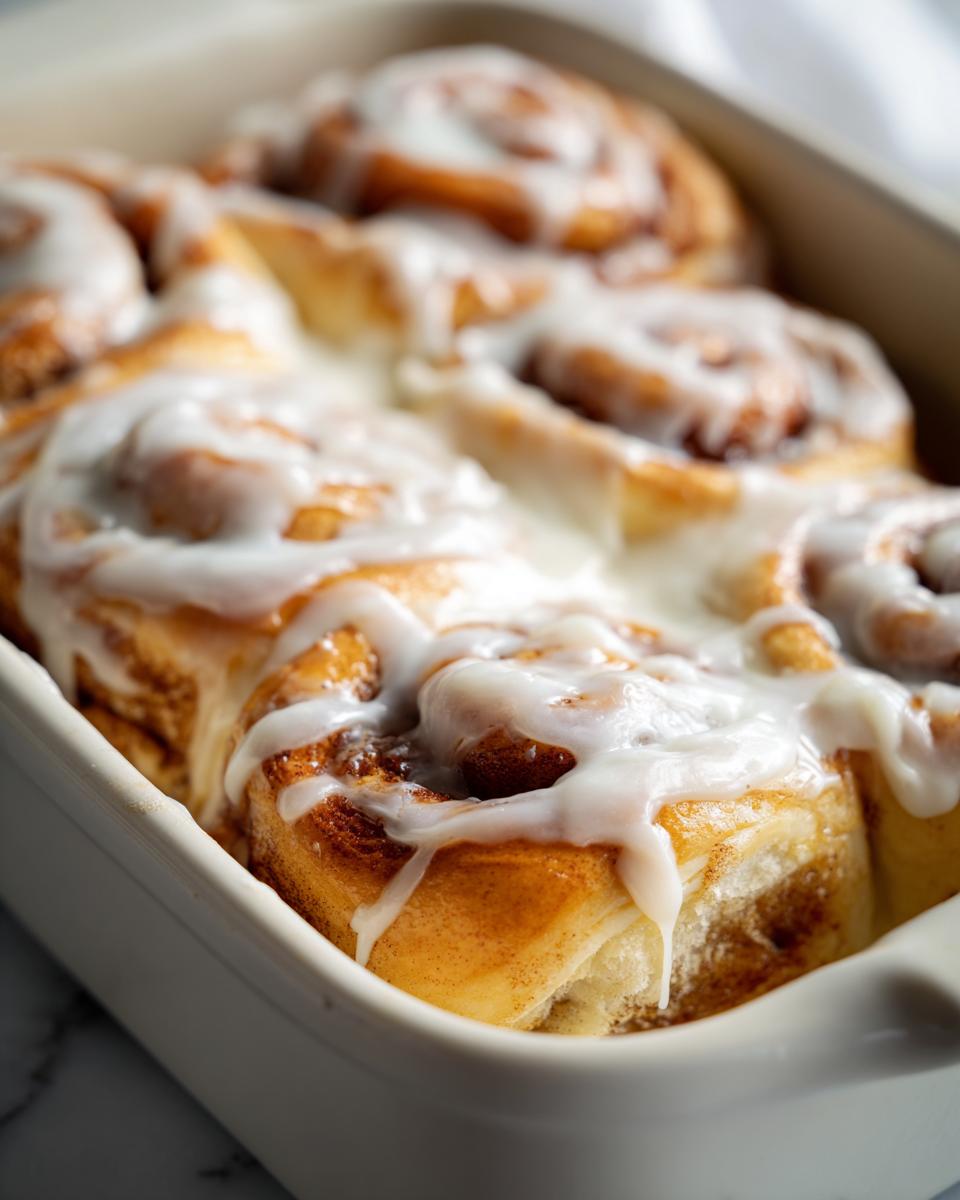
There’s honestly nothing I love more than walking into my kitchen on a chilly morning and smelling yeast dough rising, knowing that soon, the entire house will be filled with that unmistakable scent of warm cinnamon and sweet vanilla. If you’ve ever dreamed of achieving bakery-style perfection without stepping foot in a professional kitchen, you’ve come to the absolute right place! My goal with these recipes, just like when I was learning from my grandmother, is reliability. Trust me, we are perfecting the ultimate soft and gooey homemade cinnamon buns today. These aren’t your dry, crumbly versions; these are rich, fluffy breakfast pastries that practically melt the moment they hit your tongue. I learned early on that the best memories are made around reliable, comforting food, and this recipe is pure comfort! If you’re looking for more baked goods that fit this vibe, check out my recipe for cinnamon roll casserole—it’s another brunch hero!
- Why You Will Make These The Best cinnamon buns
- Gathering Ingredients for Your Gooey cinnamon buns Recipe
- Step-by-Step Instructions for Perfect homemade sweet rolls
- Expert Tips for Bakery Style cinnamon rolls from Scratch
- Making Ahead and Storing Your cinnamon buns
- Troubleshooting Common Issues with Yeast Dough
- Creative Variations for Your Next Batch of cinnamon buns
- Frequently Asked Questions About These Sweet Treats
- Nutritional Information Estimate
- Share Your Weekend Brunch Baking Success
Why You Will Make These The Best cinnamon buns
I promised you the best, and I always deliver! When you follow this recipe, you aren’t just making rolls; you’re creating a memory. These rolls consistently win over every single person who tries them. Seriously, they disappear faster than I can make them!
- Seriously Soft Texture: We use a sweet yeast dough enriched with butter and eggs. The result is dough that stays incredibly fluffy and tender, even the next day.
- The Gooey Factor: That dark brown sugar and melted butter filling caramelizes just perfectly, creating that irresistible, sticky swirl that makes everyone grab for an extra napkin. If you loved that gooey texture in my cinnamon roll casserole, you’ll adore it here!
- Speedy Rise Time: While yeast baking takes patience, I’ve optimized this recipe so the dough usually doubles in about an hour and a half total, meaning you can get these fluffy breakfast pastries onto the table faster than you think.
- Bakery-Style Look, Home Cook Ease: These look like something you’d buy from that fancy downtown bakery, but I promise the technique is straightforward. We’re achieving that bakery style from scratch without any complicated methods.
- Perfect Frosting Melt: Because we frost them while they are still warm, that thick cream cheese frosting melts right down into every crevice, securing that signature moist, decadent bite.
Gathering Ingredients for Your Gooey cinnamon buns Recipe
Alright, friend, let’s get down to what truly makes these cinnamon buns so special—it’s all in the quality and condition of the ingredients! You might think yeast dough is fussy, but once you see what we’re working with, you’ll realize why this formula guarantees incredibly soft cinnamon rolls every single time. Just make sure your eggs are out on the counter warming up for an hour before you start! If you’ve ever made my cinnamon sugar donut holes, you know I love a well-prepared pantry.
For the Sweet Yeast Dough
- 1 cup whole milk, warmed to 110°F (It should feel warm like bath water—not hot!)
- 2 1/4 teaspoons active dry yeast
- 1/2 cup granulated sugar, divided (We use half here, half in the filling!)
- 1/2 cup unsalted butter, softened, plus more for greasing
- 2 large eggs, room temperature (This is key for absorbing into the dough nicely!)
- 4 cups all-purpose flour, plus more for dusting
- 1 teaspoon salt
For the Cinnamon Swirl Filling
- 1/2 cup unsalted butter, melted (for filling)
- 1/2 cup packed light brown sugar (Make sure you pack it into the measuring cup!)
- 2 tablespoons ground cinnamon (Use the good stuff, the aroma matters!)
For the Cream Cheese Frosting
- 8 ounces cream cheese, softened (Let this sit out with the butter!)
- 1/2 cup unsalted butter, softened (for frosting)
- 2 cups powdered sugar, sifted (Sifting prevents those powdery lumps!)
- 1 teaspoon vanilla extract
- 1-2 tablespoons milk or heavy whipping cream (We’ll add this slowly until it’s perfect.)
Step-by-Step Instructions for Perfect homemade sweet rolls
Okay, putting together the perfect loaf of sweet yeast dough takes a little love, but I promise, the effort is what makes these soft cinnamon rolls taste like they came from a professional kitchen. Don’t rush the yeast steps—that’s where all the magic for a fluffy texture happens! If you are looking for other great dough recipes while you wait for these to rise, my recipe for simple homemade milk bread loaf uses very similar foundational techniques!
Mixing and Activating the Dough
First, let’s get that yeast happy. Mix your warm milk, yeast, and just one little tablespoon of sugar. Let it sit for about ten minutes. If it gets foamy and bubbly on top, congratulations, your yeast is alive and ready to party! If nothing happens, dump it out and start over with warmer milk.
In your large bowl, mix the softened butter, the rest of your granulated sugar, and the room temperature eggs until they are just combined. Now, pour in that foamy yeast mixture. Gradually add your flour and salt. Once a shaggy dough forms, get ready to knead! You can use a stand mixer for about 5 to 7 minutes or knead by hand on a lightly floured surface. My little trick here for checking elasticity: take a small piece of dough and see if you can gently stretch it thin enough to see light through it without tearing—that means you’ve got good gluten development!
The First Rise and Preparing the Filling
Once the dough is smooth and elastic, pop it into a bowl that you’ve lightly buttered. Give it a gentle turn so it’s coated. Cover that bowl with a clean tea towel or plastic wrap and set it somewhere quiet and warm—like in a slightly warm, turned-off oven or near a sunny window. You’re looking for it to get completely doubled in size, which usually takes between 60 to 90 minutes. Don’t peek too often!
While that dough is puffing up, let’s prepare the filling, which is super simple. In a small bowl, just whisk together the melted butter, that packed brown sugar, and your cinnamon until you have a thick, gorgeous paste. That cinnamon sugar filling is going to be the key to that gooey center we crave!
Shaping, Rolling, and Cutting the cinnamon buns
Once your dough has doubled, gently punch it down—get that air out! Lightly flour your counter, and roll that dough out into a big rectangle, about 12×18 inches. It should be fairly even. Now, take your thick cinnamon-sugar filling and spread it everywhere, making sure you leave about a one-inch border bare along one of the long edges. That border is crucial for sealing later!
Starting on the long edge *opposite* that border, roll that dough up as tightly as you possibly can, like you’re rolling a fancy rug. Pinch that seam tightly closed—this is how we keep the filling locked inside our amazing cinnamon buns. Once sealed, grab a sharp knife or unflavored dental floss (my favorite trick for clean cuts!) and slice that log into 12 equal pieces. Try to keep your cuts straight so all your rolls bake evenly!
Second Rise and Baking
Generously butter your 9×13 inch baking dish—don’t skimp here! Place your cut rolls inside, making sure they aren’t squished too tightly together yet, but close enough that they start to touch as they rise. Cover them loosely again and let them have their second slumber for 30 to 45 minutes until they look nice and puffy. Preheat your oven to 375°F during the last 15 minutes of this rise time. You want that oven hot and ready!
Pop the whole pan into the preheated oven. They usually take about 20 to 25 minutes until the tops are a lovely, light golden brown. Trust your eyes more than the timer sometimes!
Crafting the Best cinnamon bun frosting
We’re using the best recipe for cream cheese glazed buns, which means a thick but spreadable frosting. While the rolls are baking, beat your softened cream cheese and softened butter together until they are completely smooth—no lumps allowed in Ellie’s kitchen! Slowly start adding the sifted powdered sugar and vanilla extract. This is where the texture is made or broken. If the frosting seems too stiff, slowly add the milk or heavy whipping cream one tablespoon at a time until you get that perfect, luscious consistency for spreading over your warm cinnamon buns.
Finishing Touches: Frosting Warm Rolls
This is my favorite moment! Once the rolls come out and are golden, grab that frosting and start spreading it immediately. Don’t wait until they cool down if you want that classic, slightly melted, ooey-gooey experience! When the frosting hits the hot rolls, it melts just enough to seep down into all those delicious swirls. If you prefer a much thicker, set glaze that doesn’t melt much, let the rolls cool for about 10 to 15 minutes before starting to frost them. Either way, they are heavenly!
Expert Tips for Bakery Style cinnamon rolls from Scratch
Baking yeast dough from scratch can feel intimidating, but honestly, the professional look comes down to just a couple of small, consistent habits. I picked these up from years of trial and error (and a few kitchen flops early on!). If you follow these simple tricks, you’ll nail that bakery style every time. These aren’t about being fancy; they’re about ensuring your sweet yeast dough behaves exactly how it should!
- Test Your Yeast First: This sounds obvious, but it’s worth repeating because dead yeast ruins everything! Always use milk that is around 110°F. If it’s too cold, the yeast sleeps. If it’s too hot, you kill it dead. That foamy layer in the first five minutes is your green light. If you suspect your yeast is old, you can check out tips on buying yeast for cinnamon buns recipe with active dry yeast if you’re unsure about the freshness in your pantry!
- Don’t Fear the Stickiness: When you’re rolling out the dough for the filling, it *will* feel a little sticky, especially when you spread that melted butter and brown sugar mixture on top. That stickiness is what turns into the wonderfully caramelized layer once baked! Use just enough flour when rolling to prevent it from sticking to the counter, but resist adding too much, or your rolls will firm up instead of staying soft.
- Sealing the Log is Non-Negotiable: Remember when we rolled the dough up? That final pinch where the two edges meet needs to be sealed tightly. If you don’t seal it, the pressure from the rising and baking will push the filling out, and you’ll end up with caramelized puddles in the pan rather than swirls inside the roll. It saves you from having a mess and ensures every bite of your final sweet treat has cinnamon in it.
- The Cold Night Trick (If You’re Planning Ahead): If you are baking these for a big weekend brunch or holiday morning, use the overnight trick from the notes section! After you punch the dough down the first time, wrap it very tightly and place it in the fridge. The cold slows the yeast way down. In the morning, take it out, let it warm up on the counter for maybe an hour, and proceed with rolling and cutting. This results in an even more complex, developed flavor, similar to my cream cheese pound cake where chilling helps the structure.
- Frost While Hot: I cannot stress this enough for maximum gooiness! If you want that fantastic, melty frosting that coats the entire warm sweet roll, you must apply the cream cheese frosting as soon as they come out of the oven. They should be piping hot. If you prefer stiffer, glossy icing, then let them cool down completely first—it’s all about preference!
Making Ahead and Storing Your cinnamon buns
One of the best things about making these incredible cinnamon buns from scratch—aside from the taste, of course—is knowing you can bake ahead! Nobody wants to wake up at 4 AM on Christmas morning to knead dough, right? I highly recommend using the refrigeration trick I mentioned earlier if you plan on serving these for a holiday morning treat or a big weekend brunch.
To prep ahead: Follow the instructions right up until you cut the rolls for the second rise. Arrange them in your buttered dish, cover them very tightly with plastic wrap (maybe twice!), and place the whole pan in the refrigerator overnight—up to 18 hours works great. The cold just keeps the yeast super happy but slow. When you wake up, pull them out while you get the coffee going. Let them sit on the counter, still covered, for about 60 to 90 minutes until they look puffy and have almost doubled again. Then, bake as directed! This results in the softest rolls imaginable.
If you have leftovers (which I doubt!), keeping them fresh is easy. Store any unfrosted rolls in an airtight container at room temperature for up to two days. They really do stay moist! Reheating is crucial for bringing back that fresh-from-the-oven meltiness. For best results, I always take individual rolls, wrap them loosely in a slightly damp paper towel, and zap them in the microwave for about 15 to 20 seconds. That steam warms them through perfectly. If you want the outside just a tiny bit crispier, heat them in a 350°F oven for about 8 minutes instead. If you’re craving something quick and warm on a random Tuesday, you should try my recipe for easy stovetop cinnamon applesauce—it hits that warm spice craving fast!
For freezing, I prefer to freeze them *after* they are baked but *before* frosting. Let the baked rolls cool completely, then place them snugly in a freezer-safe container or bag. When you want one, just thaw overnight in the fridge and reheat as described above. Then, make a fresh batch of that amazing cream cheese frosting—it never freezes well.
Troubleshooting Common Issues with Yeast Dough
Now, let’s talk turkey. Baking with yeast dough is incredibly rewarding, but there are a couple of spots where things can go sideways if you aren’t careful. Don’t you worry one bit if this happens! I’ve been there, and honestly, failures are just lessons in disguise that make your next batch even better. When you’re working this hard for perfect, fluffy breakfast pastries, you want them to succeed!
If you are using my recipe for the simple homemade milk bread loaf, you might recognize some of these dough dramas. The key to success here is temperature control and tightness!
My Dough Won’t Rise—Did I Kill the Yeast?
This is the most common heartbreak in yeast baking! If your dough hasn’t doubled in size after 90 minutes, the yeast is likely the culprit. Check your milk temperature again. If you used milk that was too hot (anything over 130°F), you accidentally sterilized your yeast, meaning it’s dead and can’t produce the gas needed for rising. Too cold, and it’s just sluggish.
If you’re certain the temperature was right, it might just be old yeast. You can try warming the bowl slightly (maybe place it near a pilot light or in a barely warm oven for 15 minutes) just to encourage it, but usually, if it looks flat after the first rise time, you’ll need to start over with fresh yeast. Don’t waste your time trying to bake flat dough; it will taste heavy and dense.
Why Did My Filling Leak Out Everywhere?
Ah, the dreaded puddle of brown sugar syrup at the bottom of your pan! This happens for one of two reasons, and both are fixable next time. First, you might not have sealed the dough log tightly enough after rolling. Remember when I said to pinch that seam closed? If you miss a spot, the dough opens up during the baking expansion, and all that glorious, buttery filling just oozes out.
The second culprit is often rolling the dough too thin or not leaving that one-inch border bare at the end. That empty strip acts like glue! When you seal the roll, the edge of the dough adheres to itself instead of sealing the sticky filling to another layer of dough. Next time, press firmly along the entire length of that final seam!
Are My Rolls Too Dense Even After Rising?
If your dough rose nicely the first time but still feels a bit heavy or tough when you go to roll it out, you might have over-kneaded it. Kneading develops gluten, but too much kneading creates a very tight, bouncy, elastic dough that doesn’t like to puff up during the second rise. You wanted the dough smooth, but not rock-hard! For that perfectly airy texture, stop kneading the moment the dough feels smooth and elastic. Remember—we want these to be fluffy breakfast pastries, not bread loaves!
Creative Variations for Your Next Batch of cinnamon buns
I truly believe a great recipe is just a starting point, and once you’ve mastered these classic, soft cinnamon rolls, it’s time to start getting creative! Playing around with the filling and toppings is the best way to keep things exciting, especially if you want to impress guests during weekend brunch baking or make holiday morning treats feel extra special. These ideas are all simple tweaks that keep the dough foundation nice and reliable!
Since you nailed the core recipe and got those incredibly gooey cinnamon buns down pat, here are a few ways you can switch things up for your next two dozen!
- Try Nutty Additions: After you spread the cinnamon filling, sprinkle on about 1/2 cup of chopped pecans or walnuts. They toast beautifully in the oven and add a fantastic, buttery crunch that perfectly contrasts with the soft roll. You could even use this idea when making my easy apple pie bars when you want to add texture!
- Spice Swap: If you want something different from the traditional trio, try swapping out half of the cinnamon for cardamom. Cardamom has this warm, slightly citrusy floral note that works beautifully with the dough. It makes them taste sophisticated, almost like a European brioche cinnamon bun.
- Go Fruity: Think about adding finely diced, sauteed apples or pears to the filling mix, maybe adding a tiny splash of maple syrup to the butter mixture for moisture. It gives you that warm spice flavor profile, much like my moist cinnamon apple cake recipe, but in roll form!
- The Braided Beauty: Instead of punching the dough down flat, try slicing the log into thicker ‘ribbons’ instead of 12 even rolls. Arrange these ribbons in the pan like you’re weaving a basket or braiding hair before the second rise. When baked, you get these gorgeous, giant portions—perfect for sharing! This is a fun visual upgrade that works great for celebrations.
- Alternate Frosting Flavors: While the cream cheese frosting is perfect, try mixing in a tablespoon of lemon zest and juice for a tangy contrast, or use a maple glaze instead of the classic white icing. A maple glaze is just powdered sugar, vanilla, and pure maple syrup until it’s pourable. It keeps things sweet but seasonally appropriate! For more flavor ideas, check out the amazing variations people are sharing over at this great resource!
Frequently Asked Questions About These Sweet Treats
I know when you get this deep into a baking project, you might have a few last-minute worries popping up! That’s totally normal, especially when working with a sweet yeast dough. I’ve pulled together the questions I get asked most often about achieving that perfect soft texture and managing substitutions. You’ve got this, and you are so close to having the best homemade sweet rolls ready for brunch!
Can I use instant yeast instead of active dry yeast?
Yes, absolutely! Instant yeast is fantastic because it doesn’t require that proofing step we do in the beginning, which saves a few minutes. If you are substituting, you can skip mixing the yeast with the milk entirely. Just whisk your instant yeast directly into your dry ingredients (the flour and salt) along with the sugar. Then, when you mix the wet and dry ingredients together, simply pour in your warm milk along with the butter and eggs. You don’t need to wait for it to foam up first. It should all come together a little faster, but you might need to watch the initial rise time, as instant yeast can sometimes rise a bit quicker than active dry.
How do I get the ‘ooey-gooey’ texture everyone talks about?
That ‘ooey-gooey’ factor comes down to two things we built into this recipe: the filling and that little secret ingredient! First, make sure you pack that brown sugar tightly and use plenty of melted butter in the filling—that creates the caramelizing syrup when baking. But the real trick, which I noted in the recipe card, is pouring just a little bit of heavy whipping cream—about 1/4 cup—evenly over the rolls right before that second rise. As they bake, that cream seeps into the dough, keeping the inside of your warm sweet rolls incredibly moist and tender, making them feel extra decadent.
What is the best way to reheat warm sweet rolls?
Honestly, the best way to reheat leftover rolls is by injecting a little moisture back into them! The microwave is your friend for speed. Take your lovely sweet treat, wrap it loosely in a slightly damp paper towel—it acts like a tiny steam tent—and microwave it for 15 to 20 seconds. It thaws any residual stiffness instantly. If you have a little more time, like you are preparing for a cozy snack later, the oven is great too. Wrap the rolls in foil and heat them at 350°F for about 8 to 10 minutes. That gentle heat warms them all the way through without drying out the edges. If you’re looking for more straightforward weeknight fixes instead of baking projects, I have some great easy weeknight dinners you might enjoy!
Nutritional Information Estimate
Now, I know what you’re thinking. When something is this delicious, this rich, and this utterly comforting, it can’t possibly be good for you, right? Well, you know I always believe in transparency here at DeliceRecipe! Because these are homemade sweet rolls made with quality ingredients, the nutrition varies quite a bit from what you might find in a can, but they are still what I consider an indulgence, perfect for a celebratory morning treat rather than an everyday pantry staple.
Please remember, this information is just an estimate. I calculated this based on the ingredients list provided, assuming a standard serving size of one generously frosted roll. If you load up on cream cheese frosting or use skim milk instead of whole milk, these numbers will shift! Treat this chart as a general guideline for your weekend brunch baking.
- Serving Size: 1 bun
- Calories: 450
- Sugar: 45g (Mostly from the filling and frosting, as you’d expect!)
- Fat: 22g
- Saturated Fat: 14g
- Carbohydrates: 58g
- Protein: 7g
They’re a little high in sugar and fat, yes, but they are pure, homemade joy, made with real butter and cream cheese—that’s what matters most when you’re treating yourself!
Share Your Weekend Brunch Baking Success
I truly hope that the smell of these warm, sticky rolls filled your kitchen with as much happiness as it fills mine. That’s the whole point of home baking, isn’t it? Getting everyone together around a plate of something delicious you made with your own two hands! Now that you’ve mastered the ultimate soft and gooey cinnamon buns, I would just be tickled pink if you let me know how they turned out.
If you followed along and found this recipe reliable and delicious, please consider leaving a quick rating right here on the site! Your reviews help other home cooks feel confident enough to try their hand at these sweet yeast dough delights. It means the world to me when I hear that one of my recipes became a new tradition for your family, maybe even making it onto your list of favorite easy breakfast ideas.
And listen, I absolutely *love* seeing your creations! If you snap a picture of those perfectly browned edges or that glorious mountain of cream cheese frosting, tag me on social media! Seeing your stunning homemade sweet rolls is honestly the best part of my day. Until the next baking adventure, happy cooking!
PrintThe Ultimate Soft & Gooey Homemade Cinnamon Buns with Cream Cheese Frosting
Make bakery-style cinnamon rolls from scratch that are soft, fluffy, and irresistibly gooey. This recipe delivers rich, warm sweet rolls perfect for weekend brunch or holiday mornings.
- Prep Time: 30 min
- Cook Time: 25 min
- Total Time: 1 hour 50 min
- Yield: 12 servings 1x
- Category: Breakfast
- Method: Baking
- Cuisine: American
- Diet: Vegetarian
Ingredients
- 1 cup whole milk, warmed to 110°F
- 2 1/4 teaspoons active dry yeast
- 1/2 cup granulated sugar, divided
- 1/2 cup unsalted butter, softened, plus more for greasing
- 2 large eggs, room temperature
- 4 cups all-purpose flour, plus more for dusting
- 1 teaspoon salt
- 1/2 cup unsalted butter, melted (for filling)
- 1/2 cup packed light brown sugar (for filling)
- 2 tablespoons ground cinnamon (for filling)
- 8 ounces cream cheese, softened (for frosting)
- 1/2 cup unsalted butter, softened (for frosting)
- 2 cups powdered sugar, sifted (for frosting)
- 1 teaspoon vanilla extract (for frosting)
- 1–2 tablespoons milk or heavy whipping cream (for frosting)
Instructions
- Activate the yeast: In a small bowl, combine the warm milk, yeast, and 1 tablespoon of the granulated sugar. Let stand for 5 to 10 minutes until foamy.
- Prepare the dough: In a large bowl or stand mixer, combine the remaining granulated sugar, softened butter, and eggs. Mix until combined. Add the yeast mixture, flour, and salt. Mix until a shaggy dough forms, then knead for 5 to 7 minutes until the dough is smooth and elastic.
- First rise: Place the dough in a lightly buttered bowl, turning to coat. Cover the bowl and let it rise in a warm place for 60 to 90 minutes, or until doubled in size.
- Make the filling: While the dough rises, combine the melted butter, brown sugar, and cinnamon in a small bowl. Mix until it forms a thick paste.
- Shape the rolls: Punch down the risen dough. On a lightly floured surface, roll the dough into a large rectangle, about 12×18 inches. Spread the cinnamon-sugar filling evenly over the dough, leaving a small border on one long edge.
- Roll and cut: Starting from the long edge opposite the border, tightly roll the dough into a log. Pinch the seam closed. Cut the log into 12 equal pieces.
- Second rise: Arrange the cut rolls in a generously buttered 9×13 inch baking dish. Cover loosely and let rise again for 30 to 45 minutes until puffy. Preheat your oven to 375°F during the last 15 minutes of the rise.
- Bake: Bake for 20 to 25 minutes, or until the tops are golden brown.
- Make the frosting: While the buns bake, beat the softened cream cheese and butter together until smooth. Gradually add the powdered sugar and vanilla extract. Add milk or cream one tablespoon at a time until you reach a smooth, spreadable consistency.
- Frost and serve: Remove the buns from the oven. Immediately spread the cream cheese frosting generously over the warm cinnamon buns. Let them sit for 5 minutes so the frosting melts slightly into the swirls, then serve warm.
Notes
- For extra gooey cinnamon buns, pour 1/4 cup of heavy whipping cream over the rolls before the second rise.
- You can prepare the dough the night before, let it rise once, punch it down, wrap it tightly, and refrigerate. Bring it to room temperature before rolling and cutting in the morning.
- If you want a thicker glaze instead of a melted frosting, wait 15 minutes after removing the buns from the oven before applying the cream cheese frosting.
Nutrition
- Serving Size: 1 bun
- Calories: 450
- Sugar: 45g
- Sodium: 350mg
- Fat: 22g
- Saturated Fat: 14g
- Unsaturated Fat: 8g
- Trans Fat: 0.5g
- Carbohydrates: 58g
- Fiber: 2g
- Protein: 7g
- Cholesterol: 65mg