
Oh my gosh, have you ever thought about what your Christmas morning breakfast *should* look like? Forget scrambling eggs while everyone waits impatiently! I’m talking about pulling apart a giant, warm, gooey centerpiece that smells like pure holiday magic. That’s why I’m sharing my favorite tradition now: homemade, pull-apart christmas tree cinnamon rolls. Seriously, these aren’t just sweet rolls; they’re shaped just right, covered in a bright green glaze, and they make the whole house feel instantly festive. It took me years to nail the dough for this exact texture, but trust me when I say this recipe is worth every minute for that perfect tear and bite.
- Why Our Homemade christmas tree cinnamon rolls Are a Holiday Must-Make
- Gathering Ingredients for christmas tree cinnamon rolls
- Step-by-Step Instructions for Shaped christmas tree cinnamon rolls
- Ingredient Notes and Substitutions for Your christmas tree cinnamon rolls
- Make Ahead & Freezer Tips for Festive Dough Recipes
- Serving Suggestions for Your christmas tree cinnamon rolls Centerpiece
- Storing and Reheating Leftover christmas tree cinnamon rolls
- Frequently Asked Questions About Shaped Cinnamon Rolls
- Rate This Holiday Baking Recipe
Why Our Homemade christmas tree cinnamon rolls Are a Holiday Must-Make
Listen, you can grab the canned kind, and that’s fine for a quick fix, but when you’re making memories, you need something that tastes like you put your whole heart into it. That’s what this homemade version gives you!
- They are unbelievably soft and buttery—way better than anything store-bought.
- The pull-apart format means serving is easy; just grab a branch!
- Since they rise up together, they bake into one cohesive, gorgeous shape.
The Ultimate Holiday Brunch Centerpiece
Wow, when this thing hits the table, you’ll hear gasps. It’s not just a dish; it’s decoration! Forget the fussy platter arrangements. These christmas tree cinnamon rolls naturally form an edible centerpiece that screams ‘Holidays are here!’ Because we are making the dough completely from scratch, it has a chew and a stretch that canned stuff just can’t touch. It’s the star of any Christmas Morning Breakfast Ideas spread.
Tips for Best Homemade christmas tree cinnamon rolls Texture
If you want that legendary soft texture, you absolutely have to treat your butter right. Before you even think about adding the sugar, your butter needs to be perfectly softened—think easily dented by the press of a finger, but not melted or greasy at all.
When you cream that perfect butter with the sugar, you are physically beating tiny pockets of air into the dough. This little bit of effort is what makes these rolls balloon up light when they bake, giving you that amazing melt-in-your-mouth goodness when you pull them apart.
Gathering Ingredients for christmas tree cinnamon rolls
Getting ready for baking day means checking your pantry twice! I always pull out everything before I start mixing because trying to find the brown sugar while the yeast is blooming is just asking for trouble. We need a few different components here: the soft dough, the buttery filling, and that super festive green glaze. If you need tips on spiking your glaze flavor, I have a great post about cream cheese glazes that might give you some ideas!
Dough Ingredients
This is the base for that perfect pull-apart texture, so exact measurements really matter here. Make sure your milk is just right—we need that yeast to wake up! You’ll need:
- 1 cup warm milk (about 110°F)
- 2 1/4 teaspoons active dry yeast
- 1/2 cup granulated sugar, divided
- 1/2 cup unsalted butter, softened, divided (use 1/4 cup for dough, save 1/4 cup for filling)
- 2 large eggs, room temperature
- 4 cups all-purpose flour, plus more for dusting
- 1 teaspoon salt
Filling and Green Glaze Components
For the super gooey inside, we use brown sugar for that deep flavor. And for the star of the show—that bright green color—we’re going with gel coloring if you have it, because it really makes the color pop without thinning out our icing.
- Filling: 1 tablespoon ground cinnamon
- Filling: 1/2 cup packed light brown sugar
- Filling: 1/4 cup melted unsalted butter
- Green Glaze: 2 cups powdered sugar
- Green Glaze: 3 tablespoons milk
- Green Glaze: 1/2 teaspoon vanilla extract
- Green Glaze: Green food coloring (gel preferred)
- Decoration: Red and green sprinkles or small candies
Step-by-Step Instructions for Shaped christmas tree cinnamon rolls
Okay, this is where the fun really begins! While the dough is resting, mix up that cinnamon-brown sugar paste. Once the dough has puffed up nicely—it should look like a happy cloud—it’s time to get serious about shaping our centerpiece. This part is great for getting older kids involved; it definitely qualifies as one of those fun Kids Holiday Baking Activities where precision isn’t too important!
Making and Proofing the Festive Dough
First things first, wake up that yeast in the warm milk with a pinch of sugar. Give it about ten minutes to get foamy. If it doesn’t foam, honey, ditch it and start that step over! Once it’s happy, mix in the rest of your sugar, softened butter, and eggs. Then, slowly introduce the flour and salt until you have a shaggy ball. Turn it out onto the counter and start kneading. You need to work it for a good 5 to 7 minutes until it feels smooth and stretchy—that means you properly developed the gluten, which is key for those amazing homemade rolls. Pop it in an oiled bowl, cover it, and let it chill out for about an hour and a half until it’s doubled. Patience is the secret ingredient here!
Cutting and Assembling the christmas tree cinnamon rolls Shape
Punch that air out gently. On a floured surface, roll that dough into that big 12×18 inch rectangle. Slather that cinnamon filling all over it, edge to edge. Now, grab your pizza cutter or a sharp knife and slice it lengthwise into three equal strips. Lay these three strips side-by-side. This is the tricky bit: starting from one long edge, you’re going to make diagonal cuts along both long sides, but don’t cut through the middle! You cut maybe an inch in from the edge, creating lots of separate ‘branches’ on both sides, leaving the center connected. Next, gently twist the cut sections, alternating which way you twist them to make a rough tree shape in the middle section. Pinch the bottom ends tight together to make a little trunk base.
Carefully slide the whole assembled tree onto a baking sheet lined with parchment paper. Cover it loosely, let it have its second rise for 30 minutes, and preheat that oven to 375°F (190°C) about halfway through that rise time.
Baking and Applying the Green Glaze
Bake those babies for about 20 to 25 minutes until they look beautifully golden brown. Let them cool down just a tiny bit, because we want them warm, not scorching hot, for the glaze.
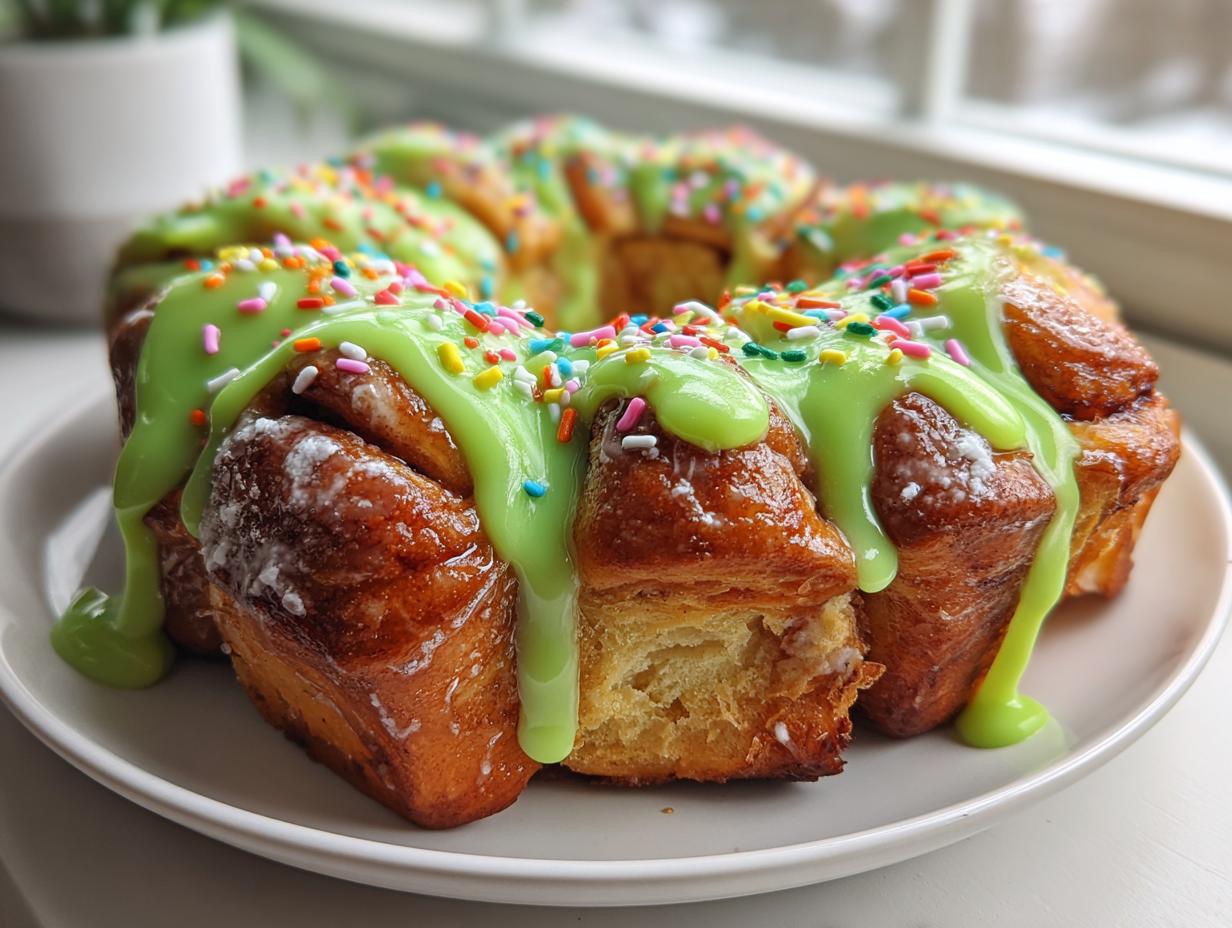
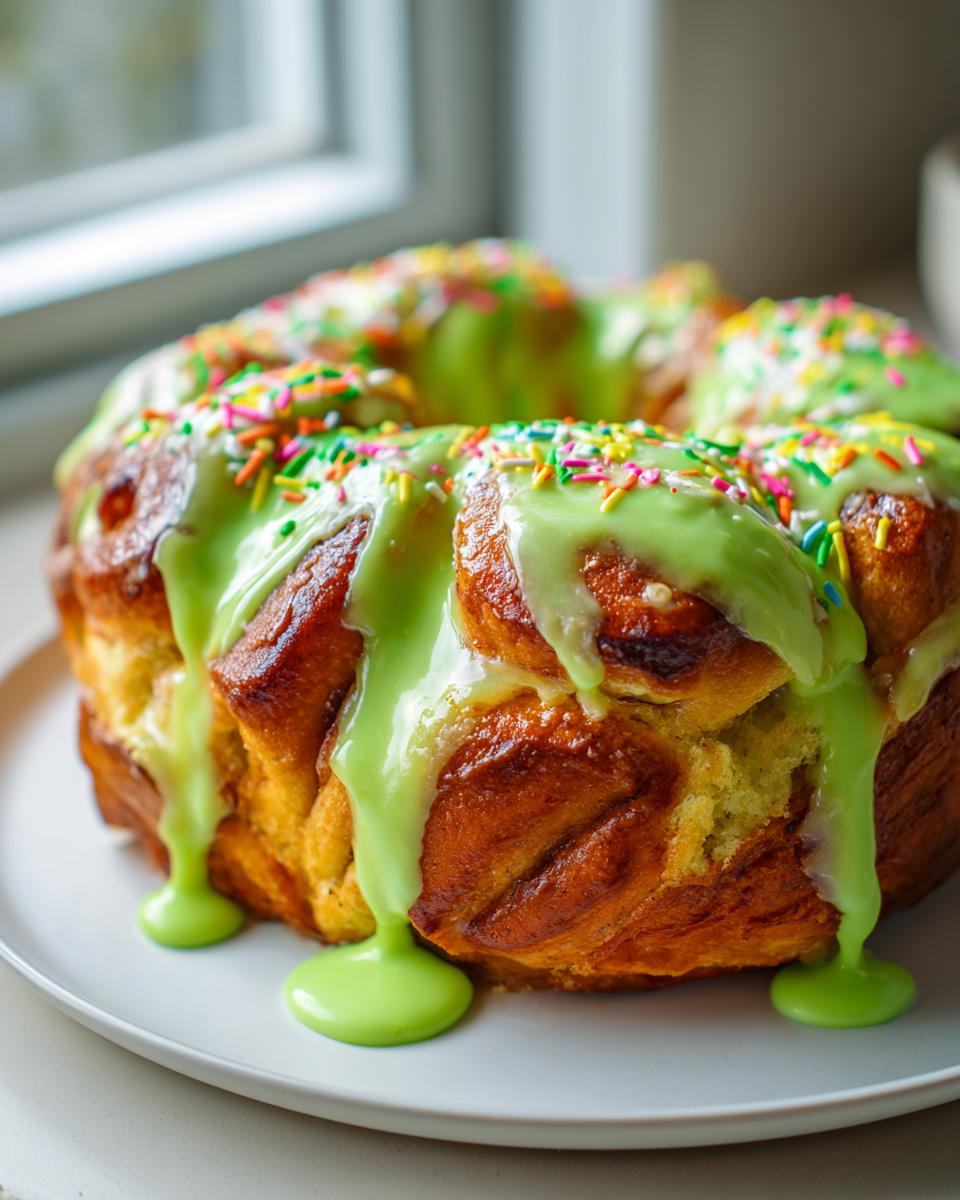
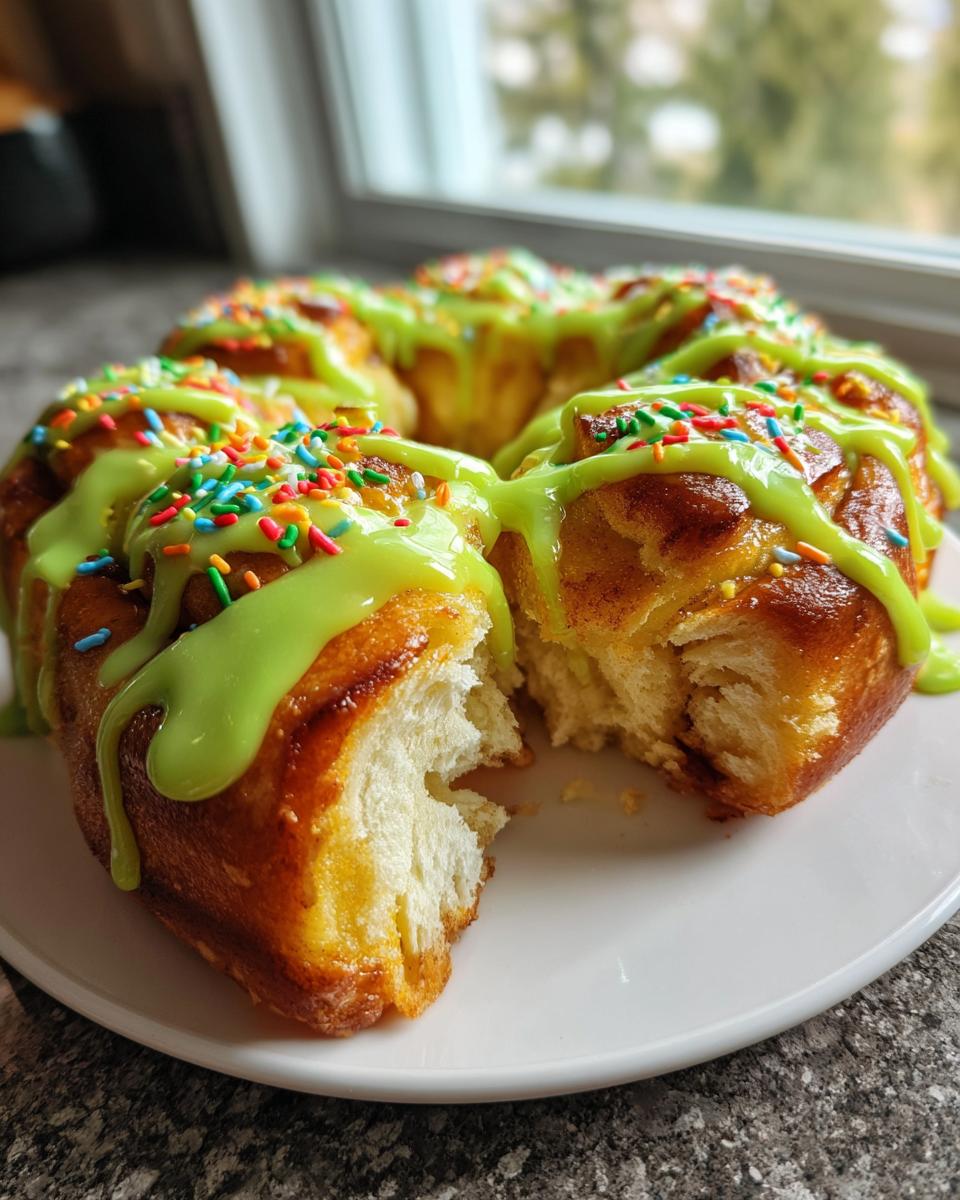
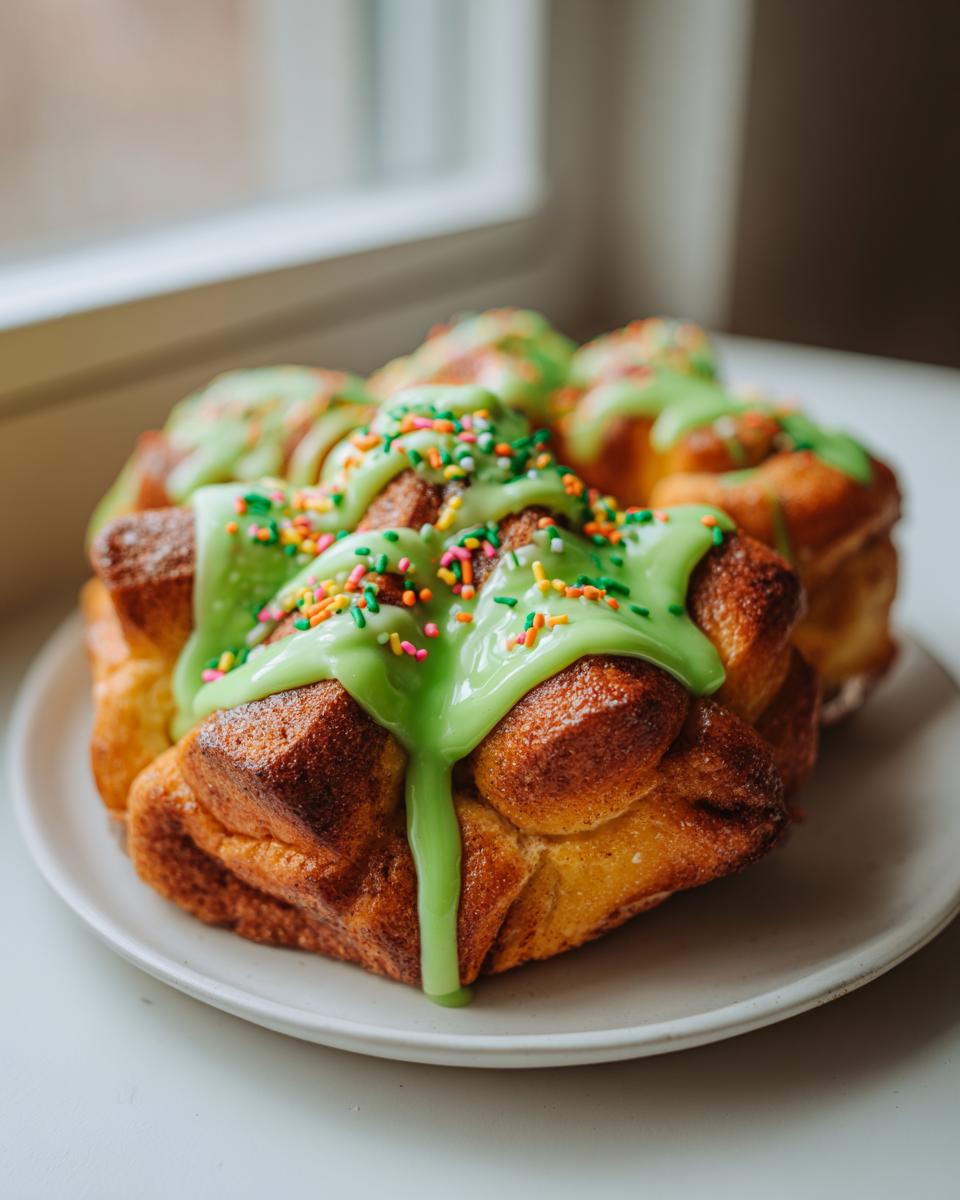
While they’re cooling, whisk your powdered sugar, milk, and vanilla. Now for the color! Add your green food coloring slowly until you get that bright, cheerful green. If you see a recipe for Glazed Christmas Sweets, they always use gel coloring for vibrancy! Drizzle that gorgeous green thick over the warm rolls, and don’t wait—sprinkle your red and green candies right on top so they stick fast. That’s how you get the best looking Sweet Christmas Treats!

Ingredient Notes and Substitutions for Your christmas tree cinnamon rolls
So, I know life gets hectic, especially during the holidays when you’re trying to juggle everything from presents to party prep. If you are absolutely slammed and don’t have time for the full yeast dough process, don’t panic! You can absolutely use two cans of the good quality store-bought refrigerated cinnamon roll dough. Seriously, that’s mentioned in the notes for a reason!
If you go that route, just unroll the pieces and arrange them in the tree shape, making sure to leave little gaps between the rolls so they have room to expand while baking. Now, for making ahead—my favorite trick! After you’ve assembled that beautiful tree shape on the parchment paper, cover it really well with plastic wrap and stick the whole sheet into the fridge overnight. It slows down that second rise beautifully. When you pull it out the next morning, just let it sit on the counter for about 15 minutes while the oven heats up before baking. It means less stress and still gives you that amazing tasting cinnamon roll experience!
Make Ahead & Freezer Tips for Festive Dough Recipes
The holidays are all about enjoying moments, not stressing over morning prep, right? If you’re already deep into meal planning for Thanksgiving leftovers and Christmas Eve dinner, the last thing you want is a complicated morning routine. That’s where these glorious christmas tree cinnamon rolls save the day!
The absolute best part, besides how they taste, is just how easy they are to prep ahead of time. You can totally assemble this entire tree—dough rolled, filled, cut, and twisted—the day before you plan to bake them. Think of it: you wake up Christmas morning, and the showstopper is already ready to go!
Here’s the secret for that overnight rest. Once you have that beautiful tree shape assembled on its parchment paper, cover it really well, maybe wrap the whole baking sheet in plastic wrap, and tuck it into the fridge. The cold temperature basically pauses the yeast activity wonderfully. You’ll want to make sure you pull it out about an hour before you want to bake it, though! We need that second rise time to be extended because the dough is coming from cold storage—I usually add an extra 15 minutes to the normal 30-minute rest time just to be safe. It gives them a chance to warm up slightly and get nice and puffy again before they hit the oven. Baking them right out of the fridge makes them dense, and we definitely don’t want that!
This prep-ahead system lets you focus on enjoying family, maybe even comparing notes on the best pull apart bread recipes out there, knowing your stunning breakfast centerpiece is taken care of. It’s the ultimate trick for stress-free Make Ahead Holiday Desserts!
Serving Suggestions for Your christmas tree cinnamon rolls Centerpiece
You’ve made the centerpiece, now you need the supporting cast! Because these christmas tree cinnamon rolls are so rich and sweet, you want something savory on the side to balance out the morning spread. I always pair this with something simple, like fluffy scrambled eggs—you can find my favorite, creamy recipe right here!
Remember, these are absolutely best when served warm right after the glaze sets. A little cup of hot chocolate or strong coffee next to each serving makes everything feel extra cozy. They really are the perfect anchor for any big holiday brunch collection!
Storing and Reheating Leftover christmas tree cinnamon rolls
Okay, what if you actually have leftovers? Which sometimes happens—though honestly, these disappear fast in our house! But just in case you manage to save some of those gorgeous christmas tree cinnamon rolls, you absolutely want to store them so they don’t turn into hockey pucks overnight. Nobody wants a rock-hard roll!
For short-term storage, say one or two days, just cover the entire leftover tree tightly with plastic wrap. If your rolls are still sitting on the original parchment paper, that makes it easy to move the whole thing to a large airtight container. You can keep them right on the counter if your kitchen isn’t too warm. If it’s going to be longer than two days, or if your house is unusually warm, tuck that sealed container into the fridge. Don’t worry about the glaze; it usually holds up fine.
Now, the important part: reheating! You need moisture back in them. The microwave is your friend here for speed. Take just a single ‘branch’ or a couple of pieces, wrap it in a damp (not soaking wet!) paper towel, and nuke it for about 15 to 20 seconds. That towel creates steam, and steam equals soft rolls again. Perfect for a quick mid-week treat!
If you’re planning on reheating a large center slice, or if you want that *just-baked* texture back, go for the oven. Set your oven to a super low temperature—like 300°F. Wrap that section tightly in foil, making sure it’s well-sealed, and heat it for about 8 to 10 minutes. This gentle heat warms them evenly from the inside out without cooking them further. Trust me, reheating carefully keeps these festive holiday baking treats tasting almost as good as they did fresh!
Frequently Asked Questions About Shaped Cinnamon Rolls
I get so many questions about these christmas tree cinnamon rolls, which totally makes sense because they look a little complicated, even though they are secretly super simple! Here are the things I hear all the time when people are planning their holiday baking. Don’t worry about making mistakes; we all learn as we go!
Can I use store-bought dough for these christmas tree cinnamon rolls?
Yes, yes, you absolutely can, especially if you are looking for an Easy Christmas Breakfast solution in a pinch! I mentioned it in the notes, but it works great. You just arrange the refrigerated roll pieces in the tree outline on your parchment paper instead of rolling and cutting the homemade dough. My only warning is that homemade dough gives you that extra soft, pillowy texture that really makes this a fantastic sweet Christmas treat, but canned dough is a baker’s friend when time is short!
How do I prevent the green glaze from looking dull?
That bright green needs to shine like an ornament, right? The secret here is mostly the color itself. If you are using regular liquid food coloring from the grocery aisle, it sometimes washes out flat once mixed with the white powdered sugar. I strongly suggest using gel food coloring—it’s way more concentrated. You only need the tiniest toothpick tip of gel color to get that vibrant look. Also? Only mix the glaze right before you plan to drizzle it! The longer it sits, the flatter the color can sometimes look.
Rate This Holiday Baking Recipe
Well, we made it! We tackled the dough, we mastered the twisty tree shape, and we drizzled on that beautiful green glaze. Now it’s your turn to come back and tell me how it went! Knowing that you are taking this recipe from my kitchen to yours is the absolute best part of doing this whole blog thing.
Seriously, I want to see your creations! Did your tree come out perfectly shaped? Did the kids get covered in sprinkles? Snap a picture of your finished christmas tree cinnamon rolls and tag me on Instagram or Facebook!
And if you loved how that homemade, soft dough pulled apart, please leave a star rating right below—it truly helps other home cooks find this recipe when they are planning their own festive baking projects. Happy stirring, shaping, and eating!
PrintHomemade Pull-Apart Christmas Tree Cinnamon Rolls with Green Glaze

Create a festive centerpiece for your holiday morning with these soft, pull-apart cinnamon rolls shaped like a Christmas tree. This recipe uses homemade dough for the best texture and includes a simple green glaze for decoration.
- Prep Time: 45 min
- Cook Time: 25 min
- Total Time: 145 min
- Yield: 1 large tree (about 12 servings) 1x
- Category: Breakfast
- Method: Baking
- Cuisine: American
- Diet: Vegetarian
Ingredients
- 1 cup warm milk (about 110°F)
- 2 1/4 teaspoons active dry yeast
- 1/2 cup granulated sugar, divided
- 1/2 cup unsalted butter, softened, divided
- 2 large eggs, room temperature
- 4 cups all-purpose flour, plus more for dusting
- 1 teaspoon salt
- 1 tablespoon ground cinnamon
- 1/2 cup packed light brown sugar
- 1/4 cup melted unsalted butter
- For the Green Glaze:
- 2 cups powdered sugar
- 3 tablespoons milk
- 1/2 teaspoon vanilla extract
- Green food coloring (gel preferred)
- For Decoration:
- Red and green sprinkles or small candies
Instructions
- Activate the yeast: In a large bowl, combine the warm milk, yeast, and 1 teaspoon of the granulated sugar. Let stand for 5 to 10 minutes until foamy.
- Mix the dough: Add the remaining granulated sugar, 1/4 cup of the softened butter, and the eggs to the yeast mixture. Mix well. Gradually add the flour and salt until a soft dough forms.
- Knead the dough: Turn the dough out onto a lightly floured surface and knead for 5 to 7 minutes until smooth and elastic.
- First rise: Place the dough in a lightly oiled bowl, turning to coat. Cover and let rise in a warm place for 1 to 1.5 hours, or until doubled in size.
- Prepare the filling: While the dough rises, mix the 1 tablespoon cinnamon, brown sugar, and 1/4 cup softened butter in a small bowl until combined into a paste.
- Roll and fill: Punch down the risen dough. On a lightly floured surface, roll the dough into a large rectangle, about 12×18 inches. Spread the cinnamon filling evenly over the dough.
- Cut the strips: Cut the dough rectangle lengthwise into three equal strips.
- Shape the tree: Arrange the three strips side-by-side on a piece of parchment paper. Cut diagonal slits along both long edges of the combined dough, leaving the center section intact. This creates the ‘branches’ of the tree.
- Assemble the tree: Gently twist the cut sections of the strips, alternating which side you twist them toward, to create a rough tree shape in the center. Pinch the bottom ends together to form the trunk base.
- Second rise: Carefully transfer the parchment paper with the shaped dough onto a baking sheet. Cover loosely and let rise for 30 minutes. Preheat your oven to 375°F (190°C).
- Bake: Bake for 20 to 25 minutes, or until golden brown. Let cool slightly on the baking sheet.
- Make the glaze: Whisk together the powdered sugar, milk, and vanilla extract. Add green food coloring drop by drop until you achieve a bright green color.
- Decorate: Drizzle the green glaze over the warm cinnamon rolls. Immediately top with sprinkles or candies before the glaze sets. Serve warm for a perfect holiday breakfast or brunch centerpiece.
Notes
- For a faster option, you can substitute 2 cans of store-bought refrigerated cinnamon roll dough, arranging the pieces in the tree shape instead of rolling and cutting homemade dough.
- If you are planning for a large gathering, this recipe is excellent for meal planning; you can assemble the tree shape the night before, cover it, and refrigerate. Add an extra 15 minutes to the second rise time before baking.
- This pull-apart bread style works well for sharing, similar to what you might find when looking at best meal delivery services for group events.
Nutrition
- Serving Size: 1 roll section
- Calories: 380
- Sugar: 35
- Sodium: 350
- Fat: 18
- Saturated Fat: 10
- Unsaturated Fat: 8
- Trans Fat: 0.5
- Carbohydrates: 50
- Fiber: 2
- Protein: 6
- Cholesterol: 55