
Oh, sticky icing! I know that frustration so well. You spend hours cutting perfect shapes, baking them until they’re just right, and then you go to decorate—only to find your gorgeous design is still tacky twelve hours later. It’s the worst, especially when you need those cookies to stack up neatly for gifting. That’s why, here at DeliceRecipe, we don’t mess around with glazes that behave like putty. Trust me when I tell you this recipe for sugar cookie icing that hardens completely is non-negotiable.
I tested this royal icing formula dozens of times right here in my upstate New York kitchen until I was absolutely certain it would dry firm, smooth, and wonderfully glossy. This isn’t some fussy store-bought mix; this is the tried-and-true method that gives you that beautiful, durable finish you see in bakeries. If you want cookies that are stackable, giftable, and resistant to fingerprints, you’ve found your new secret weapon. We’re going straight to reliability, no fuss! For more foolproof decorating ideas, check out my guide to making easy cookie icing that hardens perfectly.
- Why This Is the Best Sugar Cookie Icing That Hardens (The Secret to Durability)
- Essential Ingredients for Sugar Cookie Icing That Hardens
- Step-by-Step Guide: Making Sugar Cookie Icing That Hardens Firmly
- Decorating Technique for Perfect Sugar Cookie Icing That Hardens
- Drying Times and Troubleshooting for Sugar Cookie Icing That Hardens
- Storage and Making Ahead with Hardening Cookie Icing
- Essential Cookie Decorating Equipment
- Frequently Asked Questions About This Icing
- Nutritional Estimate for Hardening Cookie Icing
- Nutritional Estimate for Hardening Cookie Icing
Why This Is the Best Sugar Cookie Icing That Hardens (The Secret to Durability)
When you need sugar cookie icing that hardens like cement—in a good way!—you need to look past simple powdered sugar-and-milk glazes. My testing showed that for truly professional results, you must use meringue powder. That little ingredient is what separates the weak, runny stuff from the best cookie icing that dries hard. It gives the icing the structure needed to survive being bagged, shipped, or stacked high!
If your goal is creating beautiful, durable decorations, this recipe guarantees that finish. It’s specifically formulated for cut-out cookies because it dries completely solid, meaning your lovely designs are safe from smudges and humidity. That’s why this is my go-to recipe for creating truly stackable cookie icing for holiday tins. We want reliability, my friends! Mastering this type of decorative icing is essential, and I talk more about the science behind royal icing recipe secrets elsewhere on the site.
Achieving That Glossy Royal Icing for Cookies
And the great news? This reliable icing doesn’t look dull! When you follow the beating instructions later—and I mean really beat it until it looks like fluffy white clouds—you trap just the right amount of air. This air is what gives your final design that beautiful, almost shiny finish. It’s a standard feature of true glossy royal icing for cookies, and it happens naturally when you mix it vigorously!
Essential Ingredients for Sugar Cookie Icing That Hardens
When you’re going for that beautiful, hard shell that defines professional cookie decorating, you can’t just throw random items into a bowl. The beauty of this specific sugar cookie icing that hardens comes down to the quality and preparation of just a few simple things. We rely on measurement and clarity here because we need zero doubt about whether this icing will set firm!
Remember, we are aiming for hard icing for sugar cookies, so every measurement matters. Here is exactly what you need:
- 2 cups powdered sugar, sifted (Yes, you must sift this! Don’t skip it.)
- 3 tablespoons meringue powder (This is the stabilizer magic.)
- 6 tablespoons warm water (Added slowly, trust me.)
- 1 teaspoon clear vanilla extract (If you want that dazzling white finish.)
- Gel food coloring (Optional, but required for pretty designs!)
Ingredient Clarity and Preparation
Let’s talk prep, because this is where most people mess up their otherwise perfect batch. First, that powdered sugar? It has to be sifted. Every single lump will block you from getting that smooth river of icing later, and it just ruins the final hard shell. I learned early on that trying to beat those lumps out just makes you over-mix everything else!
Next up is the water, which should be warm, not hot. You add it slowly while the mixer is on its lowest speed. If you dump the full 6 tablespoons in all at once, you’ll end up with soup, not icing! We need control here to build that structure slowly. And if you see vanilla extract sitting on your counter, grab the clear kind if you can. Standard vanilla works fine, but it leaves a slight beige tint when you’re trying to achieve that bright white, bakery-style look.
Step-by-Step Guide: Making Sugar Cookie Icing That Hardens Firmly
Alright, now that we have our impeccable ingredients lined up, it’s time for action! This part is so satisfying because you watch the ingredients magically transform into something amazing. This is the method for making an easy icing that sets firm, which means less fuss later on when you need to stack those cookies to give them away. You need to be patient here, especially with the mixer!
- First, grab your medium bowl. Dump in the sifted powdered sugar and the meringue powder. Give them a quick whisk just to introduce them to each other.
- Turn your electric mixer on low—and I mean low! Start adding that warm water, just tablespoon by tablespoon, until everything is *just* combined. Resist the urge to crank up the speed yet; we don’t want a sugar cloud erupting in the kitchen!
- Now for the magic: Increase that speed to medium-high. You’ve got to let it run for a solid five to seven minutes. Seriously, set a timer! This long beating time is what incorporates the air and makes the icing bright white and stiff. It’s ready when it holds stiff peaks when you lift the paddle. Wow!
- Once it looks perfect, mix in that teaspoon of clear vanilla extract.
Mastering Consistency: Outlining vs. Flooding
This is the secret sauce for decorating those cut-out cookies beautifully. You need two different thicknesses for a professional-looking border and fill. If you only have one consistency, you’ll have to wait ages between steps, and who has time for that? For more on getting that perfect consistency that sets solid, make sure you check out my guide on the sugar cookie icing recipe hard finish.
For outlining consistency (the thicker one you use to pipe the edges), the icing should flow off your mixer paddle slowly. Think of it like thick honey. Once you lift the paddle, it should take a moment—maybe three seconds—for the little blob dripping back into the bowl to smooth itself out. We want it firm enough to hold its shape when piped!
For flooding consistency (the thinner stuff you use to fill the center), we need it faster. This is where the famous ribbon test comes in. Add water a tiny bit at a time until a ribbon of icing dripped off your spoon disappears completely back into the main batch after about ten seconds. That’s your sweet spot for a smooth fill! If it disappears in two seconds, it’s too thin; if it takes twenty seconds, it’s still too thick. This control is key to achieving a final product that sets solid.
Coloring Your Sugar Cookie Icing That Hardens
If you’re planning on spreading color around, divide your icing immediately after achieving that perfect texture. A little warning here: Do not over-thin your colors! Too much liquid, even from gel coloring, will sabotage your efforts to have sugar cookie icing that hardens. Gel colors are potent, so add them drop by tiny drop and mix gently. Usually, just a pinprick of color is plenty to start. Remember, it’s much easier to add more color than to try to thicken runny icing again!
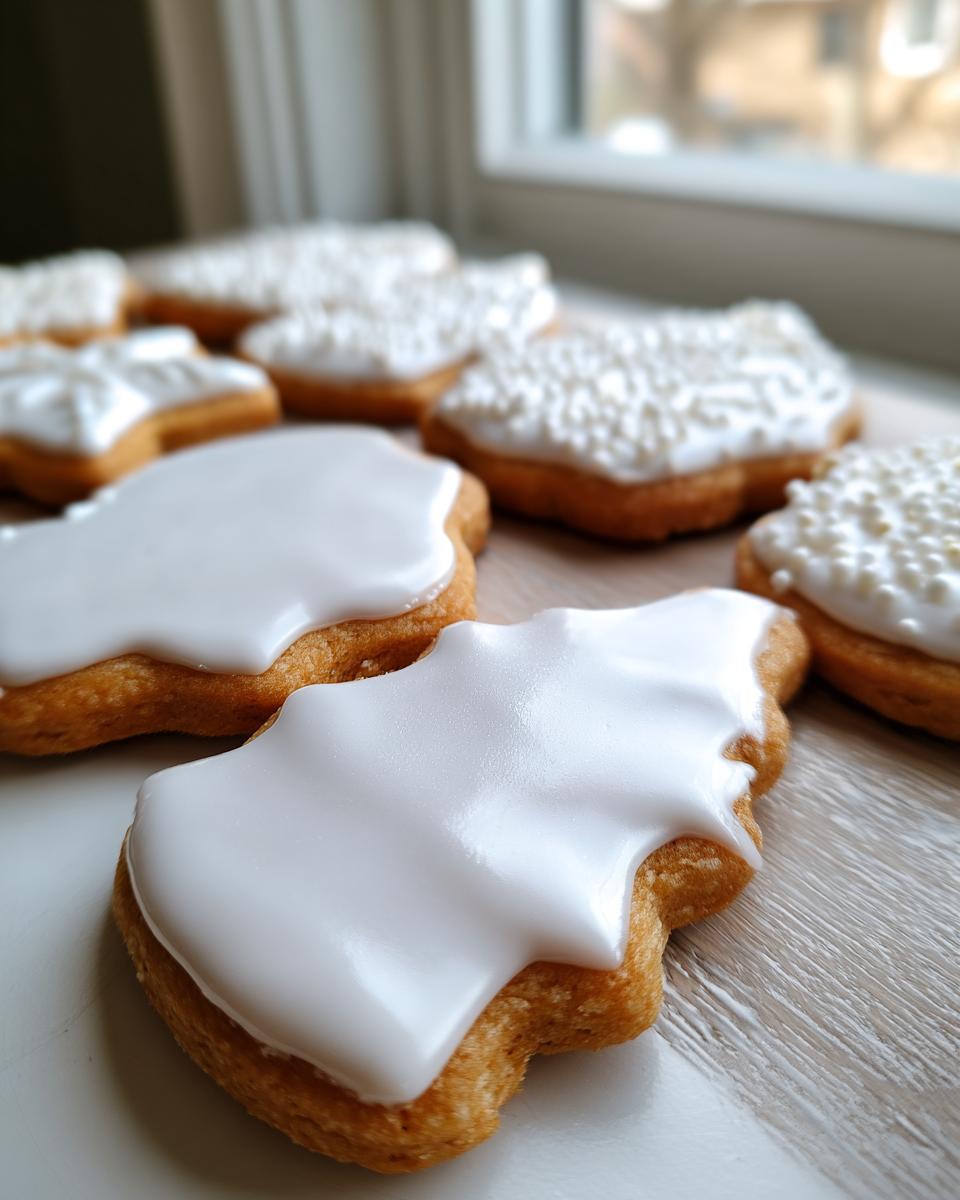
Decorating Technique for Perfect Sugar Cookie Icing That Hardens
So you’ve got your two gorgeous consistencies ready to go—the thick outline batch, and the smooth, flowing flood batch. Now we get to the fun part where we turn a plain cookie into a piece of edible art! When you’re working with sugar cookie icing that hardens, the order of operations is absolutely critical. If you rush this, you might end up with a giant melted mess, and nobody wants that heartbreak!
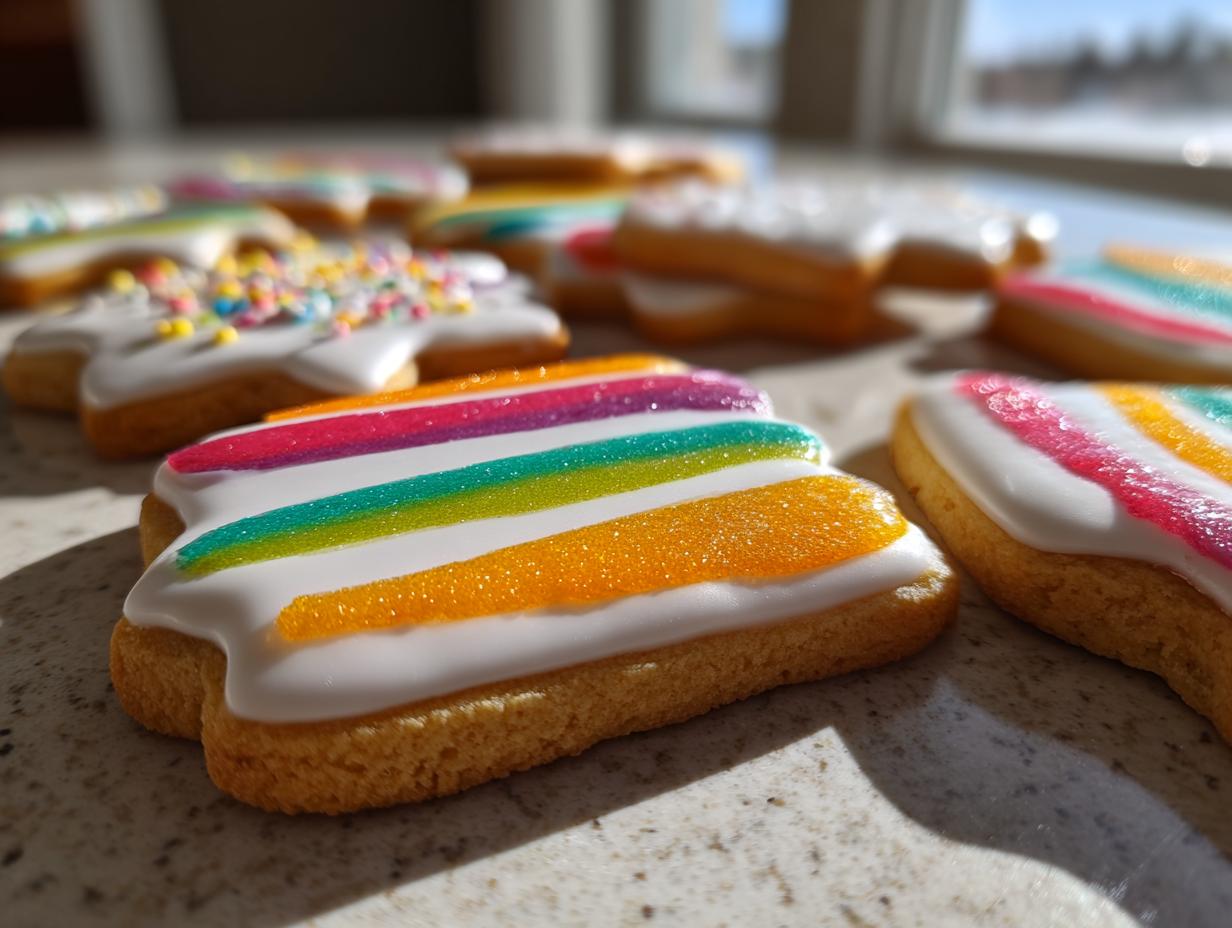
Start by taking your outlining consistency and loading it into a piping bag fitted with a small tip. Pipe a nice, clean border around the entire edge of your cooled cookie. Think of this border as a little dam or a retaining wall. It’s there to hold the thinner flooding icing inside when we apply it later.
This next step requires willpower, but trust me, it’s worth the pause! You must let that piped outline dry until it’s firm to the touch. I usually wait at least 15 to 30 minutes. If you flood too soon, the thin icing will simply sneak right under that border wall and spread where it shouldn’t. When that dam is solid, you move on to the flood!
Take your flooding consistency icing and carefully pour or pipe it into the center of your outline. Use a scribe tool—or even the end of a toothpick if that’s what you have handy—to gently push the icing right up to the inside edge of your border. It should spread itself out beautifully to fill the space smoothly. This technique ensures you get that flawless, uniform layer that dries hard and looks so professional. These cookies look amazing when paired with chewy bases; check out my recipe for the best soft chewy cutout sugar cookies!
Drying Times and Troubleshooting for Sugar Cookie Icing That Hardens
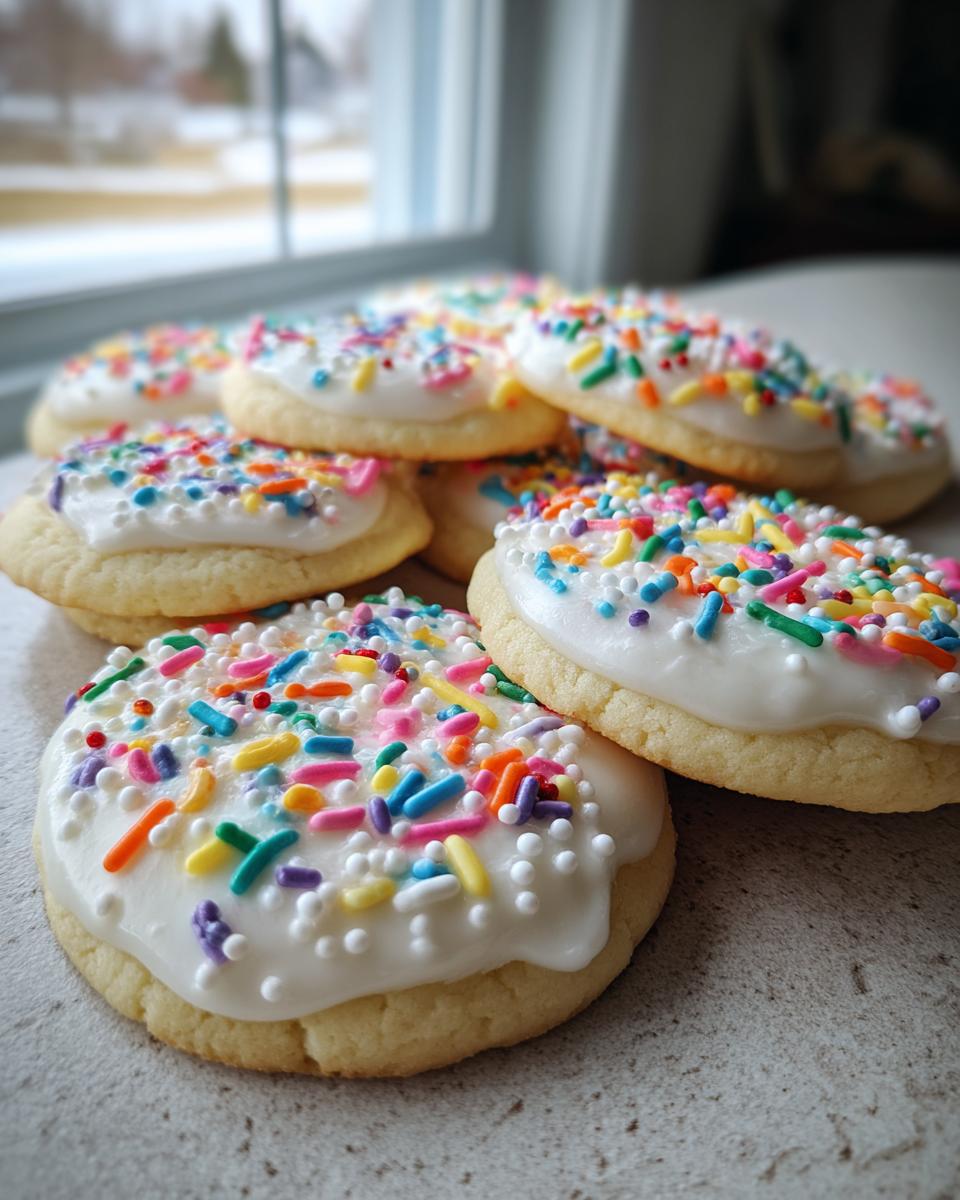
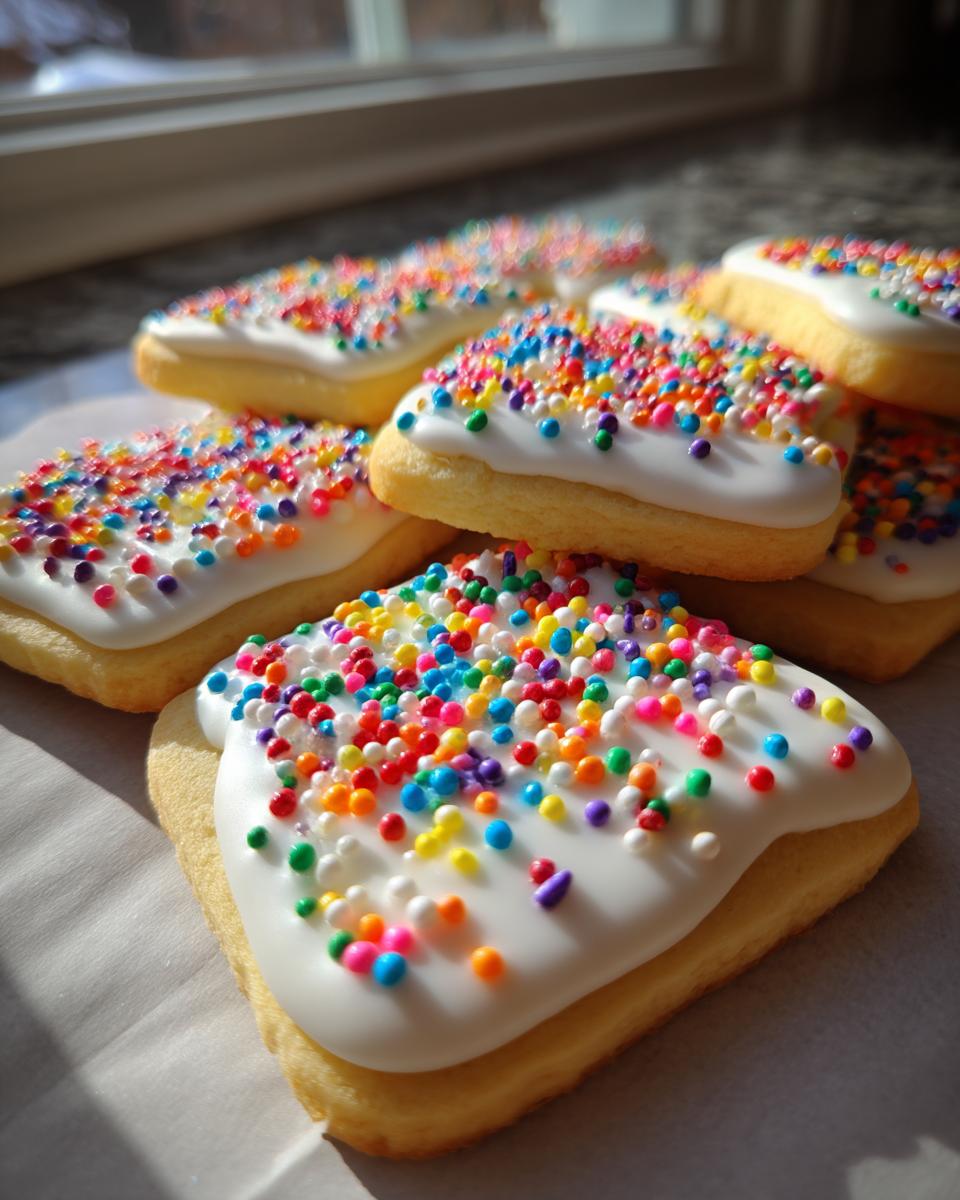
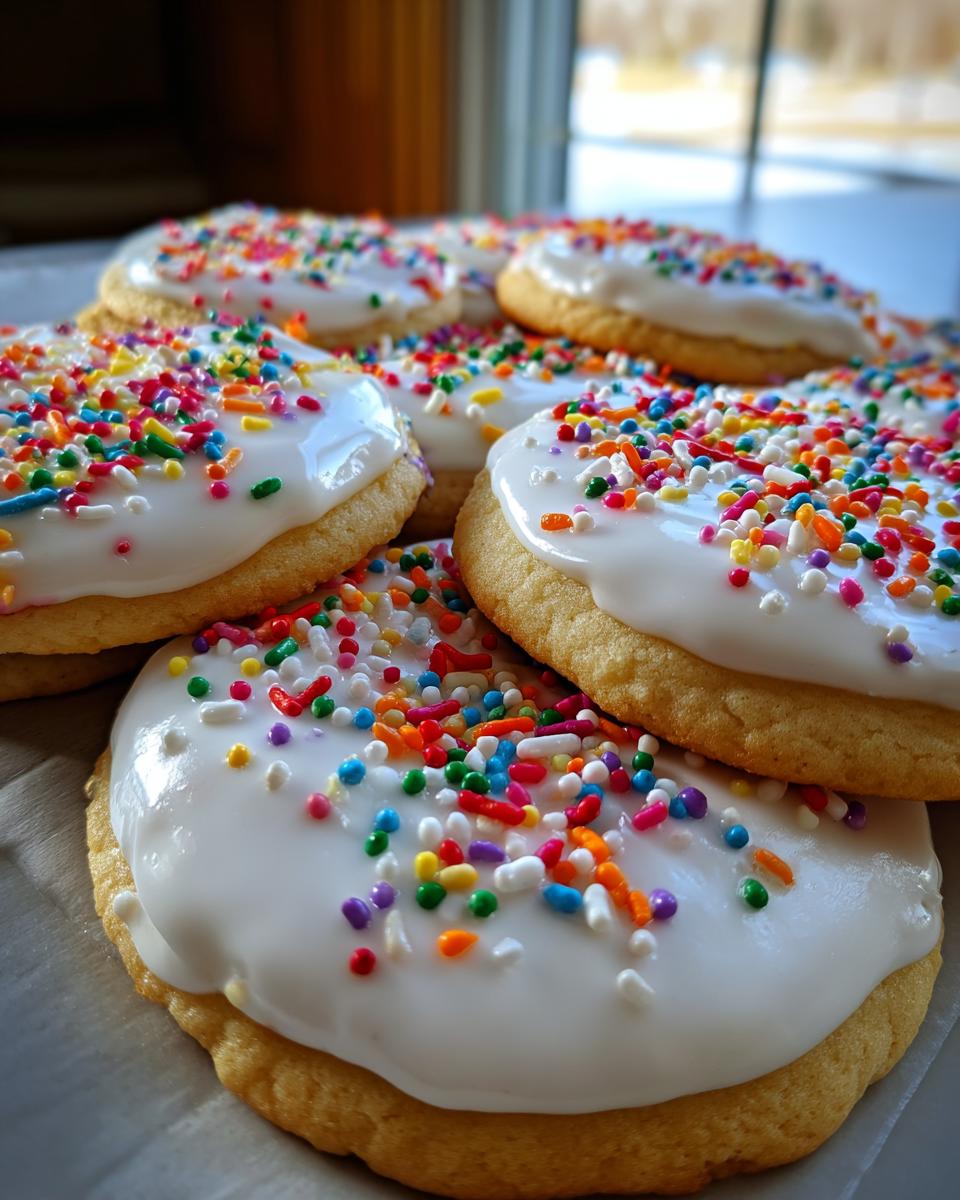
Okay, you’ve decorated your hearts out, and everything looks perfect! Now comes the hardest part: waiting. When you’ve put this much effort in, the last thing you need is icing that stays tacky forever. If you followed the mixing instructions, you’ll have a beautiful **sugar cookie icing that hardens** well, but drying time is still crucial. Ideally, you want to leave these cookies uncovered at room temperature for a minimum of six hours, but honestly? Overnight is always safer.
If you leave them out overnight, I guarantee you’ll wake up to a batch of sturdy, glossy masterpieces that are ready for wrapping. This full drying time ensures that dreaded tackiness is gone for good, which is the whole reason we went to the trouble of making a recipe for **how to make icing that doesn’t stay sticky**! If you try to package sticky cookies, you’re just ending up with a mess later.
But what if things go a little sideways? Troubleshooting is part of home baking, and it happens. If you notice your icing came out too thick (it wouldn’t flood nicely), add water just half a teaspoon at a time until it flows right again. If, heaven forbid, it’s too thin (it ran right off the cookie or disappeared instantly in the ribbon test), whisk in one tablespoon of powdered sugar at a time until you regain that thick consistency. You can often save a batch with minor adjustments!
Tips for Quick Hardening Cookie Frosting
Sometimes, especially around the holidays, we need to speed things up. If you don’t have a whole night to wait, here are a few tricks I’ve picked up. First, humidity is your enemy here. If it’s a rainy or muggy day where you live, the icing is going to take longer to set firm, no matter what. Try to decorate in the driest room of the house!
Secondly, never seal the cookies away while they are drying! You need airflow to help that moisture evaporate. I always place my decorated cookies on a flat cooling rack. If you have a small, gentle fan running in the corner of the room (not pointing directly at the cookies, mind you!), that slight air circulation helps pull the moisture away faster. This is a great tip for getting that quick hardening cookie frosting result without compromising structure, but do this cautiously; too much direct airflow can sometimes cause minor cracking.
Storage and Making Ahead with Hardening Cookie Icing
One of the biggest gifts this royal icing gives you is its amazing make-ahead capability. When you’re baking for holidays or big parties, you absolutely need an icing that behaves itself in storage. The great thing about this recipe for **hardening cookie icing** is that it’s truly stable!
If you’ve made more than you need—and honestly, when making this much coloring, you often do—don’t even think about putting it in the fridge. Cold air makes the icing seize up and can cause it to get grainy when you try to bring it back to temperature. Instead, scrape any leftover icing into a clean, airtight container. Plastic containers with snap lids are my favorite for this.
Keep that container tucked away in your pantry or a cool cabinet at room temperature. It’s perfectly happy there for up to three days. Just remember one thing before you use it again: you have to stir it really, really well! Sometimes the sugar settles on the bottom, so you need to gently bring that consistency back together. If it seems a hair too stiff after sitting overnight, just pulse in half a teaspoon of water until it flows nicely again.
This ability to make a big batch ahead of time is a lifesaver. I often dye my flood colors the day before I plan to decorate. That way, when I pull out the sugar cookies, everything is already mixed, stable, and ready to go. It means less stress and more enjoyment when it’s time to decorate those beautiful cookies! Speaking of beautiful cookies, if you ever experiment beyond cut-outs, you have to try my ginger molasses cookies; they are heavenly.
Essential Cookie Decorating Equipment
Now that you’ve mastered making this glorious sugar cookie icing that hardens, we need to talk tools. You don’t need twenty different fancy gadgets to get that professional look, but having the right tools makes the entire process feel less like work and more like art! Since this is the perfect icing for beginners, I tried to keep this list simple and focused on what really makes a difference in getting that smooth, durable finish.
First and foremost, you absolutely need an electric mixer. Trying to beat royal icing by hand until it hits those stiff peaks is a workout I wouldn’t wish on my worst enemy! An electric hand mixer or a stand mixer will save your wrists and ensure you hit that vigorous 5-to-7-minute beating time required to get the right structure into the icing.
Next up, let’s talk about applying the icing. You’ll need piping bags for this! You can use disposable plastic ones, or you can invest in reusable silicone bags—whatever feels best for you. Fit them with a small round tip, maybe a Wilton #2 or #3, for piping those neat outlines, or you can just snip the very end off the plastic bag if you prefer—that’s what I do when I’m in a hurry.
- Scribe Tool: This is my favorite little helper! It’s just a fancy name for a long, thin metal pick. You use it to gently push the flooding icing into the corners or pop any little air bubbles that sneak their way into your design. It makes getting those sharp edges so much easier.
- Sifter: I harp on sifting the powdered sugar, and that’s because this tool is essential for making sure your hard icing for sugar cookies ends up perfectly smooth. If you don’t have a fine-mesh sieve, borrow one!
- Coloring Supplies: If you plan on making pretty designs, you need gel food coloring. Liquid drops change the consistency too much, but gels give you deep, vibrant color without adding excess water that could prevent your glossy royal icing for cookies from setting up nicely.
Trust me, having these few key items ready means less frustration when you sit down to decorate. A great recipe is only half the battle; the right technique and tools finish the job!
Frequently Asked Questions About This Icing
It’s so common to have questions when you first tackle royal icing, especially when you are hunting for an icing that hardens overnight! Don’t worry for a second; we’ve all been there staring at a bowl of icing wondering, “Is this right?” Here are the most common things I hear from folks trying this recipe for the first time to ensure you get that perfect, durable finish.
Can I use regular vanilla extract instead of clear vanilla?
You absolutely can! If you’re using regular vanilla extract, it will work perfectly fine in terms of flavor and helping the icing set. The only difference you’ll notice is that your icing won’t be pure, stark white. Standard vanilla has a slight caramel color to it, so your final decorated cookies will have a touch of a creamy, off-white tint. If you are aiming for that dazzling, bright white finish for holiday designs, that’s when you should stick to the clear kind. It’s really just an aesthetic choice for this failproof cookie glaze!
How long does the icing take to dry completely hard?
This is the big one! To get that truly solid shell that makes for hard icing for sugar cookies ideal for gifting, you need patience. I always advise letting the cookies dry for a minimum of six to twelve hours at room temperature. However, if I’m making cookies for a cookie swap or shipping them anywhere, I insist on letting them dry completely overnight. That extra few hours ensures that even the thickest areas of the flooding are bone dry and not even slightly tacky in the center. Remember, dry icing is the only way to get truly stackable cookie icing that won’t smudge in transit!
What causes the icing to crack when drying?
Ugh, cracks! That’s so discouraging after all that hard work. Usually, in my experience, cracking comes down to two main culprits when you are making an icing that sets firm. First, too much liquid overall—if your icing was even slightly too thin when you flooded, it puts too much strain on the dry outer shell as the moisture tries to escape, causing it to tear. Second, drying too fast! Don’t put your cookies in a blast of a very hot, dry environment, or directly in front of a fan on high speed! That rapid evaporation pulls the moisture out of the surface too quickly, leading to those hairline fissures. Gentle, consistent air circulation is the goal.
If you’re looking for more ways to streamline your baking, you might enjoy checking out my simple easy tiramisu recipe; it uses minimal fuss for maximum flavor!
Nutritional Estimate for Hardening Cookie Icing
I always want to be transparent about what we’re using in our home kitchens, even when it’s just an accessory like icing! Please remember that these numbers are just estimates based on the standard ingredients listed and how much icing it yields. These values can change wildly depending on the exact brands you use, especially with the powdered sugar!
- Serving Size: 1/4 cup
- Calories: 180
- Sugar: 45g
- Sodium: 25mg
- Fat: 0g
- Protein: 2g
This icing is pure decorating fuel! The majority of the calories come straight from the sugar needed to achieve that beautiful, hard, glossy shell we love so much. You can see a full breakdown of where these numbers come from by checking out this helpful guide on sugar cookie icing that hardens easy recipe.
PrintFoolproof Royal Cookie Icing That Hardens Perfectly & Dries Glossy

Learn how to make easy royal icing that hardens perfectly for decorating sugar cookies. This recipe sets smooth, dries glossy, and creates durable, stackable cookies ideal for gifting.
- Prep Time: 15 min
- Cook Time: 0 min
- Total Time: 15 min
- Yield: Enough icing for 2 dozen medium cookies
- Category: Baking Accessory
- Method: Mixing
- Cuisine: American
- Diet: Vegetarian
Ingredients
- 2 cups powdered sugar, sifted
- 3 tablespoons meringue powder
- 6 tablespoons warm water
- 1 teaspoon clear vanilla extract
- Gel food coloring (optional)
Instructions
- In a medium bowl, combine the sifted powdered sugar and meringue powder.
- Add the warm water slowly while mixing on low speed with an electric mixer until the mixture is just combined.
- Increase the speed to medium-high and beat for 5 to 7 minutes until the icing is stiff, bright white, and holds stiff peaks.
- Mix in the clear vanilla extract.
- For outlining consistency (thicker), add 1 teaspoon of water at a time until the icing flows slowly from the mixer paddle.
- For flooding consistency (thinner, for filling in areas), add 1 teaspoon of water at a time until the icing flows smoothly off a spoon in a ribbon that disappears into the bowl after about 10 seconds.
- Divide the icing into separate bowls if you plan to color it. Add gel food coloring sparingly and mix until the color is uniform.
- Use the outlining consistency to pipe borders onto your cooled sugar cookies. Let the outline dry for 15 to 30 minutes until it is firm to the touch.
- Use the flooding consistency to fill in the outlined areas. Gently spread the icing with a scribe tool or the back of a small spoon.
- Allow the cookies to dry uncovered at room temperature for 6 to 12 hours, or until the icing is completely hard and dry to the touch. For best results, let them dry overnight.
Notes
- Use clear vanilla extract if you want pure white icing; standard vanilla extract will give a slight off-white tint.
- If the icing is too thick, add water half a teaspoon at a time. If it is too thin, add powdered sugar one tablespoon at a time.
- Store unused icing in an airtight container at room temperature for up to three days; stir well before reusing.
- This hard icing is perfect for stackable cookie projects and durable decorations.
Nutrition
- Serving Size: 1/4 cup
- Calories: 180
- Sugar: 45
- Sodium: 25
- Fat: 0
- Saturated Fat: 0
- Unsaturated Fat: 0
- Trans Fat: 0
- Carbohydrates: 45
- Fiber: 0
- Protein: 2
- Cholesterol: 0